50.3k
50.3k

ClickHouse Managed Postgres isn't just another hosted Postgres. It's one half of a unified data stack: NVMe-backed Postgres for your transactional workload, ClickHouse for real-time analytics, and fully managed replication keeping the two in sync. Two databases, operated as one product.
We wanted users to experience the value of that combination for themselves. So we asked ourselves: What's the shortest path from signing up to experiencing the value of the full Postgres + ClickHouse stack on your own data?
That question exposed a gap in the existing experience.
After creating a Postgres service, users landed on the Overview page. The page was designed for an active database, surfacing operational metrics and activity. But for someone just getting started, everything was empty: no activity, no data to explore, and little indication of what to do next.
At the same time, we already had a solid answer for what that journey could look like in our docs. Our CLI quickstart guide walks users through the full flow: provision Postgres, load a million rows, set up a CDC ClickPipe, query the replicated tables from ClickHouse and from Postgres via pg_clickhouse. It's precise, scriptable, and it's what we point power users to.
But a documentation quickstart guide is a parallel track. You read in one tab and work in another, while the product itself has no idea where you are in the journey. We wanted that same end-to-end path to live inside ClickHouse Cloud — stateful, aware of what users have already done, and able to point them towards the next step that would create value.
How do people experience the value of a database?
We at ClickHouse think that databases are the best thing ever, but appreciate that they can be a bit boring sometimes. One thing we know from past experience with ClickHouse Cloud is that people don’t experience the value of a database by looking at dashboards. They experience it by working with data.
That made getting data into Postgres the natural starting point. From there, users could run queries, experience Postgres firsthand, and then see how easily the same data could flow into ClickHouse for real-time analytics. That became the foundation of the onboarding experience.
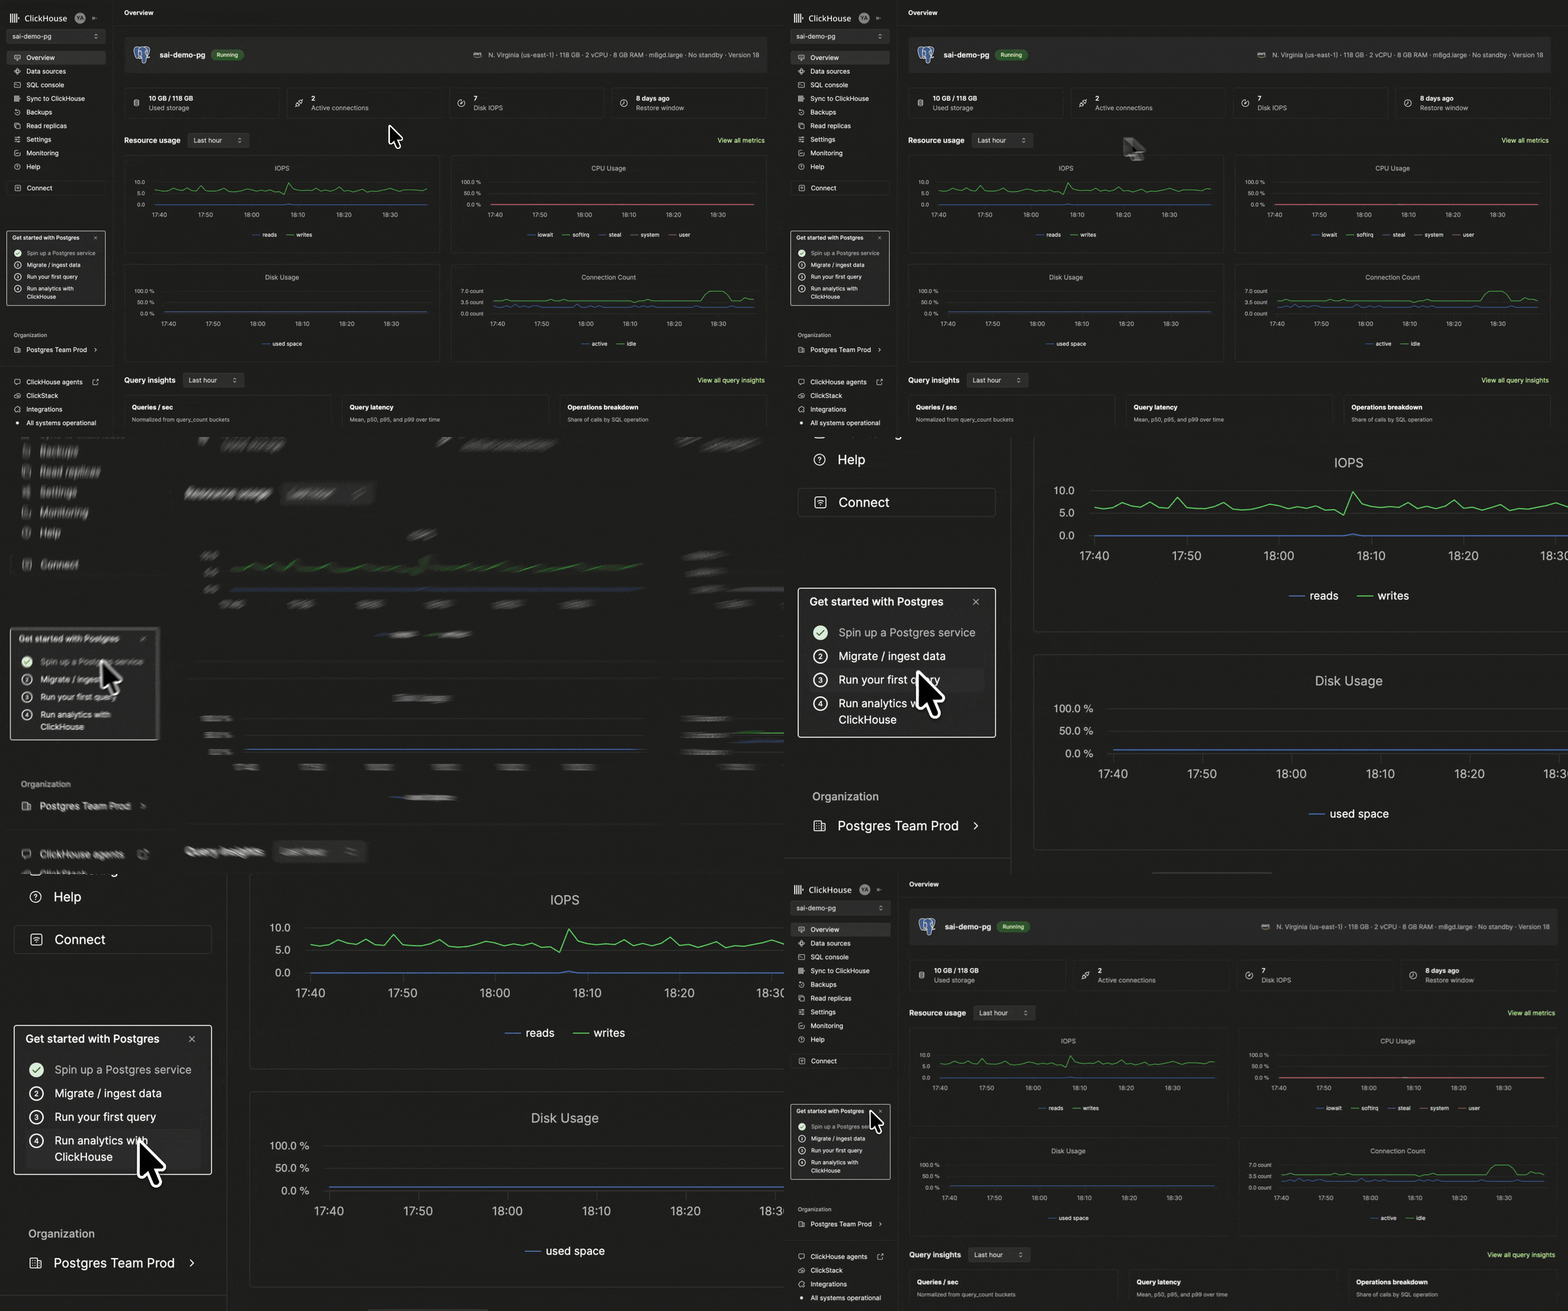
The value of the product, in four steps
Four steps that make the unified data stack real:
| Step | What the user does | What it proves |
|---|---|---|
| 1 | Spin up a Postgres service | NVMe Postgres, provisioned in minutes |
| 2 | Migrate or ingest data | Fully managed Postgres → Postgres migration via ClickPipes |
| 3 | Run your first query | Raw throughput on your own data, in the SQL Console |
| 4 | Run analytics with ClickHouse | CDC to ClickHouse + pg_clickhouse as a single query layer |
Finish those and you've used the core value of the product. Everything after that is discovery.
Step 1 — Spin up a Postgres service
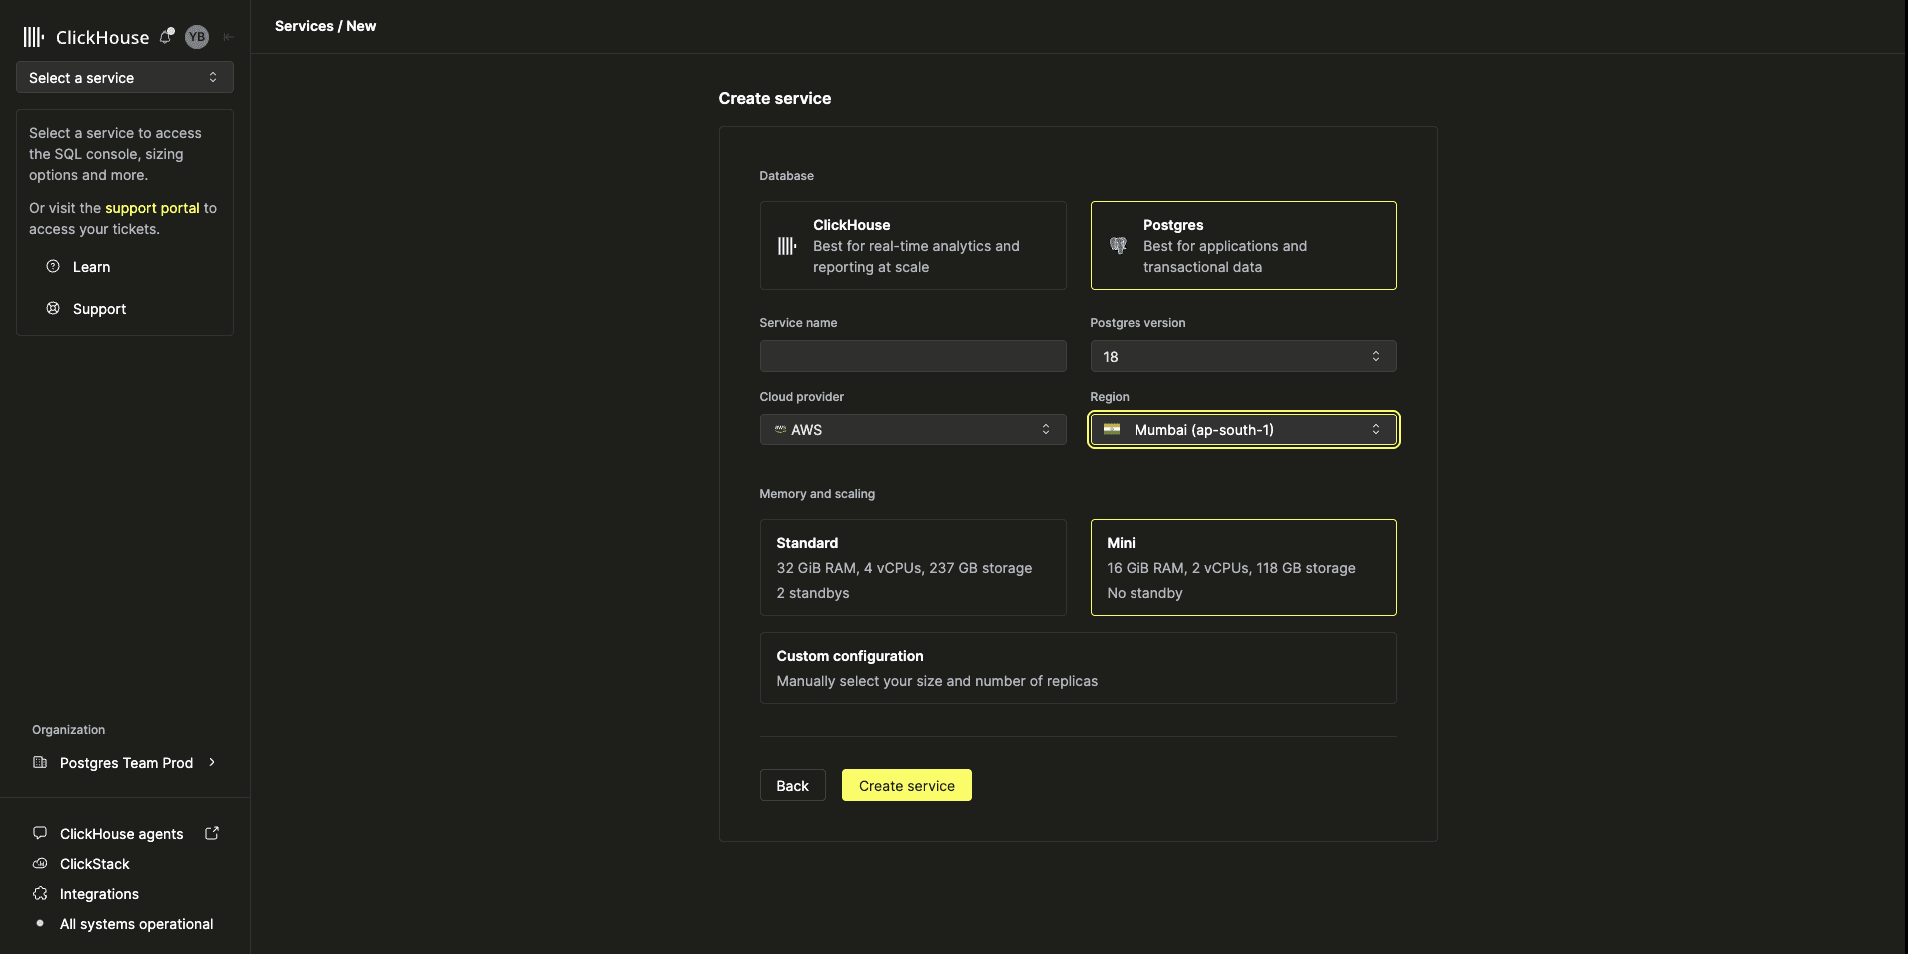
Provisioning is deliberately the least interesting step and a confirmation that your service has been created successfully. You pick a cloud service provider and region, a size, a Postgres version, and then the service will be up and running in a few minutes. We use NVMe for storage, which is where the performance story starts.
After a few minutes, you have a running database and nothing left to configure.
Step 2 — Migrate or ingest data
If there's one step we want every user to complete, it's this one. A database only gets interesting once there's data in it.
Most people should start by migrating from an existing Postgres. Nothing is as convincing as your own tables, your own queries, and your own access patterns.
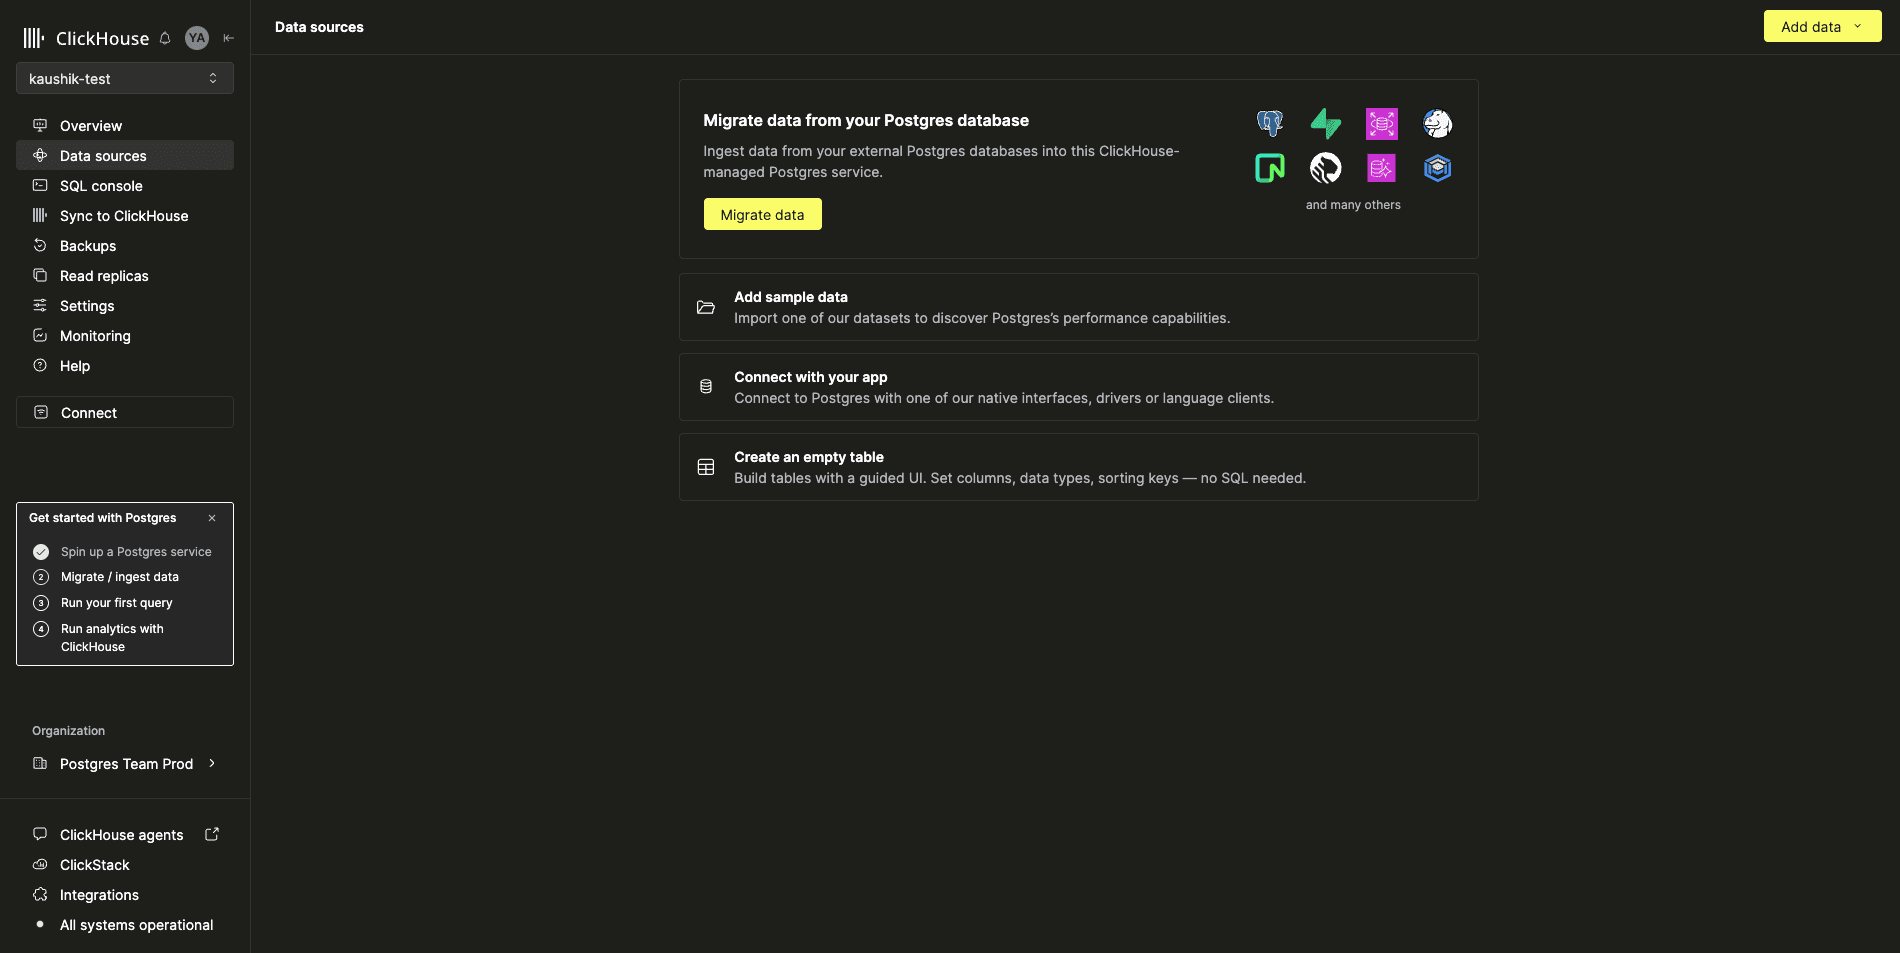
Because this is the workflow we believe delivers the most value, we made “Migrate data from your Postgres database” a first-class citizen of the onboarding experience.
ClickPipes handles the migration as a fully managed Postgres-to-Postgres workflow: users provide the connection string, and ClickPipes handles the snapshot, the publication, the replication slot, and the ongoing sync.
But not everyone is ready to connect an existing database on day one. Some users want to explore the product first, while others simply want a quick way to experiment. So we provided alternative ways to get data into the system:
- Connect with your language client — Postgres is Postgres; use the driver you already have.
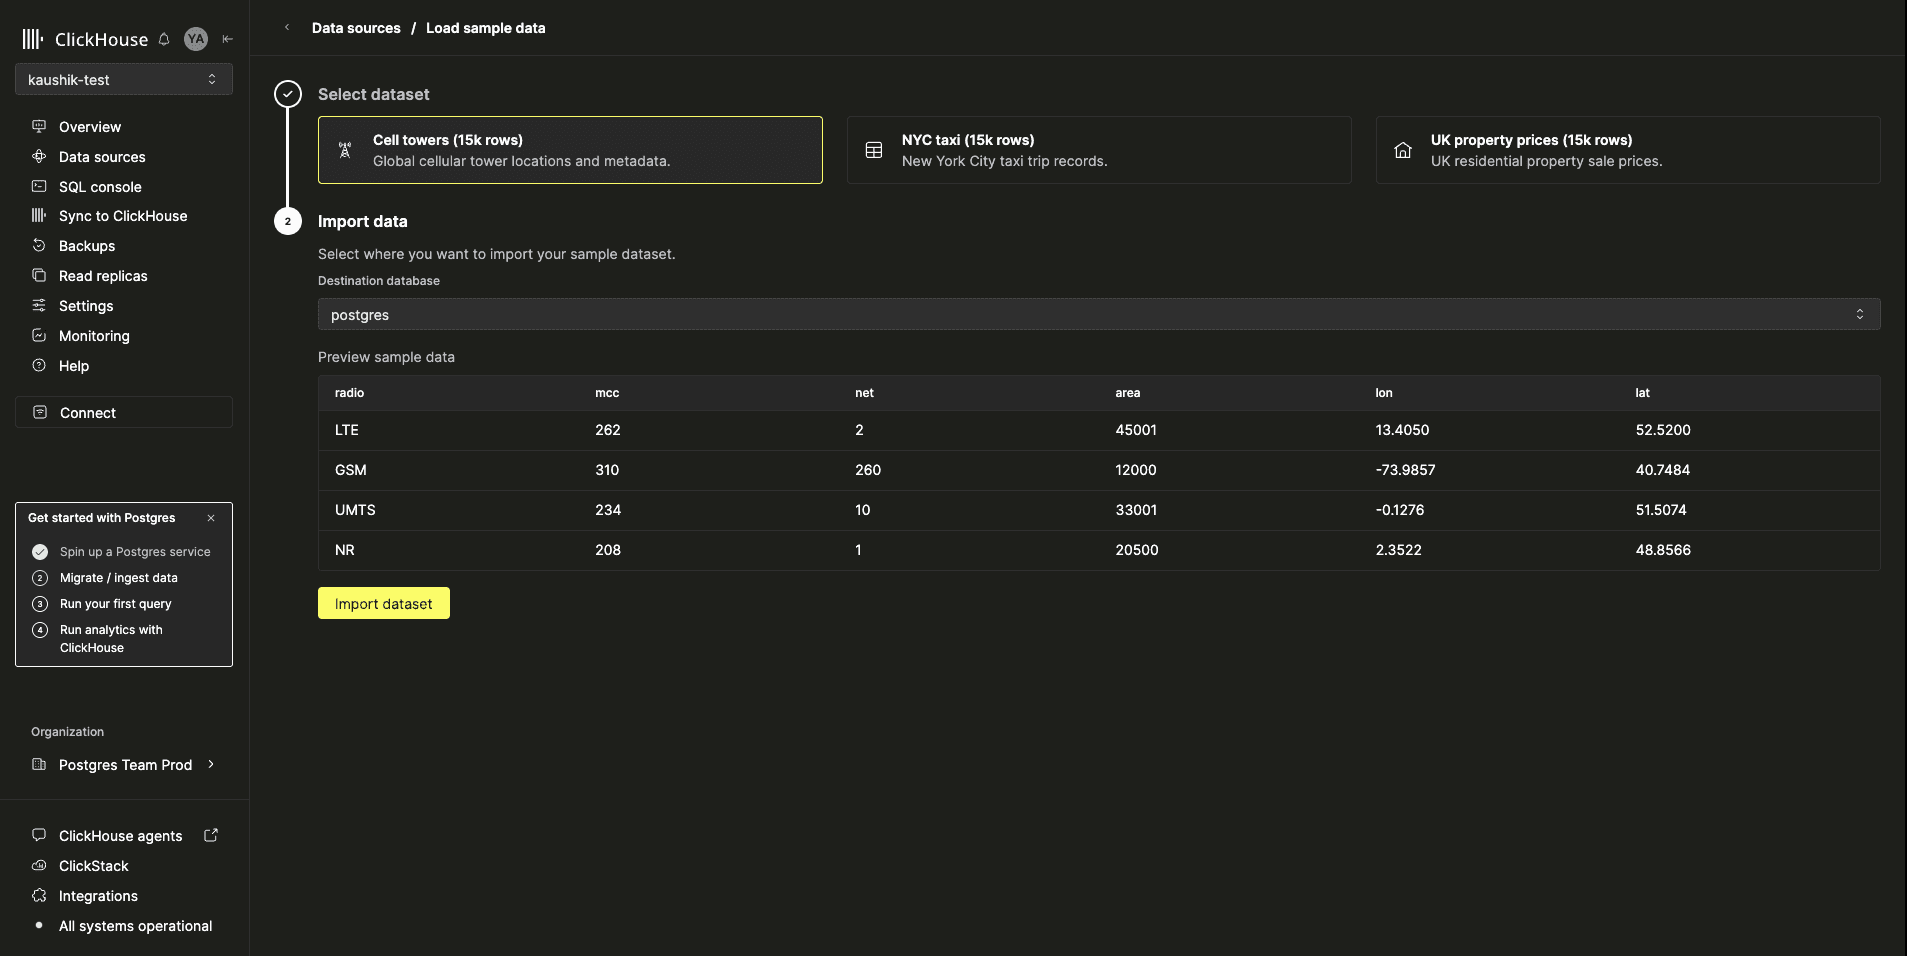
- Load a sample dataset — and start querying in seconds
- Create a table from scratch — the table creator, for a quick hands-on start.
Several sample datasets are available if you'd rather not connect a database yet.
Step 3 — Run your first query
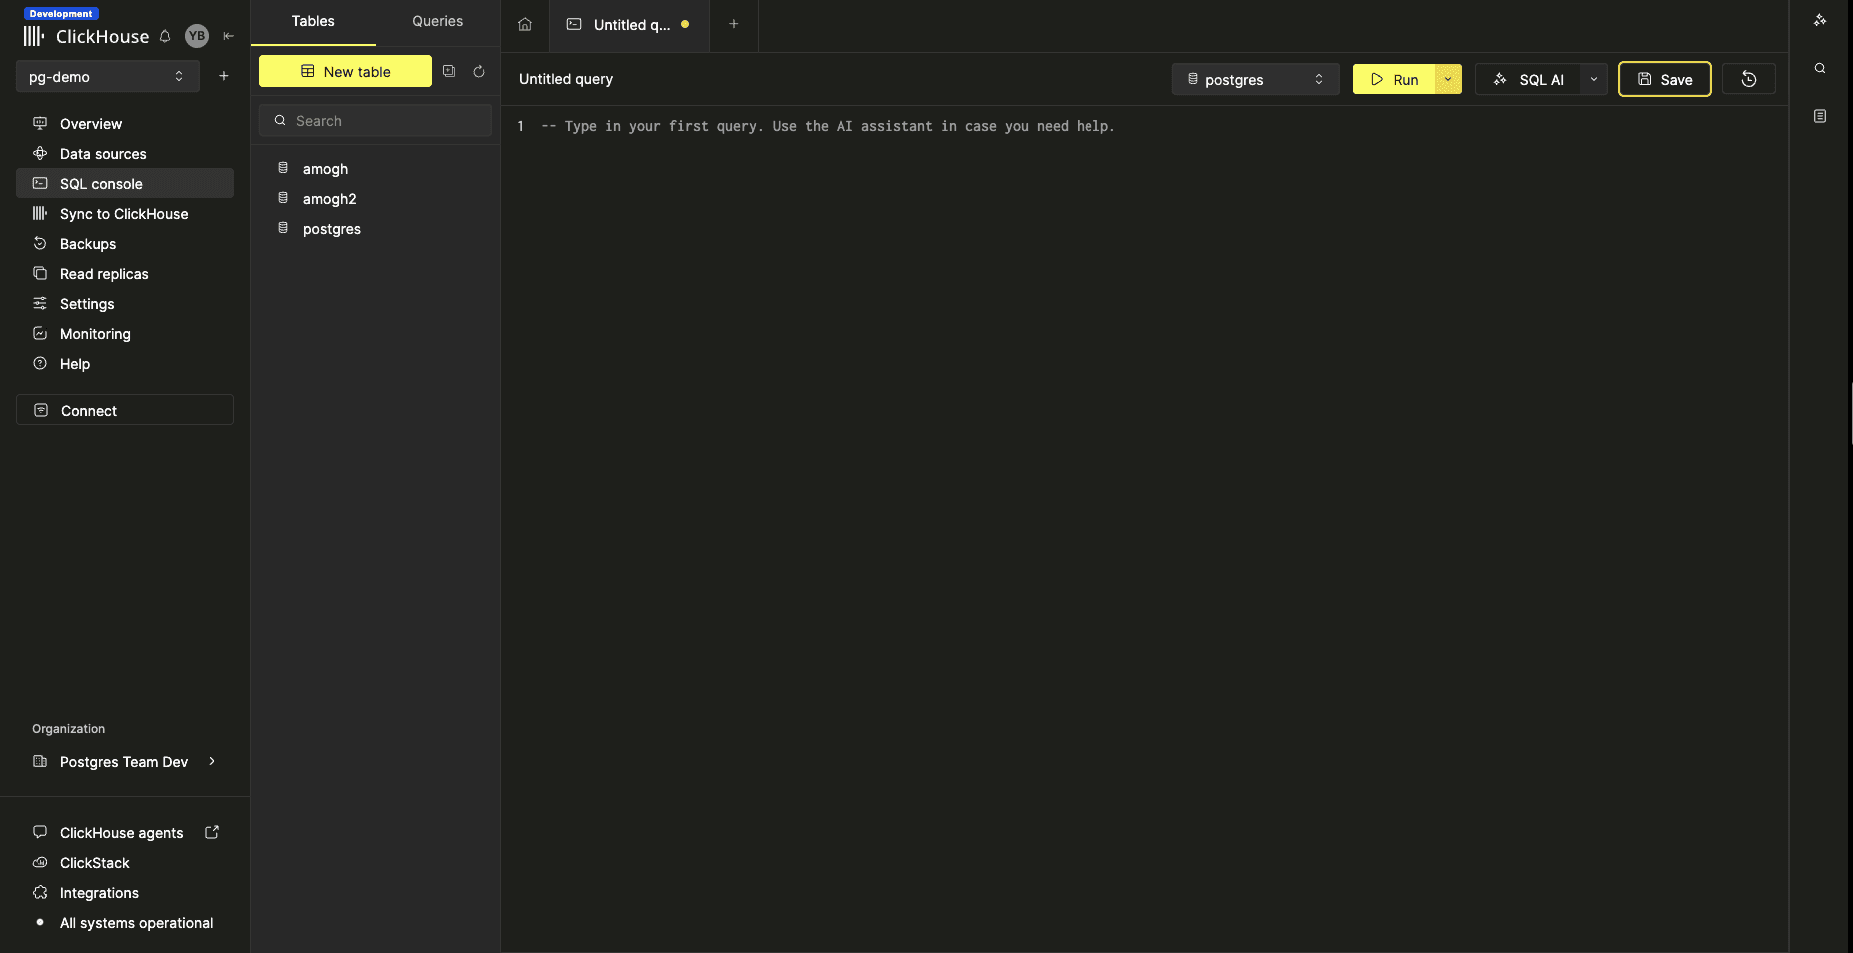
Once data is in, we take you straight to the SQL Console instead of expecting you to find it yourself. There, you can inspect your tables and run your first query.
This is the first genuine "aha!" moment. It's the point where users stop configuring and start experiencing the product.
If you don’t want to start with a blank editor, our AI Assistant can help generate SQL based on what you’re trying to accomplish. This can be particularly useful when you’ve just migrated your data and aren’t familiar with its schema yet.
Step 4 — Run analytics with ClickHouse
This is the step that no other managed Postgres can offer, where the full unified stack comes together.
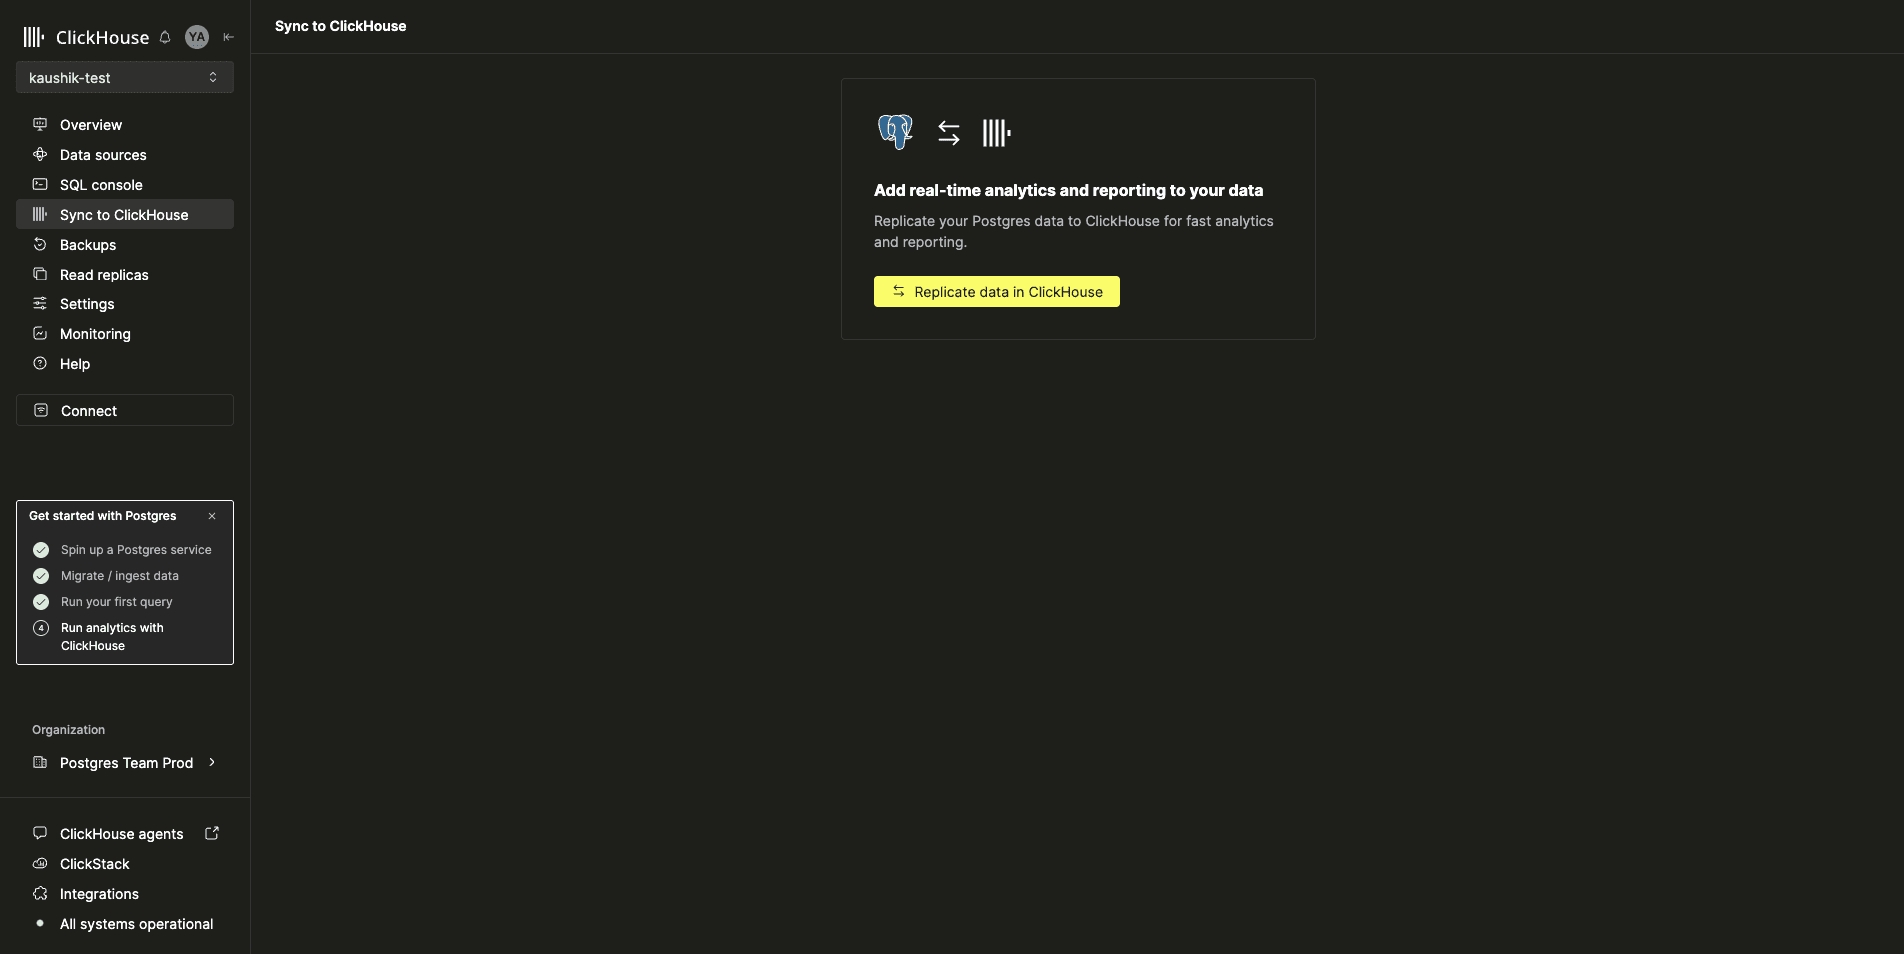
With a few clicks, you can configure a Postgres CDC ClickPipe that first copies your existing Postgres data into ClickHouse, then continuously replicates every change. Within minutes, data is flowing into ClickHouse, with less than a minute of lag between them. You now have one system for operational workloads and one for analytics, kept in sync without having to build and maintain a pipeline yourself.
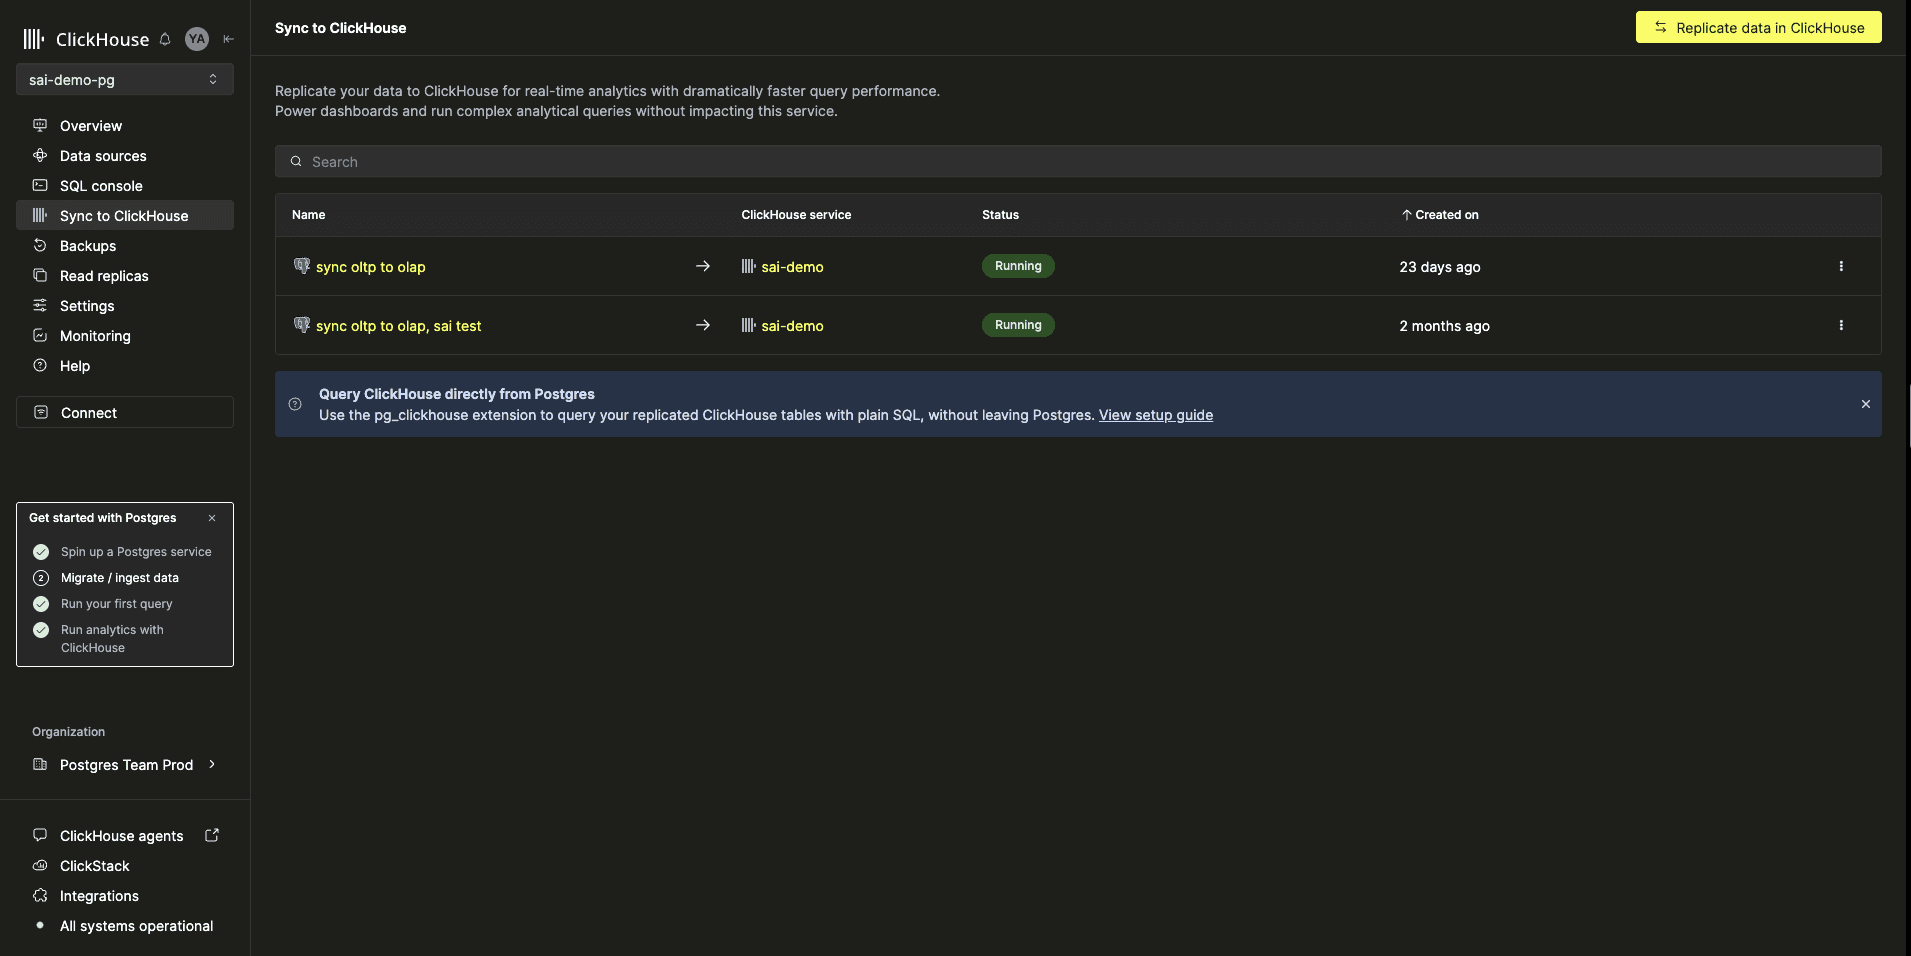
For teams that would rather stay in the Postgres ecosystem entirely, we also surface the pg_clickhouse extension. It allows users to query ClickHouse using familiar PostgreSQL syntax, giving them a single query layer across both engines.
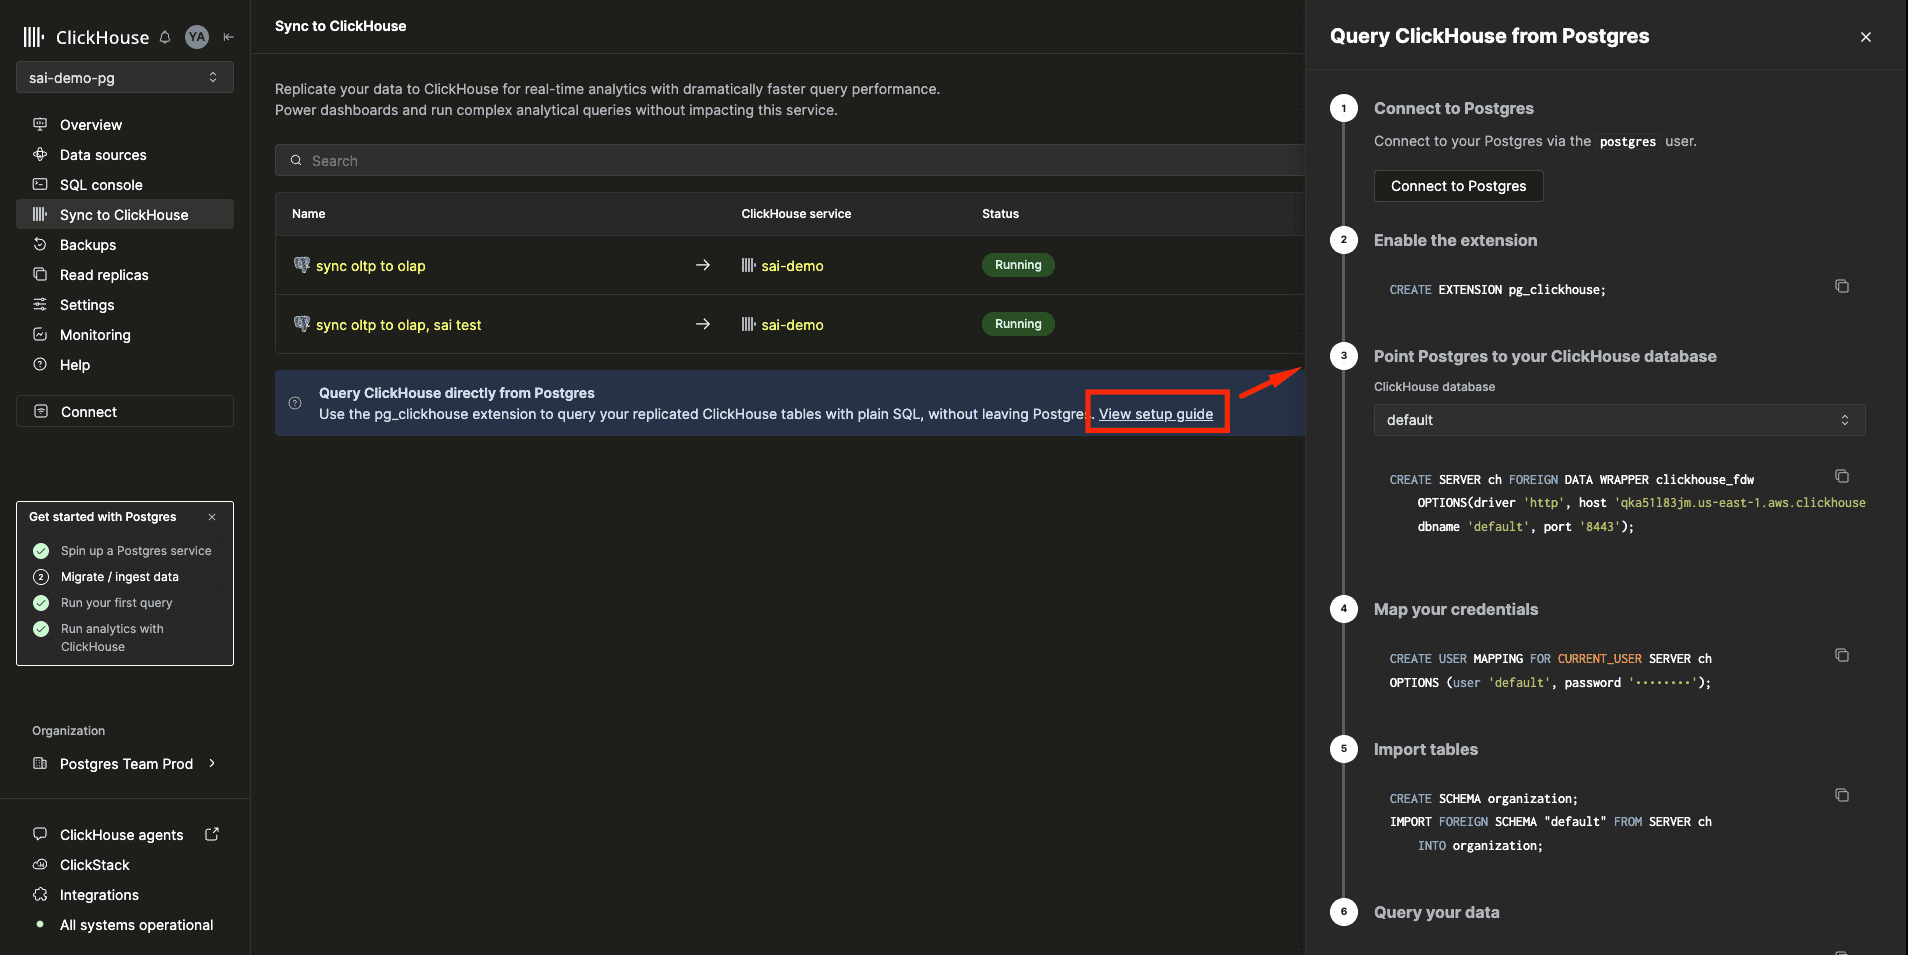
Import the ClickHouse tables as foreign tables and Postgres becomes a single query layer over both engines — same connection, same SQL, analytical queries executing in ClickHouse. Even on a 1M-row dataset that's 3–7x faster: five aggregations drop from 555 ms to 164 ms, a JOIN with aggregations from 1,246 ms to 170 ms. The gap widens with scale.
By the end of Step 4 you will have walked through the entire unified stack — transactional writes, managed CDC, analytical reads — without assembling any of it yourself.
Designing for momentum
We intentionally kept the new onboarding process short, visible, and outcome-oriented. Every completed step reinforces a sense of progress, while the remaining steps make the finish line feel achievable.
We also chose to describe each step as an outcome rather than a UI action. Instead of telling users to “Open the SQL Console” or “Configure CDC,” we focus on what we want them to accomplish:
- Spin up a Postgres service
- Migrate or ingest data
- Run your first query
- Run analytics with ClickHouse
We deliberately stopped at four steps. It was tempting to include more, but onboarding isn't documentation. Its job isn't to teach every feature, it's to get users far enough into the product that they can understand its value and continue exploring on their own.
We’re building ClickHouse Managed Postgres to deliver a fast, reliable Postgres experience with the power of ClickHouse analytics just a few steps away. Our new onboarding experience is designed to help you get there faster. Give it a try and let us know what you think — we’d love to hear your feedback and ideas.
Get started today
Interested in seeing how ClickHouse works on your data? Get started with ClickHouse Cloud in minutes and receive $300 in free credits.
Sign up