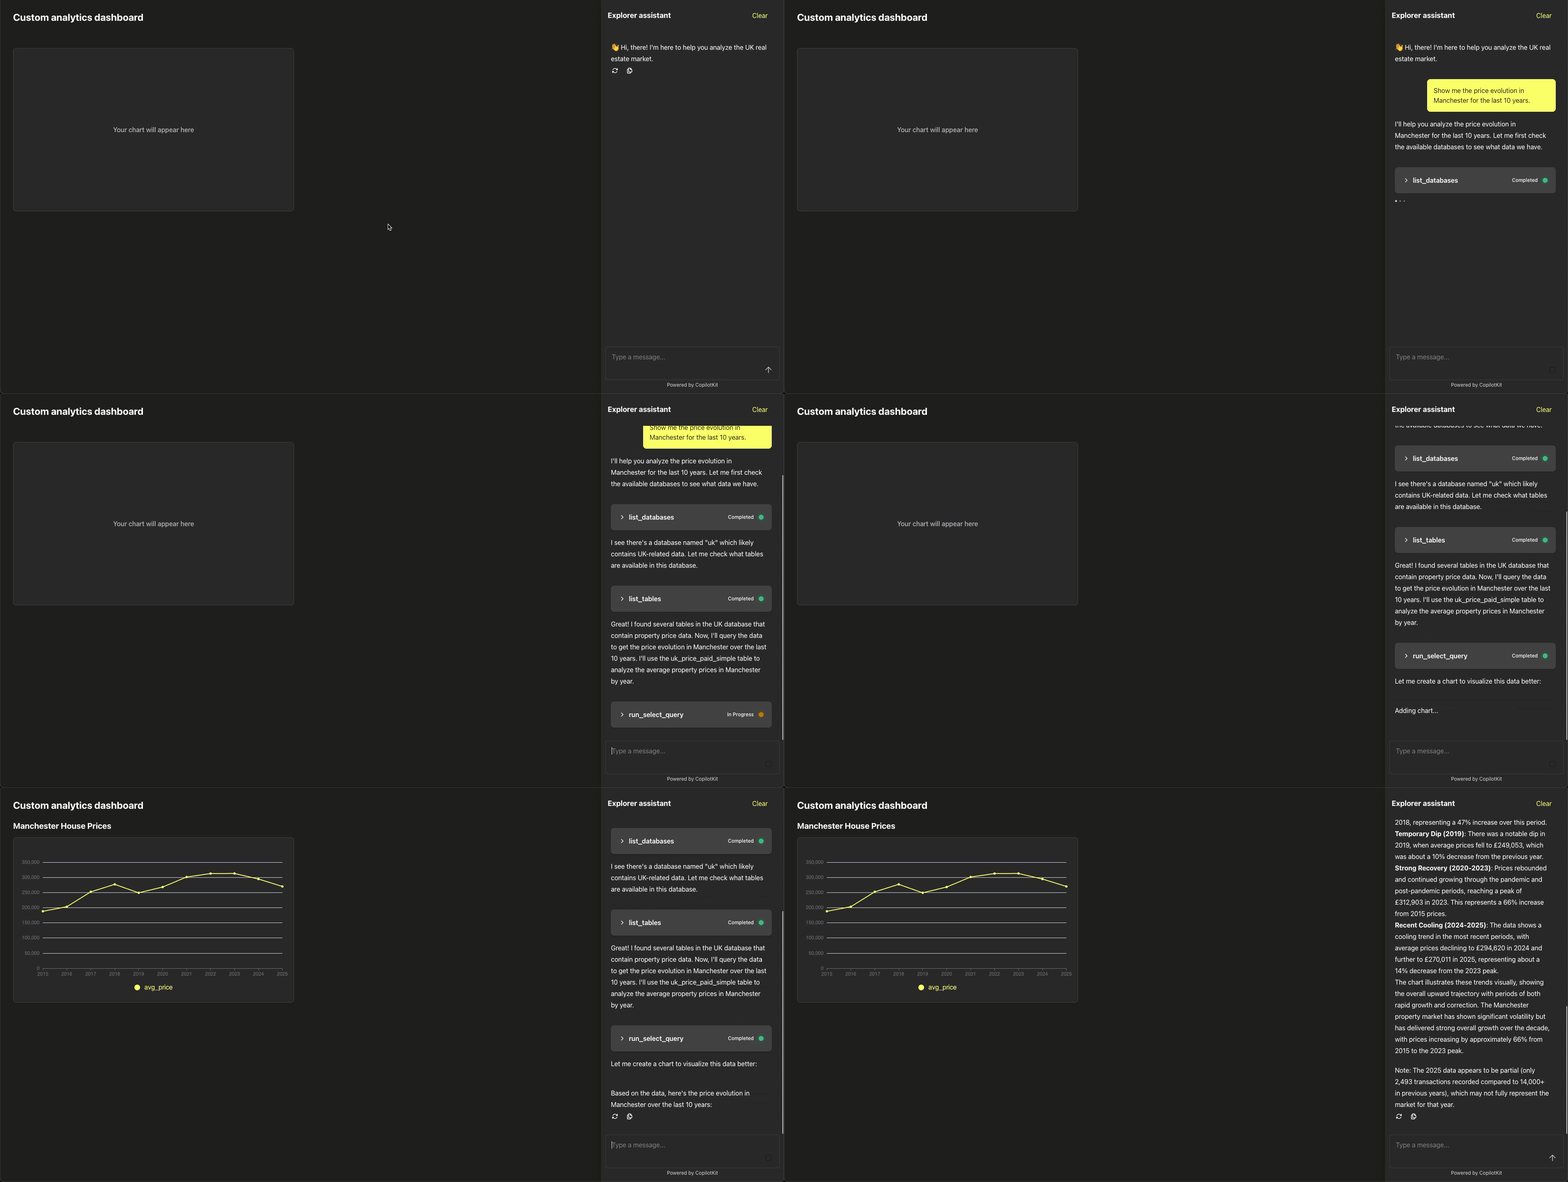
Searching for your new house, you’re trying to understand the price trends in the neighborhood. Imagine that instead of browsing through pre-defined charts, clicking through filters and dropdowns to get the information you’re interested in, you could just ask:
“Show me the price evolution in Manchester for the last 10 years.”
And it just responds with a chart, an explanation, and maybe even follow-up questions.

That is the promise of Agentic applications. Powered by Large Language Models (LLMs), they can reason through complex tasks, call APIs, and build entire workflows from a single user prompt, making them intelligent, interactive user experiences.
Watch our customer panel discuss the potential of MCP in real-time analytics applications in this video.
In this blog, we will show how to build one. We will create a build-your-own analytics dashboard experience for the UK real estate market using ClickHouse MCP Server and CopilotKit. This example is built using React with Next.js, but the same approach can be used with any modern application framework.
Components of the Agentic application #
Let’s start by going through the components of an agentic application.
Large language model #
At the core of any agentic application is a Large Language Model (LLM). The LLM interprets user prompts, understands context, generates responses, and decides what actions to take.
For a smooth and responsive experience, it is essential to use a capable model with fast performance and a reasonably large context window. Agentic applications often deal with complex prompts, interact with external tools, and use data from third-party systems. As more information is added to the context, the model must process it efficiently and respond quickly. This is what enables an interactive and natural experience for the end user.
In our example, we use the model Claude Sonnet 3.7 from Anthropic. When writing this blog, it was one of the best-performing on TAU-bench for the airline and retail use case, a benchmark that aims to rank LLMs on their interaction with human users and ability to follow domain-specific rules.
ClickHouse MCP Server #
Our agentic application is going to help users analyze the UK real estate market data by building their custom dashboard. While the market data is public and the model may have seen it in pre-training, that information is stored in the model’s weights, not as exact records. This means that even if the model has seen some of the data, there’s a chance it’ll make up some numbers if we asked questions about property in the UK. In many cases, the model will need access to live or proprietary data sources to provide accurate and useful insights.
This is the purpose of a Model Context Protocol (MCP) server, an open standard that enables developers to build secure, two-way connections between their data sources and AI-powered tools.
ClickHouse MCP server enables developers to integrate ClickHouse inside their agentic application, allowing the application to query data directly from the application.
CopilotKit #
The third core component in this setup is CopilotKit which is a UI framework designed to simplify the development of agentic applications.
I chose to use CopilotKit for this project because it abstract away several complex aspects of the architecture. It provides built-in support for the chat interface, connects easily with different LLMs, and manages tool calls or UI actions that the model can decide to perform.
Next, we will see how each of these components works together.
High level architecture #
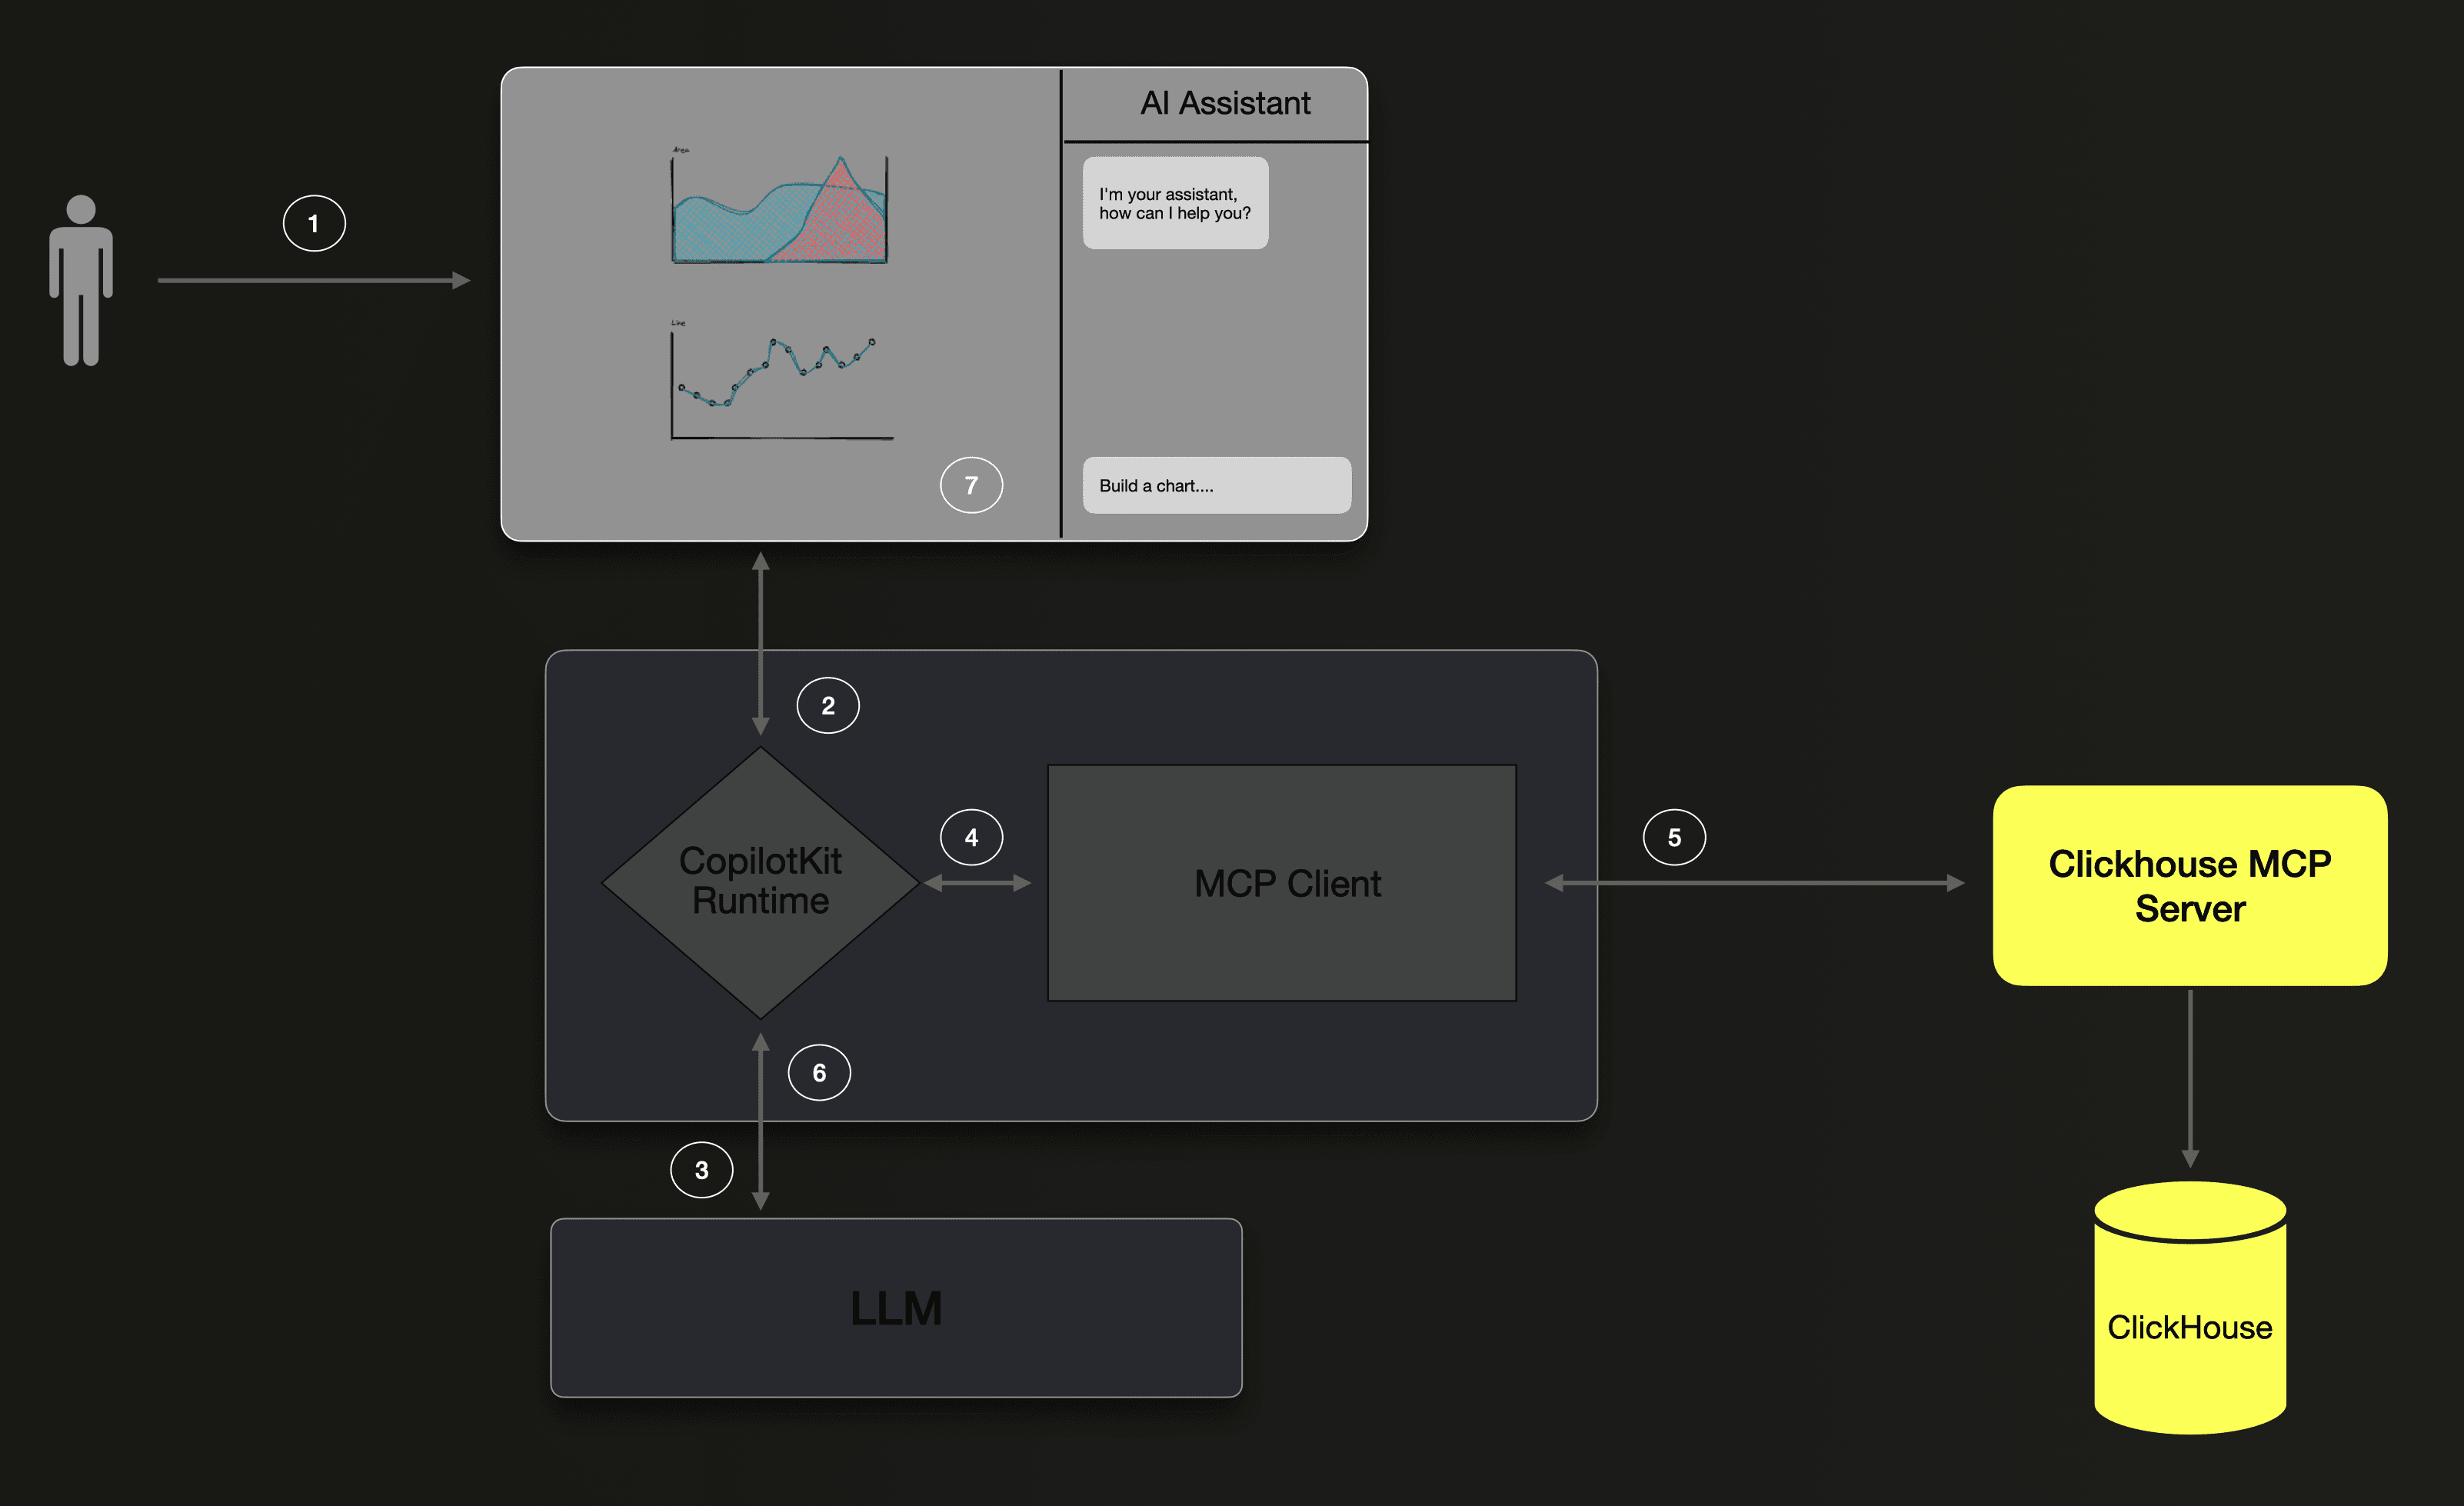
Let’s walk through the flow triggered by a user request. This example illustrates how the components interact to turn a natural language prompt into a fully rendered chart.

- The user sends the following prompt: “Show me the price evolution in Manchester for the last 10 years.”
- The prompt, along with the list of available actions and state variables, is sent to the CopilotKit runtime.
- CopilotKit enriches the prompt with the list of MCP resources, then forwards it to the LLM. The LLM analyzes the prompt and available resources, determines that it needs to retrieve data, and generates a SQL query targeting ClickHouse.
- The CopilotKit runtime uses the MCP client to send the query request.
- MCP Client calls the ClickHouse MCP Server with the SQL query to retrieve the price data in the Manchester area for the last 10 years.
- The data is returned to the LLM along with the current context. The model identifies the generateChart action and prepares the response by formatting the data according to the expected chart parameters.
This flow highlights how the different parts of the agentic application work together. The model interprets the user’s prompt, fetches data using ClickHouse through the MCP Server, and updates the UI by calling predefined actions.
How to build the Agentic application #
Now that we’ve covered how the application works at a high level, let’s go through a step-by-step guide to building it from scratch.
This section focuses only on the important part of the implementation. For a fully working example, look at the example in this Github repository.
Initialize the application #
We start by creating a new React application and initializing it with the CopilotKit framework. To do this, we use the npx helper to bootstrap the project. When prompted about how the application will interact with the model, be sure to select the MCP option.
1npx create-next-app@latest
2cd agentic-app
3npx copilotkit@latest init
Bring your own LLM #
By default, OpenAI is configured by CopilotKit. We can swap with another model if we wish to, here is the list of models supported by Copilotkit.
The connection to the LLM happens on the server side, by default CopilotKit exposes an API route that the client integrates with to interact with the LLM.
Edit the file ./app/api/copilotkit/routes.ts to swap the model.
1import { AnthropicAdapter } from "@copilotkit/runtime";
2
3// const serviceAdapter = new OpenAIAdapter()
4const serviceAdapter = new AnthropicAdapter({model: "claude-3-7-sonnet-latest"});
Don’t forget to provide the API key (ANTHROPIC_API_KEY) as an environment variable.
Deploy the ClickHouse MCP Server #
In this example, we deploy the ClickHouse MCP Server locally, but it is also possible to deploy it remotely and have multiple MCP clients connect to it.
Soon, ClickHouse Cloud will offer a remote MCP server as a default interface. That means any MCP client could connect directly to your cloud instance without additional local setup.
Want early access? Sign up for the AI features waitlist at clickhouse.ai.
1# Clone the ClickHouse MCP Server repository
2git clone https://github.com/ClickHouse/mcp-clickhouse
3# Install dependencies
4python3 -m venv .venv && source .venv/bin/activate && uv sync && uv add fastmcp
5# Configure connection to ClickHouse database
6export CLICKHOUSE_HOST="sql-clickhouse.clickhouse.com"
7export CLICKHOUSE_USER="demo"
8export CLICKHOUSE_SECURE="true"
9export CLICKHOUSE_PORT="8443"
10# Run the MCP server and expose SSE transport protocol
11fastmcp run mcp_clickhouse/mcp_server.py:mcp --transport sse
For this demo, we’re using the ClickHouse SQL Playground, which includes the UK market dataset.
Finally, we use the fastmcp command to start the MCP server and expose it using SSE transport, by default, on port 8000.
Configure the MCP Client #
CopilotKit comes with built-in support for MCP client, we just need to configure the connection so it can access it.
Edit the file ./app/copilotkit/page.tsx to add the ClickHouse MCP Server connection.
1useEffect(() => {
2    setMcpServers([
3      { endpoint: "http://localhost:8000/sse" },
4    ]);
5 }, []);
Create the agent actions #
The main promise of an agentic application is that it can take actions on behalf of the user, guided by their conversation.
In our case, the goal is for the application to generate custom charts based on the user's description. This is the action we need to describe so the LLM can perform it.
For this, we're going to use the CopilotKit hook useCopilotAction. This hook lets developers define custom actions that the model can invoke. In our example, the action is to add a new chart configuration.
We are also going to leverage another hook: useCopilotReadable, which allows us to share a state variable from the application with the model. Here, we make the chart configuration array available to the model.
To set this up, edit the file ./app/copilotkit/page.tsx to define the new action and make the charts state variable available to the model.
1// Chart configuration array
2const [charts, setCharts] = useState<Chart[]>([]);
3
4// Share the charts state variable with LLM
5useCopilotReadable({
6  description: "These are all the charts props",
7  value: charts,
8});
9
10// Create a new action generateChart that will be used by the LLM to create the correct chart configuration and add it to the state variable.
11useCopilotAction({
12    name: "generateChart",
13    description: "Generate a chart based on the provided data. Make sure to provide the data in the correct format and specify what field should be used a x-axis.",
14    parameters: [
15        {
16            name: "data",
17            type: "object[]",
18            description: "Data to be used for the chart. The data should be an array of objects, where each object represents a data point.",
19        },
20        {
21            name: "chartType",
22            type: "string",
23            description: "Type of chart to be generated. Lets use bar, line, area, or pie.",
24        },
25        {
26            name: "title",
27            type: "string",
28            description: "Title of the chart. Cant be more than 30 characters.",
29        },
30        { name: "xAxis", type: "string", description: "x-axis label" }
31    ],
32
33    handler: async ({ data, chartType, title, xAxis }) => {
34        const newChart = {
35            data,
36            chartType,
37            title,
38            xAxis
39        };
40        setCharts((charts) => [...charts, newChart] );
41    },
42    render: "Adding chart...",
43});
Then we need to add a DynamicGrid component to iterate through the chart configuration array and build the charts for each of them.
1function DynamicGrid({ charts }: { charts: Chart[] }) {
2return (
3      charts.map((chart, index) => (
4      <div className="flex flex-col gap-4" key={index}>
5              <p className="text-white whitespace-nowrap overflow-hidden text-overflow-ellipsis text-xl leading-[150%] font-bold font-inter">{chart.title}</p>
6              <GenericChart {...chart} />
7          </div>
8      ))
9  )
10}
The GenericChart component uses the echart for react chart library, but you can easily swap for your preferred ones. You can see the code for the GenericChart component here.
Final result #
We’ve covered the key parts of the implementation. From here, it’s mostly a matter of adding some styling to make the application look polished. The full source code can be found on Github.
Benefits of using ClickHouse in an Agentic application #
Real-time analytics database #
Using a real-time analytics database like ClickHouse is essential for this type of agentic application.

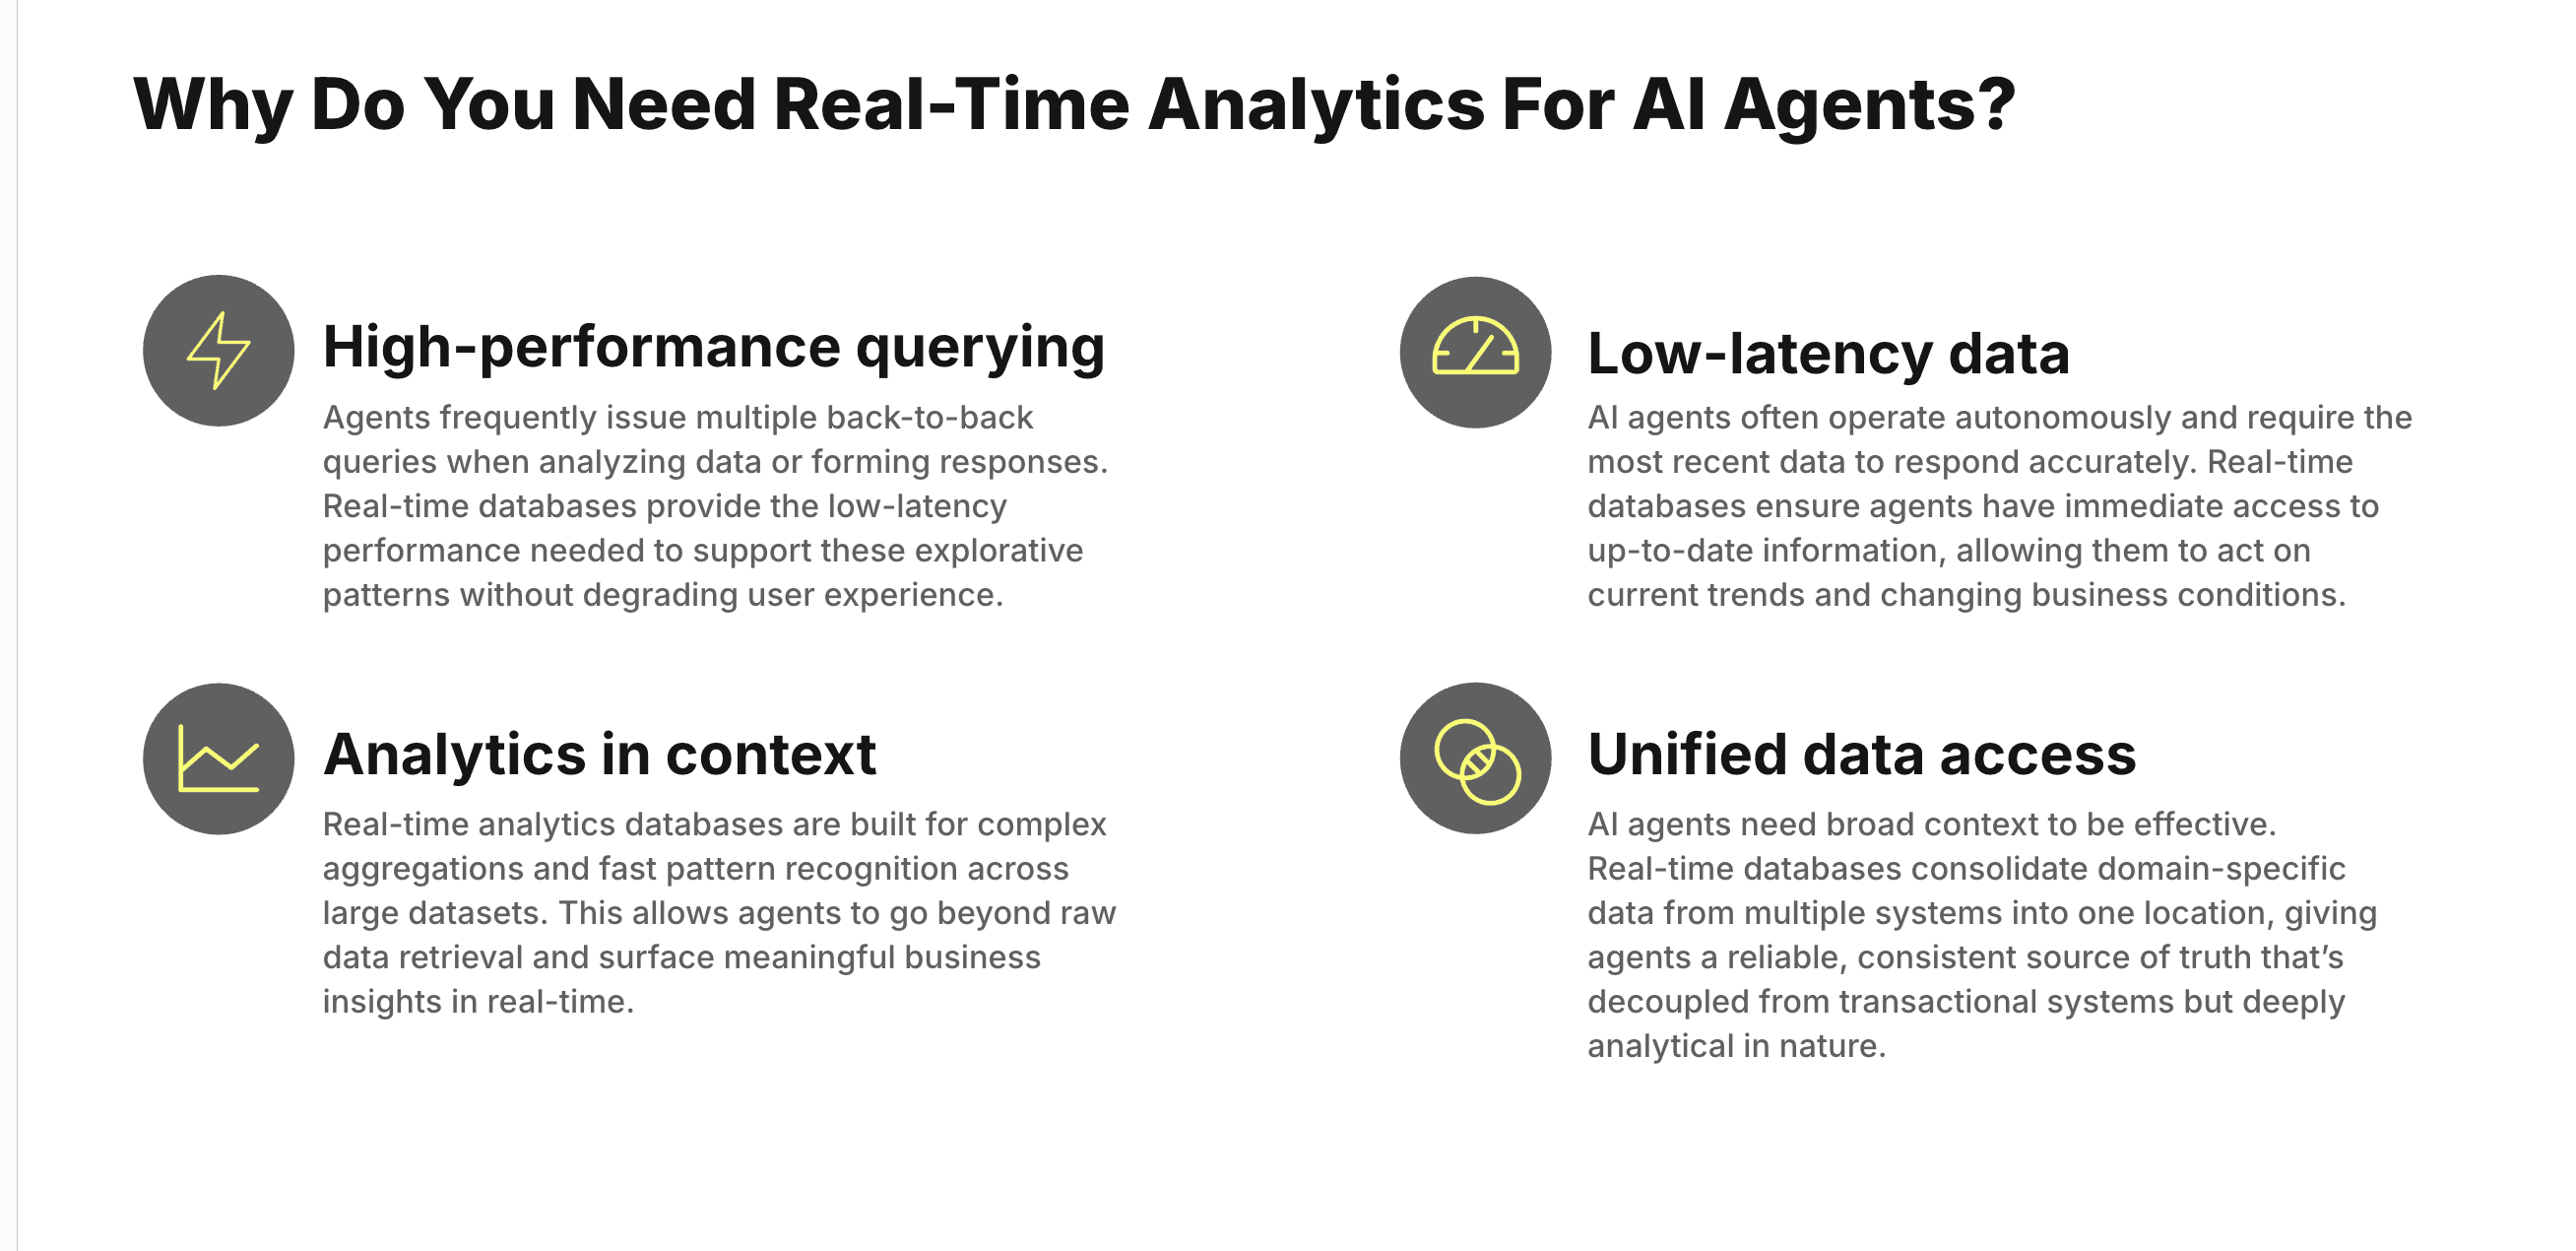
Real-time analytics databases have properties that make them well-suited for Agentic application workload. They work with near real-time data, allowing systems to incorporate the latest information as it arrives. This supports agents that need to make or support timely decisions.
These databases are also built for complex analytical tasks such as aggregations, trend analysis, and anomaly detection across large datasets. Unlike operational databases, they are optimized for extracting insights rather than simply storing or retrieving raw records.
Finally, they support interactive querying at high frequency and under high concurrency. This ensures stable performance during chat-based interactions and exploratory data work, contributing to a smoother and more responsive user experience.
Fine grained permissions and quotas #
One of the main challenges when building agentic applications is maintaining control over what the LLM is allowed to do on your behalf. This becomes especially important when the model has access to query a production database through a MCP server.
Fortunately, ClickHouse offers a wide range of permissions and quotas making it straightforward to control exactly what the MCP server can expose to the model.
In this example, we're using the SQL Playground to host the UK Market dataset. We have configured the MCP Server to authenticate to the Playground using the demo user. You can see the configuration of this user here.
The demo user has read-only access and is restricted to a specific set of databases. This allows us to limit the data the LLM can reach. On top of that, we apply quota settings and assign a limited profile to the user to prevent the model from overloading the server with too many or overly expensive queries. This setup gives us fine-grained control over both the scope and cost of what the model can do.
Conclusion #
In this blog post, we explored how to build an agentic application using ClickHouse MCP Server and CopilotKit.
By leveraging the capabilities of LLMs, we created an application that allows users to build their own analytics dashboard on UK market data.
The use of a fast, scalable and secure analytics database like ClickHouse is crucial for the efficiency and effectiveness of such applications. This approach opens up new possibilities for creating AI-powered tools that provide deeper insights and better user experiences.


