Available now in the AWS Marketplace #
AWS Glue is Amazon’s serverless data integration service that extracts, transforms, and loads data from or to multiple data sources and services. Today, we’re announcing the launch of the official ClickHouse Connector for AWS Glue, which utilizes their Apache Spark-based serverless ETL engine.
The new ClickHouse Connector for AWS Glue is built on our native Spark connector, enabling you to work with PySpark or Scala within Glue notebooks or ETL scripts. Our new connector eliminates the complexity of installing and managing the ClickHouse Spark connector. Now, with a few clicks, you can install it directly from the AWS Marketplace and add it to your Glue environment in no time.
The connector is available today from the AWS Marketplace.
In this blog, we’ll learn how to build scalable production-ready Apache Spark Jobs with AWS Glue in Python.
Setting up the connector #
We’ll start by setting up the connector.
Prerequisites #
Our connector will work with version 4 of AWS Glue. The first thing you’ll need to verify is that you have access to the following versions and use the version below:
- ClickHouse Cloud 25.4+
- AWS Glue 4 (Spark 3.3, Scala 2, Python 3)
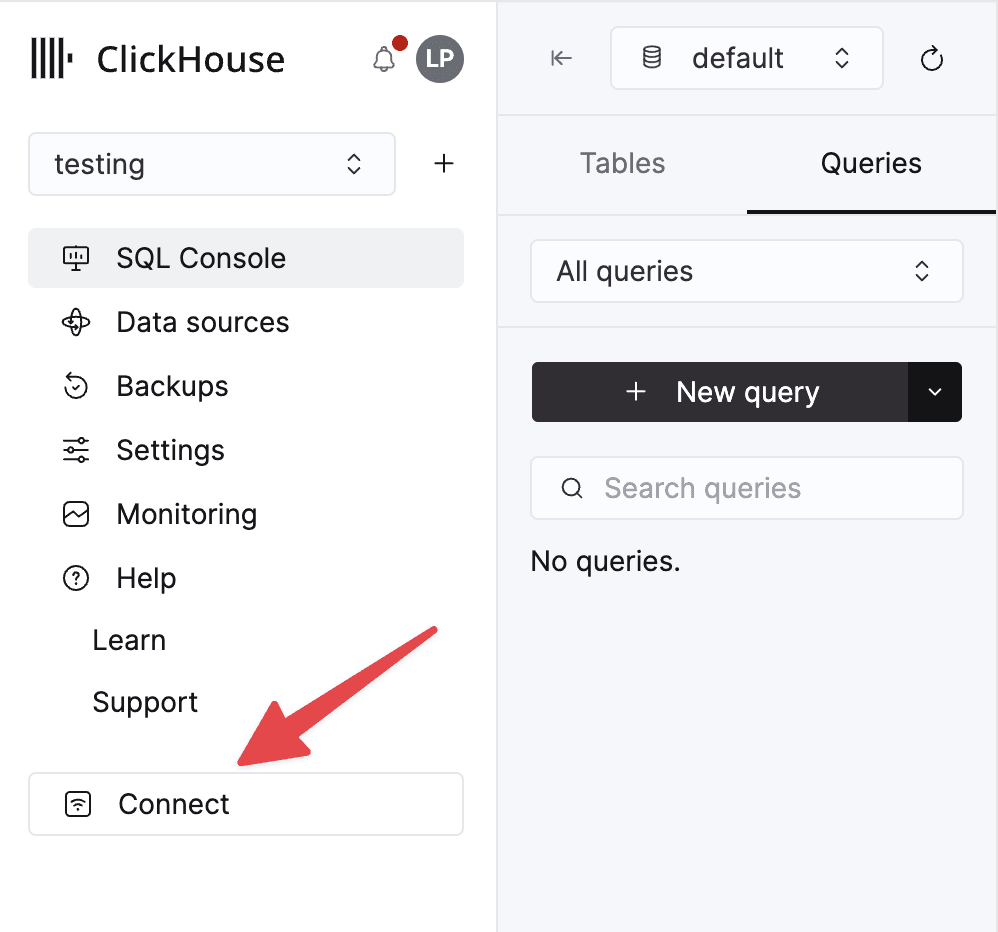
Get your ClickHouse connection details #
Next, let’s gather the connection details for the ClickHouse service. You can find these by clicking the Connect button in ClickHouse Cloud.
Make a note of the following credentials, as we’ll be using them in a few steps.
- Host
- Port
- Username
- Password
Note: It’s worth downloading your credentials when you create your service for later use; otherwise, if you lose your password, you’ll need to use the reset functionality in the connect modal.
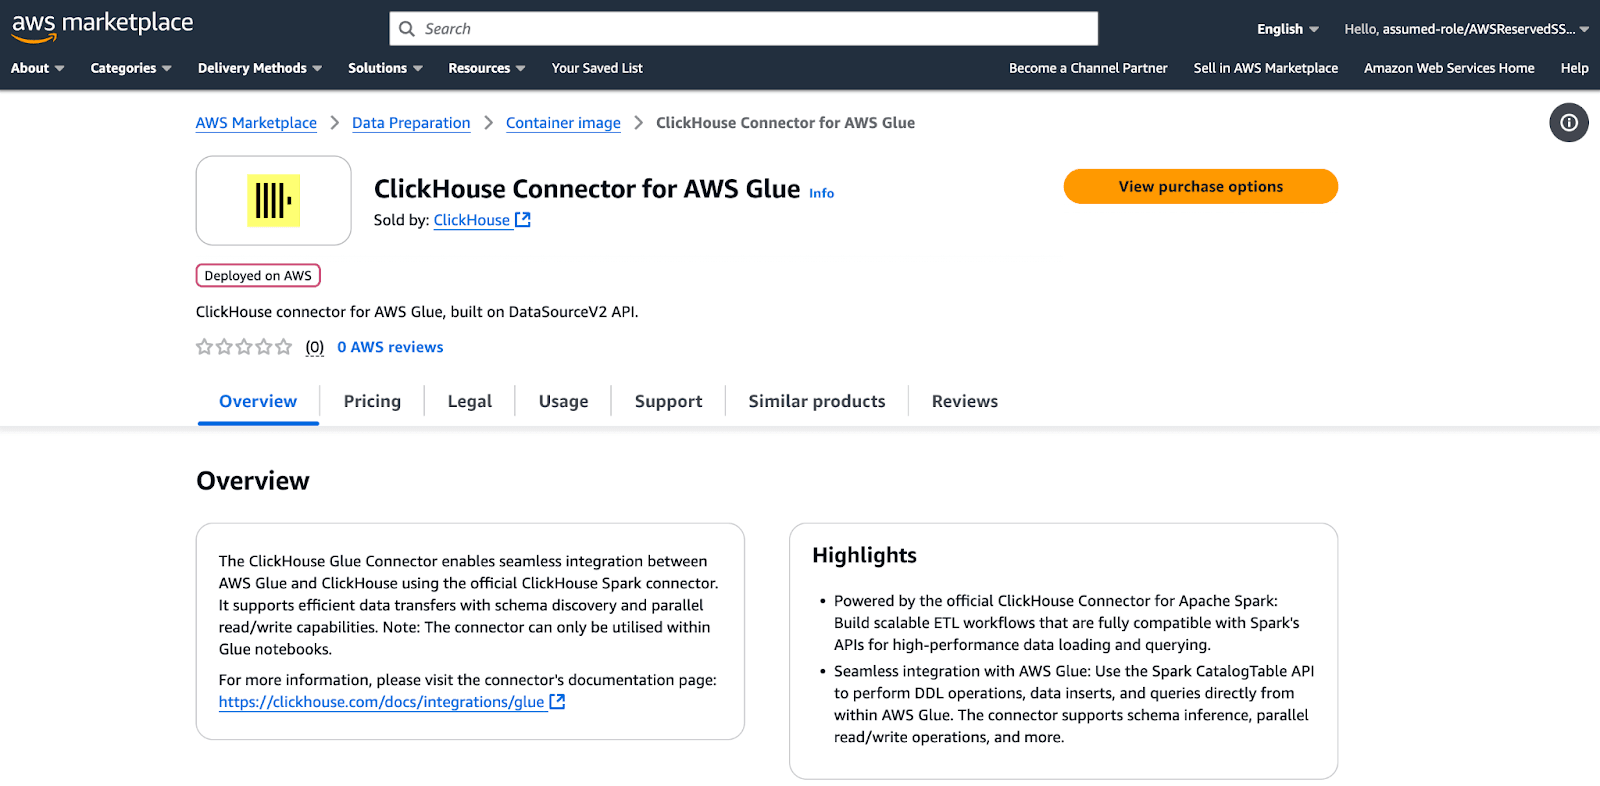
Installing the connector via the Marketplace #
To install the connector, go to the AWS Marketplace and search for “ClickHouse Connector for AWS Glue.” It’s free to subscribe and add to your organization's account.
Creating a connection #
Finding the Data Connection menu item in the left-hand navigation, we can create a connection with the ClickHouse Connector for AWS Glue. Take note of the class name here; we’ll be reusing that later as part of our Spark configuration when setting up our job.
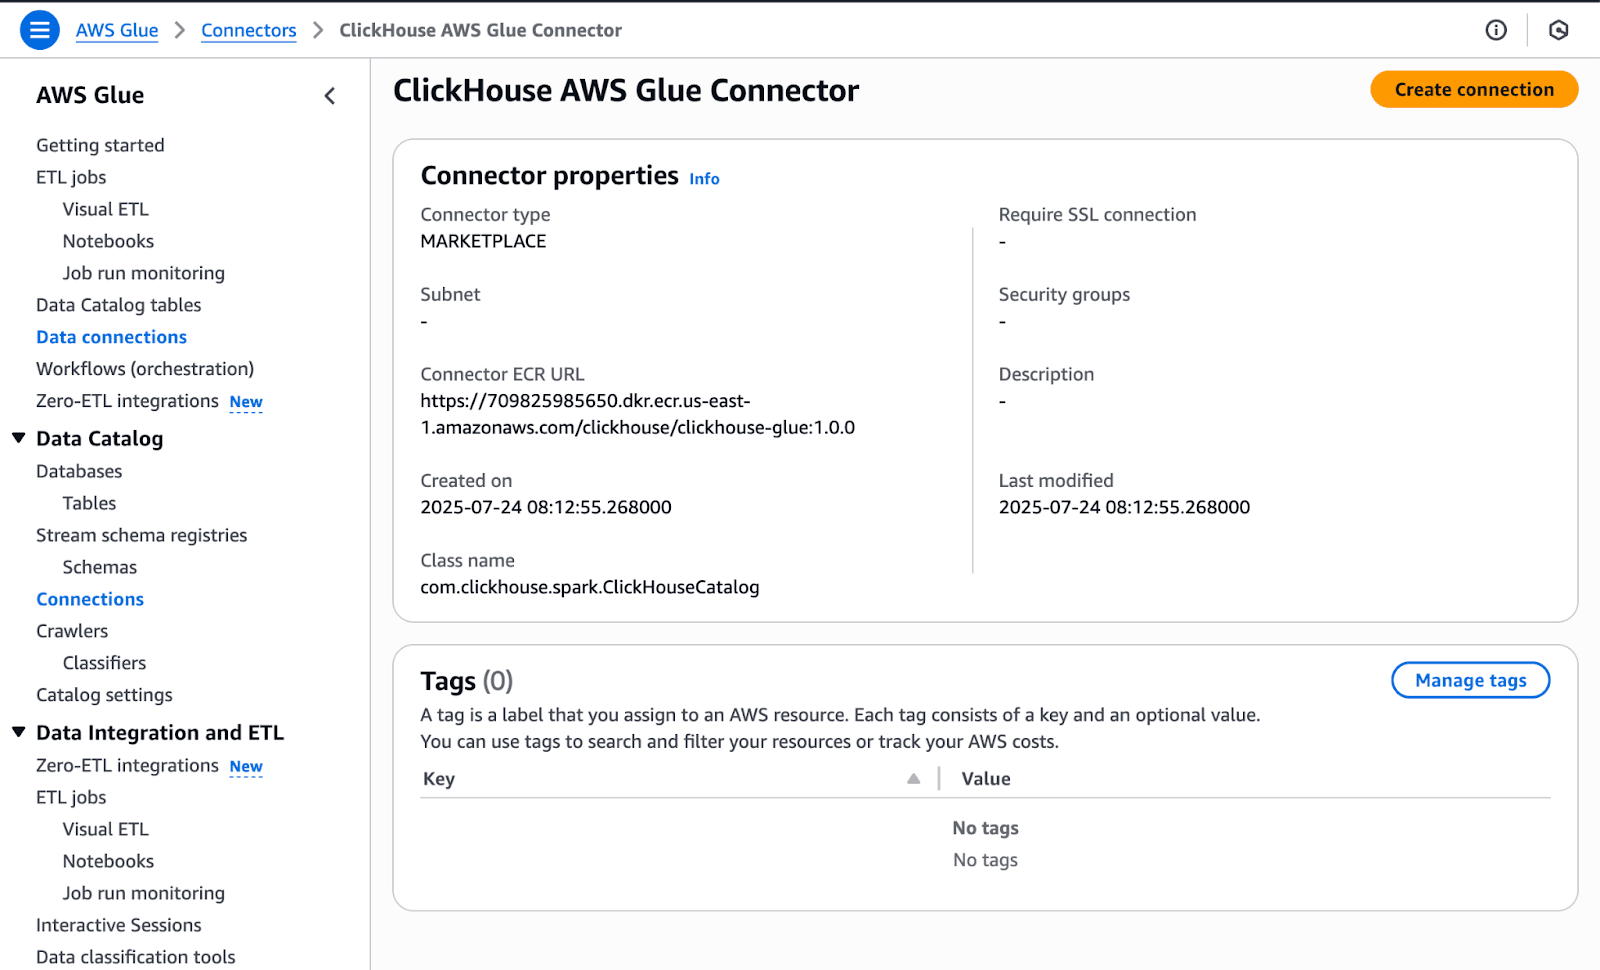
ClickHouse Connector for AWS Glue Details page
After selecting the Connector, you can create a connection, which requires you to supply a name and description that can be reused by many jobs. You can also set up networking options if the data you’re retrieving through your Glue job requires a VPC connection or access via a specific Security Group.
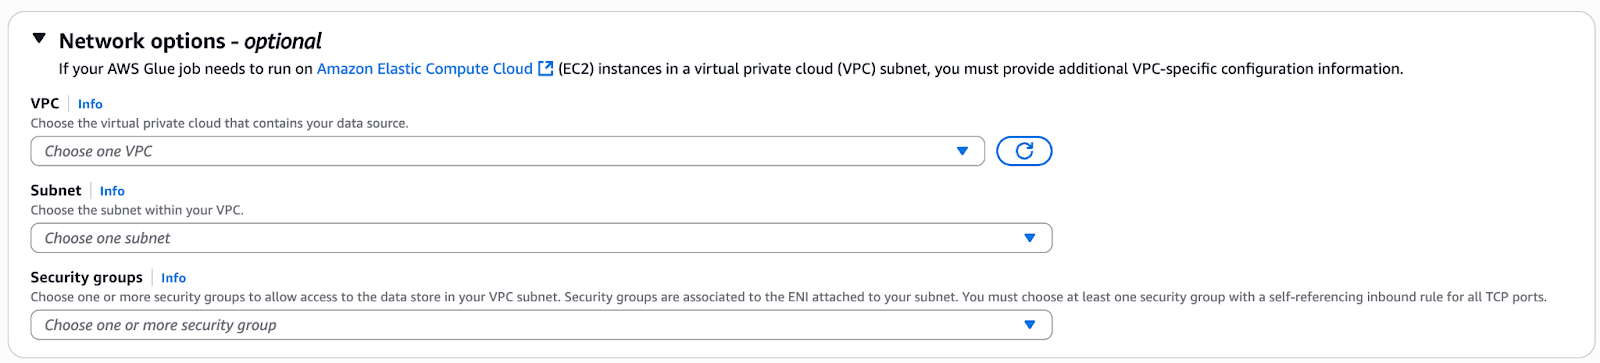
AWS Glue configurable network settings
Creating an AWS Glue Job #
Heading back to ETL Jobs via the navigation, we can create a job using the script editor. The Visual UI is not supported at the moment, but we plan to add support for this option so that you can create jobs using the Glue no-code interface.

The different AWS Glue options for creating jobs within Glue Studio
Our first goal is to create a small job that writes test data to ClickHouse, so that we can verify our connection and that everything is set up correctly. The script editor provides a full IDE-like experience within the web browser, perfect for creating and editing Glue jobs. You can also set up version control for collaboration and review of Glue Job scripts, set a job on a schedule for repeated runs, and execute the job directly from the editor.
AWS Glue Script tab code editor
Before we get started with our script, we’re going to do some setup to make sure we’re using the right IAM permissions, selecting the right AWS Glue version, which will contain the right versions of Apache Spark, Scala, and Python, and configuring some parameters that can be used for our Spark Job.
IAM Permissions for the Role #
You will need to follow the AWS Documentation to create an IAM role that AWS Glue can assume when interacting with other AWS Services, such as temporarily writing to AWS S3 or reading data sources. Ensure the glue:GetJob and glue:GetJobs are also included in the IAM roles for the role used in conjunction with the ClickHouse Connector for AWS Glue.
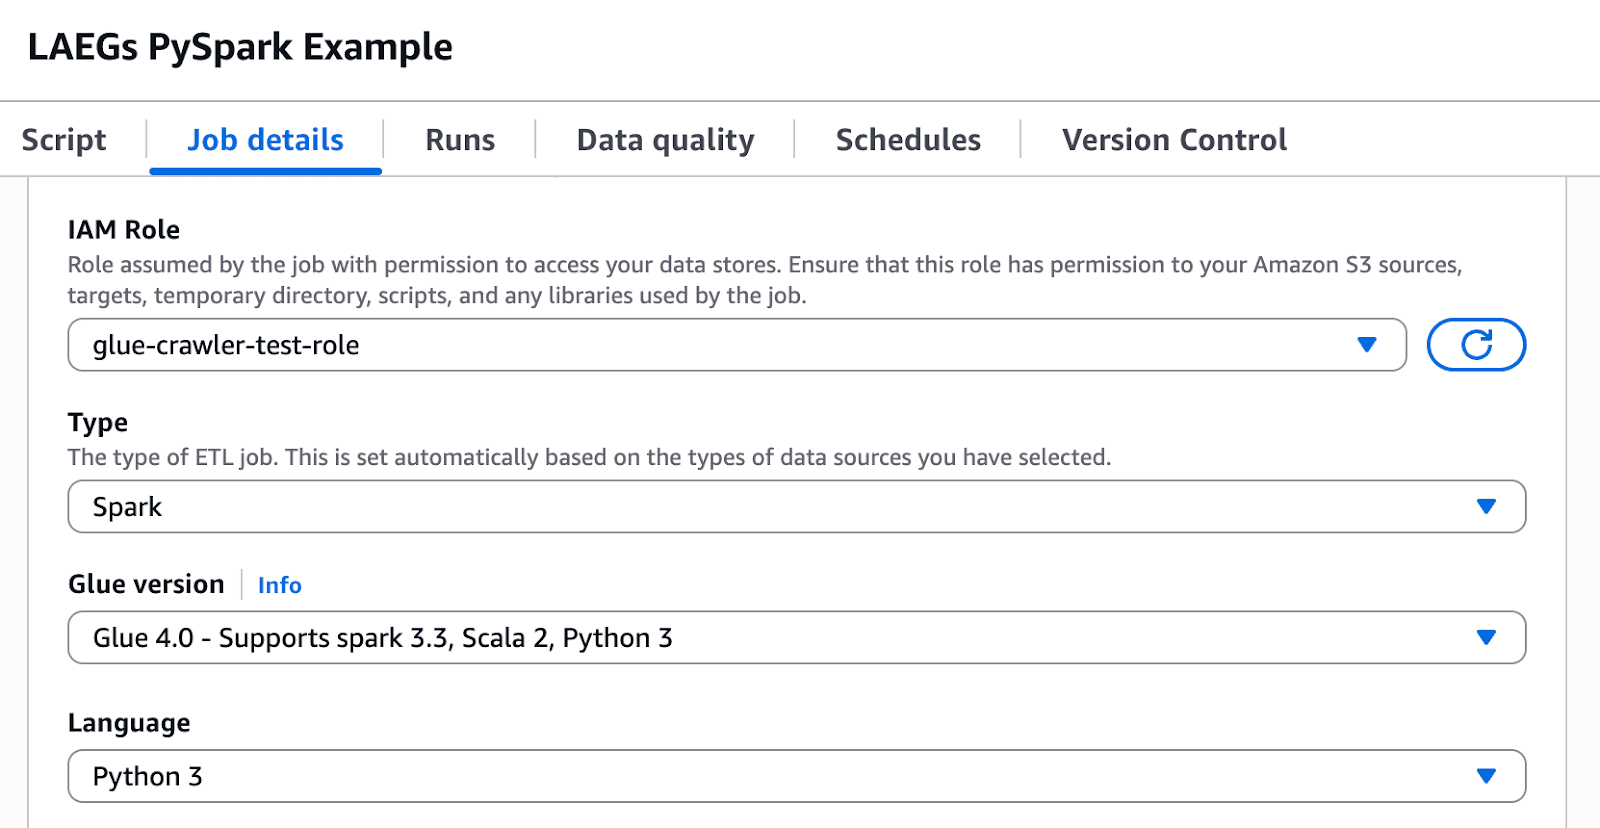
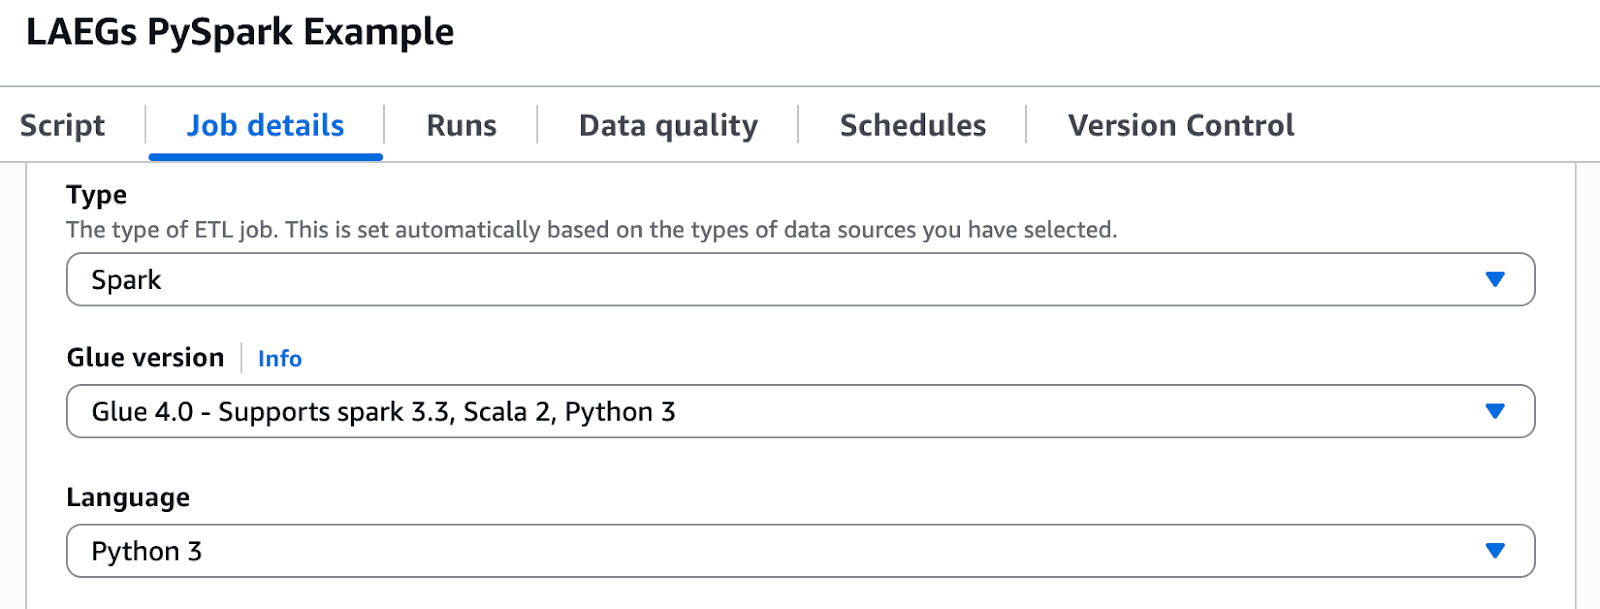
AWS Glue version #
It’s important to note that the ClickHouse connector currently supports running Spark 3.3, Scala 2, and Python 3. You’ll need to configure the Glue Version to be version 4, which supports those versions.
Configuring Job Parameters #
I suggest also setting up some parameters that can be reused in the code. You don’t have to do this step, and could replace the arguments section in the script below with the values, but doing this makes it easier to run jobs against multiple environments like dev and production. I suggest creating the following job parameters that can be modified at runtime:
- CLICKHOUSE_HOST
- CLICKHOUSE_PORT
- CLICKHOUSE_USERNAME
- CLICKHOUSE_PASSWORD
Note: parameters need to be supplied through the UI with a prefix of -- for them to be picked up and used in scripts.
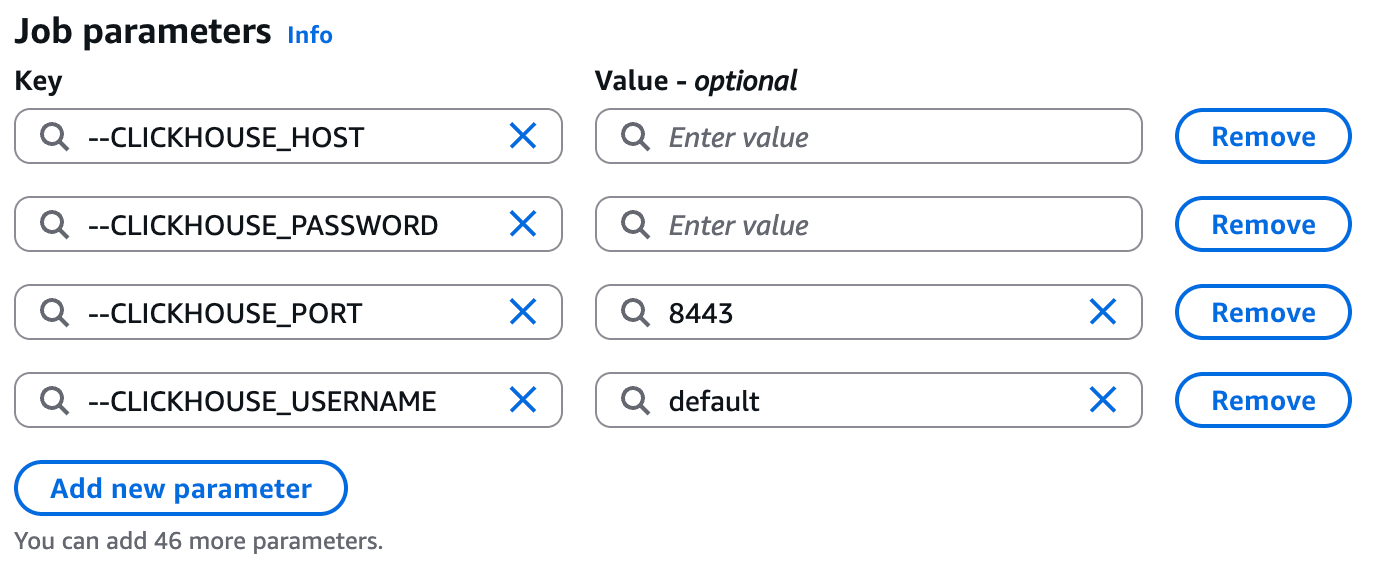
Configuring job parameters under Job Details tab
Heading back to the script tab, we can start building a script to prepare for ingesting data into ClickHouse.
Setting up the Spark Environment #
The first thing we need to set up is registering the catalog, the Spark catalog will hold the job parameters we created above. We can use the parameters by enhancing the getResolvedOptions method to get all the CLICKHOUSE_ parameters we set up in the UI and then set them in our Spark configuration.
1## @params: [JOB_NAME, CLICKHOUSE_HOST, CLICKHOUSE_PORT, CLICKHOUSE_USERNAME, CLICKHOUSE_PASSWORD]
2args = getResolvedOptions(sys.argv, [
3    'JOB_NAME',
4    'CLICKHOUSE_HOST',
5    'CLICKHOUSE_PORT',
6    'CLICKHOUSE_USERNAME',
7    'CLICKHOUSE_PASSWORD',
8])
9
10spark.conf.set("spark.sql.catalog.clickhouse", "com.clickhouse.spark.ClickHouseCatalog")
11#  Protocol and SSL config for ClickHouse Cloud
12spark.conf.set("spark.sql.catalog.clickhouse.protocol", "https")
13spark.conf.set("spark.sql.catalog.clickhouse.option.ssl", "true")
14spark.conf.set("spark.sql.catalog.clickhouse.option.ssl_mode", "NONE")
15#  Connection details
16spark.conf.set("spark.sql.catalog.clickhouse.host",args["CLICKHOUSE_HOST"])
17spark.conf.set("spark.sql.catalog.clickhouse.http_port", args["CLICKHOUSE_PORT"])
18spark.conf.set("spark.sql.catalog.clickhouse.user", args["CLICKHOUSE_USERNAME"])
19spark.conf.set("spark.sql.catalog.clickhouse.password", args["CLICKHOUSE_PASSWORD"])
20#  Suggestion: consider making this a parameter
21spark.conf.set("spark.sql.catalog.clickhouse.database", "default")
22# spark.clickhouse.write.format default value is arrow
23spark.conf.set("spark.clickhouse.write.format", "json")
24#  spark.clickhouse.read.format default value is json
25spark.conf.set("spark.clickhouse.read.format", "arrow")
Setting the Spark configuration from the resolved Glue Job parameters
Now that the connector is set up, we can start looking at how we write and read data into ClickHouse. The first thing we’ll need to do is create a table in our database. We’re just going to create a narrow table containing employees and their identifiers for testing the connector.
Managing database tables #
Our connector allows you to execute DDL operations with Spark SQL (Spark Connector ANTLR Grammar), which is extremely handy for creating, altering, or dropping tables and views. We will just create a simple table for this example that will house some data, containing an id and a name.
For more information about what data types ClickHouse supports, you can have a look through our data types documentation when you’re creating your DDL.
1logger.info("spark create tbl")
2# use ClickHouse database
3spark.sql(
4    "USE clickhouse;"
5)
6
7
8# create table DDL in the database
9spark.sql(
10    """
11    CREATE TABLE default.glue_job_example (
12      id          BIGINT    NOT NULL COMMENT 'sort key',
13      name       STRING
14    ) USING ClickHouse
15    TBLPROPERTIES (
16      engine = 'MergeTree()',
17      order_by = 'id'
18    );
19    """
20)
DDL operations using Spark SQL
Note: We currently do not support sending multiple statements in a single method call. You will need to break these into individual calls.
Writing data to ClickHouse #
We will import Row from pyspark.sql to create our dataframe and populate it with employee data. It’s trivial to write data from Dataframes into ClickHouse; the simplest method is to use the writeTo method introduced in Spark 3 with the introduction of the DataFrameWriteV2 API.
1from pyspark.sql import Row
2
3# Create DataFrame
4data = [
5    Row(id=6, name="Mark"),
6    Row(id=19, name="LAEG"),
7    Row(id=50, name="Jim"),
8    Row(id=71, name="Ian"),
9    Row(id=12, name="APCJ"),
10    Row(id=11, name="Peter"),
11    Row(id=71, name="Eva"),
12    Row(id=17, name="Jonny"),
13    Row(id=40, name="Anthony"),
14    Row(id=55, name="Petra"),
15    Row(id=42, name="Nigel"),
16    Row(id=48, name="BBC"),
17]
18df = spark.createDataFrame(data)
19
20# Write DataFrame to ClickHouse
21df.writeTo("clickhouse.default.glue_job_example")
22    .append()
Writing a Dataframe into a simple table in ClickHouse
Aggregating data sources before writing data to ClickHouse #
If we wanted to do some preprocessing and merge two sets of data to create a wide table within ClickHouse, we could use Spark to read from disparate data sources. Below is a pseudo example of taking a dataframe, reading data from S3, and creating summaries before ingesting into ClickHouse.
1# Read from multiple sources
2first_df = ...
3
4# Maybe we need to read from another datasource like S3
5second_df = spark.read.parquet("s3://.../")
6
7# We can join and create aggregated summaries before ingesting the data into ClickHouse
8combined_df = first_df
9    .join(second_df, "column_to_join_on")
10    .groupBy("column_to_group_by_1", "column_to_group_by_2")
11    .agg(
12        sum("column_to_sum").alias("sum_column_name"),
13        count("column_to_count").alias("count_of_entries_column"),
14        avg("column_to_average").alias("avg_column_name")
15    )
16
17# Write
18df.writeTo("clickhouse.database_name.table_name")
19  .append()
Combining dataframes before writing to ClickHouse
Reading data from ClickHouse #
You can read data from Clickhouse directly into a dataframe using the spark.sql method. Here we’re just going to read all the data we’ve ingested in the previous step by using a simple select query and logging it to the output.
1# Read DataFrame from ClickHouse
2df_read = spark.sql("""
3    SELECT
4        *
5    FROM
6        clickhouse.default.glue_job_example
7""")
8
9# Take the first 10 records from the dataframe
10logger.info(str(df.take(10)))
Reading from ClickHouse into a Spark Dataframe
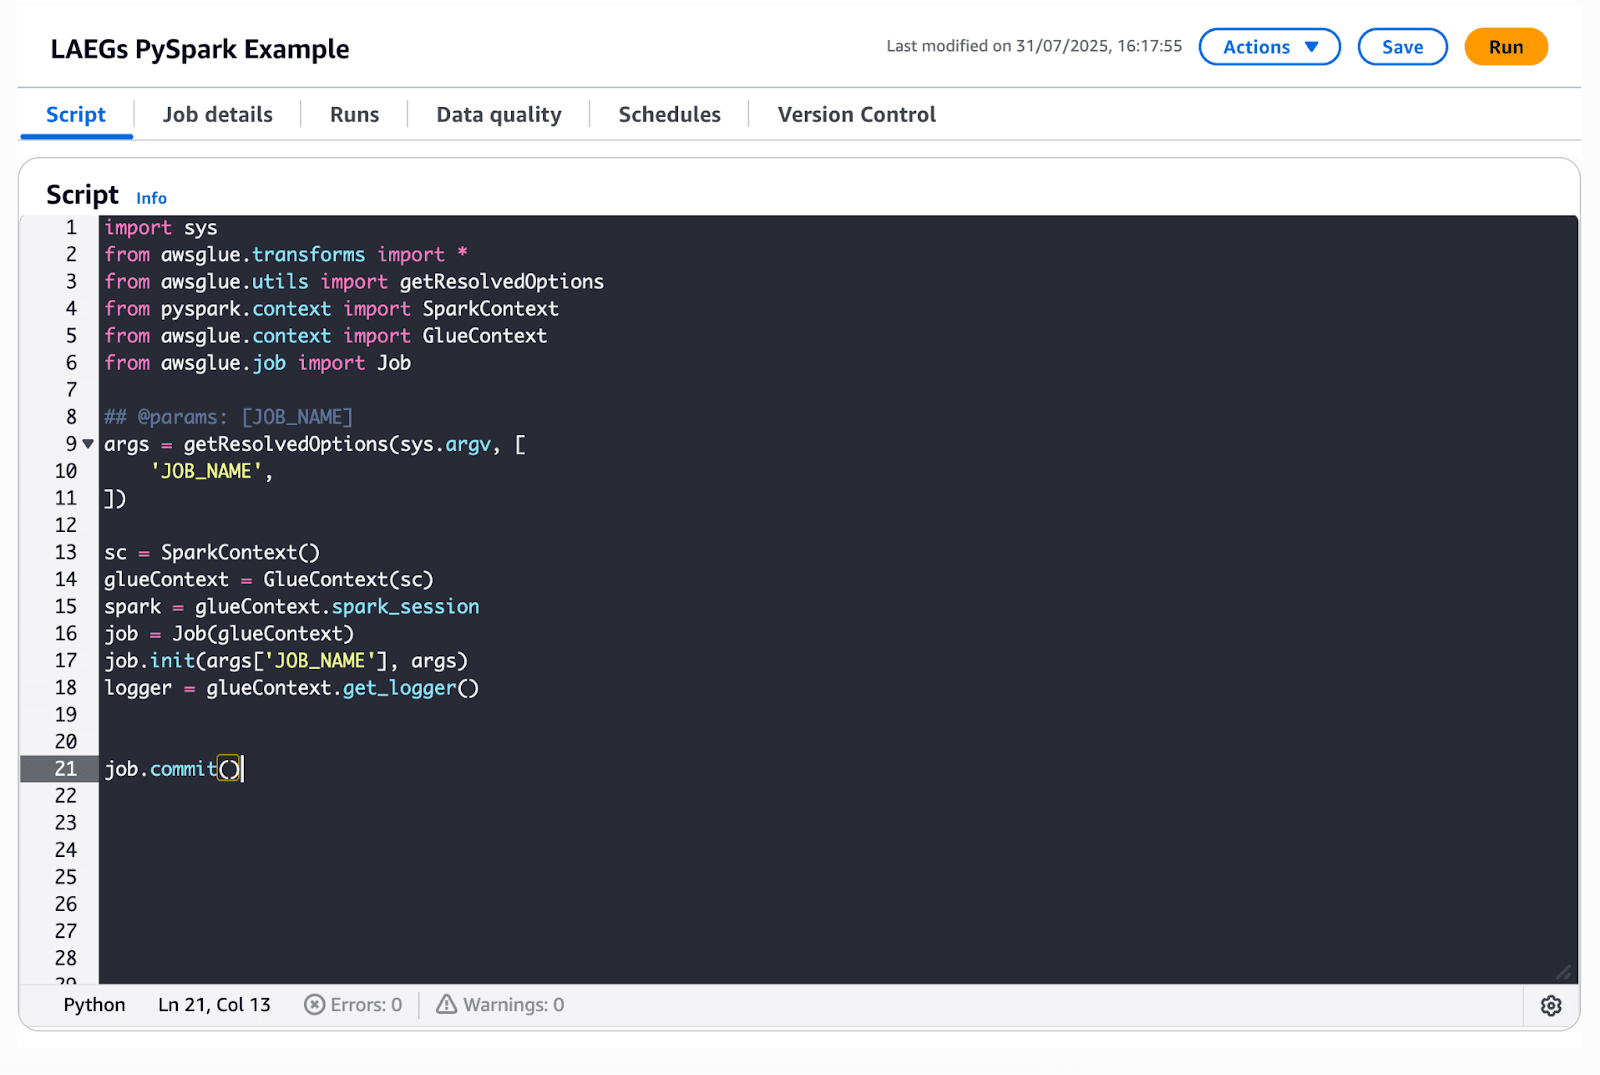
Full scripts for the example Glue job #
Copy and paste the whole script into your AWS Glue job. Remember to configure the connector, your environment, and variables as shown above!
1import sys
2from awsglue.transforms import *
3from awsglue.utils import getResolvedOptions
4from pyspark.context import SparkContext
5from awsglue.context import GlueContext
6from awsglue.job import Job
7from pyspark.sql import Row
8
9## @params: [JOB_NAME, CLICKHOUSE_PORT, CLICKHOUSE_USERNAME, CLICKHOUSE_PASSWORD]
10args = getResolvedOptions(sys.argv, ['JOB_NAME',
11    'CLICKHOUSE_HOST',
12    'CLICKHOUSE_PORT',
13    'CLICKHOUSE_USERNAME',
14    'CLICKHOUSE_PASSWORD',
15])
16
17sc = SparkContext()
18glueContext = GlueContext(sc)
19logger = glueContext.get_logger()
20spark = glueContext.spark_session
21job = Job(glueContext)
22job.init(args['JOB_NAME'], args)
23
24logger.debug("setting spark conf")
25spark.conf.set("spark.sql.catalog.clickhouse", "com.clickhouse.spark.ClickHouseCatalog")
26
27#  Protocol and SSL config for ClickHouse Cloud
28spark.conf.set("spark.sql.catalog.clickhouse.protocol", "https")
29spark.conf.set("spark.sql.catalog.clickhouse.option.ssl", "true")
30spark.conf.set("spark.sql.catalog.clickhouse.option.ssl_mode", "NONE")
31
32#  Connection details
33spark.conf.set("spark.sql.catalog.clickhouse.host",args["CLICKHOUSE_HOST"])
34spark.conf.set("spark.sql.catalog.clickhouse.http_port", args["CLICKHOUSE_PORT"])
35spark.conf.set("spark.sql.catalog.clickhouse.user", args["CLICKHOUSE_USERNAME"])
36spark.conf.set("spark.sql.catalog.clickhouse.password", args["CLICKHOUSE_PASSWORD"])
37
38#  Suggestion: consider making the database name a parameter for use in different environments
39spark.conf.set("spark.sql.catalog.clickhouse.database", "default")
40spark.conf.set("spark.clickhouse.write.format", "json")
41#  spark.clickhouse.read.format default value is json
42spark.conf.set("spark.clickhouse.read.format", "arrow")
43logger.debug("spark conf set")
44
45logger.debug("creating table in ClickHouse")
46# use ClickHouse database
47spark.sql(
48    "USE clickhouse;"
49)
50
51# create table DDL in the database
52spark.sql(
53    """
54    CREATE TABLE default.glue_job_example (
55      id          BIGINT    NOT NULL COMMENT 'sort key',
56      name       STRING
57    ) USING ClickHouse
58    TBLPROPERTIES (
59      engine = 'MergeTree()',
60      order_by = 'id'
61    );
62    """
63)
64logger.debug("table created in ClickHouse")
65
66# Create the DataFrame
67data = [
68    Row(id=6, name="Mark"),
69    Row(id=19, name="Luke"),
70    Row(id=50, name="Jim"),
71    Row(id=71, name="Ian"),
72]
73df = spark.createDataFrame(data)
74
75# Write DataFrame to ClickHouse
76df.writeTo("clickhouse.default.glue_job_example")
77    .append()
78logger.debug("data ingested into ClickHouse")
79
80# Read DataFrame from ClickHouse
81df_read = spark.sql("""
82    SELECT
83        *
84    FROM
85        clickhouse.default.glue_job_example
86""")
87
88logger.debug("data read from ClickHouse")
89logger.debug(str(df.take(10)))
90
91job.commit()
Taking your AWS Glue pipeline to production #
Of course, the above examples are just to get you started, but as you are developing your scripts in AWS Glue, it is always good to think about how you make and manage your pipelines in a reusable and scalable way for production workloads. Here are some things to consider:
Tuning your Glue job #
Considering and tuning your batch size of data and the types it contains will be crucial for performance. As part of your .writeTo method, you can add options to tune the batchsize, socket_timeout, and connection_timeout. I recommend going through all the Spark Connector configuration options, selecting and tuning the ones that make the most sense for your data shape and use case.
1# ClickHouse batch and connection settings
2...
3.option("batchsize", "100000")
4.option("socket_timeout", "300000")
5.option("connection_timeout", "10000")
6...
Using your Glue Job as part of a Glue Workflow #
How and when your Glue jobs run are crucial to your data pipeline. AWS Glue provides Glue Workflows that allow you to configure triggers to kick off the execution of your Glue job. There are several ways you can trigger your job using Glue workflows:
- Schedule
- On-demand (via Console, API, or CLI)
- EventBridge events
Below, we can set up a scheduled trigger in the Glue workflow console to run our job every day at 9 a.m.
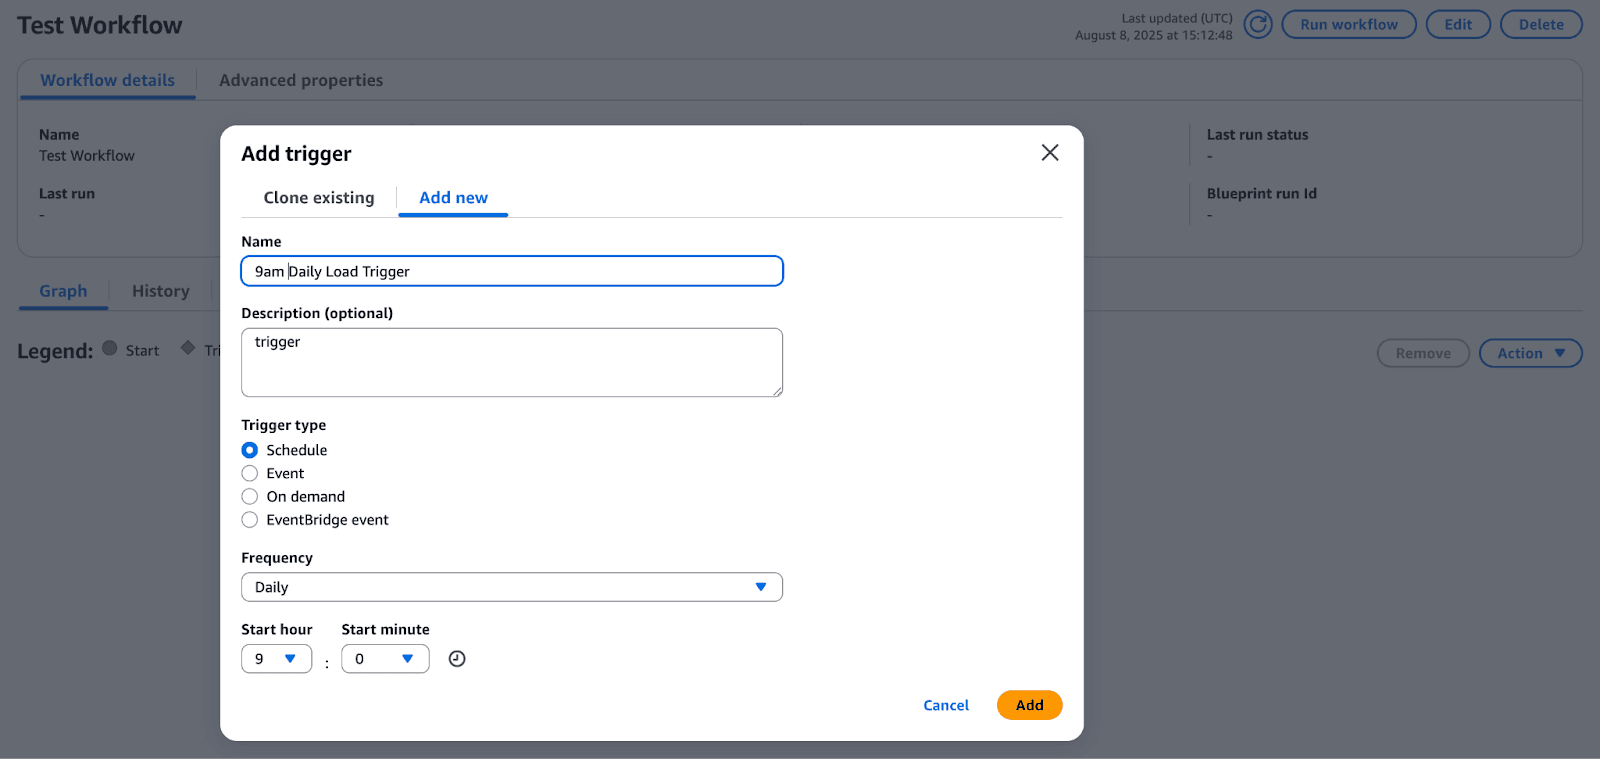
Creating a scheduled trigger in Glue Workflows

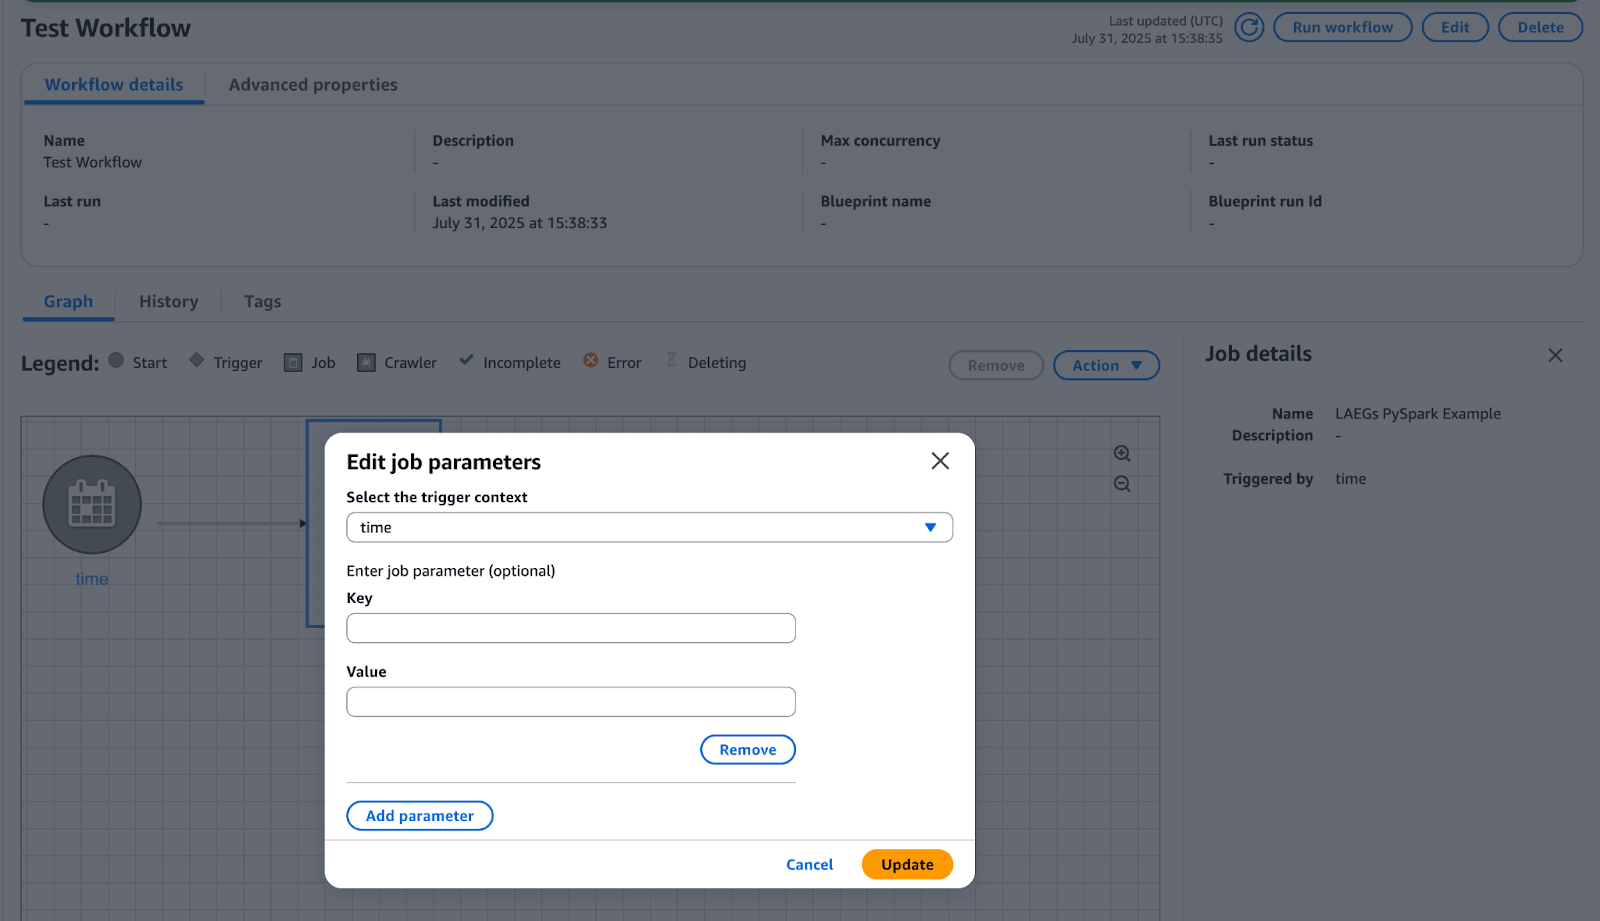
Editing job parameters for different environments
We could customize our job parameters so that a job can populate different environments, with different amounts of data into different tables. Follow the configuring job parameters section above and modify the script to add additional parameters.
Adding parameters for your Glue Job within your Glue Workflow
Programmatically creating Glue Jobs with Cloud Formation #
There are many neat features that help with managing and scheduling AWS Glue jobs. For example, you can create and manage version-controlled configurations by using AWS Cloud Formation to define ETL objects like scripts or triggers.
Below is an example of creating a cron job for an AWS Glue job that runs every 10 minutes Monday to Friday.
1---
2AWSTemplateFormatVersion: '2010-09-09'
3# Sample CFN YAML to demonstrate creating a scheduled trigger
4#
5# Parameters section contains names that are substituted in the Resources section
6# Parameters for CFN template
7Parameters:
8  # The existing Glue Job to be started by this trigger
9  CFNJobName:
10    Type: String
11    Default:
12  # The name of the trigger to be created
13  CFNTriggerName:
14    Type: String
15    Default:
16#
17# Sample CFN YAML to demonstrate creating a scheduled trigger for a job
18#
19Resources:
20# Create trigger to run an existing job (CFNJobName) on a cron schedule.
21  TriggerSample1CFN:
22    Type: AWS::Glue::Trigger
23    Properties:
24      Name:
25        Ref: CFNTriggerName
26      Description: Trigger created with CloudFormation
27      Type: SCHEDULED
28      Actions:
29        - JobName: !Ref CFNJobName
30        # Arguments: JSON object
31      # # Run the trigger every 10 minutes on Monday to Friday
32      Schedule: cron(0/10 * ? * MON-FRI *)
Example of creating an AWS Cloud Formation template to schedule Glue Job
What's next for the ClickHouse Connector for AWS Glue? #
With the first release of ClickHouse Connector for AWS Glue, we focused on the most common use case we see in production - batch write operations. We’re looking towards the future to extend the functionality and enhance the user experience.
Before the end of the year, we’ll look to support AWS Glue’s no-code visual interface to make it even simpler for creating and managing dataflows within
The connector's roadmap includes adding more support for IAM roles with AWS Secret Manager and Glue catalog crawler for automated discovery of data sources. If you’re interested in particular features being added, you can submit an integration request directly in ClickHouse Cloud.

Integrations tab within ClickHouse Cloud with “Request a new integration”
Ready to get started? #
If you’re also excited about the potential of using Spark Jobs inside of AWS Glue, sign up to ClickHouse Cloud to get $300 of trial credits that you can use to create a database service on AWS. You can then subscribe to “ClickHouse Connector for AWS Glue” for free by finding it on the AWS Marketplace.
If you have any feedback, feature requests, or issues relating to Apache Spark, you can create an issue in the ClickHouse Connector for Apache repository. Don’t forget to share your experiments and use cases with others in our ClickHouse Community Slack!