

Prerequisites
Create your Striim account
Sign up directly with Striim or through AWS Marketplace. Your 14-day free trial starts when you activate your account. No credit card is required for the trial.- Open the Striim for ClickHouse signup form, enter the required details and select Sign up.
- Open the account activation email, activate the account and sign in to the Striim cloud console.
Create your service
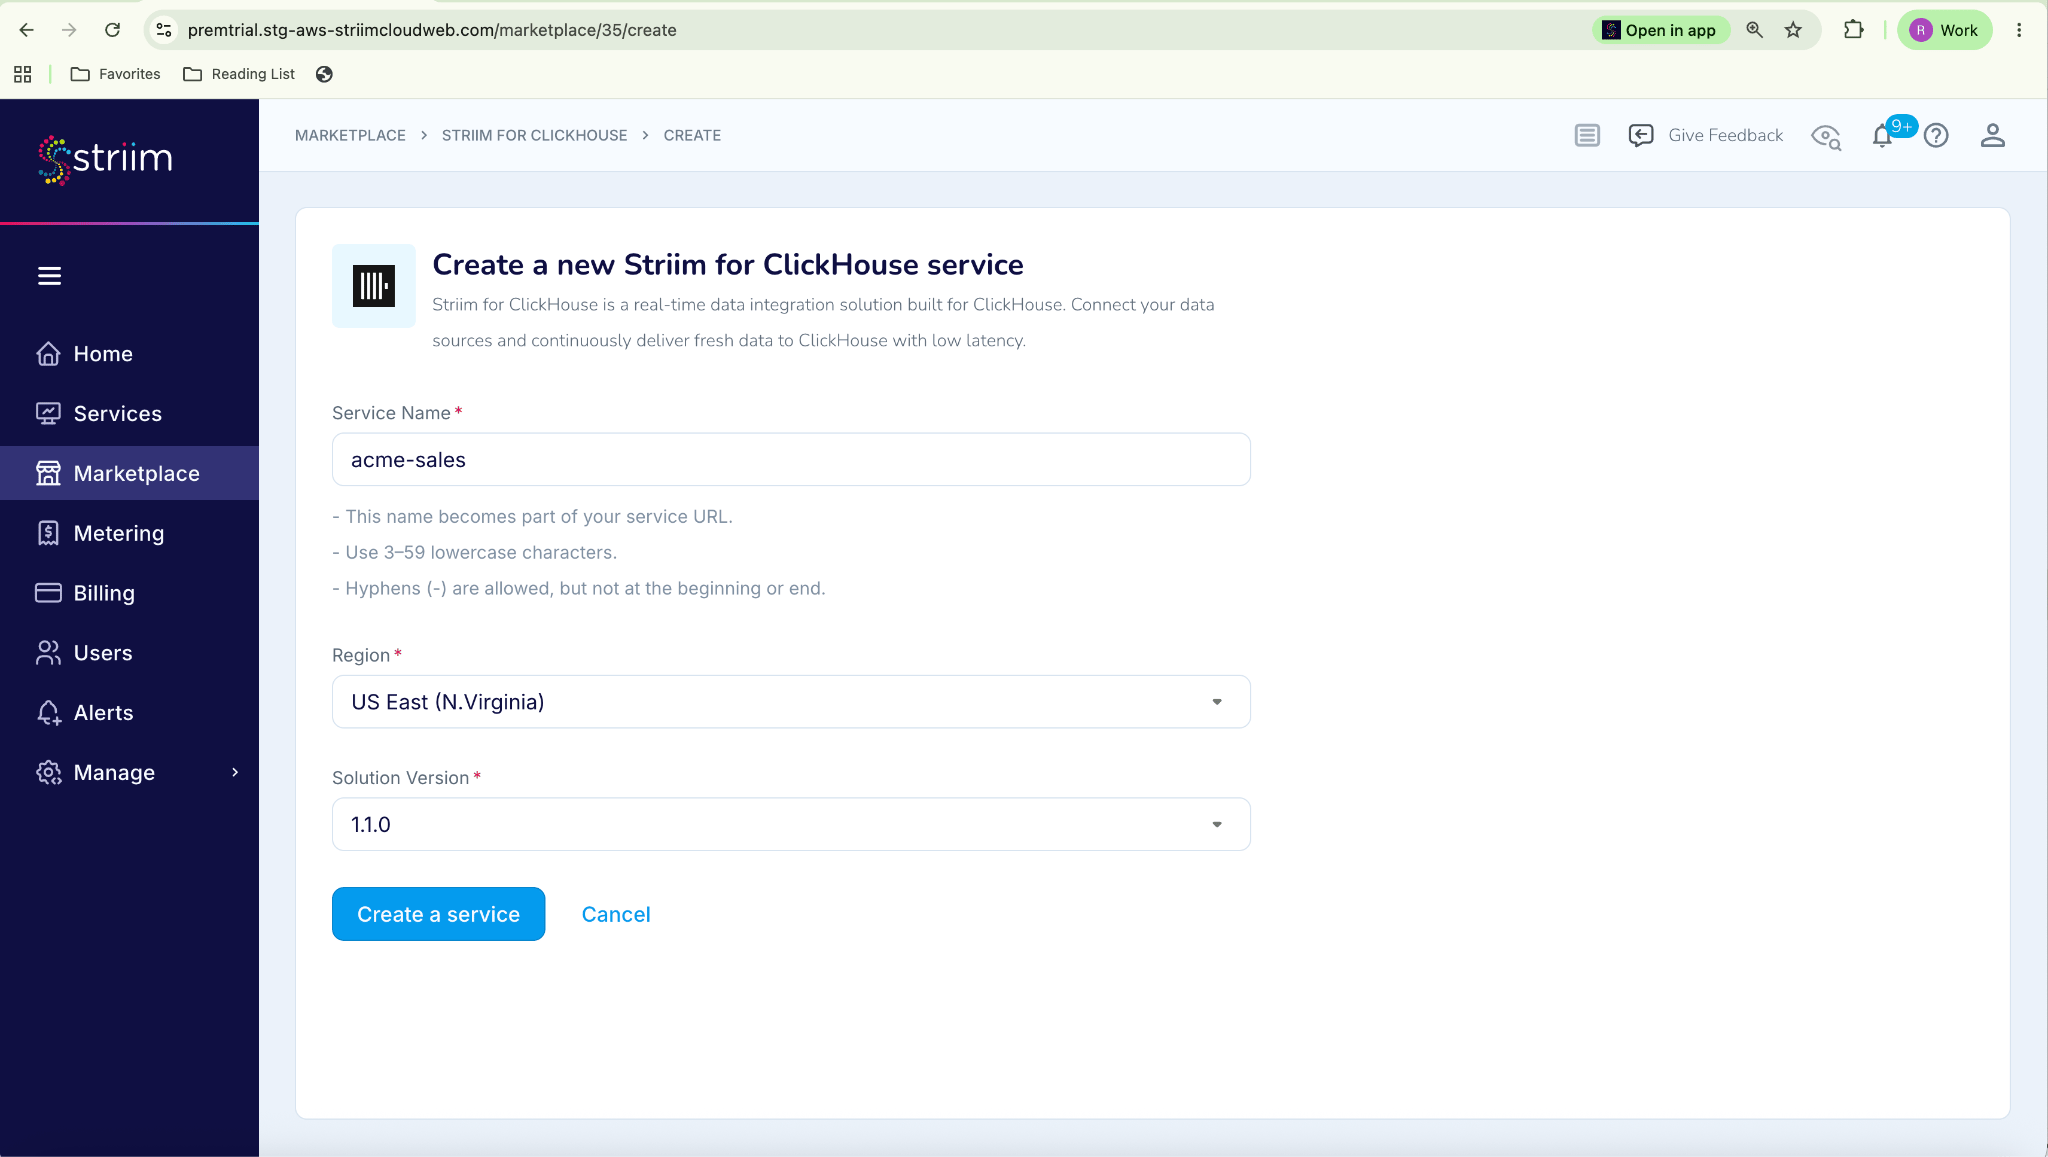
A service is a managed Striim environment on AWS where you build, run and monitor pipelines that write to ClickHouse. Your account can have only one active Striim for ClickHouse service at a time.- On your first sign-in to Striim for ClickHouse, select Get Started. Alternatively, select Marketplace in the sidebar. Under Striim for ClickHouse, select Create.
- Configure the following:
- Service Name: A name that identifies the workload or environment.
- AWS Region: The region where the service runs. Select your ClickHouse region where available to reduce latency and cross-region transfer charges. Otherwise, select the closest available region.
- The name and region cannot be changed after creation. To change either, you have to delete the service and create a new one.
- Select Create a service. Provisioning can take several minutes. Your new services use the Premium plan by default. You can change the plan on the Billing page.
- When the service is ready, choose how to launch it:
- Start building with Striim Clara AI: Launch with Striim-managed Clara AI. No API key is required.
- Review your service settings before launch: Configure your own AI provider, manage users, or set up SSH or AWS PrivateLink before launch.
Prepare your ClickHouse target
1
Get your connection details
In ClickHouse Cloud, select your service, select Connect, then choose HTTPS to see the host and port (8443). For self-managed ClickHouse, get the host and port from your administrator.
2
Choose or create the target database
Striim does not create the target database, and the application halts at startup if it is missing. Use an existing database or create one:
3
Create a dedicated user for Striim
Use a dedicated user instead of the default administrative user:For self-managed ClickHouse, you can also configure SSL X.509 authentication.
4
Grant the required privileges
Grant the user the following privileges, as listed in the Striim documentation:
Recommended ClickHouse configuration
Create a connection profile
Create a ClickHouse connection profile for pipelines to reference by name. In the connection profile wizard, configure the following:
To rotate credentials or certificates, open Connection Profiles, edit the profile and save the changes.
For AWS PrivateLink, keep the Connection URL provided by ClickHouse Cloud. Configure a Route 53 private hosted zone so the hostname resolves to the private endpoint from your Striim service. See Initial setup to write to ClickHouse.
Prepare your source
Each source type has its own setup. Find your source under Sources in the Striim for ClickHouse documentation and follow its configuration topic. For CDC capable sources you may need to enable change capture on the source and create a dedicated user for Striim with the privileges listed for that source. Note the following before you continue:- Host, port, and credentials for the Striim user.
- The schemas and tables you want to replicate. Select specific tables rather than whole schemas where you can.
- Confirmation that Striim can reach the source from AWS (firewall, VPC, PrivateLink, SSH or IP allowlist).
- Your plan: CDC for Oracle, SQL Server, Snowflake and Salesforce requires Premium.
Build and start a pipeline
You can create a pipeline using one of the following methods:- Striim Clara AI: Select Ask Clara and describe the pipeline. For example: “Build a pipeline from <source> to ClickHouse for <schema.table>.” Clara prompts for the read strategy and connection details, then generates a TQL plan. Review the plan, select Accept TQL, then select Deploy and Start this App. See Build your first application.
- Automated pipeline wizard: Create two linked applications: one for initial load and one for CDC. Striim starts the CDC application automatically when the initial load completes. See the procedure below.
- Flow Designer: Create and edit applications visually, and add transformations before data reaches ClickHouse. You can also export an application’s TQL, edit it and import the updated configuration.
Using the automated pipeline wizard
- Select Apps > Create an App, then search for and select your source.
- Select Get Started and choose the automated pipeline (initial load plus CDC), where offered for your source.
- Enter a pipeline name, select a namespace, and select Next.
- Enter your source connection properties. Inline help appears next to each setting. Striim validates the connection; you must resolve any failures before you can continue.
- Select the schemas to replicate, excluding system schemas, then select Next.
- Select the tables in each schema, then select Next.
- Select your ClickHouse connection profile and a Table Engine. See How data lands in ClickHouse for engine behavior.
- Review the table mappings. Edit them if required, then select Save & Start.
Verify data in ClickHouse
- In the Striim monitoring view, confirm events are being read and written. You can also ask Clara for the current lag.
-
In ClickHouse, inspect the table Striim created:
-
Compare row counts with the source. For
ReplacingMergeTreetables use the query shown in the next section. - Make a small change in the source (an insert, update and delete on a test row) and confirm it appears in ClickHouse.
How data lands in ClickHouse
Select Table Engine when configuring the ClickHouse target. ClickHouse Writer defaults toMergeTree. The engine determines how changes are applied and whether Striim can create the target table.
For automatic schema creation and schema evolution, use
MergeTree, ReplacingMergeTree, CollapsingMergeTree, CoalescingMergeTree or SummingMergeTree. For ReplacingMergeTree, Striim adds __STRIIM_VERSION and __STRIIM_ISDELETED columns; for CollapsingMergeTree, __STRIIM_SIGN. Query ReplacingMergeTree tables with FINAL and exclude soft-deleted rows:
Monitor your pipeline
Striim publishes ClickHouse Writer metrics in the web UI, including events accepted, events acknowledged by ClickHouse, target freshness, last write activity, batch counts and per-table merge times. System alerts are enabled automatically; add custom alerts by email, Slack or Microsoft Teams. You can also ask Clara, for example “What is the current lag on my application?”Troubleshooting
Application halts at startup naming a missing database
Application halts at startup naming a missing database
Striim does not create the target database. Create it in ClickHouse and restart.
Table or column not found, but the same schema works elsewhere
Table or column not found, but the same schema works elsewhere
Column names are always case-sensitive; database and table names follow the server file system (case-sensitive on typical Linux). Use the exact case defined in ClickHouse.
CollapsingMergeTree shows duplicates or negative sums after a restart
CollapsingMergeTree shows duplicates or negative sums after a restart
Delivery is at-least-once and this engine has no deduplication. Prefer
ReplacingMergeTree, or MergeTree with Mode = MERGE, if you use recovery.PrivateLink: Connection timed out
PrivateLink: Connection timed out
Check the VPC endpoint security group allows inbound 443, 8443, 9440 and 3306 and that outbound rules allow the connection.
PrivateLink: Connection reset by peer
PrivateLink: Connection reset by peer
Add the AWS endpoint ID to the service allow list in ClickHouse Cloud.
Application fails with an exception you do not recognize
Application fails with an exception you do not recognize
Ask Clara to explain the error and suggest fixes. Review its recommendations before changing production.
Next steps
- Sample pipeline: SQL Server to ClickHouse
- Striim for ClickHouse documentation for sources, transformations and schema evolution
- Need to replicate data to more targets in addition to ClickHouse? See Striim Platform or Striim Cloud.