

Key concepts
Setup guide
1
Gather your ClickHouse connection details
To connect to ClickHouse with HTTP(S) you need this information: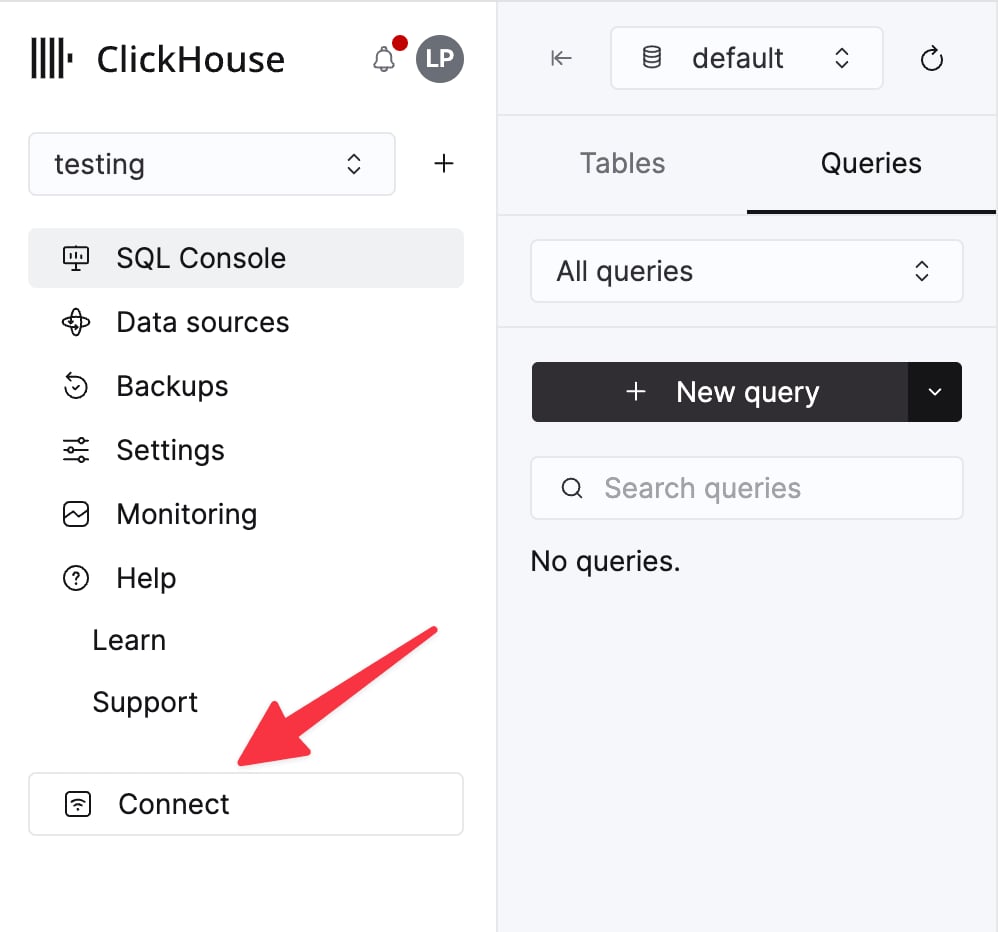
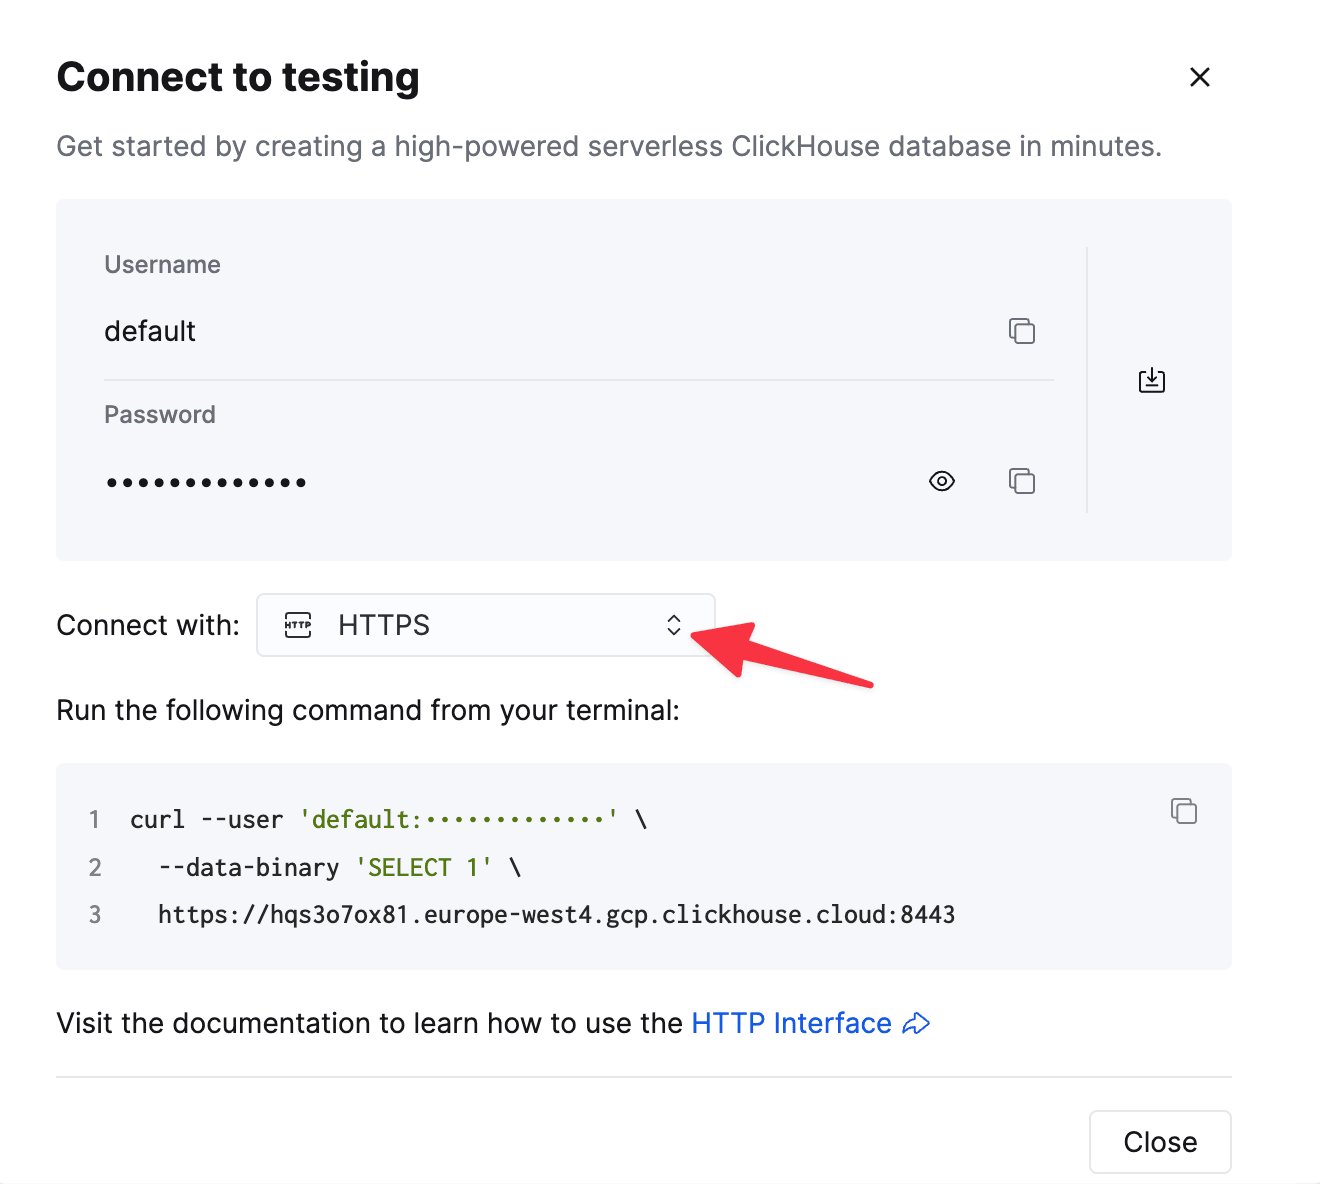
The details for your ClickHouse Cloud service are available in the ClickHouse Cloud console.
Select a service and click Connect:
curl command.2
Apify prerequisites
You’ll also need:
- An Apify account (free tier available).
- An Apify API token, found in Settings > Integrations in the Apify Console.
- Node.js 18+ installed locally (for the JavaScript examples).
3
Install dependencies
Install the Apify JavaScript client and the ClickHouse JavaScript client:
Apify also provides a Python client. If you prefer Python, install
apify-client via pip and use clickhouse-connect for ClickHouse.4
Create a target table in ClickHouse
Create a table to hold the scraped data. The schema depends on the Actor you use. This example uses MergeTree for a product scraping Actor:
5
Fetch Apify dataset and load into ClickHouse
The following script fetches the results of an Apify Actor run and inserts them into ClickHouse:
6
Automate with webhooks
Instead of running the script manually, automate the pipeline so data loads into ClickHouse every time an Actor finishes:
- In the Apify Console, go to your Actor and open the Integrations tab.
- Add a new webhook with:
- Event type:
ACTOR.RUN.SUCCEEDED - Action: An HTTP POST to your loader endpoint, or trigger another Actor that handles the ClickHouse insert.
- Event type:
- The webhook payload includes the
defaultDatasetId, which you can use to fetch the run’s results.
Best practices
Fetching data from Apify
Use the Apify client library (apify-client for JavaScript or Python) instead of raw HTTP calls. It handles pagination, retries, and authentication for you. For large datasets, paginate through results with the limit and offset parameters of the List dataset items endpoint.
Loading into ClickHouse
UseJSONEachRow format when inserting into ClickHouse. It maps directly to Apify’s JSON output with no transformation needed.
Match your ClickHouse table schema to the Actor’s output fields. Check the Actor’s output schema on its Apify Store page or in the Dataset tab after a run.
Performance
For high-throughput inserts from the JavaScript client, follow the Tips for performance optimizations. Batch rows into larger inserts rather than inserting one row at a time, and consider async inserts when client-side batching isn’t practical.Security
The examples on this page use thedefault user and database to keep things simple. In production, create a dedicated user with the minimum privileges required to insert into your target table, and store credentials securely (for example, in environment variables or a secrets manager rather than committing them to source code). See Cloud access management for guidance.