ClickHouse Cloud
此选项适用于正在使用 ClickHouse Cloud 的用户。在这种部署模式下,ClickHouse 和 HyperDX 均托管在 ClickHouse Cloud 中,从而将用户需要自建的组件数量降到最低。
除了减少基础设施管理开销之外,这种部署模式还能确保认证与 ClickHouse Cloud 的 SSO/SAML 集成。与自托管部署不同,您也无需再预置 MongoDB 实例来存储应用状态——例如仪表板、已保存搜索、用户设置和告警。
在此模式下,数据摄取完全由用户负责。您可以使用自托管的 OpenTelemetry collector、通过客户端库直接摄取、ClickHouse 原生表引擎(例如 Kafka 或 S3)、ETL 流水线,或 ClickPipes(ClickHouse Cloud 的托管摄取服务)将数据摄取到 ClickHouse Cloud 中。这种方式是运行 ClickStack 最简单且性能最佳的方案。
适用场景
此部署模式在以下场景中尤为适用:
- 您已经在 ClickHouse Cloud 中存有可观测性数据,并希望使用 HyperDX 对其进行可视化。
- 您正在运行大规模可观测性部署,并且需要 ClickStack 搭配 ClickHouse Cloud 所提供的专用级性能与可扩展性。
- 您已经在使用 ClickHouse Cloud 进行分析,并希望通过 ClickStack 的 instrumentation 库为应用进行观测,将数据发送到同一个集群。在这种情况下,我们建议使用 warehouses 来隔离可观测性工作负载的计算资源。
部署步骤
本指南假设你已创建 ClickHouse Cloud 服务。如果尚未创建,请参考快速入门指南中的“创建 ClickHouse 服务”步骤。
复制服务凭证(可选)
如果您已有希望在服务中可视化的可观测性事件,则可以跳过此步骤。
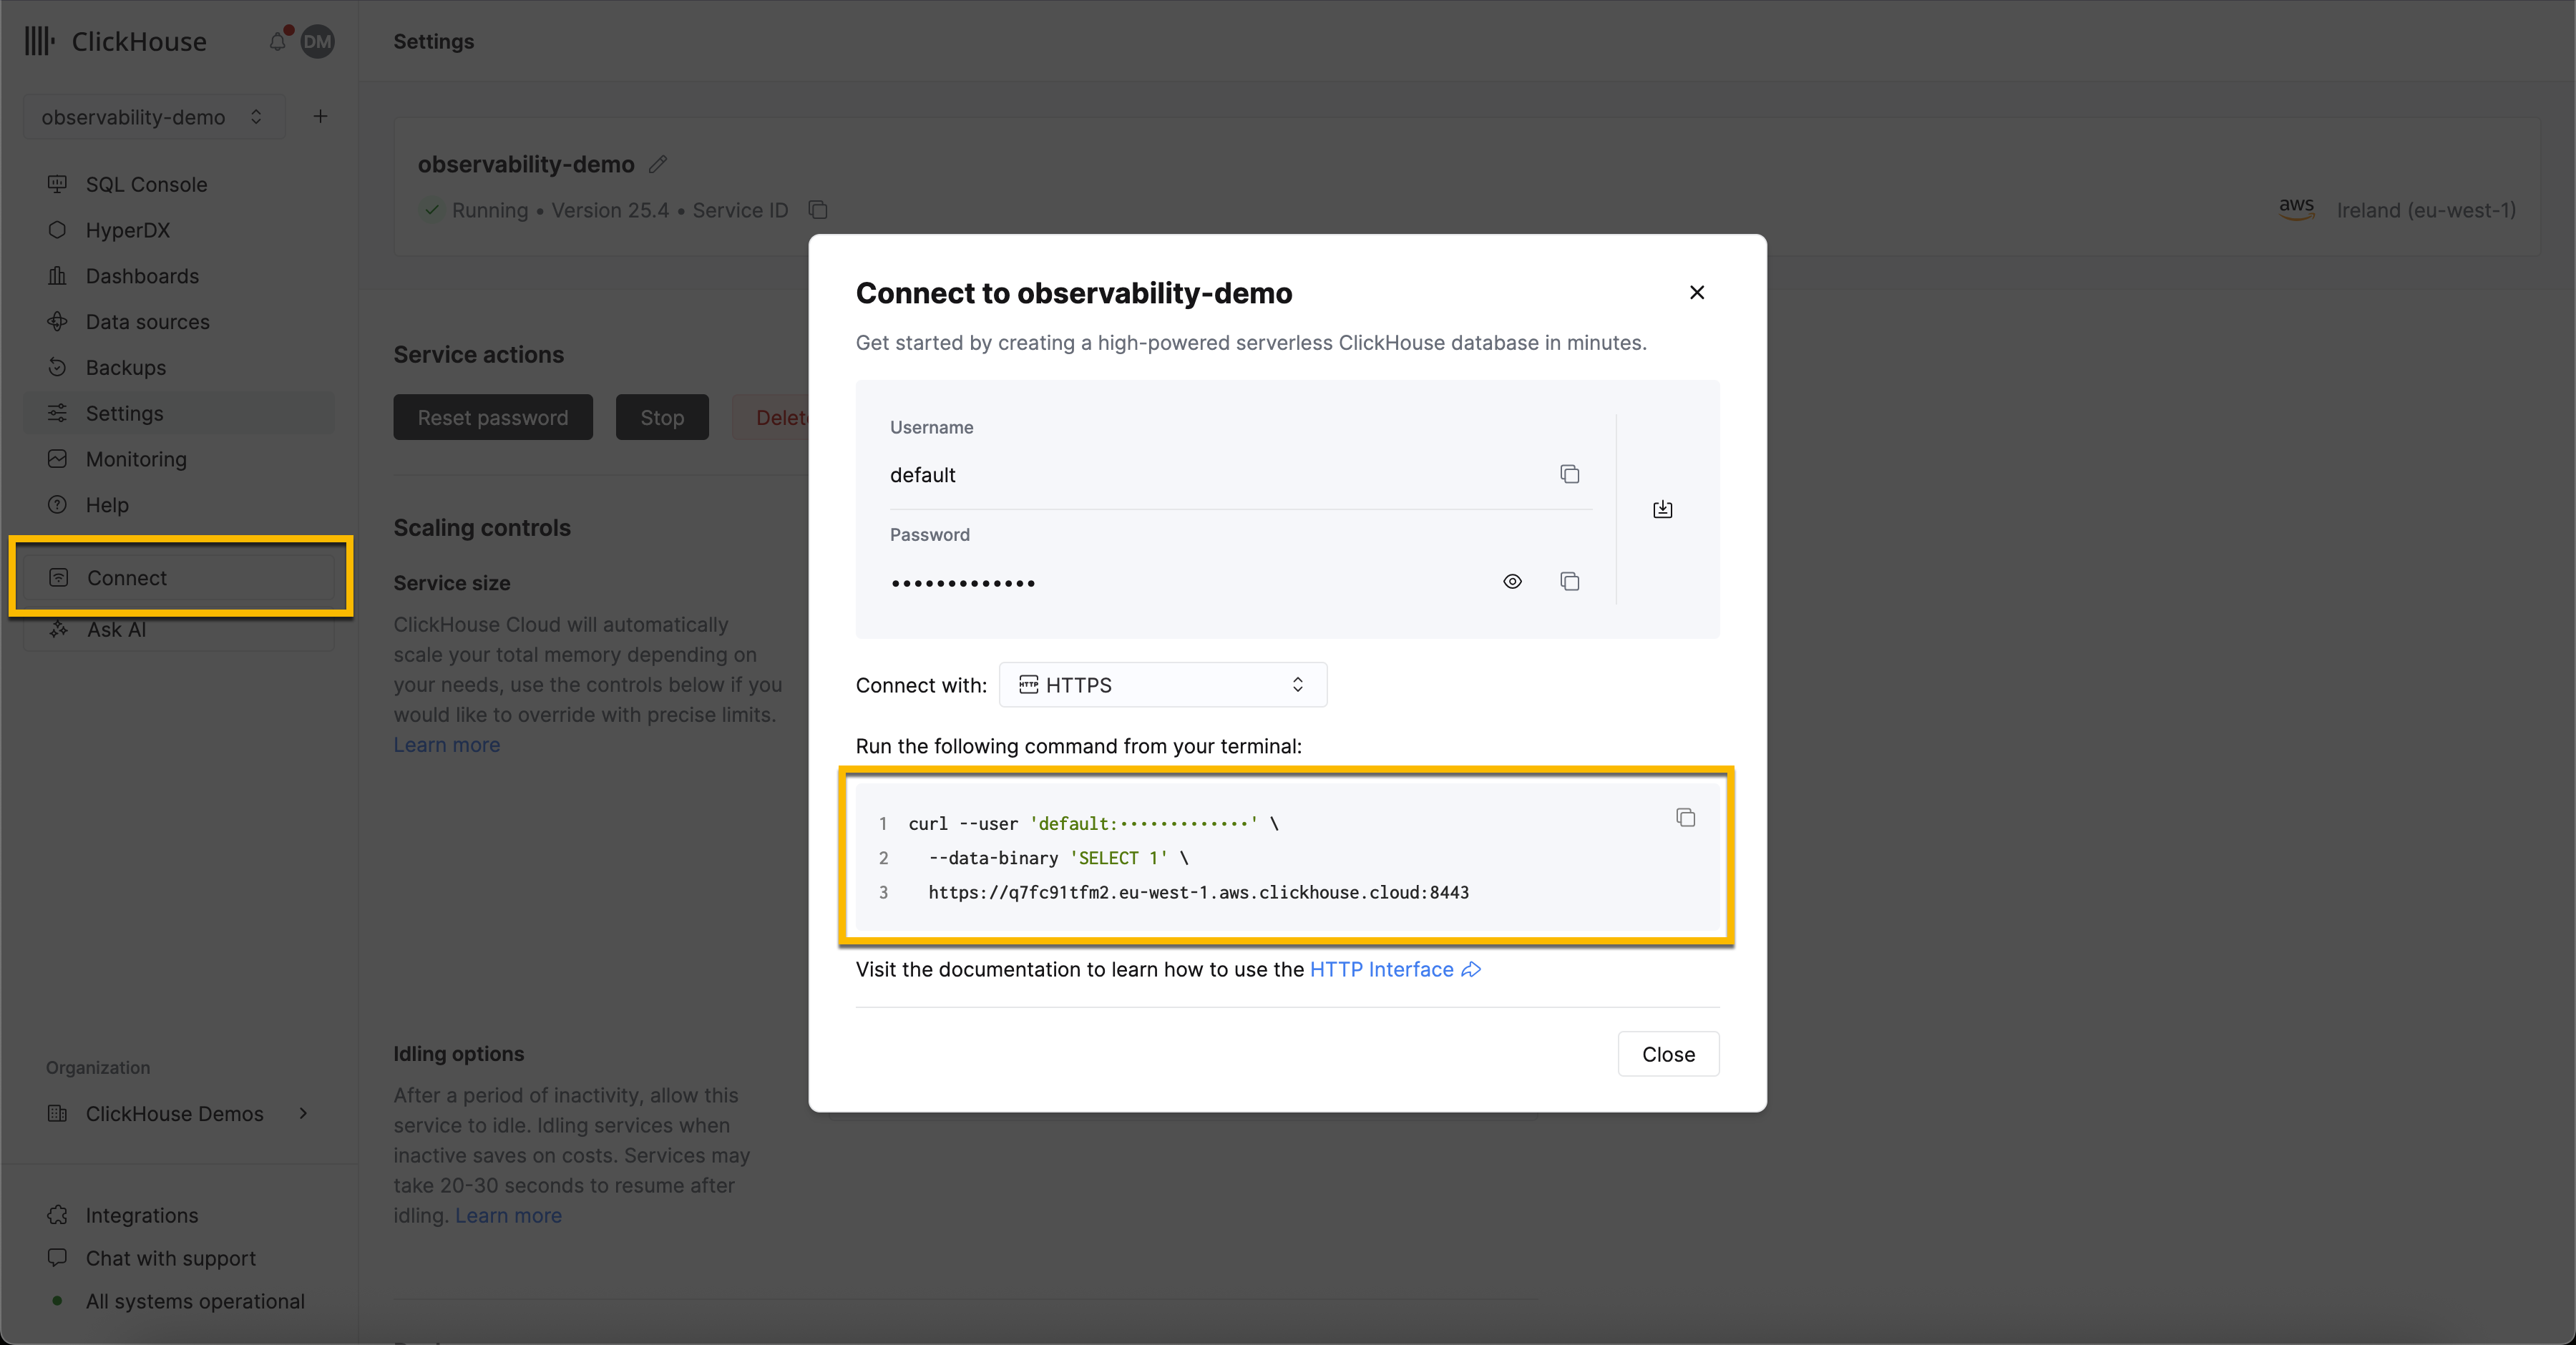
导航至主服务列表,选择您要在 HyperDX 中可视化可观测性事件的服务。
从导航菜单中点击 Connect 按钮。系统将弹出一个对话框,其中包含您服务的连接凭据以及通过不同接口和语言进行连接的操作说明。从下拉列表中选择 HTTPS,并记录连接端点和凭据信息。
部署 OpenTelemetry Collector(可选)
如果您已有希望在服务中可视化的可观测性事件,则可以跳过此步骤。
此步骤确保使用 OpenTelemetry (OTel) 架构创建表,从而可以无缝地在 HyperDX 中创建数据源。这还提供了一个 OTLP 端点,可用于加载示例数据集并将 OTel 事件发送到 ClickStack。
以下说明使用标准发行版的 OTel collector,而非 ClickStack 发行版。ClickStack 发行版需要 OpAMP 服务器进行配置,目前在私有预览阶段尚不支持。以下配置复制了 ClickStack 发行版 collector 所使用的版本,提供一个 OTLP 端点用于接收事件。
下载 OTel collector 的配置文件:
otel-cloud-config.yaml
使用以下 Docker 命令部署采集器,将相应的环境变量设置为先前记录的连接配置,并根据操作系统选择对应的命令执行。
在生产环境中,我们建议为摄取操作创建专用用户,并限制其对所需数据库和表的访问权限。详情请参阅"数据库和摄取用户"。
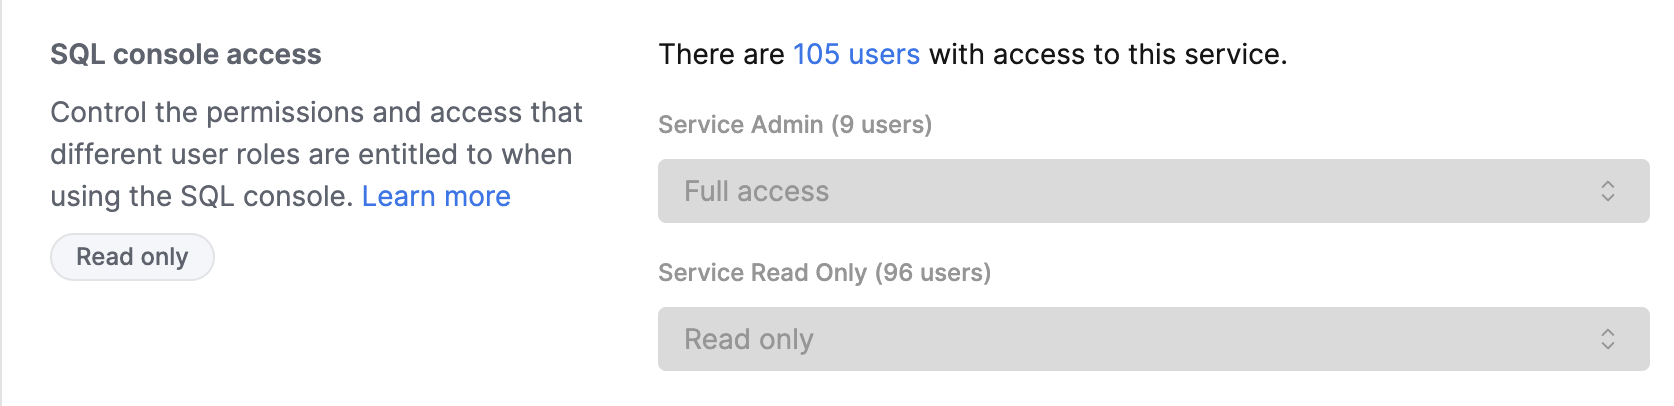
用户权限
访问 HyperDX 的用户会使用其 ClickHouse Cloud 控制台凭据自动完成身份验证。访问控制通过服务设置中配置的 SQL 控制台权限实现。
配置用户访问权限
- 在 ClickHouse Cloud 控制台中转到您的服务
- 转到 Settings(设置) → SQL Console Access(SQL 控制台访问)
- 为每个用户设置相应的权限级别:
- Service Admin → Full Access - 启用告警功能所必需
- Service Read Only → Read Only - 可查看可观测性数据并创建仪表盘
- No access - 无法访问 HyperDX
要启用告警功能,至少需要一位拥有 Service Admin 权限(在 SQL Console Access 下拉菜单中对应 Full Access)的用户登录 HyperDX 一次。此操作将在数据库中创建一个专用用户,用于执行告警查询。
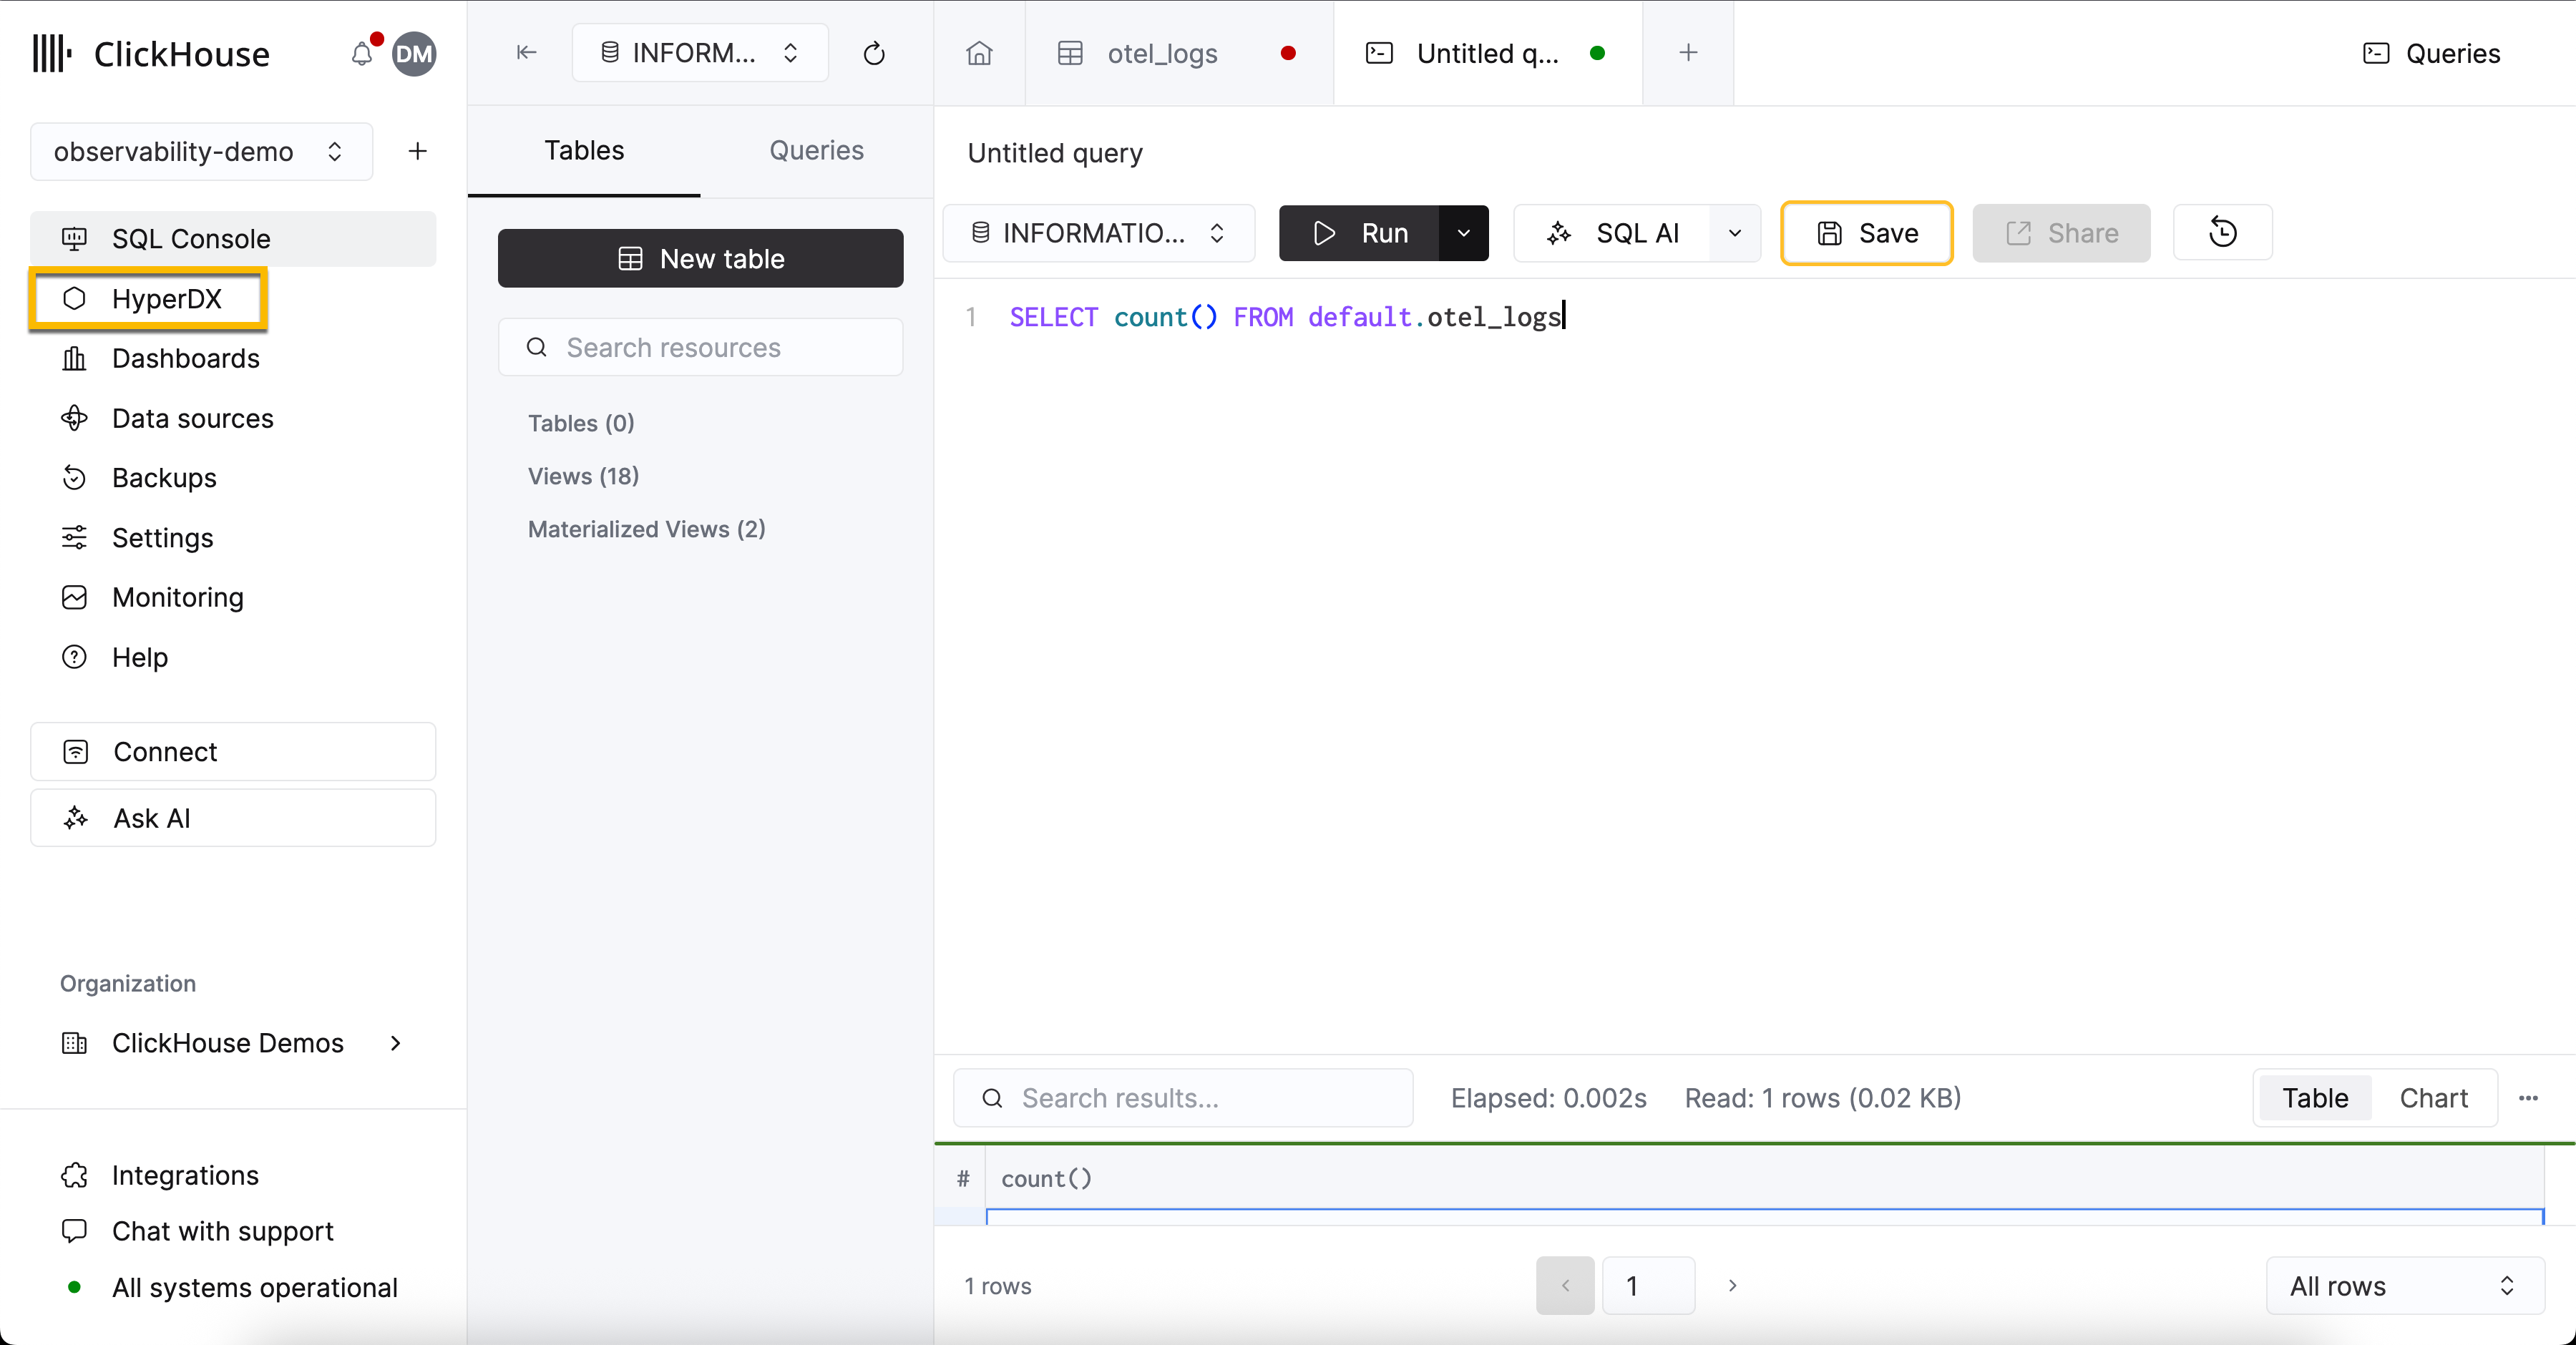
创建数据源
HyperDX 原生支持 OpenTelemetry,但不限于 OpenTelemetry——用户可根据需要使用自定义表结构。
使用 OpenTelemetry 架构
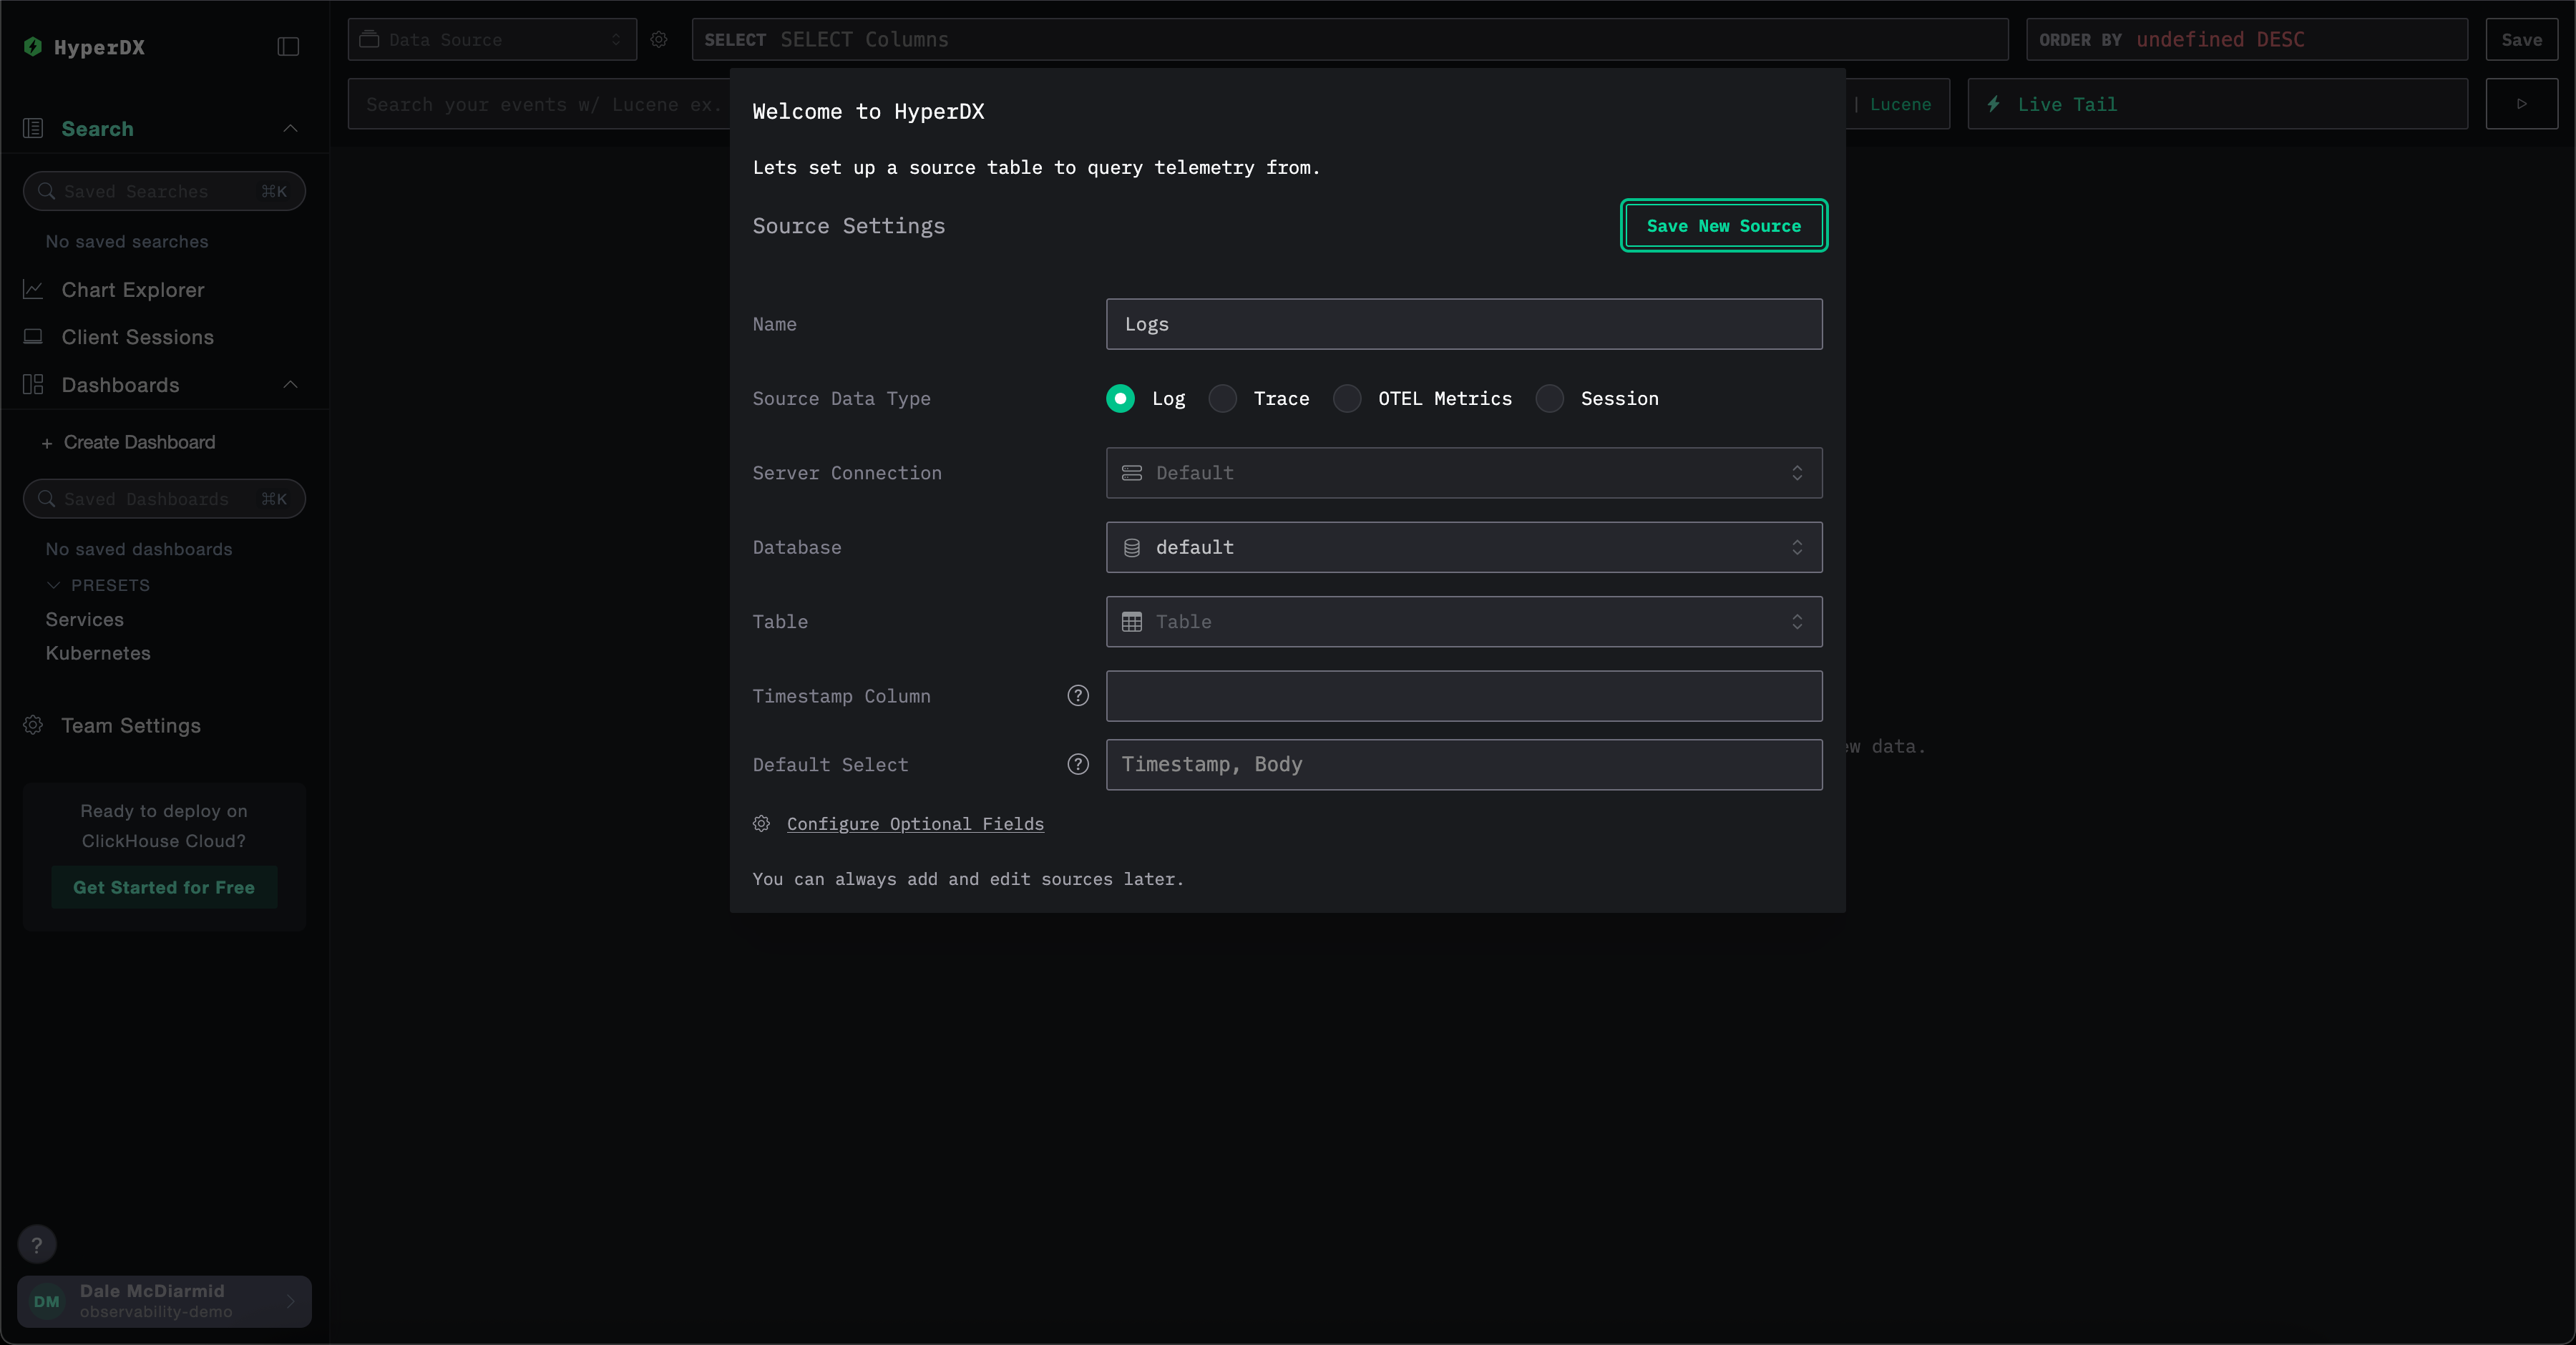
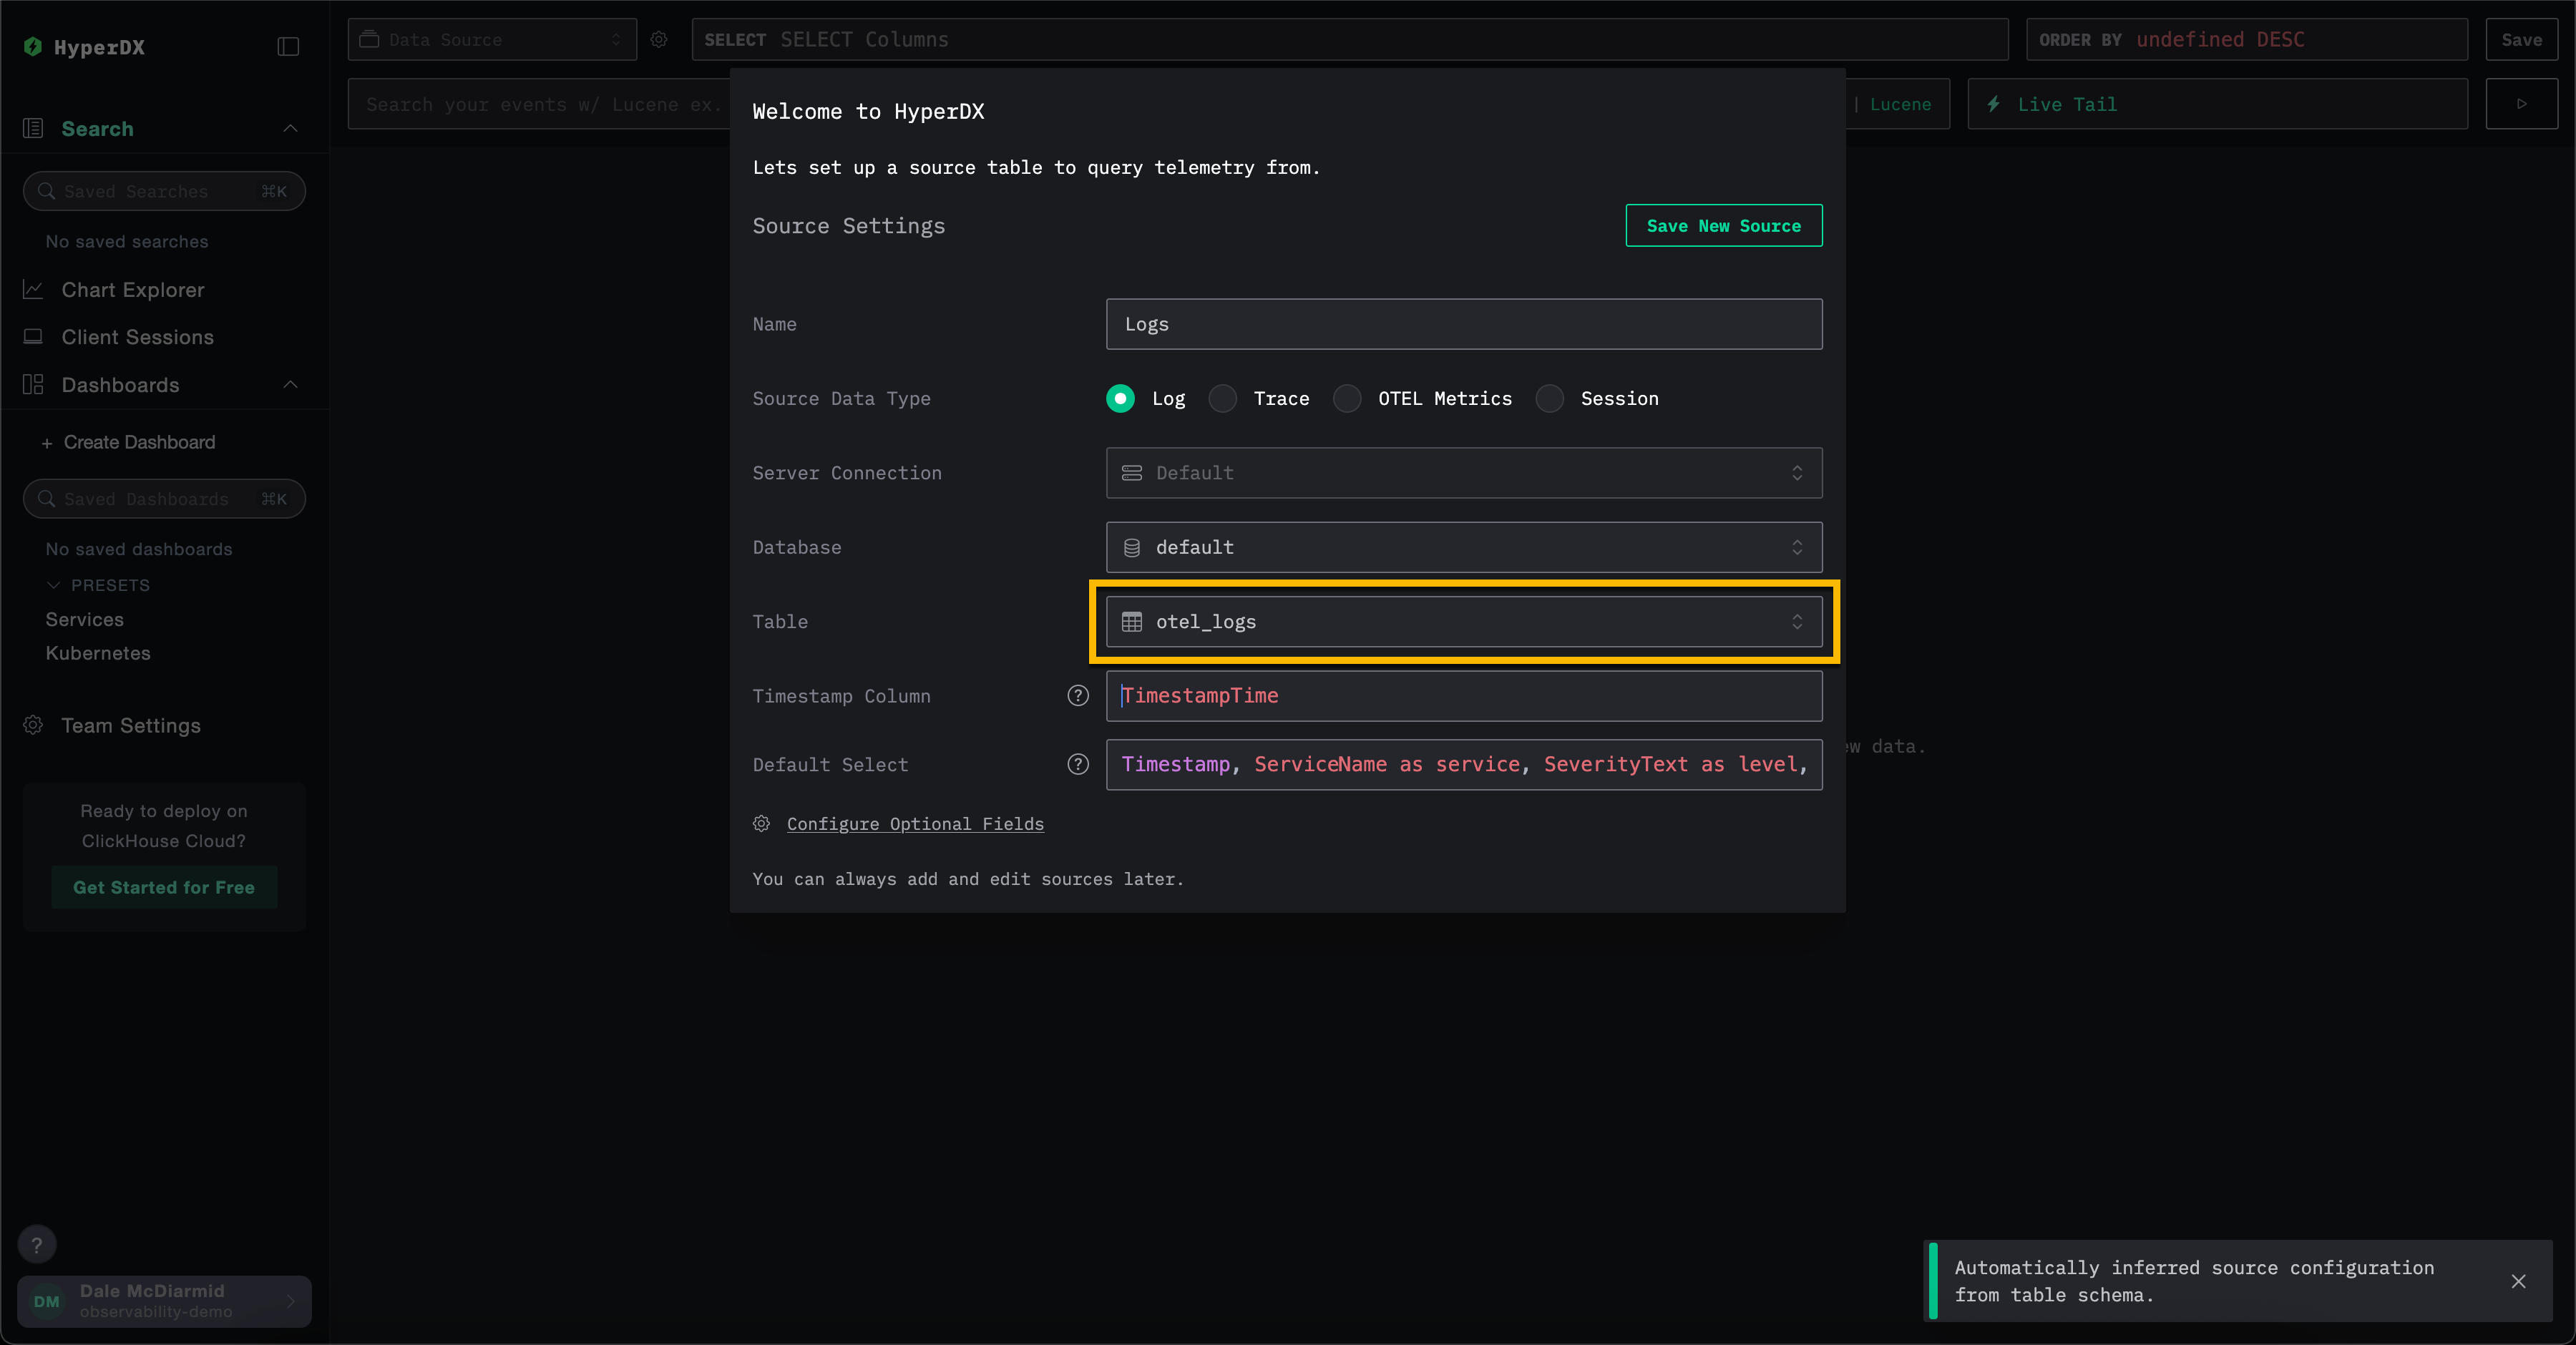
如果您使用上述 OTel collector 在 ClickHouse 中创建数据库和表,请在创建数据源模型中保留所有默认值,并在 Table 字段中填入 otel_logs 以创建日志数据源。其他设置将自动检测,然后您可以点击 Save New Source。
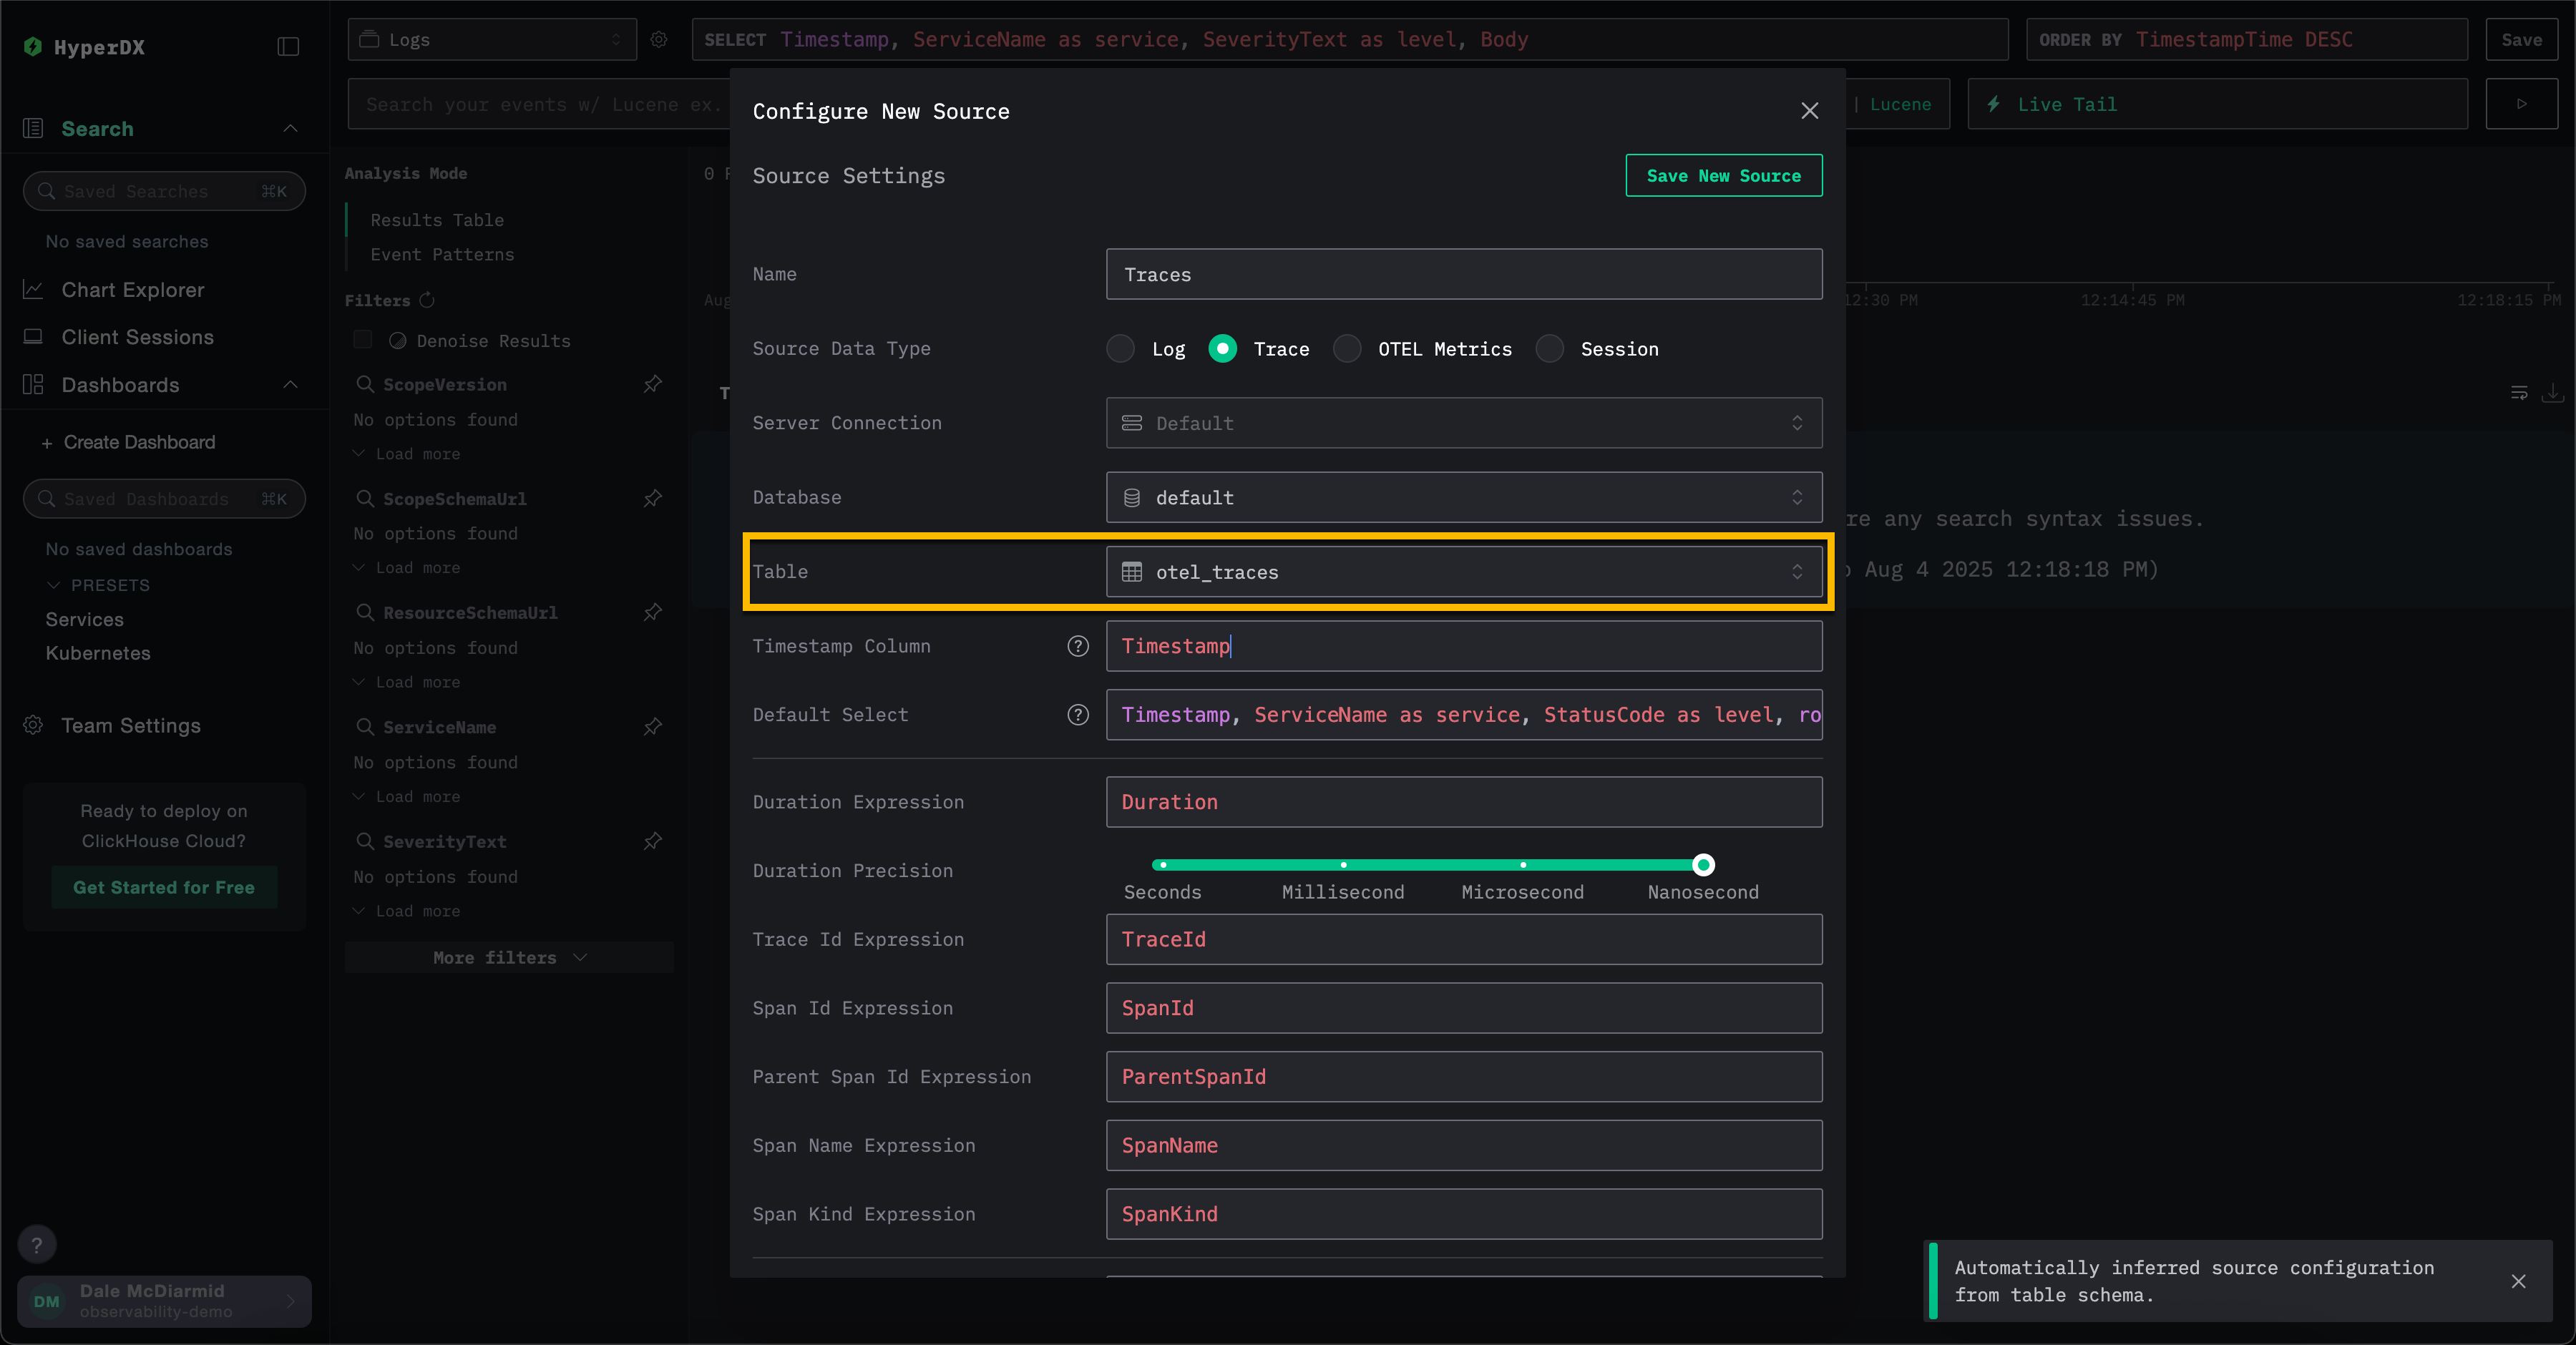
要为追踪和 OTel 指标创建数据源,您可以从顶部菜单选择 创建新数据源。

在此处,选择所需的源类型,然后选择相应的表。例如,对于追踪数据,选择表 otel_traces。所有设置将自动检测。
请注意,ClickStack 中的不同数据源(如日志和追踪)可以相互关联。要启用此功能,需要对每个来源进行额外配置。例如,在日志来源中可以指定对应的追踪来源,在追踪来源中也可以指定对应的日志来源。有关更多详细信息,请参阅"关联来源"。
使用自定义架构
需要将 HyperDX 连接到现有数据服务的用户可按需完成数据库和表的配置。如果表结构符合 ClickHouse 的 OpenTelemetry 架构,相关设置将被自动检测。
如果使用自定义架构,我们建议创建日志源并确保指定所有必需字段 - 详情请参阅"日志源设置"。
JSON 类型支持
ClickStack 中的 JSON 类型支持目前为 Beta 功能。虽然 JSON 类型本身在 ClickHouse 25.3+ 中已经可以用于生产环境,但其在 ClickStack 中的集成仍在积极开发中,可能存在功能限制、未来变更或缺陷。
从 2.0.4 版本开始,ClickStack 对 JSON 类型 提供 Beta 支持。
关于此类型的优势,请参见 JSON 类型的优势。
要启用对 JSON 类型的支持,你必须设置以下环境变量:
OTEL_AGENT_FEATURE_GATE_ARG='--feature-gates=clickhouse.json'- 在 OTel collector 中启用支持,确保使用 JSON 类型创建模式(schema)。BETA_CH_OTEL_JSON_SCHEMA_ENABLED=true- 在 HyperDX 应用中启用支持,允许查询 JSON 数据。
此外,您应联系 [email protected],确保您的 ClickHouse Cloud 服务已启用 JSON 功能。
