Looker
Partner Integration
Looker 可以通过官方 ClickHouse 数据源连接到 ClickHouse Cloud 或本地部署的 ClickHouse。
1. 收集连接信息
要通过 HTTP(S) 连接到 ClickHouse,您需要以下信息:
| 参数 | 说明 |
|---|---|
HOST 和 PORT | 通常,在使用 TLS 时端口为 8443,不使用 TLS 时端口为 8123。 |
DATABASE NAME | 默认提供一个名为 default 的数据库,请填写您要连接的目标数据库名称。 |
USERNAME 和 PASSWORD | 默认用户名为 default。请使用适合您使用场景的用户名。 |
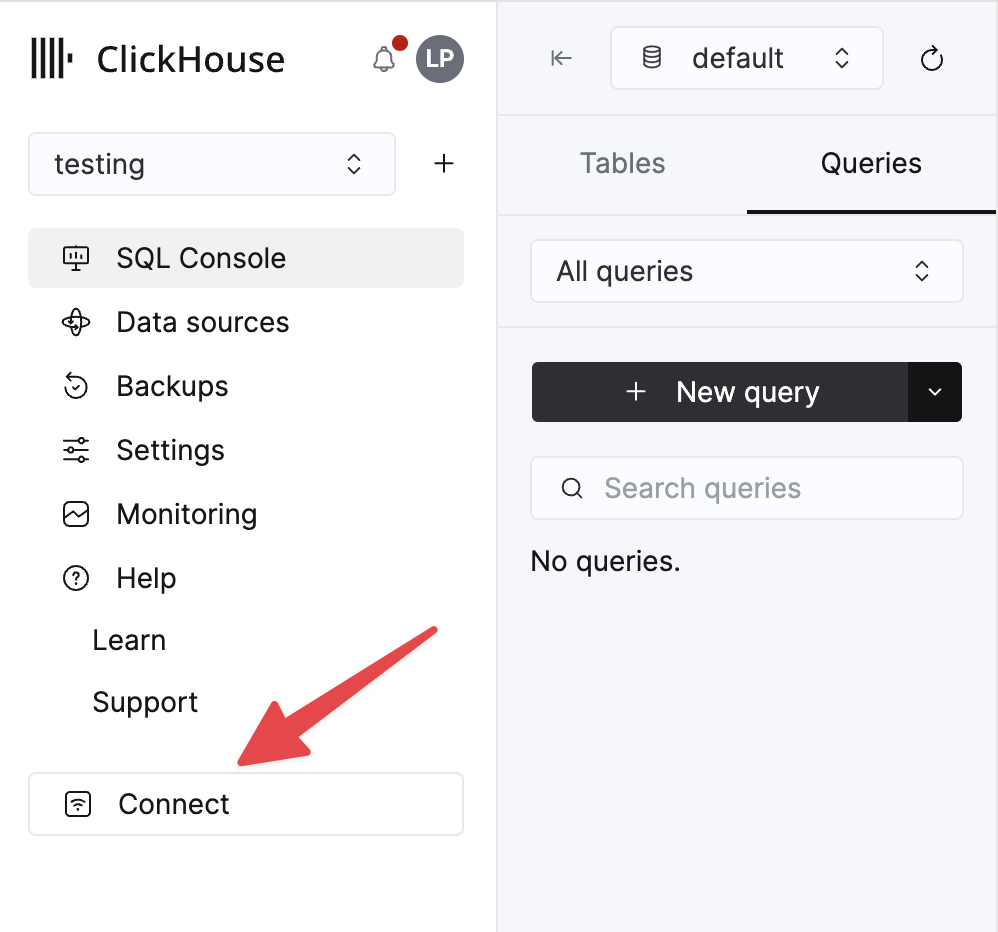
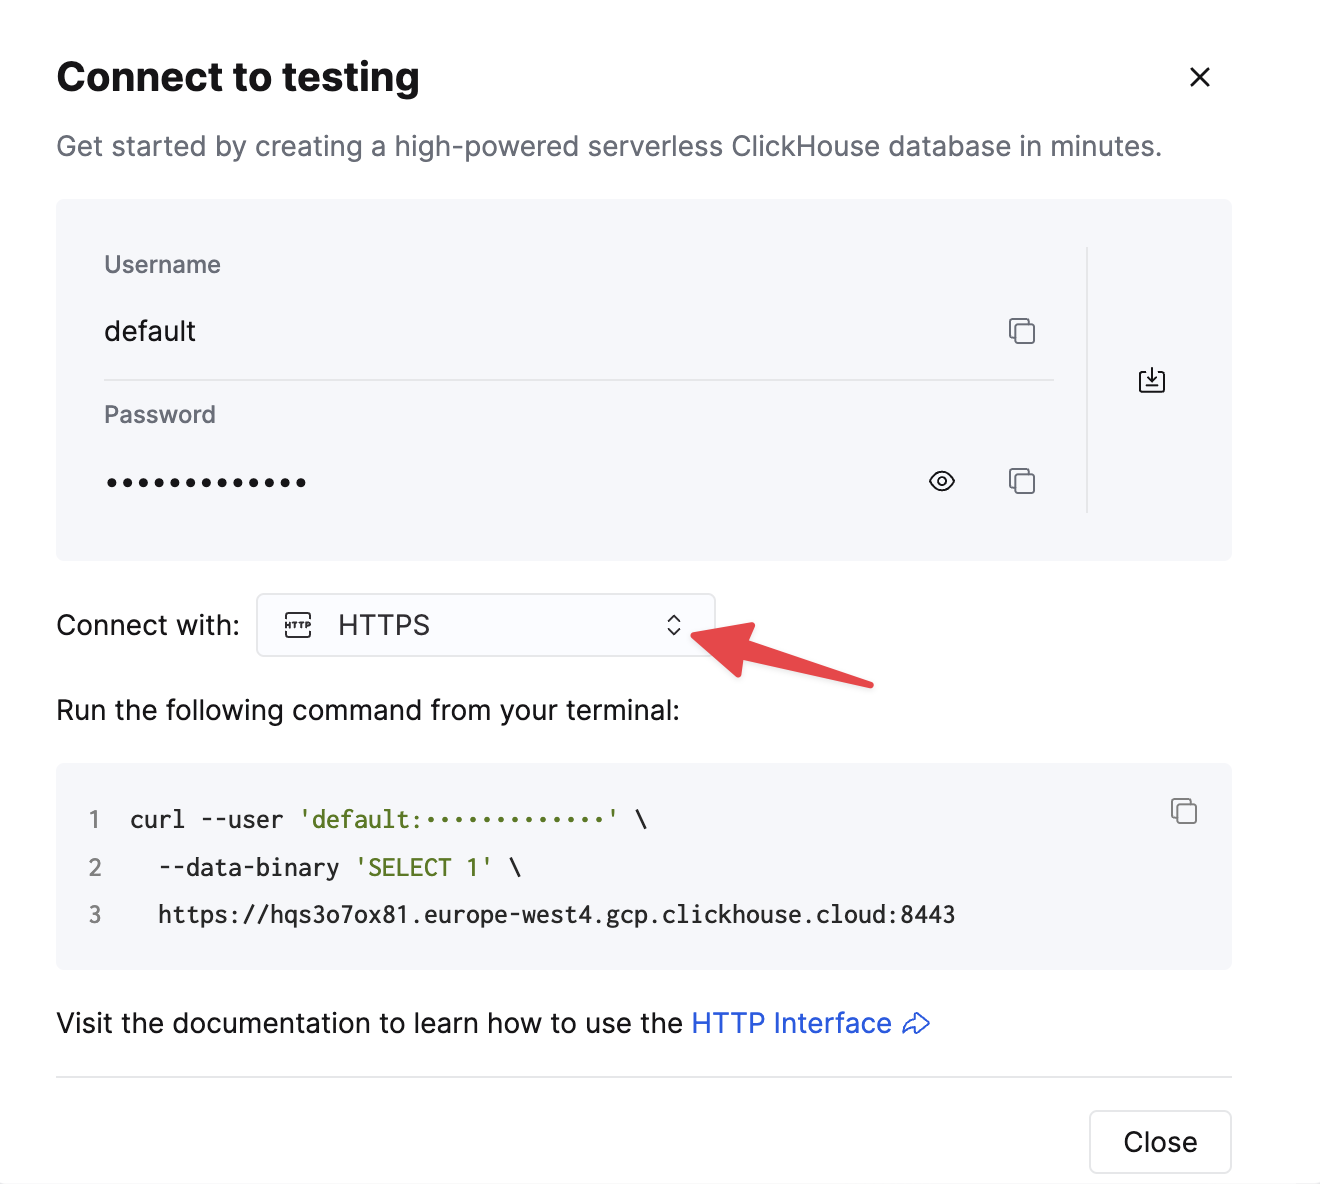
您的 ClickHouse Cloud 服务的详细信息可以在 ClickHouse Cloud 控制台中查看。 选择某个服务并点击 Connect:
选择 HTTPS。连接信息会显示在示例 curl 命令中。
如果您使用的是自托管 ClickHouse,则连接信息由您的 ClickHouse 管理员进行设置。
2. 创建 ClickHouse 数据源
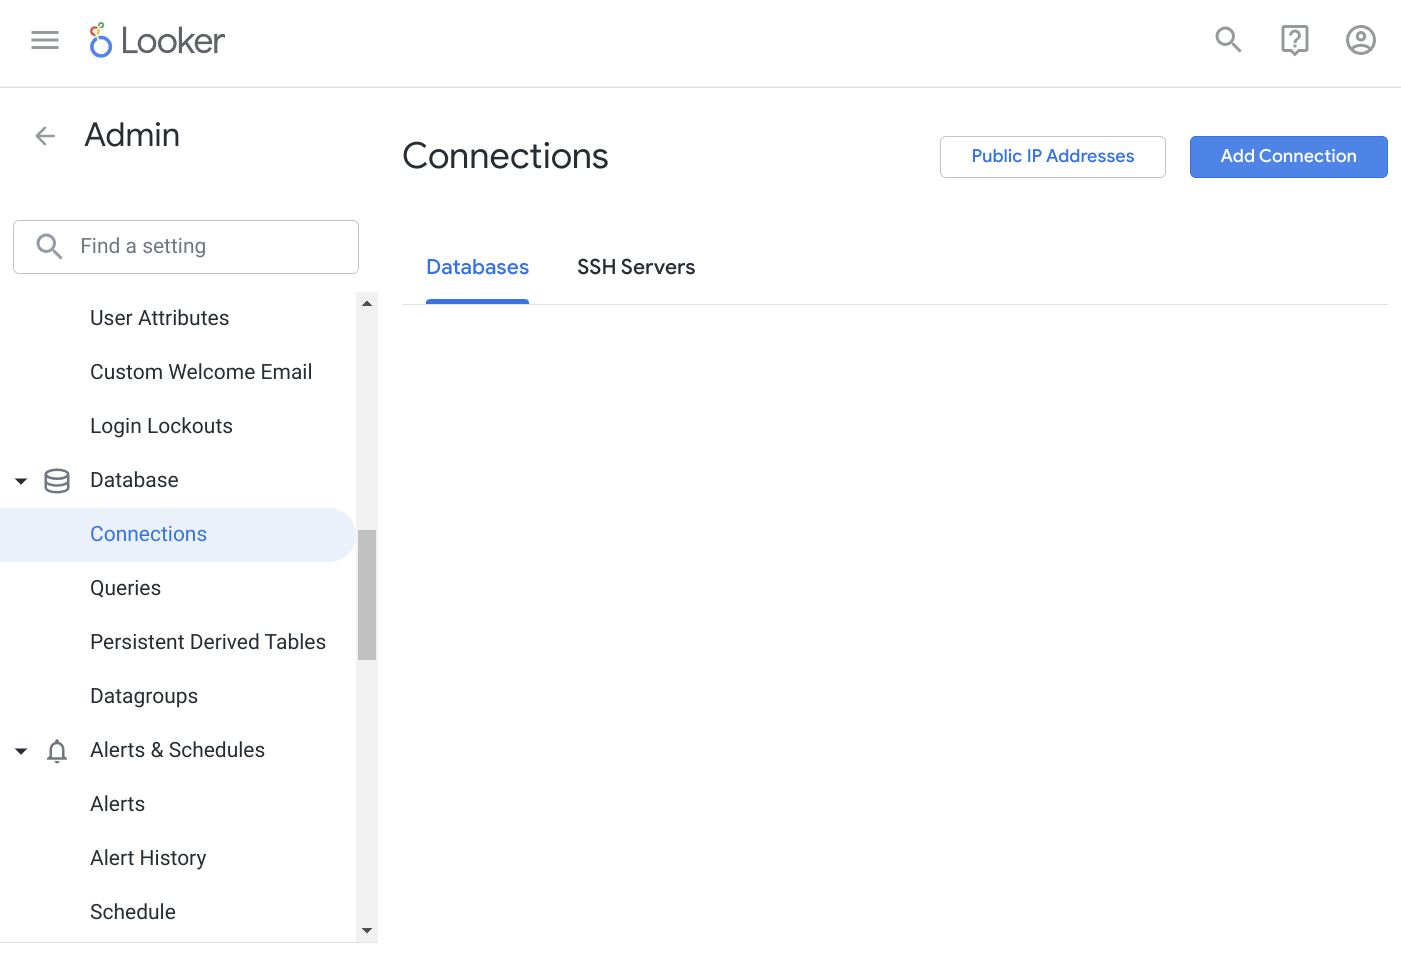
导航到 Admin -> Database -> Connections,然后单击右上角的 “Add Connection” 按钮。
为数据源选择一个名称,并在 “Dialect” 下拉列表中选择 ClickHouse。在表单中输入连接凭据。
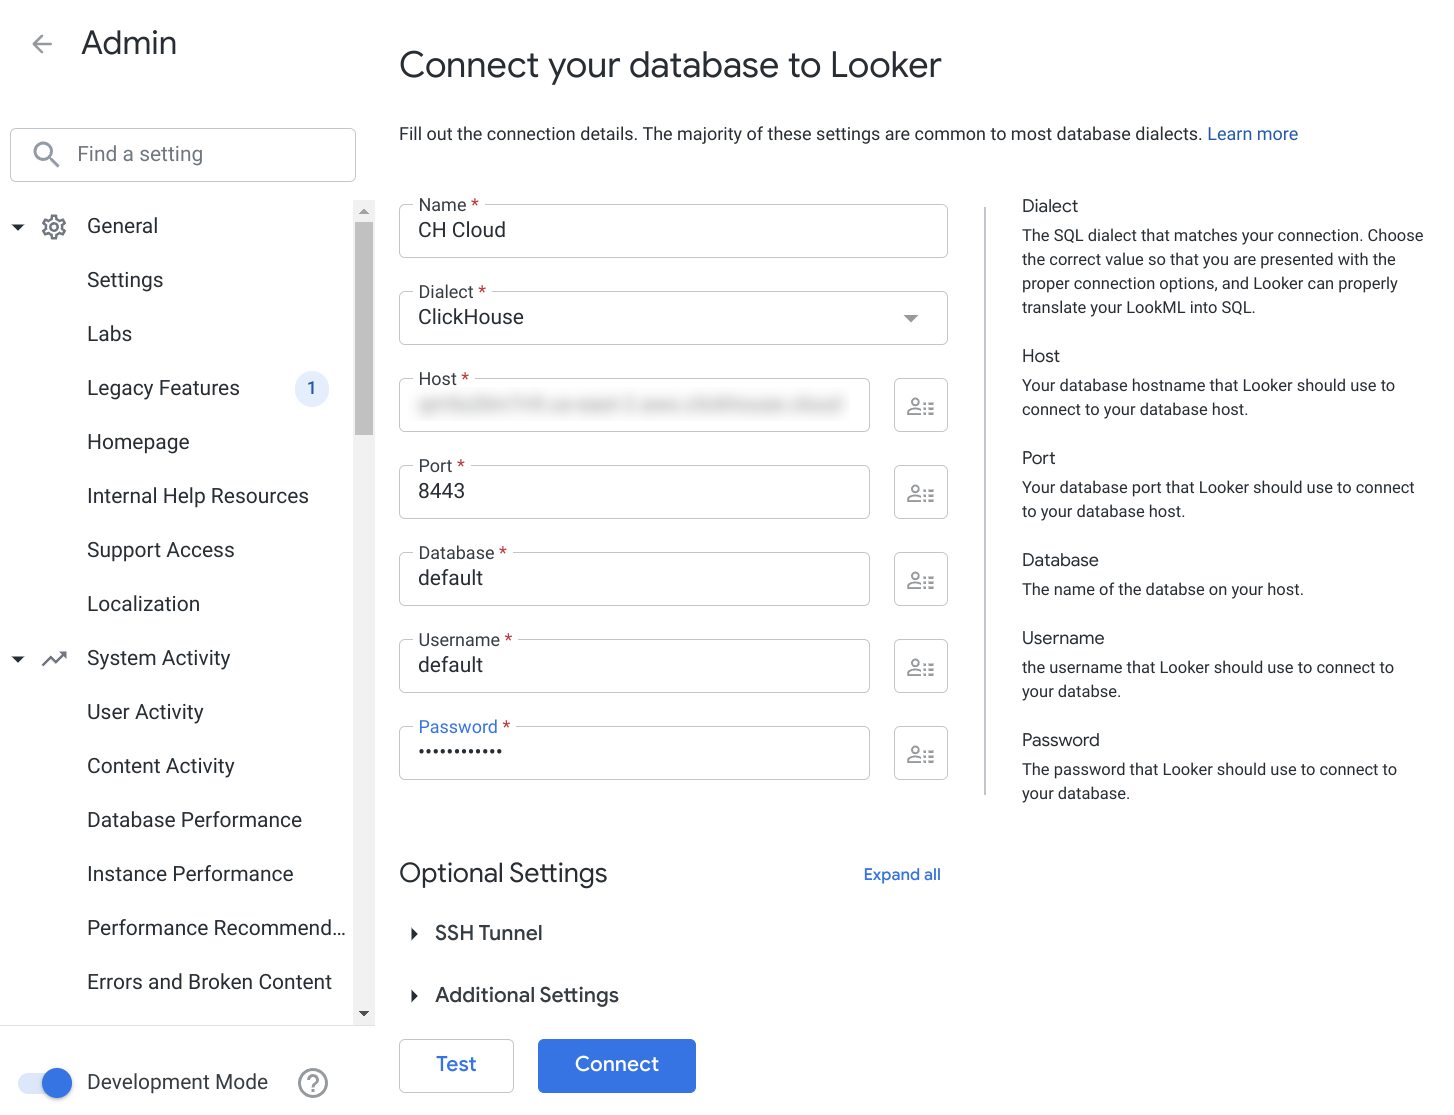
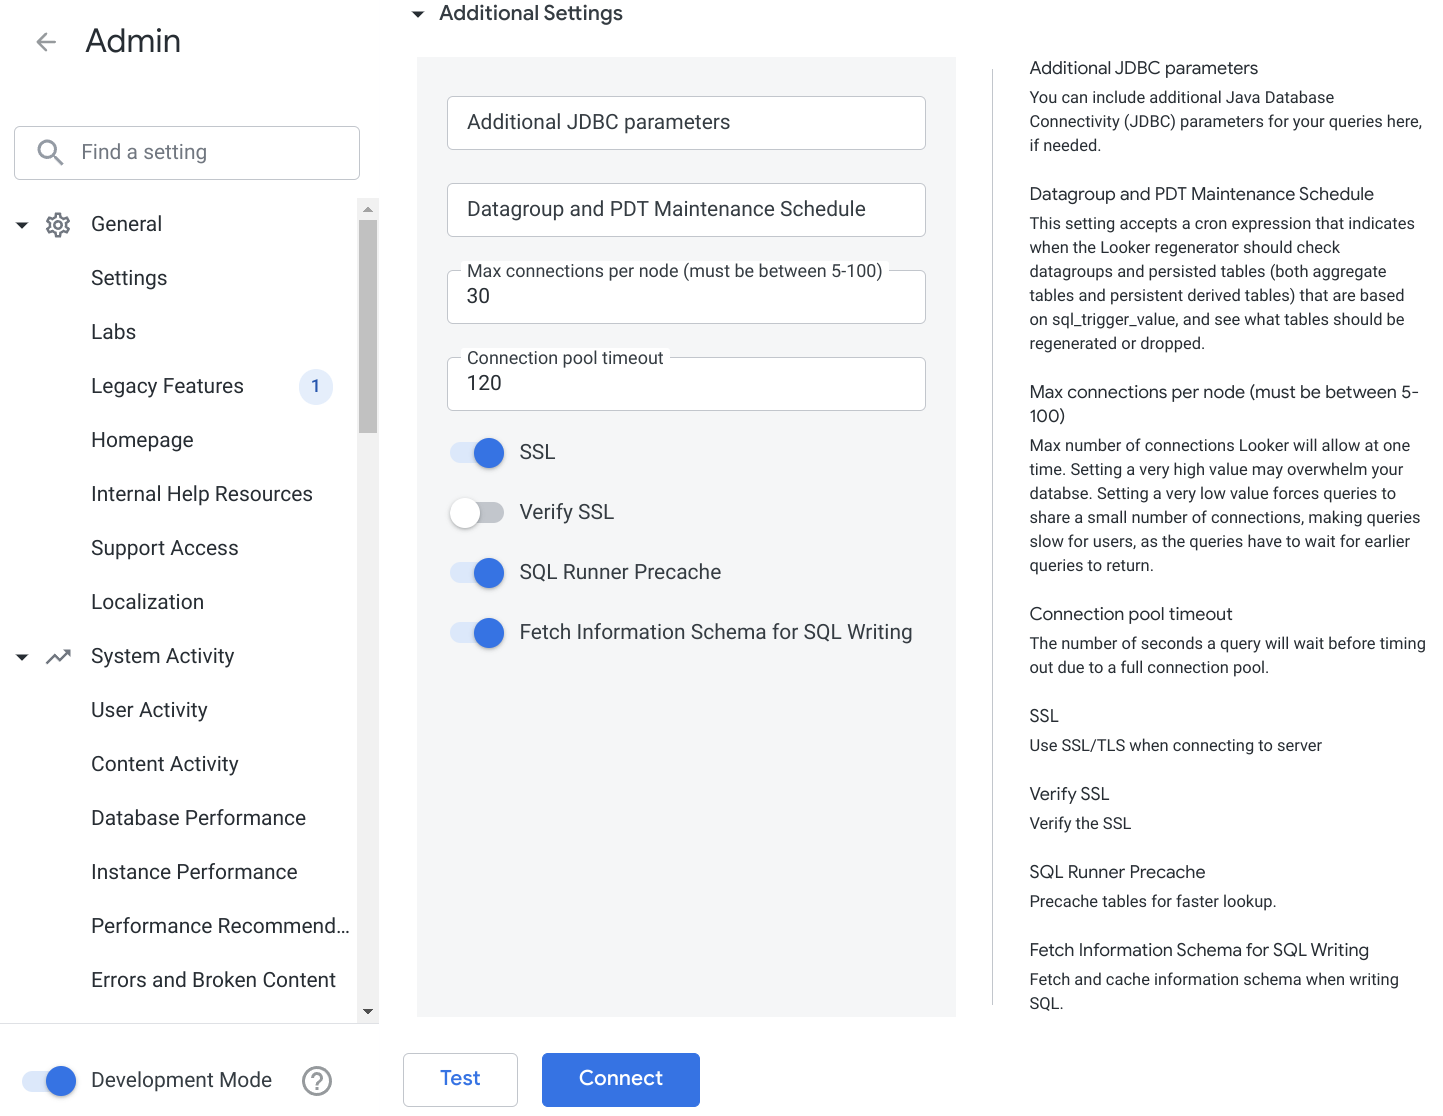
如果您使用的是 ClickHouse Cloud,或者部署需要 SSL,请确保在附加设置中启用 SSL。
请先测试连接,测试通过后,再连接到新的 ClickHouse 数据源。
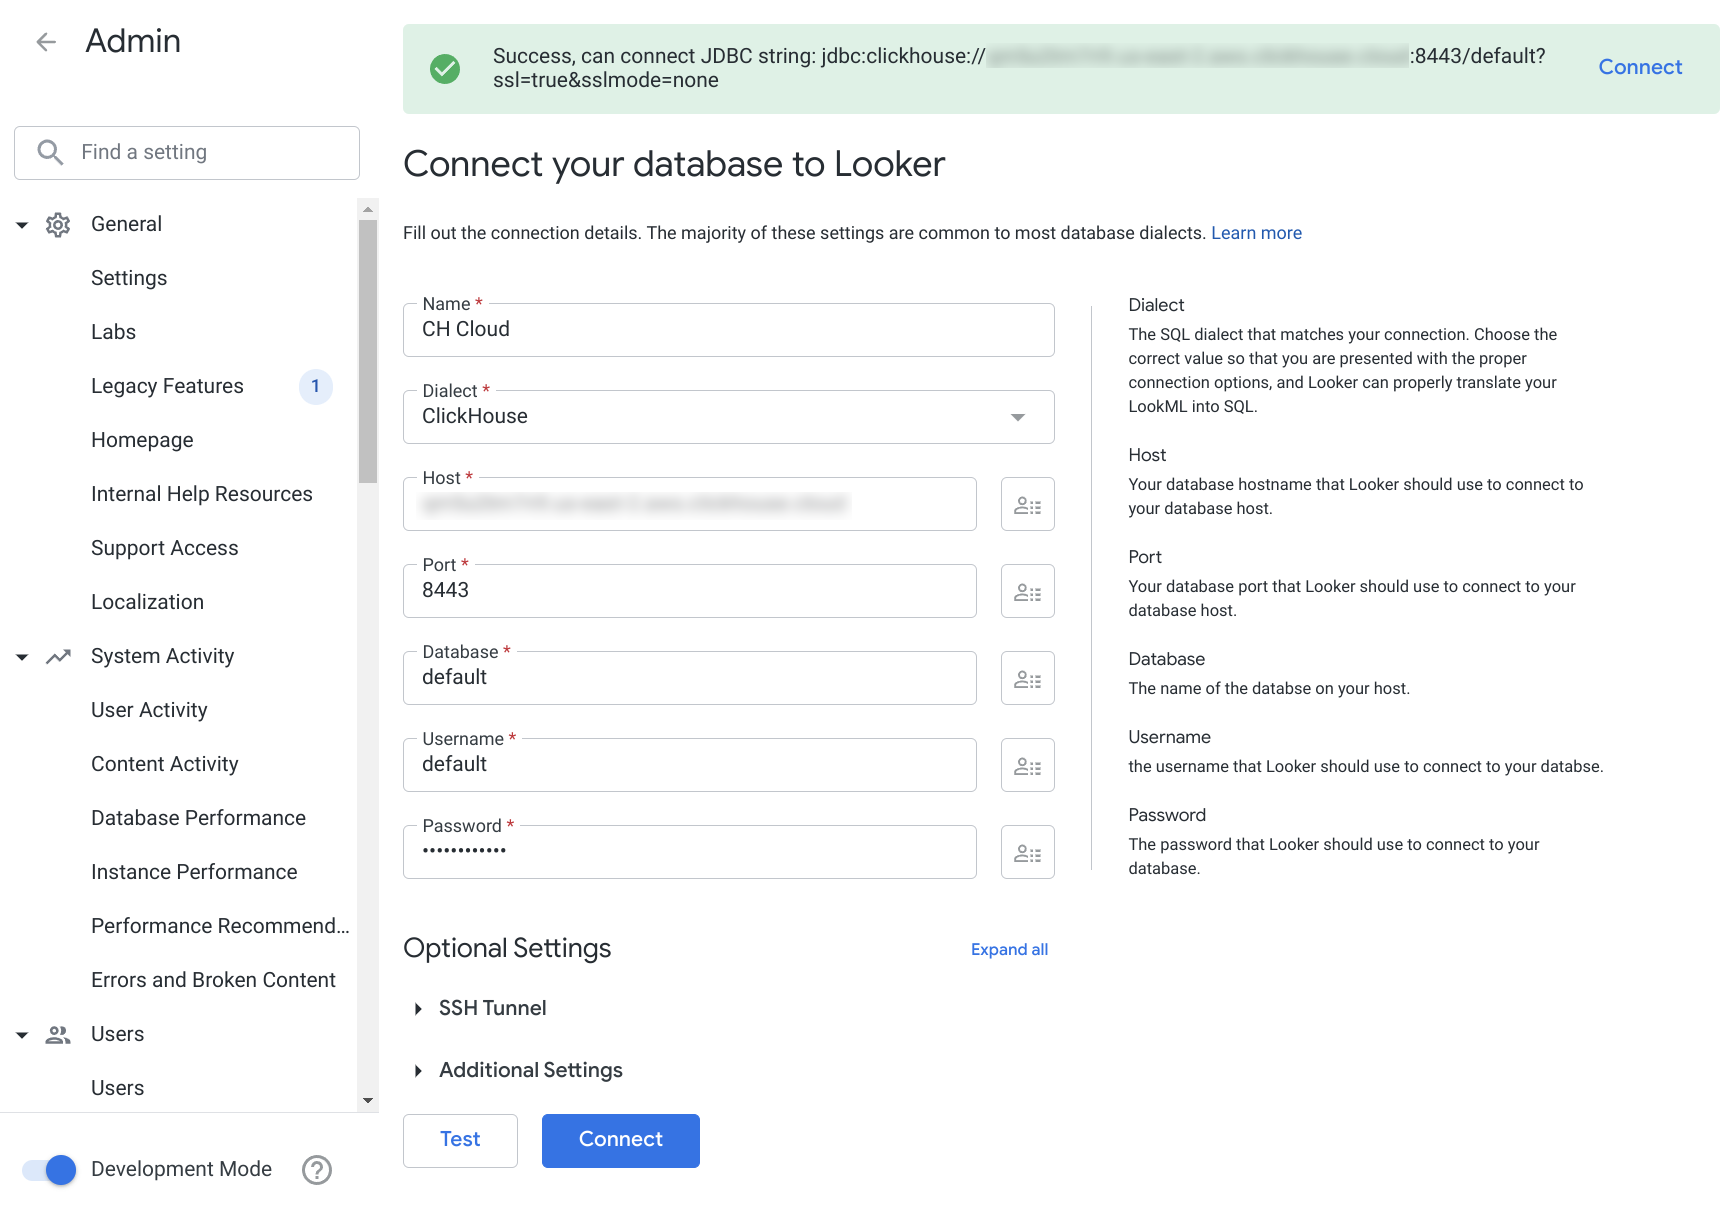
现在,您应该可以将 ClickHouse 数据源关联到 Looker 项目中。
3. 已知限制
- 以下数据类型默认按字符串类型处理:
- Array - 由于 JDBC 驱动的限制,序列化无法按预期工作
- Decimal* - 可以在模型中修改为数值类型
- LowCardinality(...) - 可以在模型中修改为合适的数据类型
- Enum8, Enum16
- UUID
- Tuple
- Map
- JSON
- Nested
- FixedString
- Geo 类型
- MultiPolygon
- Polygon
- Point
- Ring
- 不支持 Symmetric aggregate(对称聚合)功能
- 驱动程序中尚未实现 Full outer join(完全外连接)
