> ## Documentation Index
> Fetch the complete documentation index at: https://clickhouse.com/docs/llms.txt
> Use this file to discover all available pages before exploring further.
> 将 Apify 中的网页抓取和自动化数据加载到 ClickHouse
# 将 Apify 连接到 ClickHouse
export const CommunityMaintainedBadge = () => {
return ;
};
[Apify](https://apify.com/) 是一个网页抓取和自动化平台。你可以构建、运行和扩展称为 [**Actors**](https://docs.apify.com/platform/actors) 的无服务器云端程序。Actors 可用于抓取网站、爬取网络内容、处理数据或自动化工作流。每次 Actor 运行都会生成结构化输出,并将其存储在 [**Datasets**](https://docs.apify.com/platform/storage/dataset) (JSON 对象集合) 中。
将抓取或处理后的数据加载到 ClickHouse 中,用于分析、监控或富集管道。
## 关键概念
| Apify 概念 | 含义 |
| -------------------------------------------------------------------- | ----------------------------------------------------------------------------------------------------- |
| **[Actor](https://docs.apify.com/platform/actors)** | 在 Apify 平台上运行的无服务器云程序。[Apify Store](https://apify.com/store) 提供了数千个现成可用的 Actor。 |
| **[Dataset](https://docs.apify.com/platform/storage/dataset)** | Actor 运行的输出。它是一个类似表的 JSON 对象集合,可通过 [Apify API](https://docs.apify.com/api/v2) 以 JSON、CSV、XML 或其他格式获取。 |
| **[Webhook](https://docs.apify.com/platform/integrations/webhooks)** | 一种由事件驱动的 HTTP 调用,会在 Actor 运行成功、失败或发生其他生命周期事件时触发。可使用 webhook 自动化从 Apify 到 ClickHouse 的管道。 |
## 设置指南
要通过 HTTP(S) 连接到 ClickHouse,你需要以下信息:
| Parameter(s) | Description |
| ------------------------- | ------------------------------------------ |
| `HOST` and `PORT` | 通常,使用 TLS 时端口为 8443;不使用 TLS 时端口为 8123。 |
| `DATABASE NAME` | 默认情况下,存在一个名为 `default` 的数据库。请使用你要连接的数据库名称。 |
| `USERNAME` and `PASSWORD` | 默认情况下,用户名为 `default`。请根据你的使用场景使用相应的用户名。 |
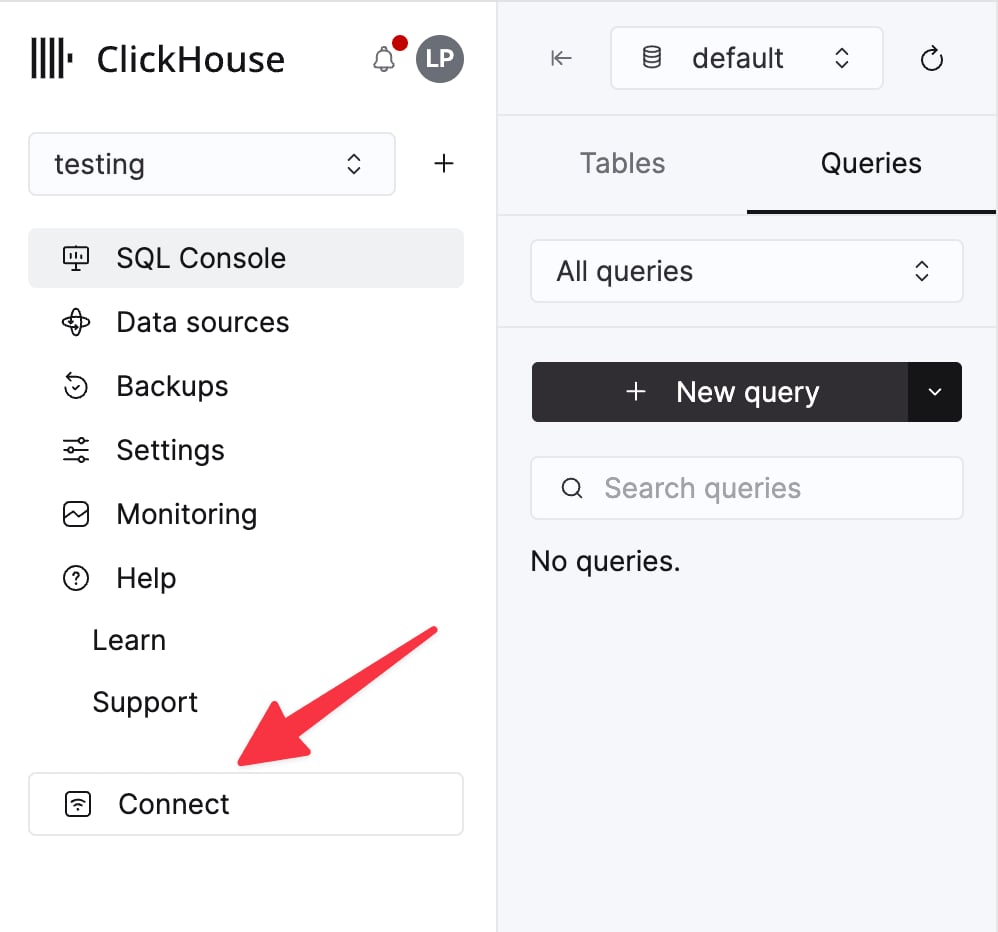
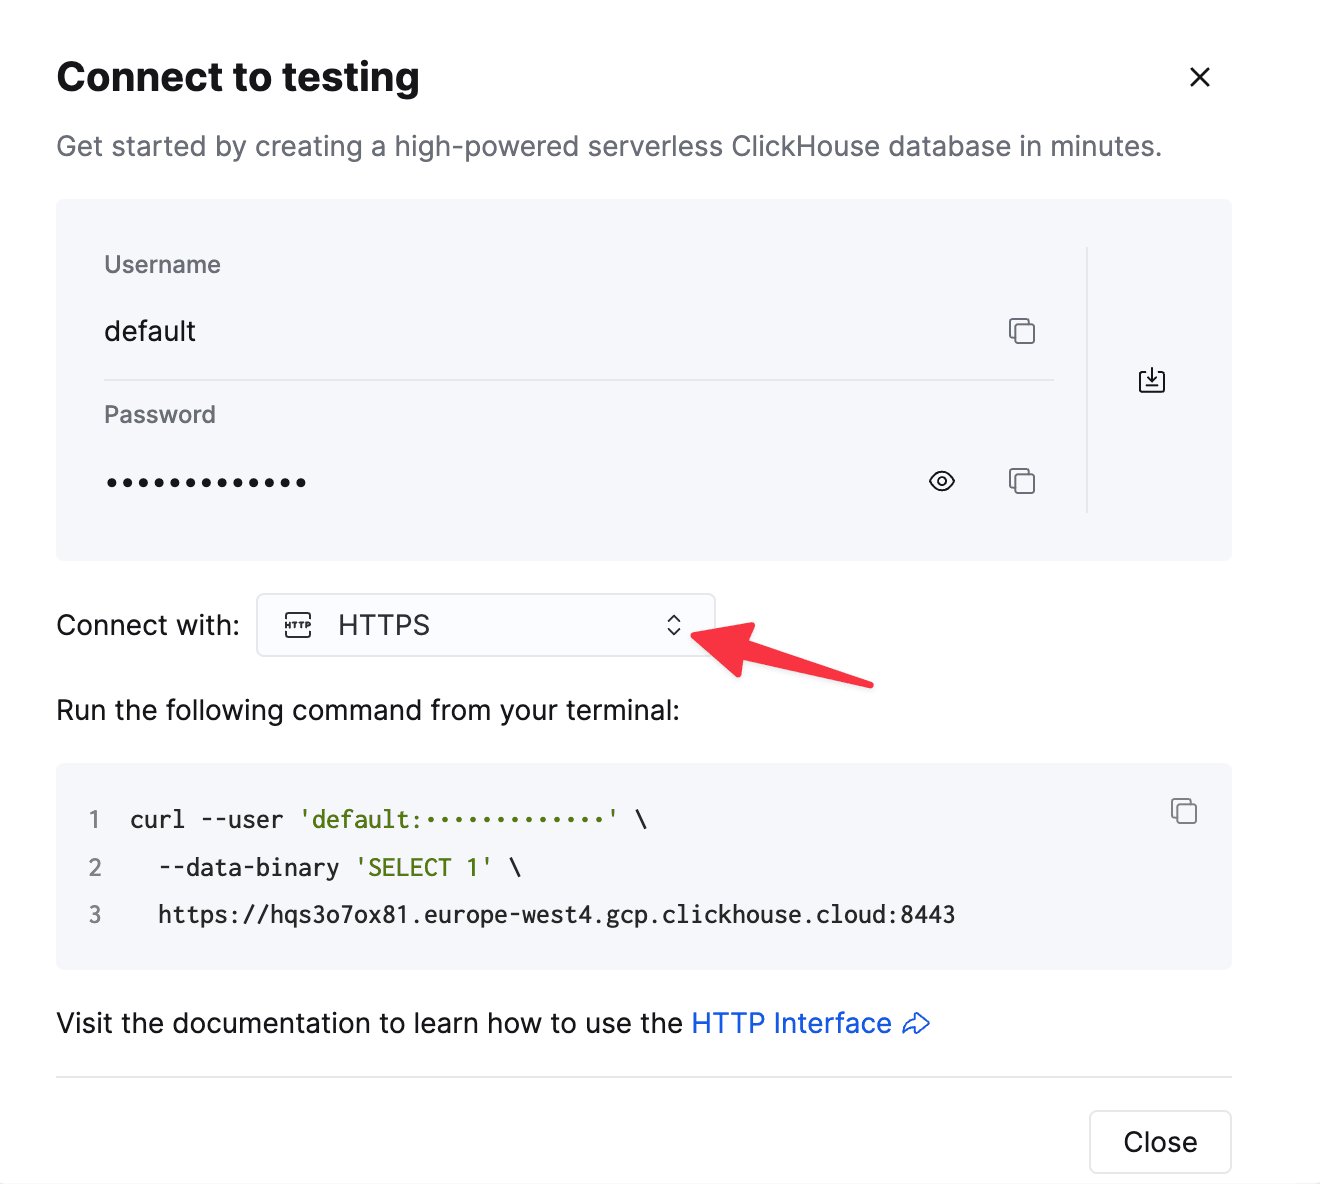
你的 ClickHouse Cloud 服务的连接信息可在 ClickHouse Cloud 控制台中查看。
选择一个服务,然后点击 **Connect**:
选择 **HTTPS**。连接信息会显示在示例 `curl` 命令中。
如果你使用的是自管理 ClickHouse,则连接信息由你的 ClickHouse 管理员配置。
你还需要:
* 一个 [Apify 账户](https://console.apify.com/sign-up) (提供免费层级) 。
* 一个 [Apify API 令牌](https://docs.apify.com/platform/integrations/api#api-token),可在 [Apify Console](https://console.apify.com/) 的 **Settings > Integrations** 中找到。
* 在本地安装 Node.js 18+ (用于 JavaScript 示例) 。
安装 Apify JavaScript 客户端 和 ClickHouse JavaScript 客户端:
```bash theme={null}
npm install apify-client @clickhouse/client
```
Apify 还提供 [Python 客户端](https://docs.apify.com/api/client/python)。如果你更习惯使用 Python,请通过 pip 安装 `apify-client`,并使用 [clickhouse-connect](/docs/zh/integrations/language-clients/python/index) 连接 ClickHouse。
创建一个用于存放抓取数据的表。schema 取决于你使用的 Actor。下面的示例针对一个产品抓取 Actor 使用 [MergeTree](/docs/zh/reference/engines/table-engines/mergetree-family/mergetree):
```sql theme={null}
CREATE TABLE apify_products
(
url String,
title String,
price Float64,
currency String,
scraped_at DateTime DEFAULT now()
)
ENGINE = MergeTree()
ORDER BY (scraped_at, url);
```
以下脚本会拉取一次 Apify Actor 运行的结果,并将其插入 ClickHouse:
```javascript theme={null}
import { ApifyClient } from 'apify-client';
import { createClient } from '@clickhouse/client';
// 初始化客户端
const apify = new ApifyClient({ token: 'YOUR_APIFY_API_TOKEN' });
const clickhouse = createClient({
url: 'https://YOUR_CLICKHOUSE_HOST:8443',
username: 'default',
password: 'YOUR_CLICKHOUSE_PASSWORD',
database: 'default',
});
// 拉取某个 Actor 最近一次运行的 dataset 条目
const run = await apify.actor('YOUR_ACTOR_ID').call();
const { items } = await apify.dataset(run.defaultDatasetId).listItems();
console.log(`Fetched ${items.length} items from Apify dataset.`);
// 插入到 ClickHouse
await clickhouse.insert({
table: 'apify_products',
values: items,
format: 'JSONEachRow',
});
console.log(`Inserted ${items.length} rows into ClickHouse.`);
await clickhouse.close();
```
对于大型 dataset,请使用 [List dataset items](https://docs.apify.com/api/v2#/reference/datasets/item-collection/list-items) 端点的 `limit` 和 `offset` 参数对结果进行分页。你还可以传递 `clean=true`,以仅获取非空且已去重的条目。
与其手动运行脚本,不如将该管道自动化,这样每次 Actor 完成时,数据都会自动加载到 ClickHouse:
1. 在 [Apify Console](https://console.apify.com/) 中,进入你的 Actor 并打开 **Integrations** 选项卡。
2. 添加一个新的 webhook,配置如下:
* **Event type:** `ACTOR.RUN.SUCCEEDED`
* **Action:** 向你的加载器端点发送 HTTP POST,或触发另一个负责向 ClickHouse 插入数据的 Actor。
3. webhook 载荷中包含 `defaultDatasetId`,你可以用它拉取该次运行的结果。
有关载荷详细信息和配置选项,请参阅 [Apify webhook 文档](https://docs.apify.com/platform/integrations/webhooks)。
另一种方式是使用 [Apify Schedules](https://docs.apify.com/platform/schedules) 按类似 cron 的计划运行 Actor,并结合 webhooks 执行加载步骤。
## 最佳实践
### 从 Apify 拉取数据
请使用 Apify 客户端库 (JavaScript 使用 [`apify-client`](https://docs.apify.com/api/client/js),Python 使用[对应客户端](https://docs.apify.com/api/client/python)) ,不要直接发起原始 HTTP 请求。它会为你处理分页、重试和身份验证。对于大型数据集,请使用 [List dataset items](https://docs.apify.com/api/v2#/reference/datasets/item-collection/list-items) 端点中的 `limit` 和 `offset` 参数对结果进行分页。
### 加载到 ClickHouse
向 ClickHouse 插入数据时,请使用 [`JSONEachRow`](/docs/zh/reference/formats/JSON/JSONEachRow) 格式。它与 Apify 的 JSON 输出直接对应,无需任何转换。
请确保 ClickHouse 表的 schema 与 Actor 的输出字段一致。你可以在 Actor 的 [Apify Store](https://apify.com/store) 页面上,或运行完成后的 **Dataset** 选项卡中查看其输出 schema。
### 性能
对于通过 JavaScript 客户端进行的高吞吐量插入,请参阅[性能优化建议](/docs/zh/integrations/language-clients/js/index#tips-for-performance-optimizations)。应将多行数据合并为较大的批次插入,而不要一次只插入一行;如果不适合在客户端进行批处理,可考虑使用[异步插入](/docs/zh/concepts/features/operations/insert/asyncinserts)。
### 安全
为便于说明,本页中的示例使用了 `default` 用户和数据库。在生产环境中,请创建一个专用用户,并仅授予其向目标表执行 insert 所需的最小权限;同时妥善保管凭证 (例如存放在环境变量或 secrets 管理器中,而不要提交到源代码仓库) 。有关说明,请参阅 [云访问管理](/docs/zh/products/cloud/guides/security/cloud-access-management/index)。
## 相关资源
* [Apify 平台文档](https://docs.apify.com)
* [Apify API 参考文档](https://docs.apify.com/api/v2)
* [Apify JavaScript 客户端](https://docs.apify.com/api/client/js)
* [Apify Python 客户端](https://docs.apify.com/api/client/python)
* [Apify Store (现成的 Actors)](https://apify.com/store)
* [Apify 集成概览](https://docs.apify.com/platform/integrations)
* [ClickHouse JavaScript 客户端](/docs/zh/integrations/language-clients/js/index)