Looker Studio
Looker Studio может подключаться к ClickHouse через интерфейс MySQL, используя официальный источник данных Google MySQL.
Настройка ClickHouse Cloud
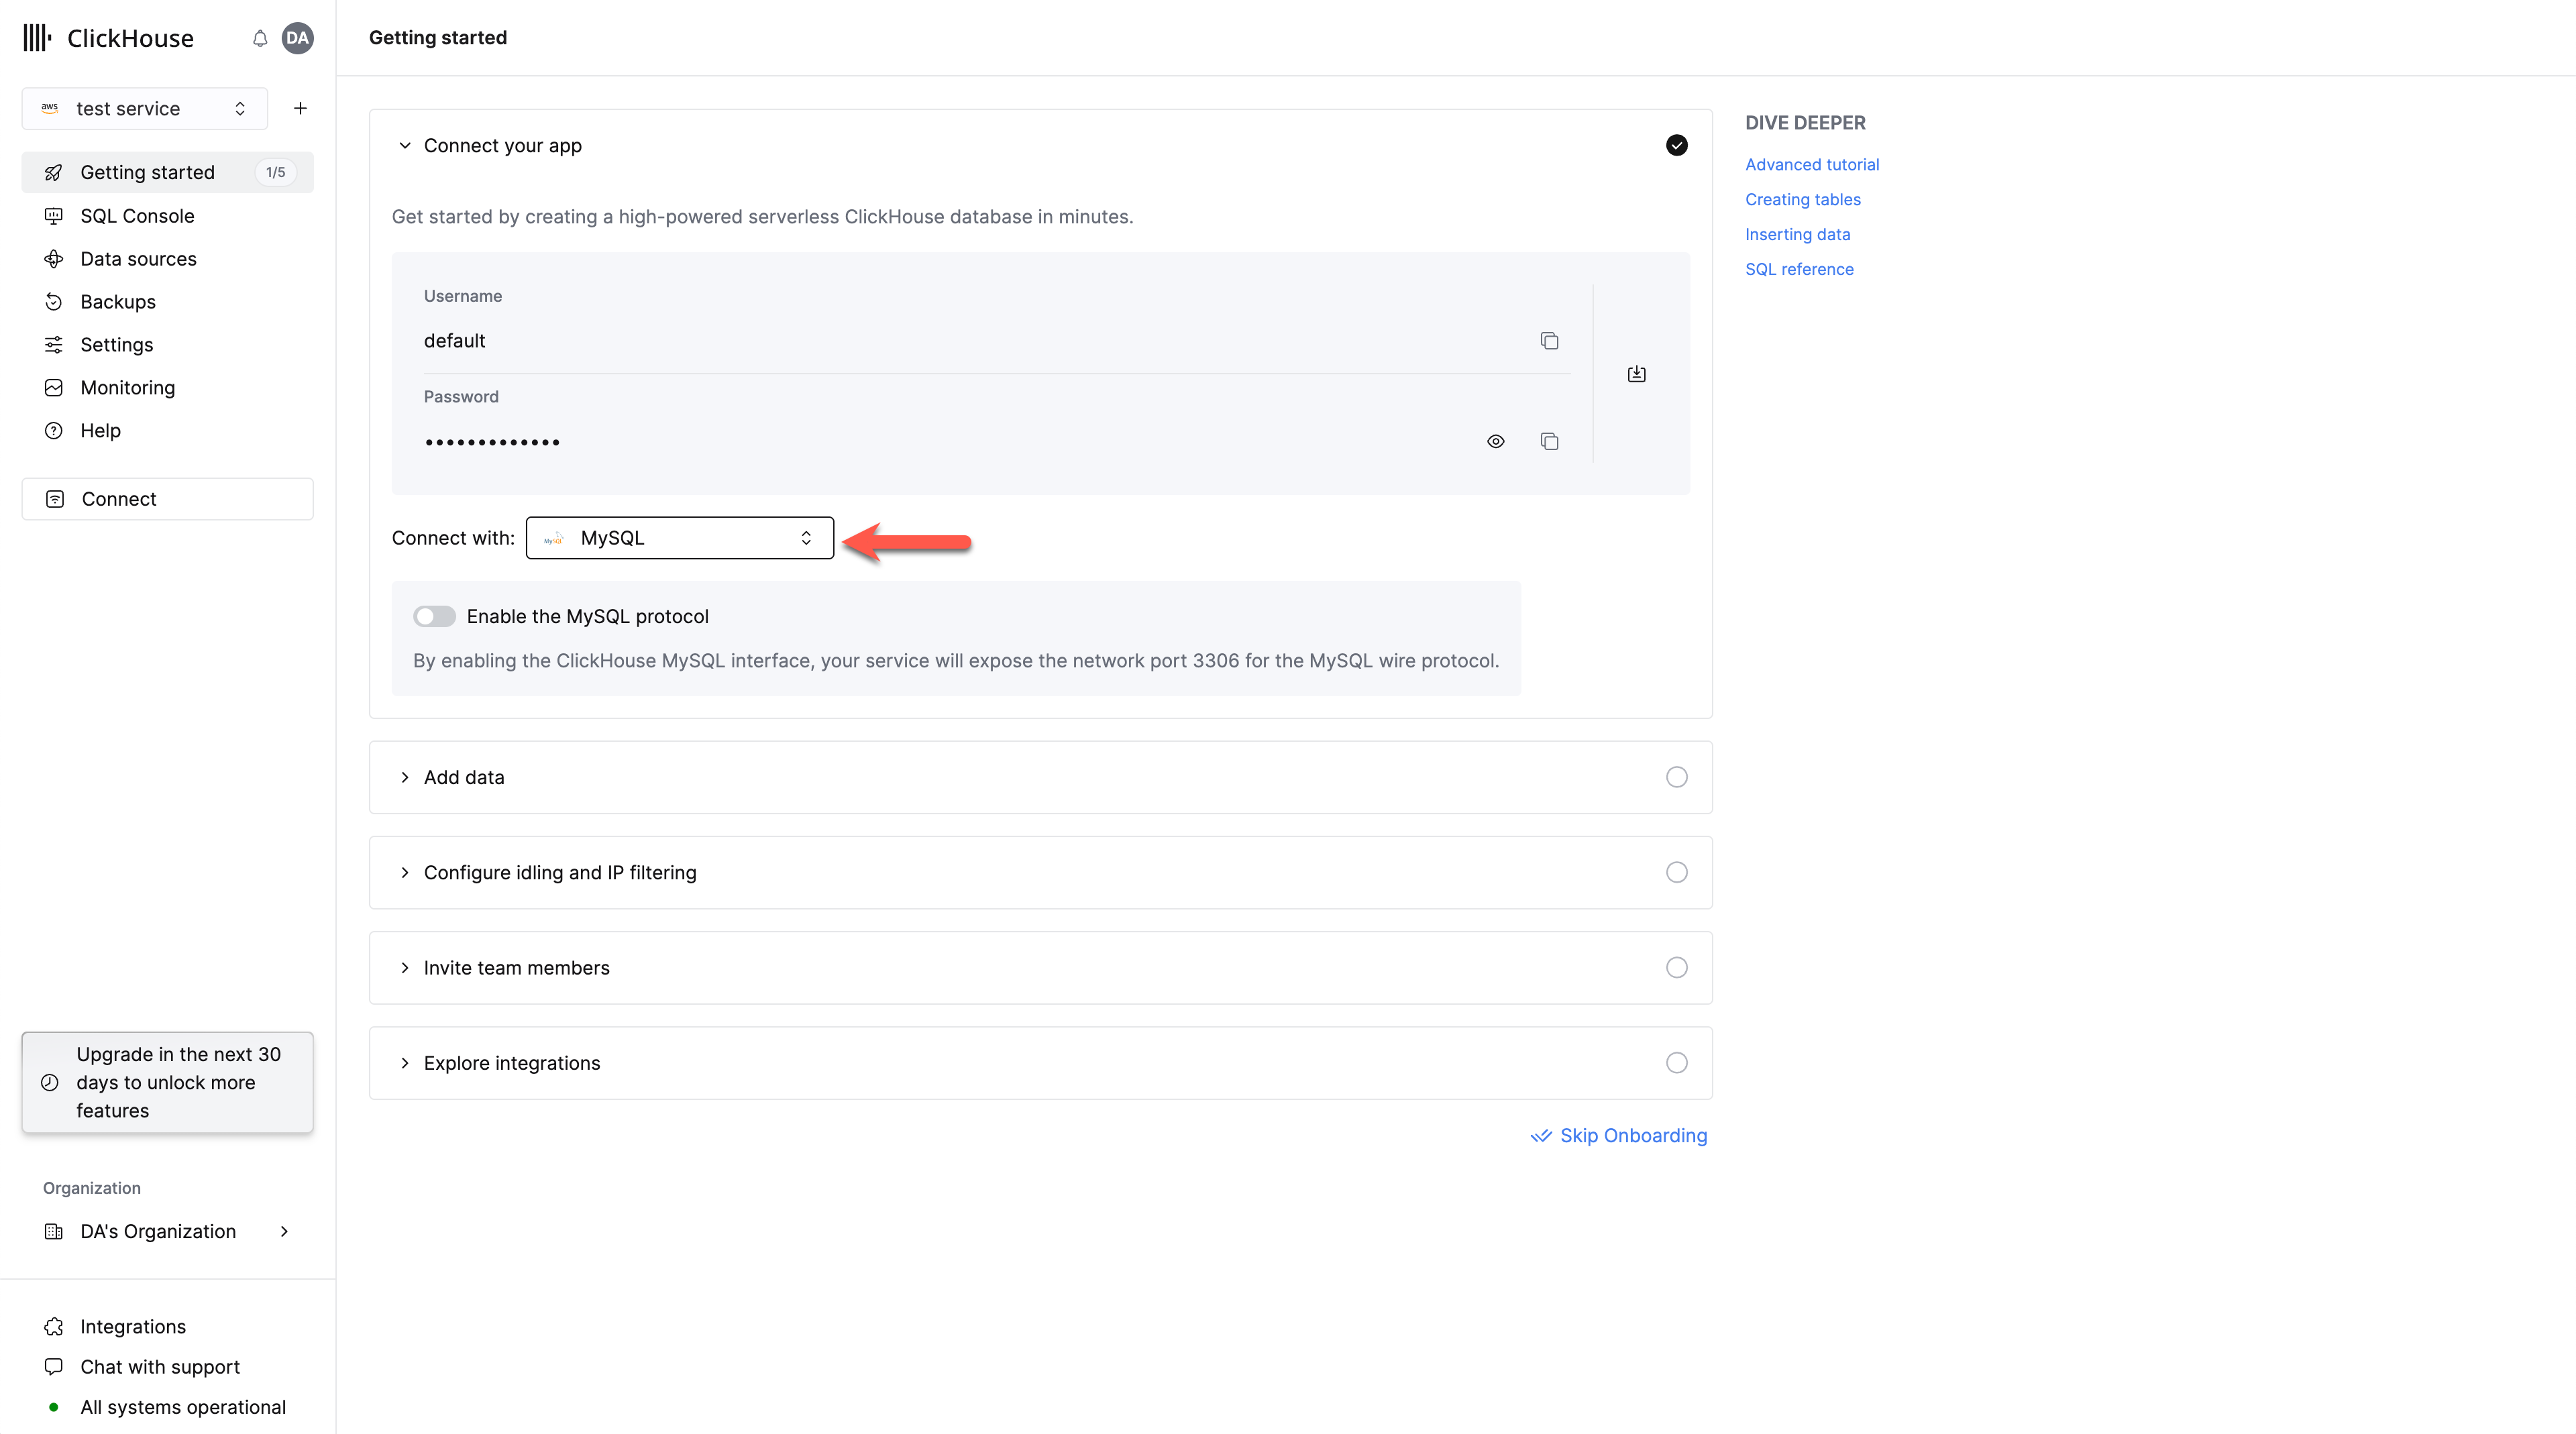
Выберите Connect your app
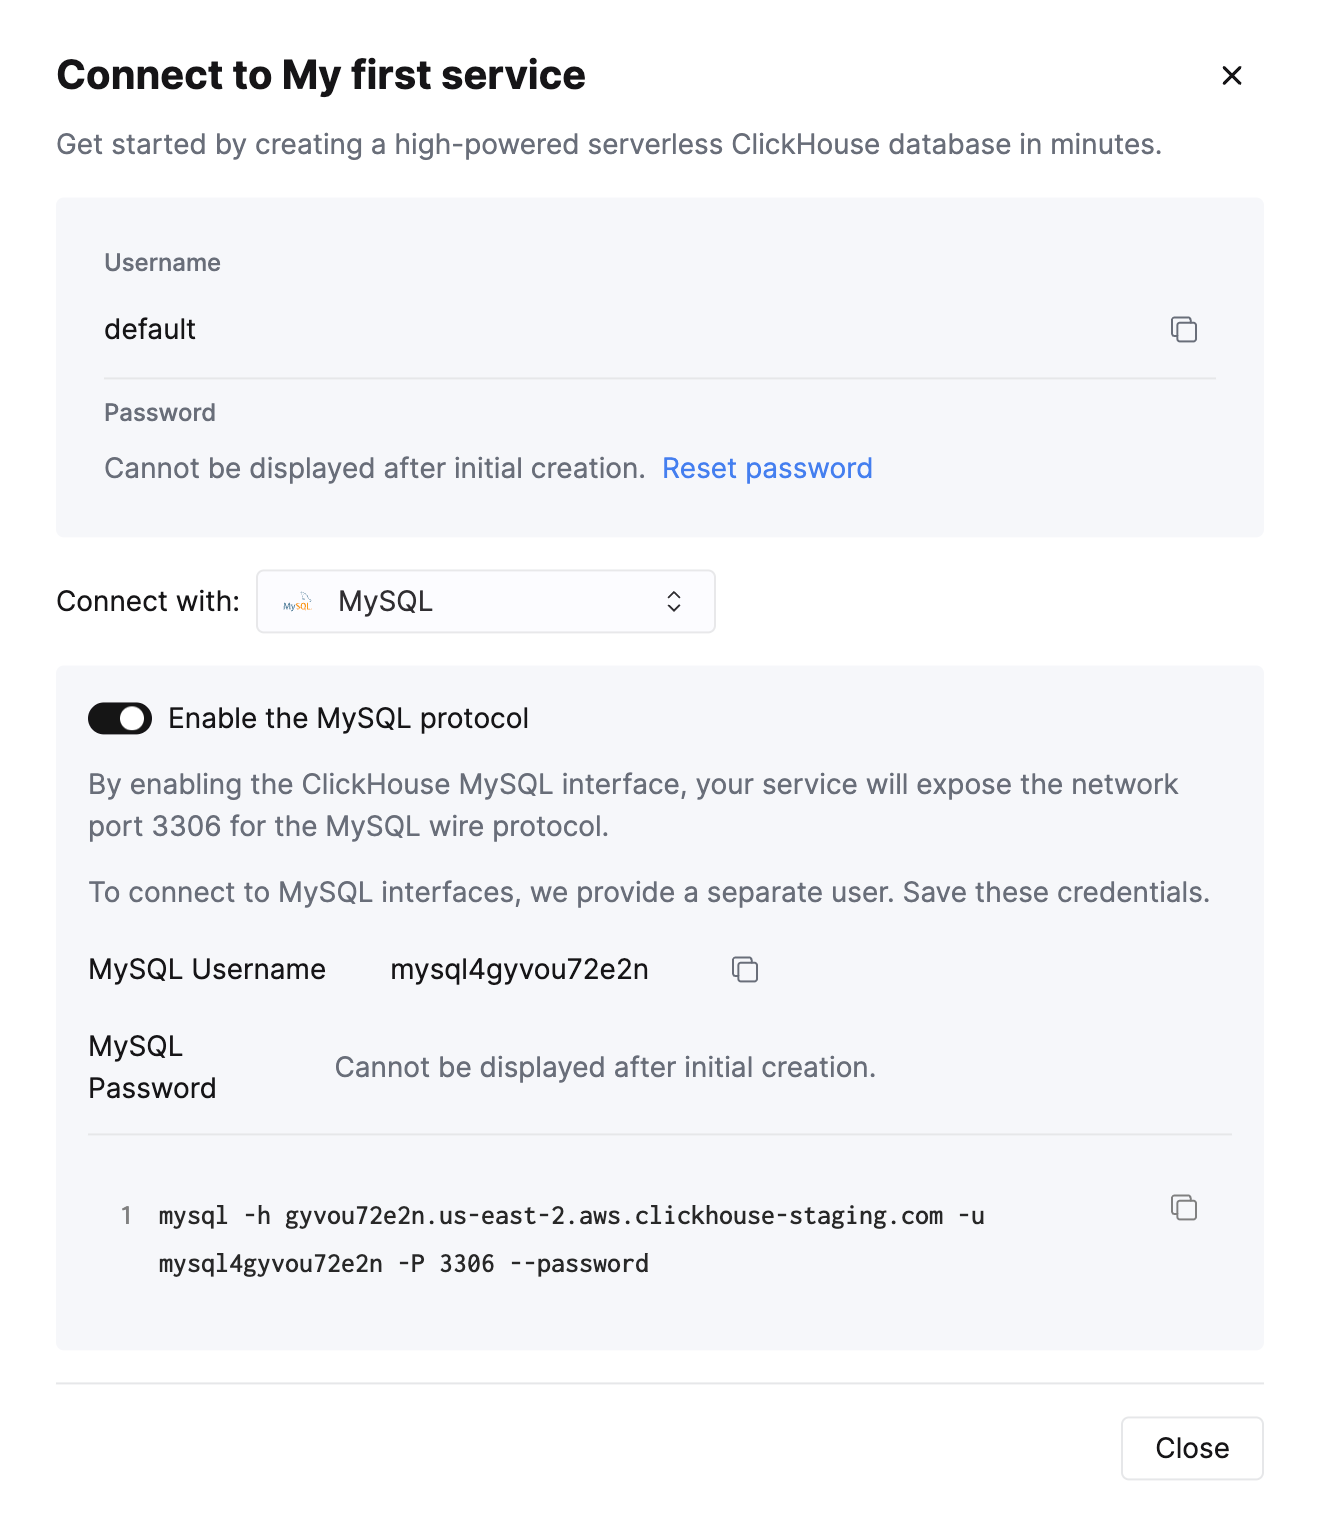
После создания сервиса ClickHouse Cloud на экране Connect your app выберите MySQL из выпадающего списка.
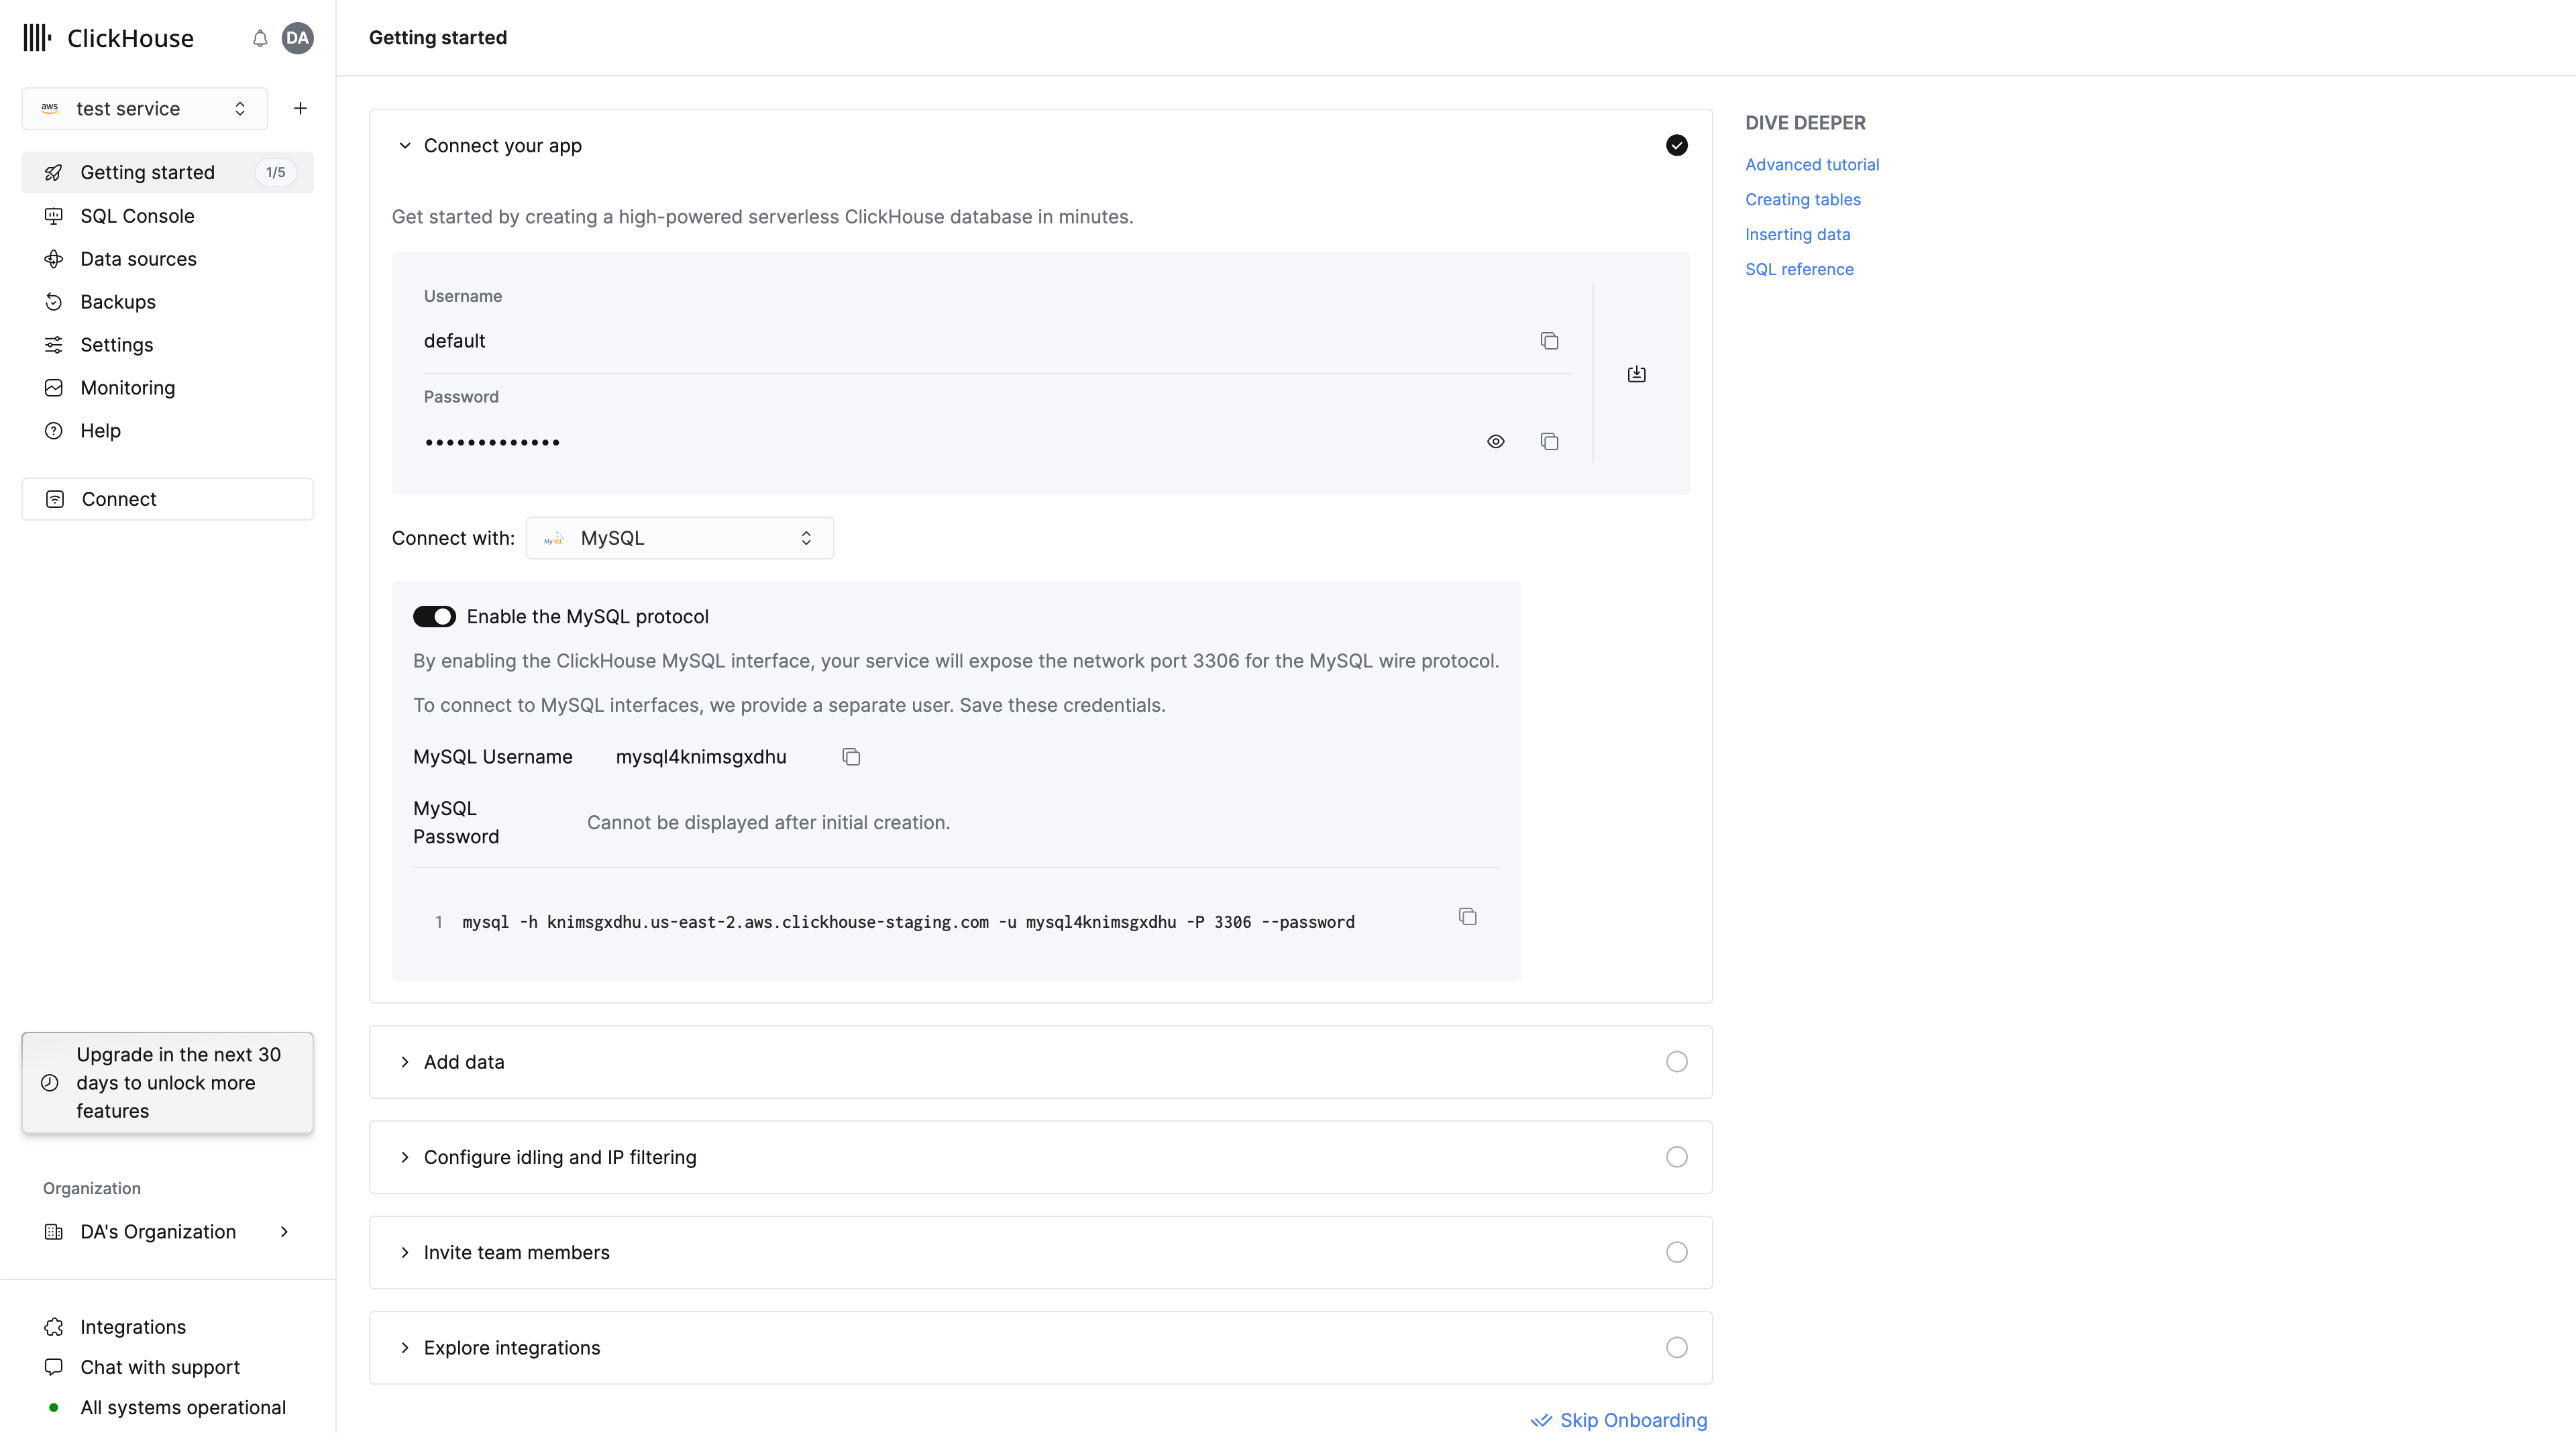
Включите интерфейс MySQL
Переключите тумблер, чтобы включить интерфейс MySQL для данного сервиса.
Это откроет порт 3306 для этого сервиса и отобразит экран подключения MySQL с вашим уникальным именем пользователя MySQL.
Или, чтобы включить интерфейс MySQL для уже существующего сервиса:
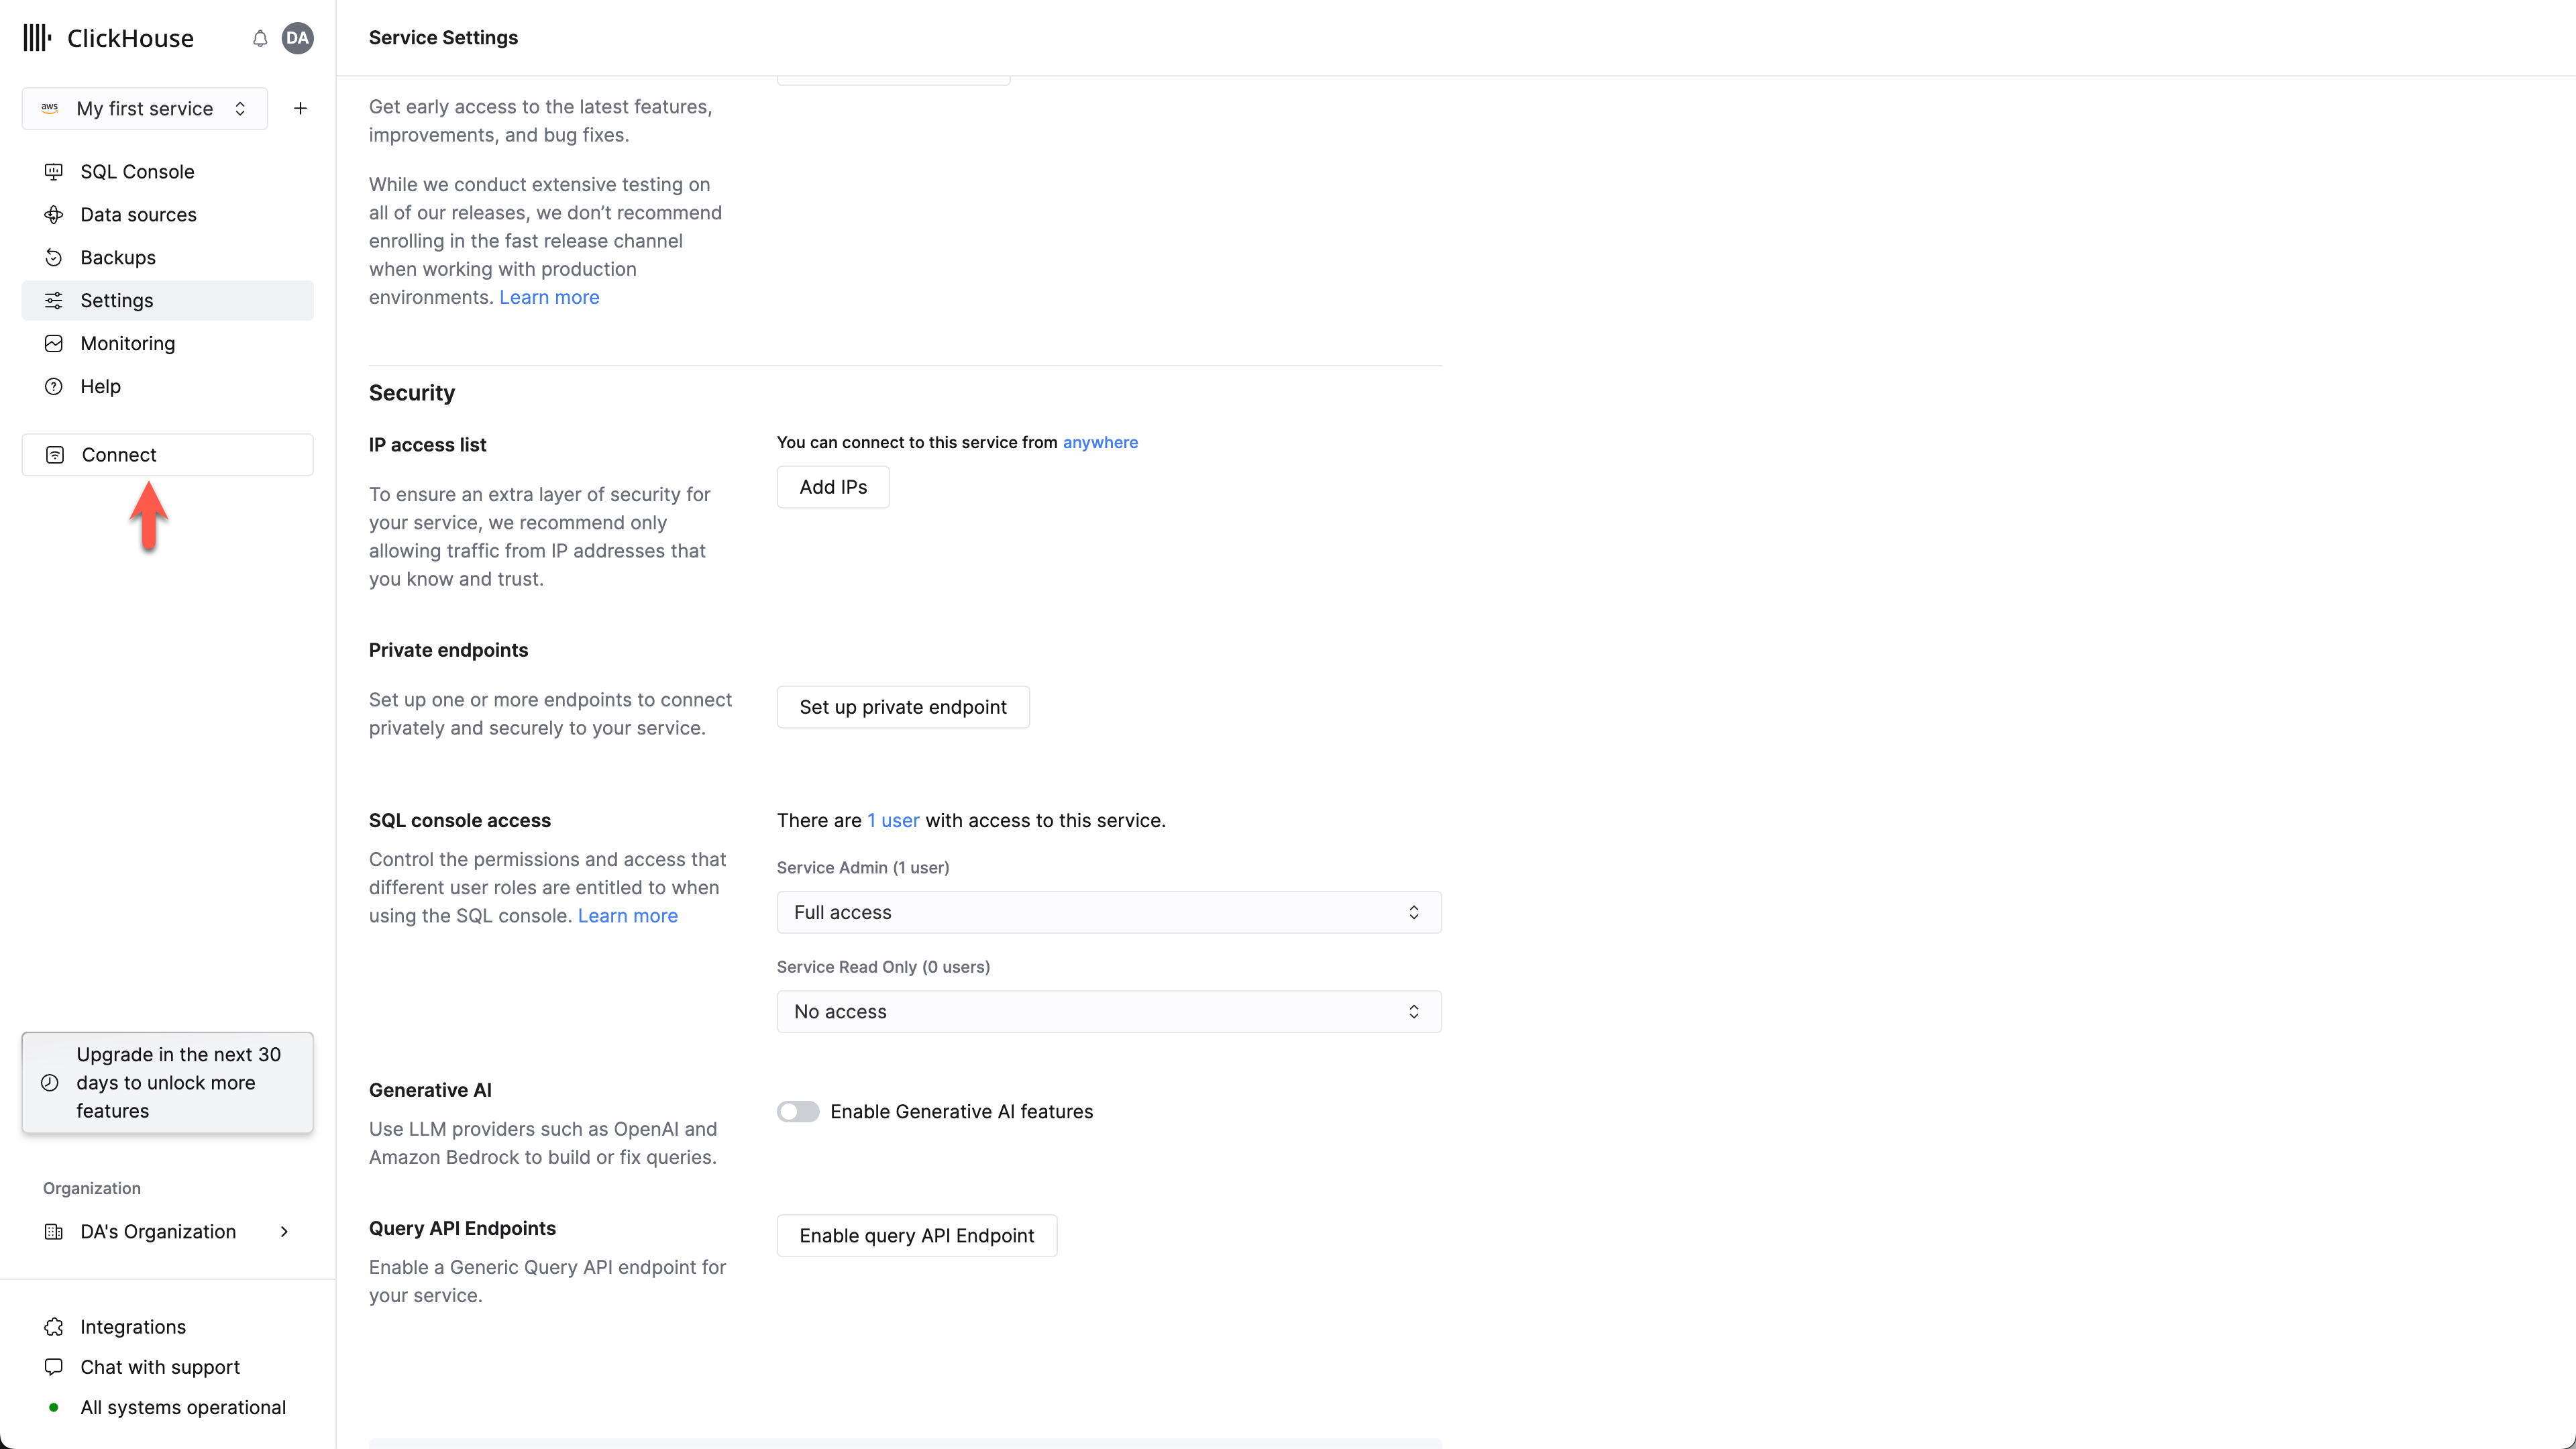
Выберите Connect
Убедитесь, что ваш сервис находится в состоянии Running, затем выберите сервис, для которого вы хотите включить интерфейс MySQL.
Выберите Connect в левом меню:
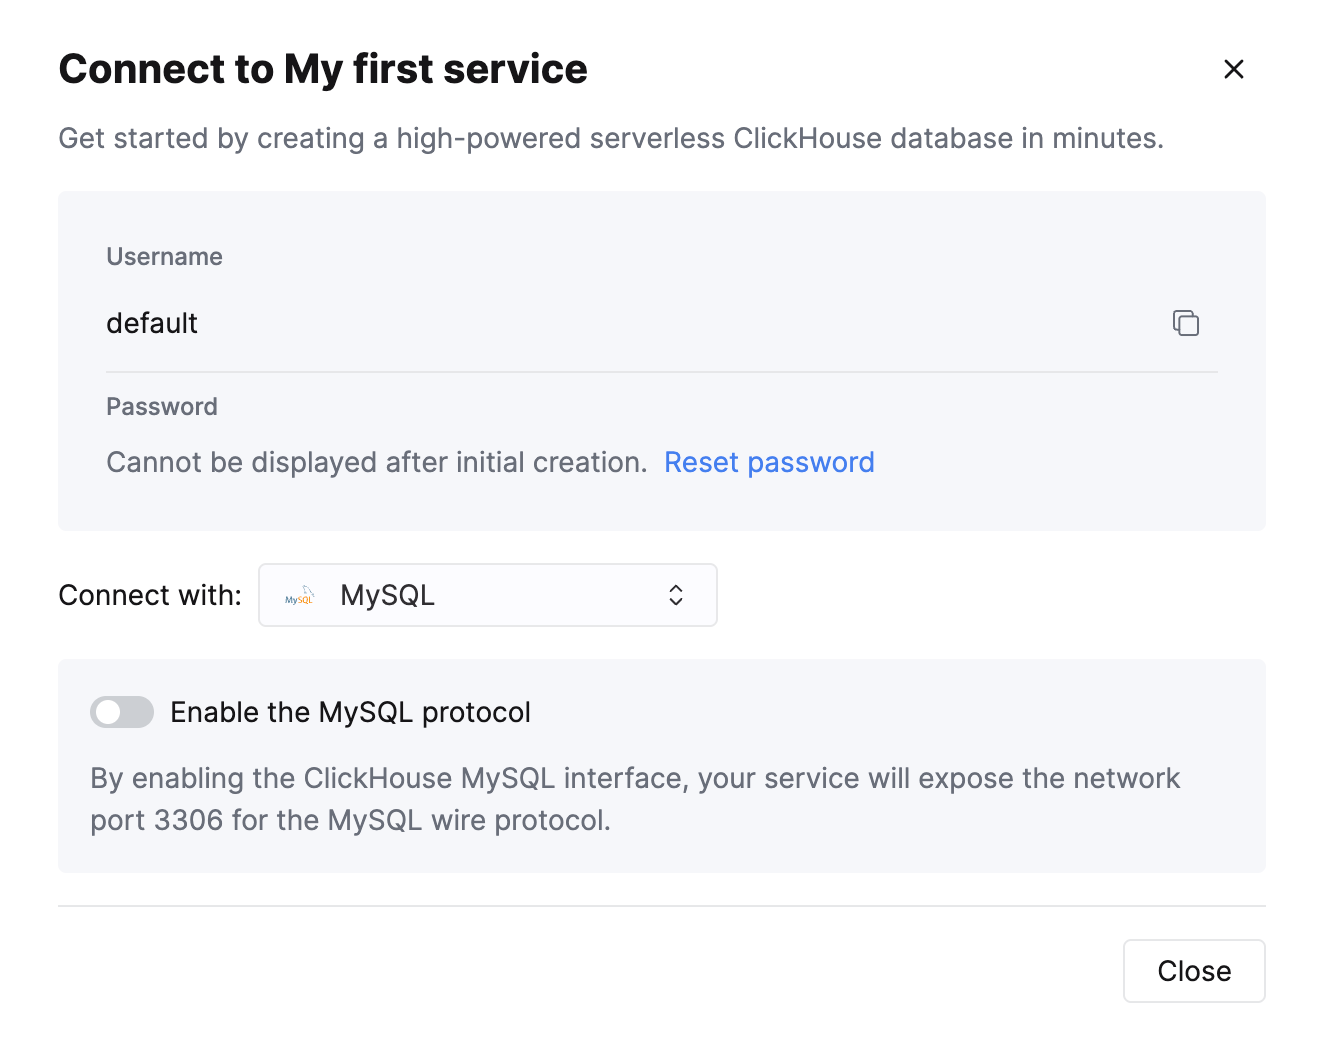
Включите интерфейс MySQL
Переключите тумблер, чтобы включить интерфейс MySQL для данного сервиса.
Это откроет порт 3306 для этого сервиса и отобразит экран подключения MySQL с вашим уникальным именем пользователя MySQL.
Создание readonly-пользователя MySQL в ClickHouse Cloud
ClickHouse Cloud автоматически создает пользователя mysql4<subdomain>, который использует тот же пароль, что и пользователь по умолчанию.
Часть <subdomain> соответствует первой части имени хоста вашего кластера ClickHouse Cloud.
Такой формат имени пользователя необходим для совместимости с инструментами, которые устанавливают защищенные соединения, но не включают данные SNI (Server Name Indication) в TLS-рукопожатие. Без информации SNI система не может выполнить корректную внутреннюю маршрутизацию, поэтому подсказка с поддоменом, встроенная в имя пользователя, предоставляет необходимую информацию для маршрутизации. Консольный клиент MySQL — пример инструмента, которому это требуется.
Рекомендуется создать нового readonly-пользователя MySQL.
Для имени хоста ClickHouse Cloud вида foobar.us-east1.aws.clickhouse.cloud часть <subdomain> равна foobar, и произвольное имя пользователя MySQL может выглядеть как mysql4foobar_team1.
Создайте профиль настроек readonly
Создайте профиль настроек, который будет применяться к вашему readonly-пользователю,
установив параметр readonly в значение 1:
Создайте нового readonly-пользователя MySQL
Создайте пользователя с именем в следующем формате:
Примените readonly_profile к новому пользователю и убедитесь, что пароль задан в формате double SHA1. Например:
Выдайте новому пользователю права доступа к нужным таблицам
Выдайте новому пользователю необходимые права для работы с нужными таблицами или базами данных.
Например, если вы хотите предоставить доступ только к system.query_log:
Для readonly-пользователя убедитесь, что вы выдаете только права SELECT к таблицам, к которым хотите предоставить доступ.
Созданного пользователя можно использовать для подключения к вашему сервису ClickHouse Cloud через интерфейс MySQL.
Устранение неполадок с несколькими пользователями MySQL в ClickHouse Cloud
Если вы создали нового пользователя MySQL и при подключении через CLI‑клиент MySQL видите следующую ошибку:
В этом случае убедитесь, что имя пользователя имеет формат mysql4<subdomain>_<username>, как описано выше.
Настройка сервера ClickHouse в локальной инфраструктуре
Обратитесь к официальной документации по настройке сервера ClickHouse с включенным интерфейсом MySQL.
Помимо добавления записи в конфигурационный файл сервера config.xml
также обязательно следует использовать Double SHA1 password encryption для пользователя, который будет работать через интерфейс MySQL.
Генерация случайного пароля с применением Double SHA1 в командной оболочке:
Результат должен выглядеть следующим образом:
Первая строка — сгенерированный пароль, а вторая строка — хеш, который можно использовать для настройки ClickHouse.
Ниже приведен пример конфигурации для mysql_user, использующей сгенерированный хеш:
/etc/clickhouse-server/users.d/mysql_user.xml
Замените значение password_double_sha1_hex на сгенерированный вами двойной SHA1-хэш.
Также рекомендуется использовать use_mysql_types_in_show_columns,
чтобы выводить исходные типы MySQL вместо типов ClickHouse в результатах запроса SHOW [FULL] COLUMNS,
что позволяет BI-инструментам корректно анализировать схему базы данных при использовании MySQL-коннекторов.
Например:
/etc/clickhouse-server/users.d/mysql_user.xml
или назначить его другому профилю вместо профиля по умолчанию.
Если у вас установлен клиент mysql, вы можете протестировать подключение из командной строки.
Используя пример имени пользователя (mysql_user) и пароля (LZOQYnqQN4L/T6L0) из приведённого выше примера, команда в терминале будет следующей:
Наконец, настройте сервер ClickHouse на прослушивание нужных IP-адресов. Например, в config.xml раскомментируйте следующий фрагмент, чтобы сервер прослушивал все адреса:
Подключение Looker Studio к ClickHouse
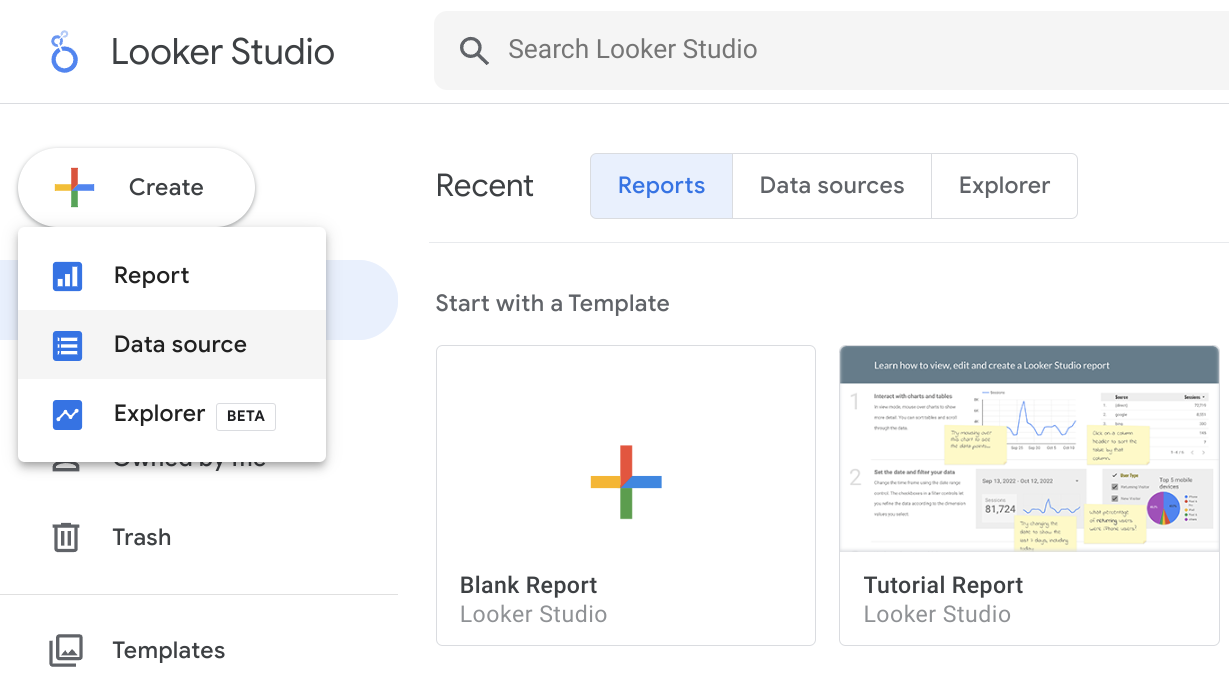
Сначала войдите на https://lookerstudio.google.com под своей учетной записью Google и создайте новый источник данных:
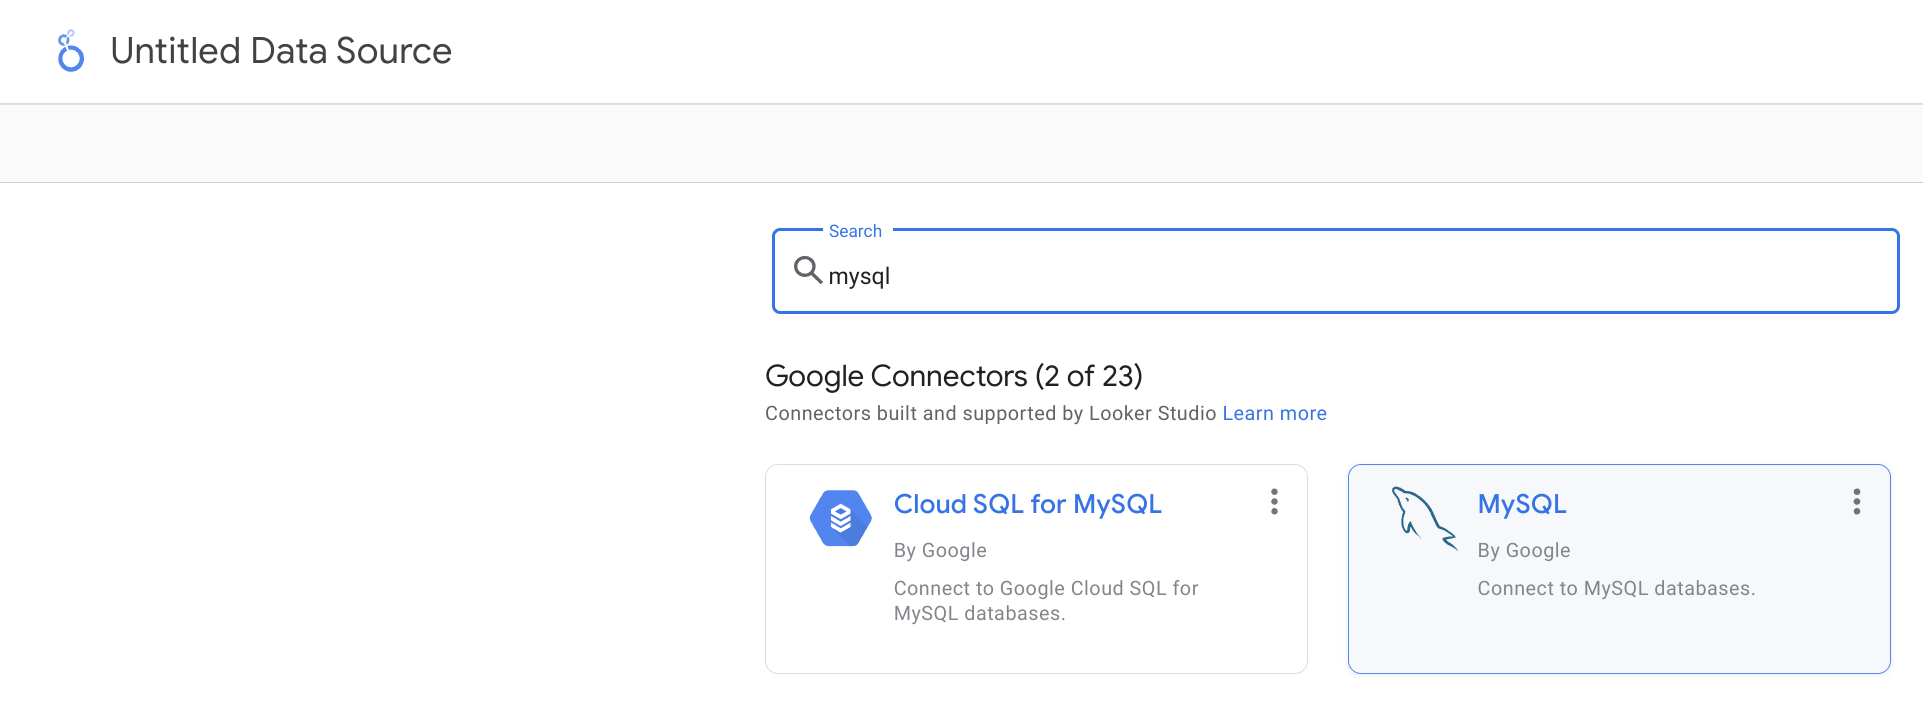
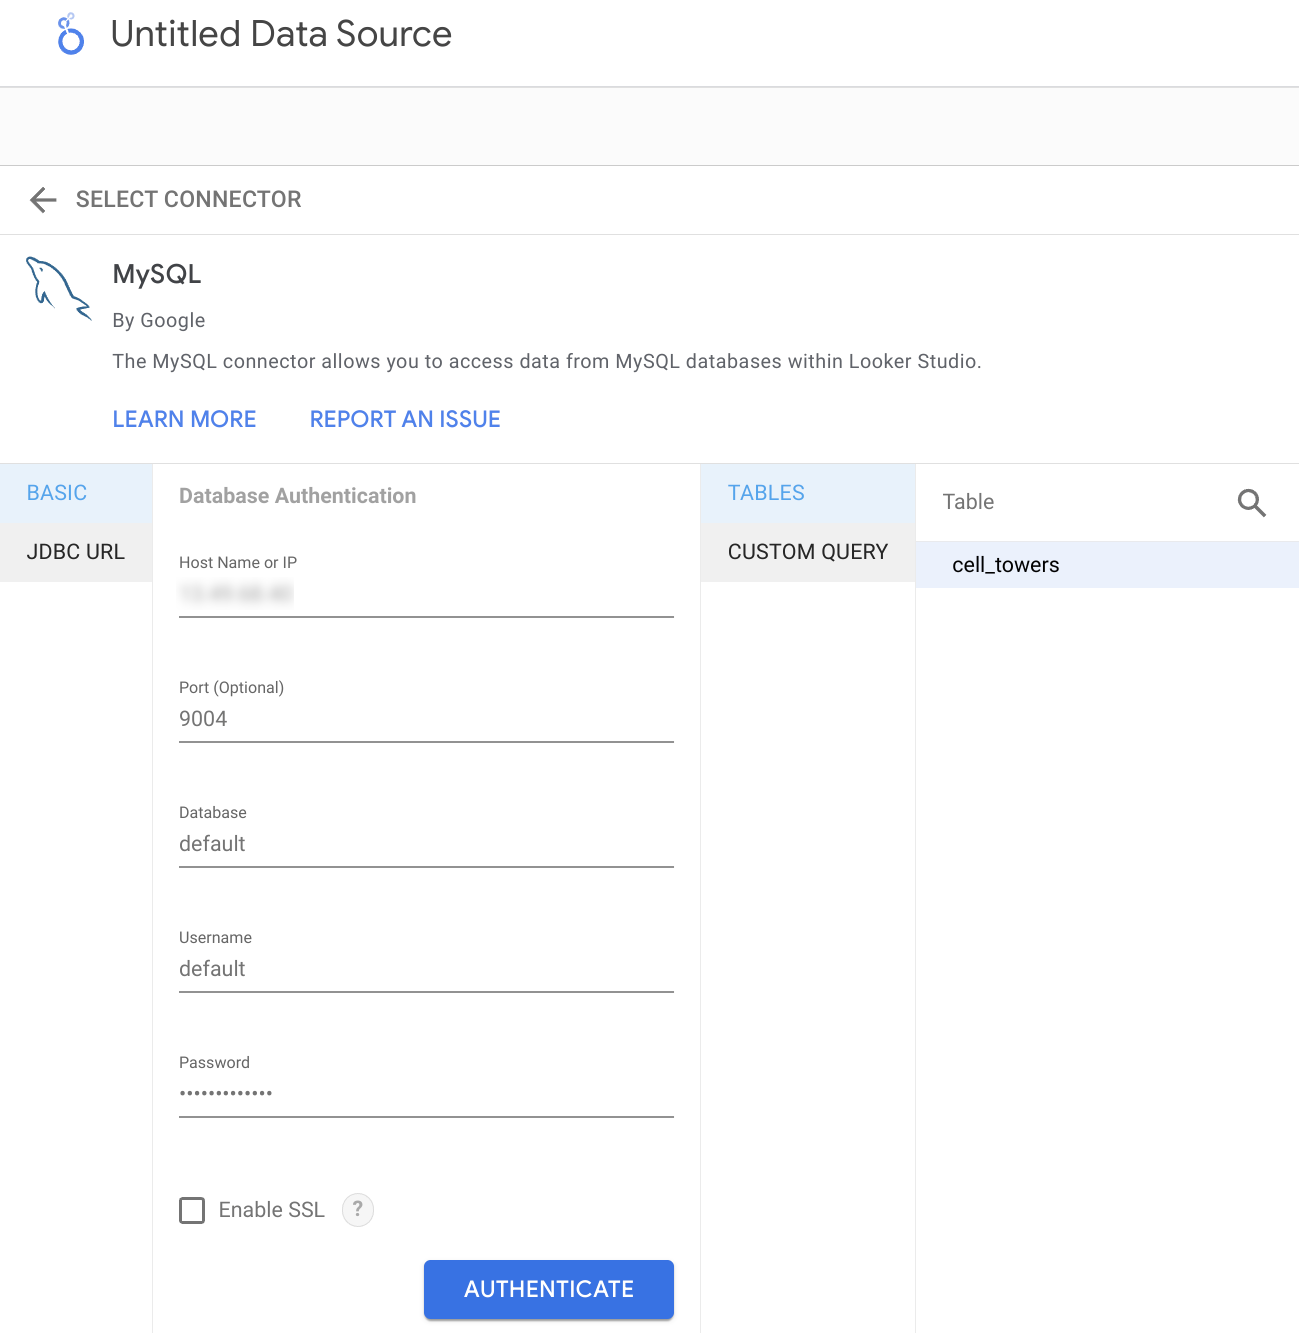
Найдите официальный коннектор MySQL от Google (он называется просто MySQL):
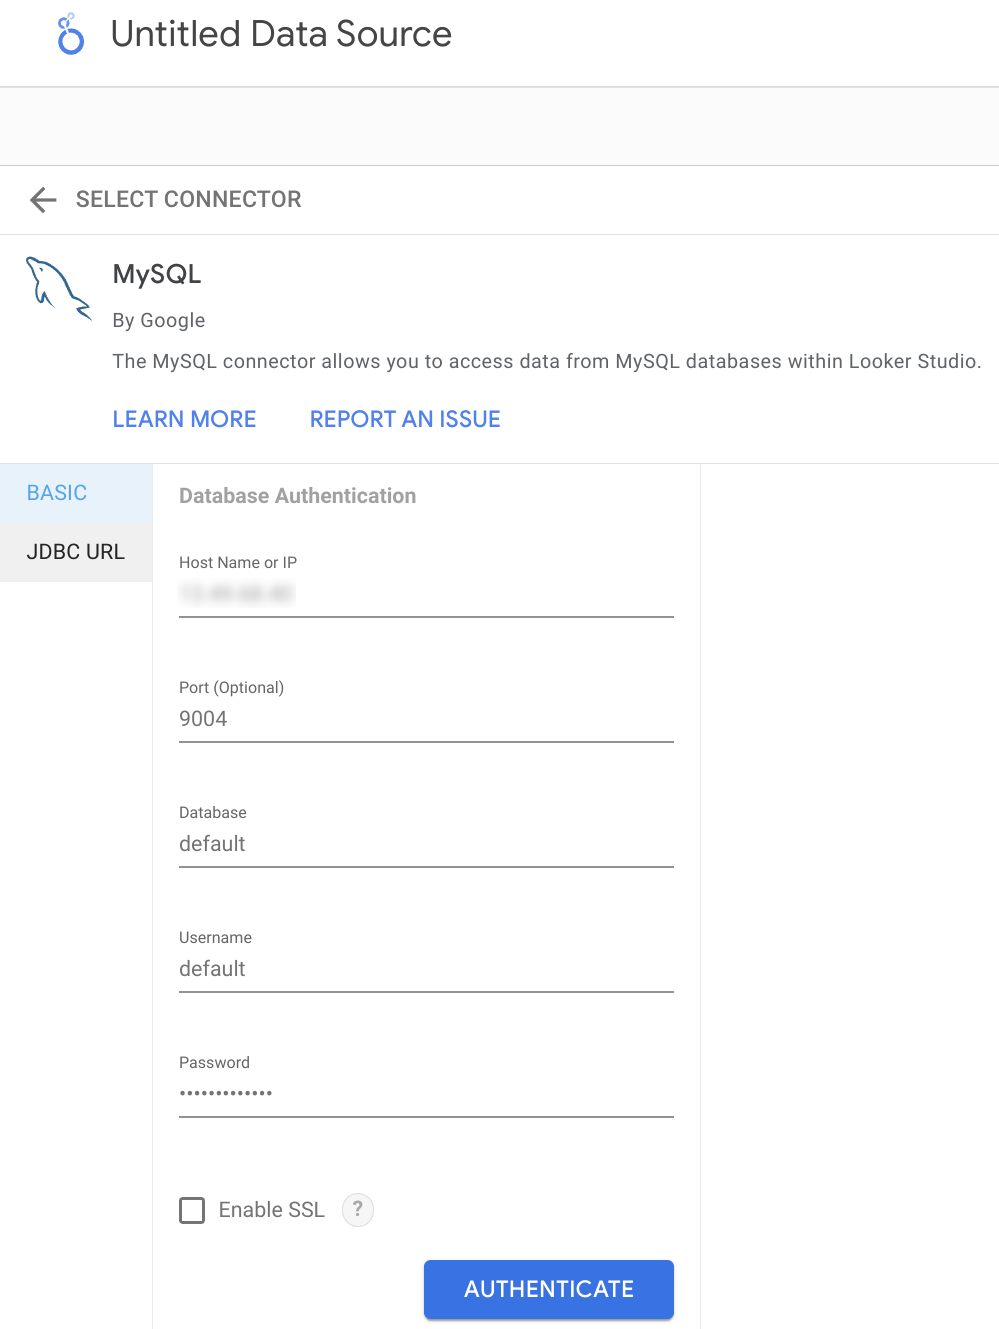
Укажите параметры подключения. Обратите внимание, что порт интерфейса MySQL по умолчанию — 9004, и он может отличаться в зависимости от конфигурации сервера.
Теперь у вас есть два варианта получения данных из ClickHouse. Во-первых, можно использовать функцию Table Browser:
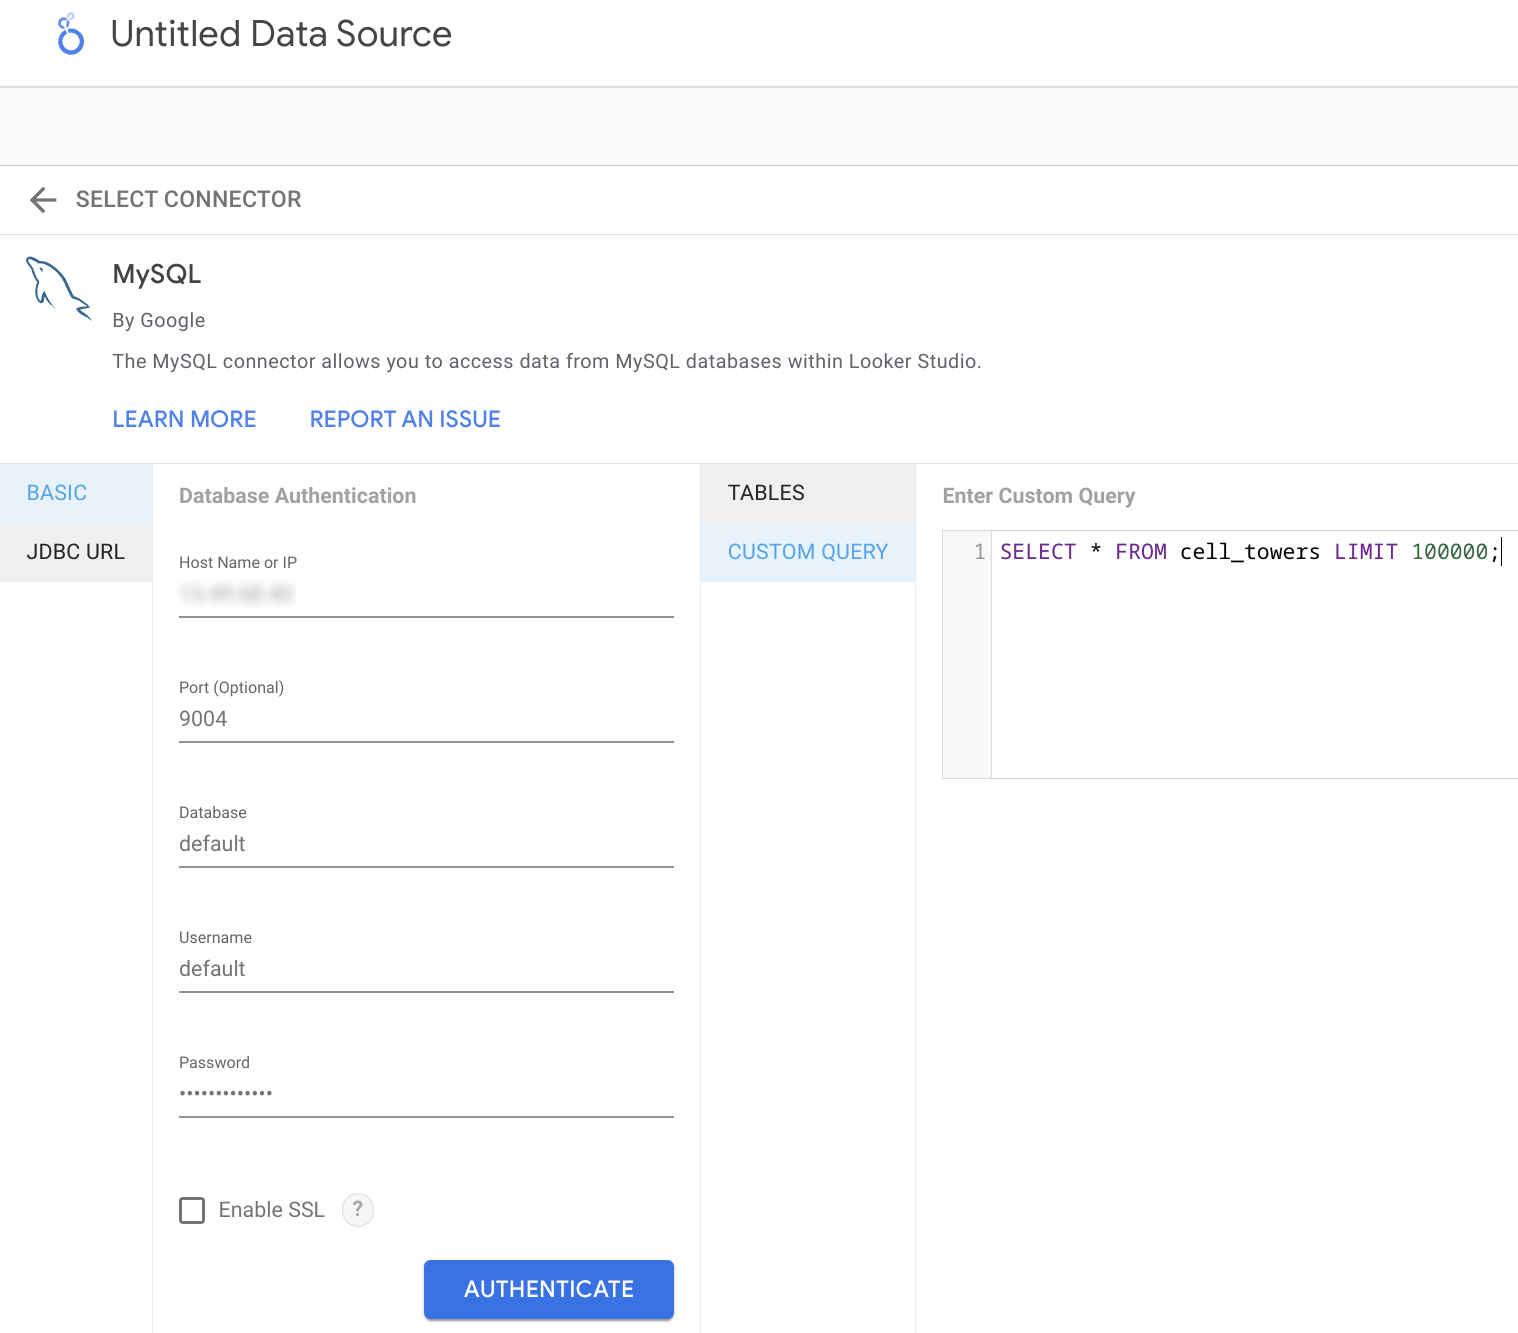
Либо можно указать пользовательский запрос для получения данных:
В итоге вы увидите автоматически определённую структуру таблицы и при необходимости сможете скорректировать типы данных.
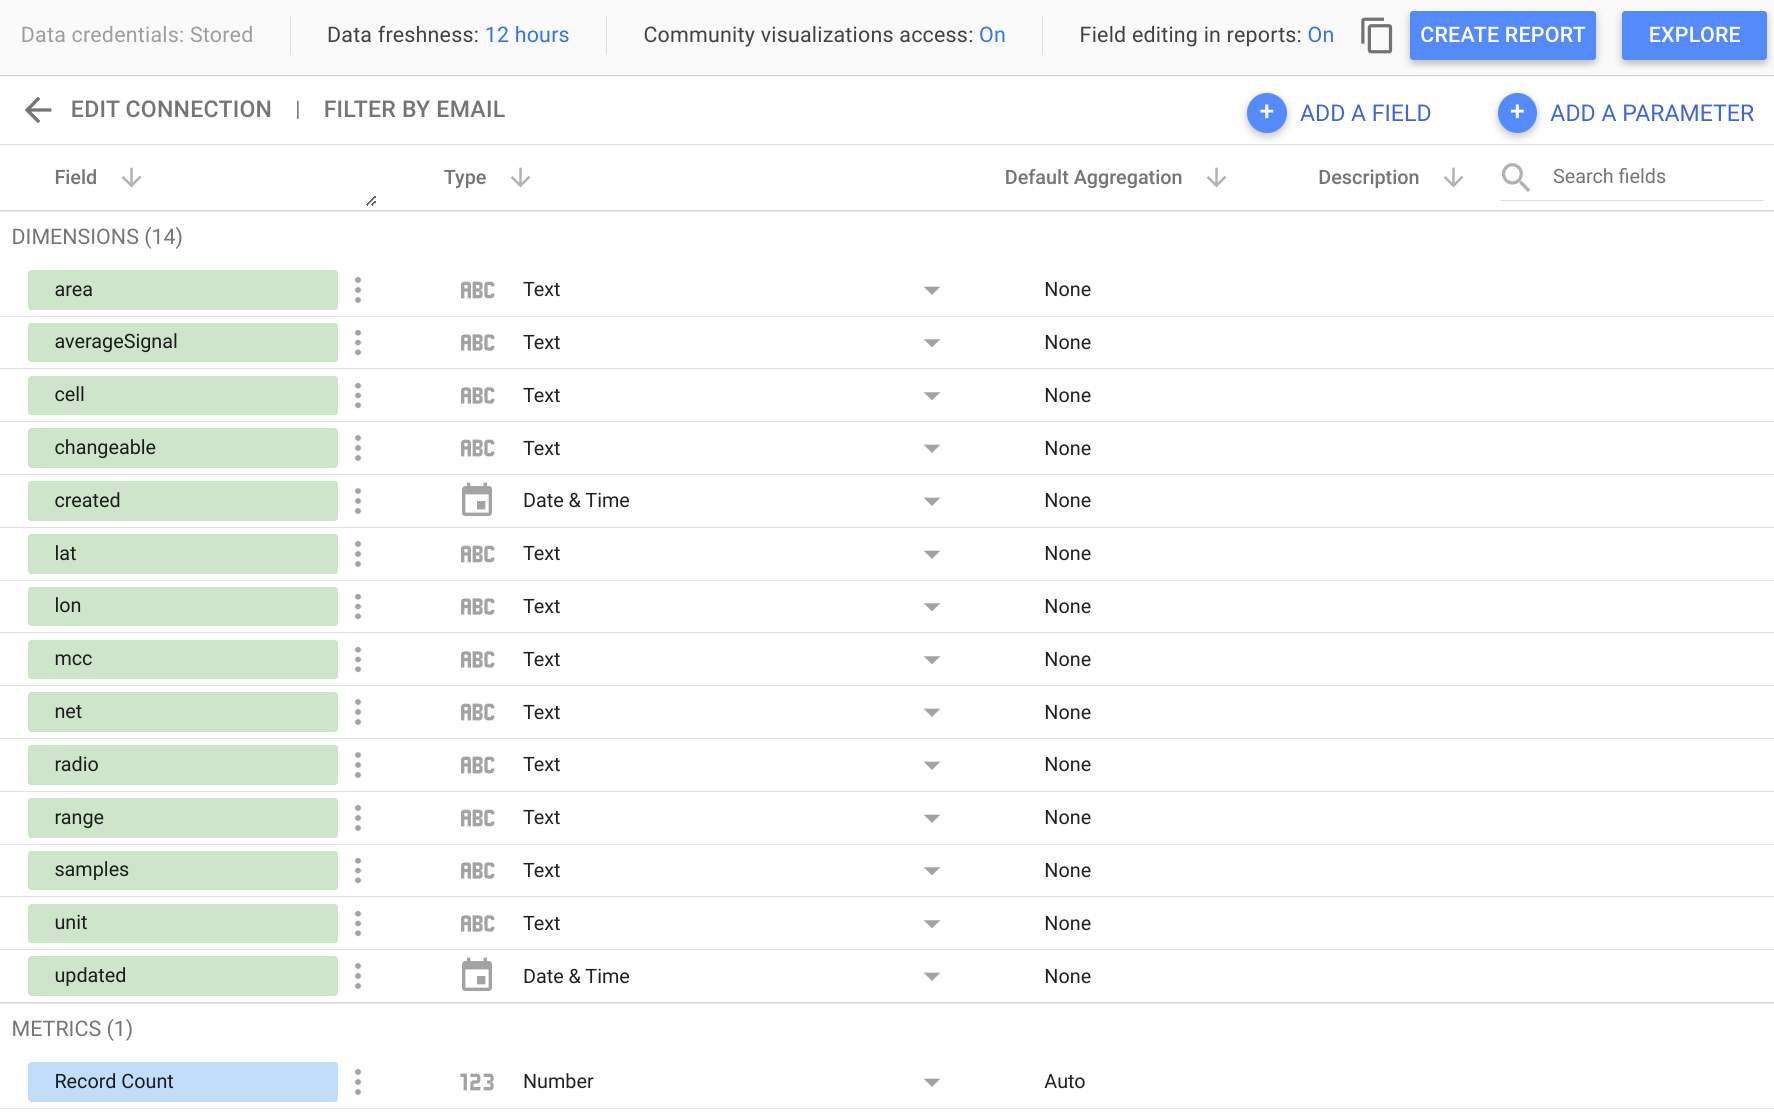
Теперь можно перейти к изучению данных или созданию нового отчёта!
Использование Looker Studio с ClickHouse Cloud
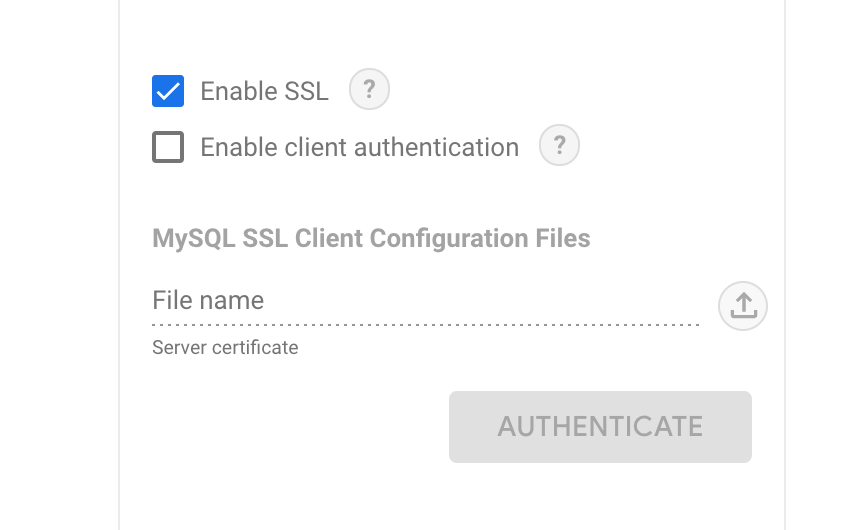
При использовании ClickHouse Cloud сначала необходимо включить интерфейс MySQL. Это можно сделать в диалоговом окне подключения на вкладке "MySQL".

В интерфейсе Looker Studio выберите опцию "Enable SSL". SSL-сертификат ClickHouse Cloud подписан Let's Encrypt. Этот корневой сертификат можно скачать здесь.
Остальные шаги такие же, как в предыдущем разделе выше.
