> ## Documentation Index
> Fetch the complete documentation index at: https://clickhouse.com/docs/llms.txt
> Use this file to discover all available pages before exploring further.
> Kafka Connect 및 ClickHouse와 함께 ClickHouse Connector Sink 사용하기
# Confluent Platform과 ClickHouse 통합
export const Image = ({img, alt, size = "lg"}) => {
const normalizedSize = ["sm", "md", "lg"].includes(size) ? size : "lg";
return ;
};
## 사전 요구 사항
다음 항목을 잘 알고 있다고 가정합니다:
* [ClickHouse Connector Sink](/docs/ko/integrations/connectors/data-ingestion/kafka/kafka-clickhouse-connect-sink)
* Confluent Platform 및 [Custom Connectors](https://docs.confluent.io/cloud/current/connectors/bring-your-connector/overview.html).
## Confluent Platform용 ClickHouse 공식 Kafka Connector
### Confluent Platform에 설치하기
이 문서는 Confluent Platform에서 ClickHouse 싱크 커넥터를 빠르게 시작할 수 있도록 돕는 간단한 안내서입니다.
자세한 내용은 [Confluent 공식 문서](https://docs.confluent.io/cloud/current/connectors/bring-your-connector/custom-connector-qs.html#uploading-and-launching-the-connector)를 참조하십시오.
#### 토픽 생성
Confluent Platform에서 토픽을 만드는 작업은 비교적 간단하며, 자세한 안내는 [여기](https://docs.confluent.io/cloud/current/client-apps/topics/manage.html)에서 확인할 수 있습니다.
#### 중요 참고 사항
* Kafka 토픽 이름은 ClickHouse 테이블 이름과 같아야 합니다. 이 값은 변환기(transformer)를 사용해 조정할 수 있습니다(예: [`ExtractTopic`](https://docs.confluent.io/platform/current/connect/transforms/extracttopic.html)).
* 파티션이 더 많다고 해서 항상 성능이 더 좋아지는 것은 아닙니다. 자세한 내용과 성능 관련 팁은 곧 공개될 가이드를 참조하십시오.
#### 커넥터 설치
커넥터는 [리포지토리](https://github.com/ClickHouse/clickhouse-kafka-connect/releases)에서 다운로드할 수 있습니다. 의견과 이슈도 그곳에 자유롭게 남겨 주십시오!
"Connector Plugins" -> "Add plugin"으로 이동한 다음, 아래 설정을 사용하십시오:
```text theme={null}
'Connector Class' - 'com.clickhouse.kafka.connect.ClickHouseSinkConnector'
'Connector type' - Sink
'Sensitive properties' - 'password'. This will ensure entries of the ClickHouse password are masked during configuration.
```
예시:
#### 연결 정보를 확인합니다
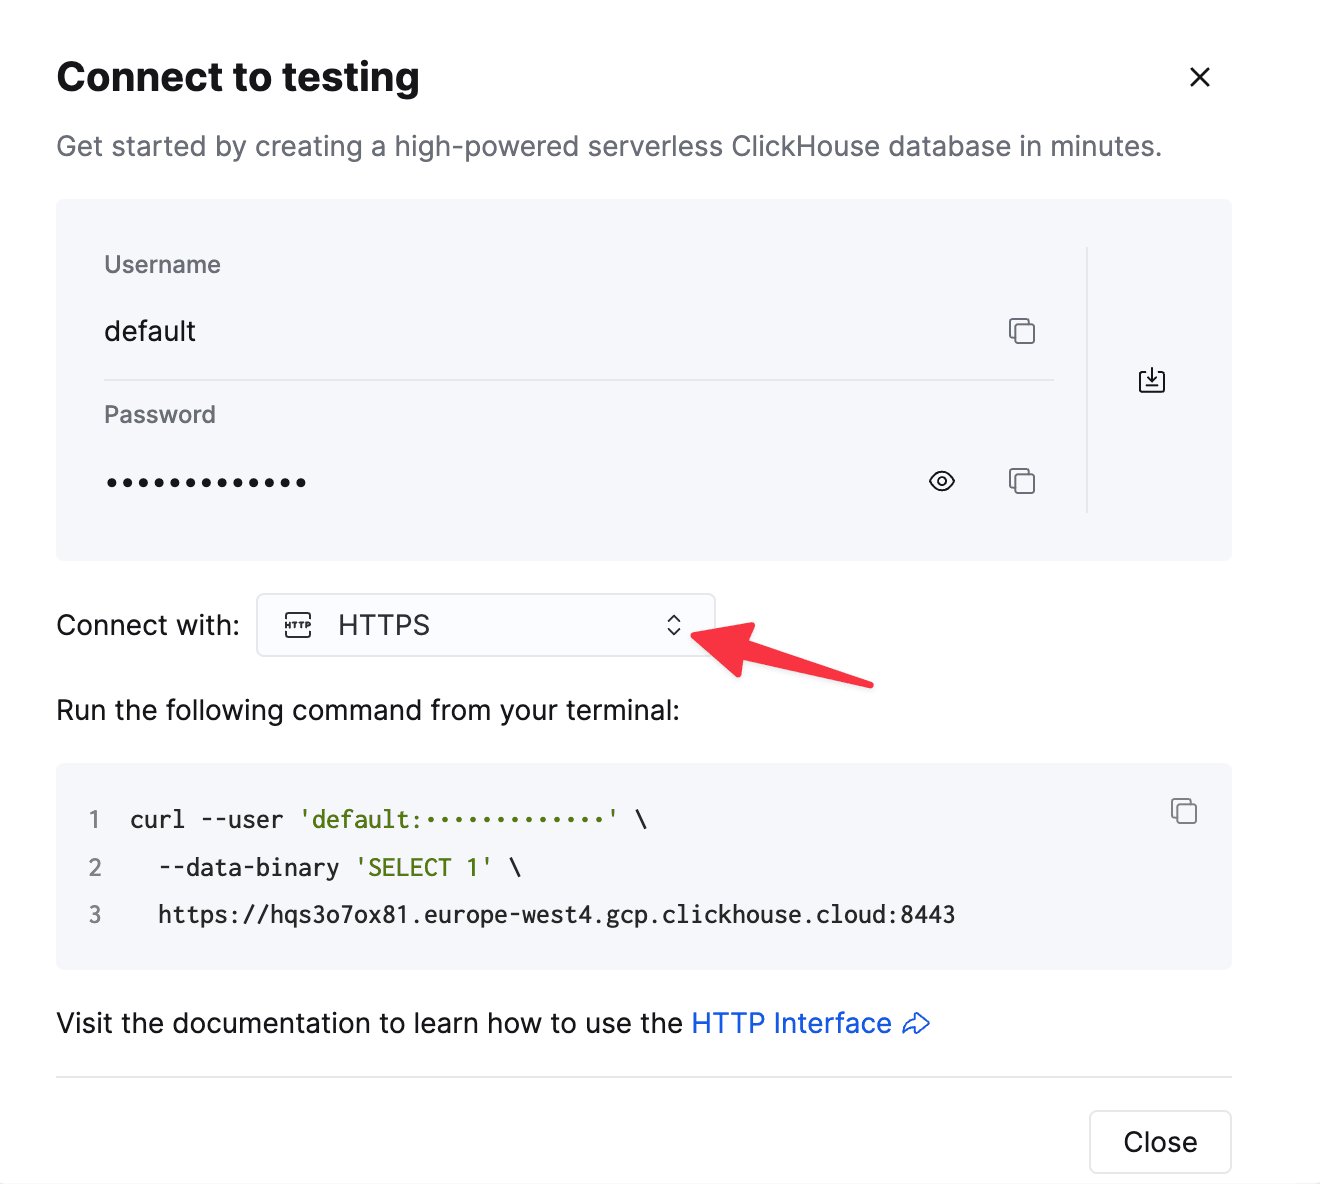
HTTP(S)로 ClickHouse에 연결하려면 다음 정보가 필요합니다.
| 매개변수 | 설명 |
| ------------------------- | ---------------------------------------------------------- |
| `HOST` and `PORT` | 일반적으로 TLS를 사용하는 경우 포트는 8443, TLS를 사용하지 않는 경우 8123입니다. |
| `DATABASE NAME` | 기본적으로 `default`라는 이름의 데이터베이스가 제공되며, 연결할 데이터베이스 이름을 사용하십시오. |
| `USERNAME` and `PASSWORD` | 기본 사용자 이름은 `default`입니다. 사용 사례에 맞는 사용자 이름을 사용하십시오. |
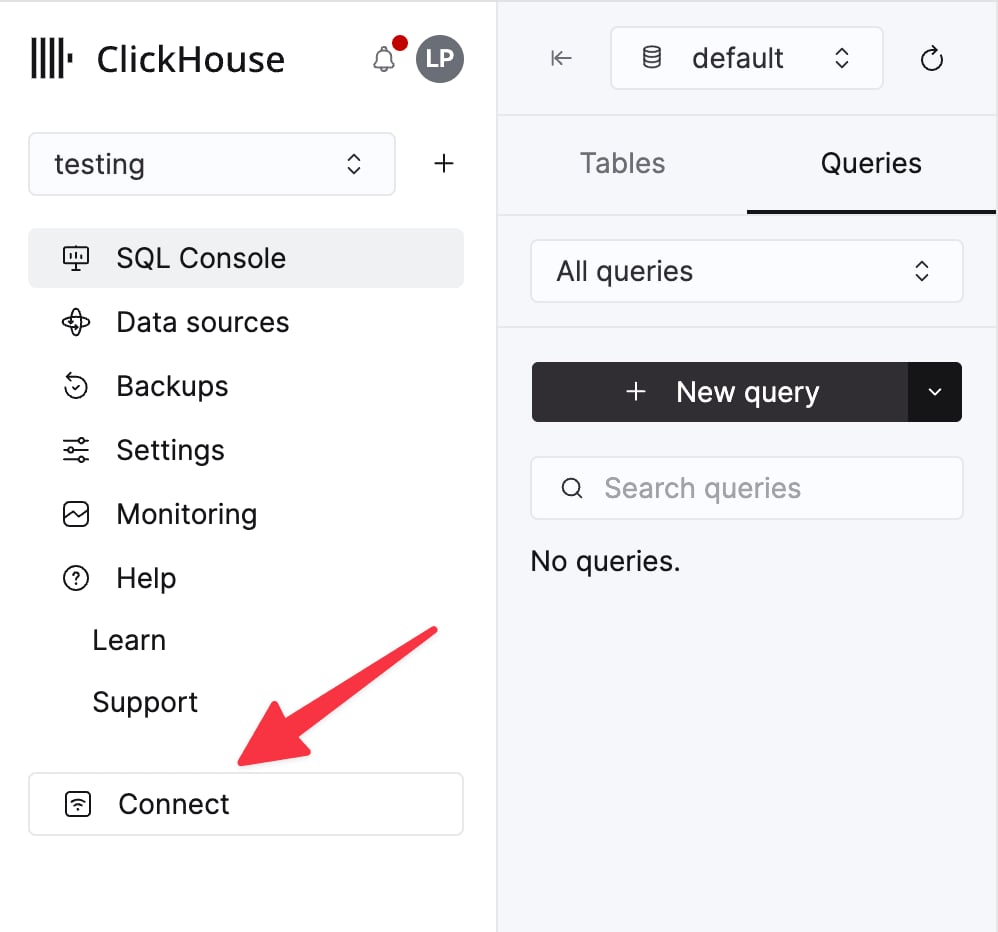
ClickHouse Cloud 서비스의 연결 정보는 ClickHouse Cloud 콘솔에서 확인할 수 있습니다.
서비스를 선택한 다음 **Connect**를 클릭하십시오.
**HTTPS**를 선택하십시오. 연결 정보가 예시 `curl` 명령으로 표시됩니다.
자가 관리형 ClickHouse를 사용하는 경우 연결 정보는 ClickHouse 관리자가 설정합니다.
#### 커넥터 설정
`Connectors` -> `Add Connector`로 이동한 다음, 다음 설정을 사용하십시오(값은 예시일 뿐입니다):
```json theme={null}
{
"database": "",
"errors.retry.timeout": "30",
"exactlyOnce": "false",
"schemas.enable": "false",
"hostname": "",
"password": "",
"port": "8443",
"ssl": "true",
"topics": "",
"username": "",
"key.converter": "org.apache.kafka.connect.storage.StringConverter",
"value.converter": "org.apache.kafka.connect.json.JsonConverter",
"value.converter.schemas.enable": "false"
}
```
#### 연결 엔드포인트 지정
커넥터가 액세스할 수 있는 엔드포인트의 허용 목록을 지정해야 합니다.
네트워크 이그레스 엔드포인트를 추가할 때는 FQDN(정규화된 도메인 이름)을 사용해야 합니다.
예시: `u57swl97we.eu-west-1.aws.clickhouse.com:8443`
HTTP(S) 포트를 지정해야 합니다. 커넥터는 아직 Native protocol을 지원하지 않습니다.
[문서를 참조하십시오.](https://docs.confluent.io/cloud/current/connectors/bring-your-connector/custom-connector-qs.html#cc-byoc-endpoints)
이제 모든 설정이 완료되었습니다!
#### 알려진 제한 사항
* Custom Connectors는 공용 인터넷 엔드포인트를 사용해야 합니다. 고정 IP 주소는 지원되지 않습니다.
* 일부 Custom Connector 속성은 재정의할 수 있습니다. 자세한 내용은 [공식 문서의 목록](https://docs.confluent.io/cloud/current/connectors/bring-your-connector/custom-connector-manage.html#override-configuration-properties)을 참조하십시오.
* Custom Connectors는 [일부 AWS 리전](https://docs.confluent.io/cloud/current/connectors/bring-your-connector/custom-connector-fands.html#supported-aws-regions)에서만 사용할 수 있습니다.
* [공식 문서의 Custom Connectors 제한 사항 목록](https://docs.confluent.io/cloud/current/connectors/bring-your-connector/custom-connector-fands.html#limitations)을 참조하십시오.