> ## Documentation Index
> Fetch the complete documentation index at: https://clickhouse.com/docs/llms.txt
> Use this file to discover all available pages before exploring further.
> 첫 번째 Amazon S3 ClickPipe를 만드는 단계별 가이드입니다.
# 첫 번째 Amazon S3 ClickPipe 만들기
export const Image = ({img, alt, size = "lg"}) => {
const normalizedSize = ["sm", "md", "lg"].includes(size) ? size : "lg";
return

;
};
S3 ClickPipe는 Amazon S3 및 S3 호환 객체 스토어의 데이터를 ClickHouse Cloud로 수집하는 완전관리형의 안정적인 방법입니다. 정확히 한 번 처리 의미 체계를 보장하며, **일회성** 수집과 **지속적인 수집**을 모두 지원합니다.
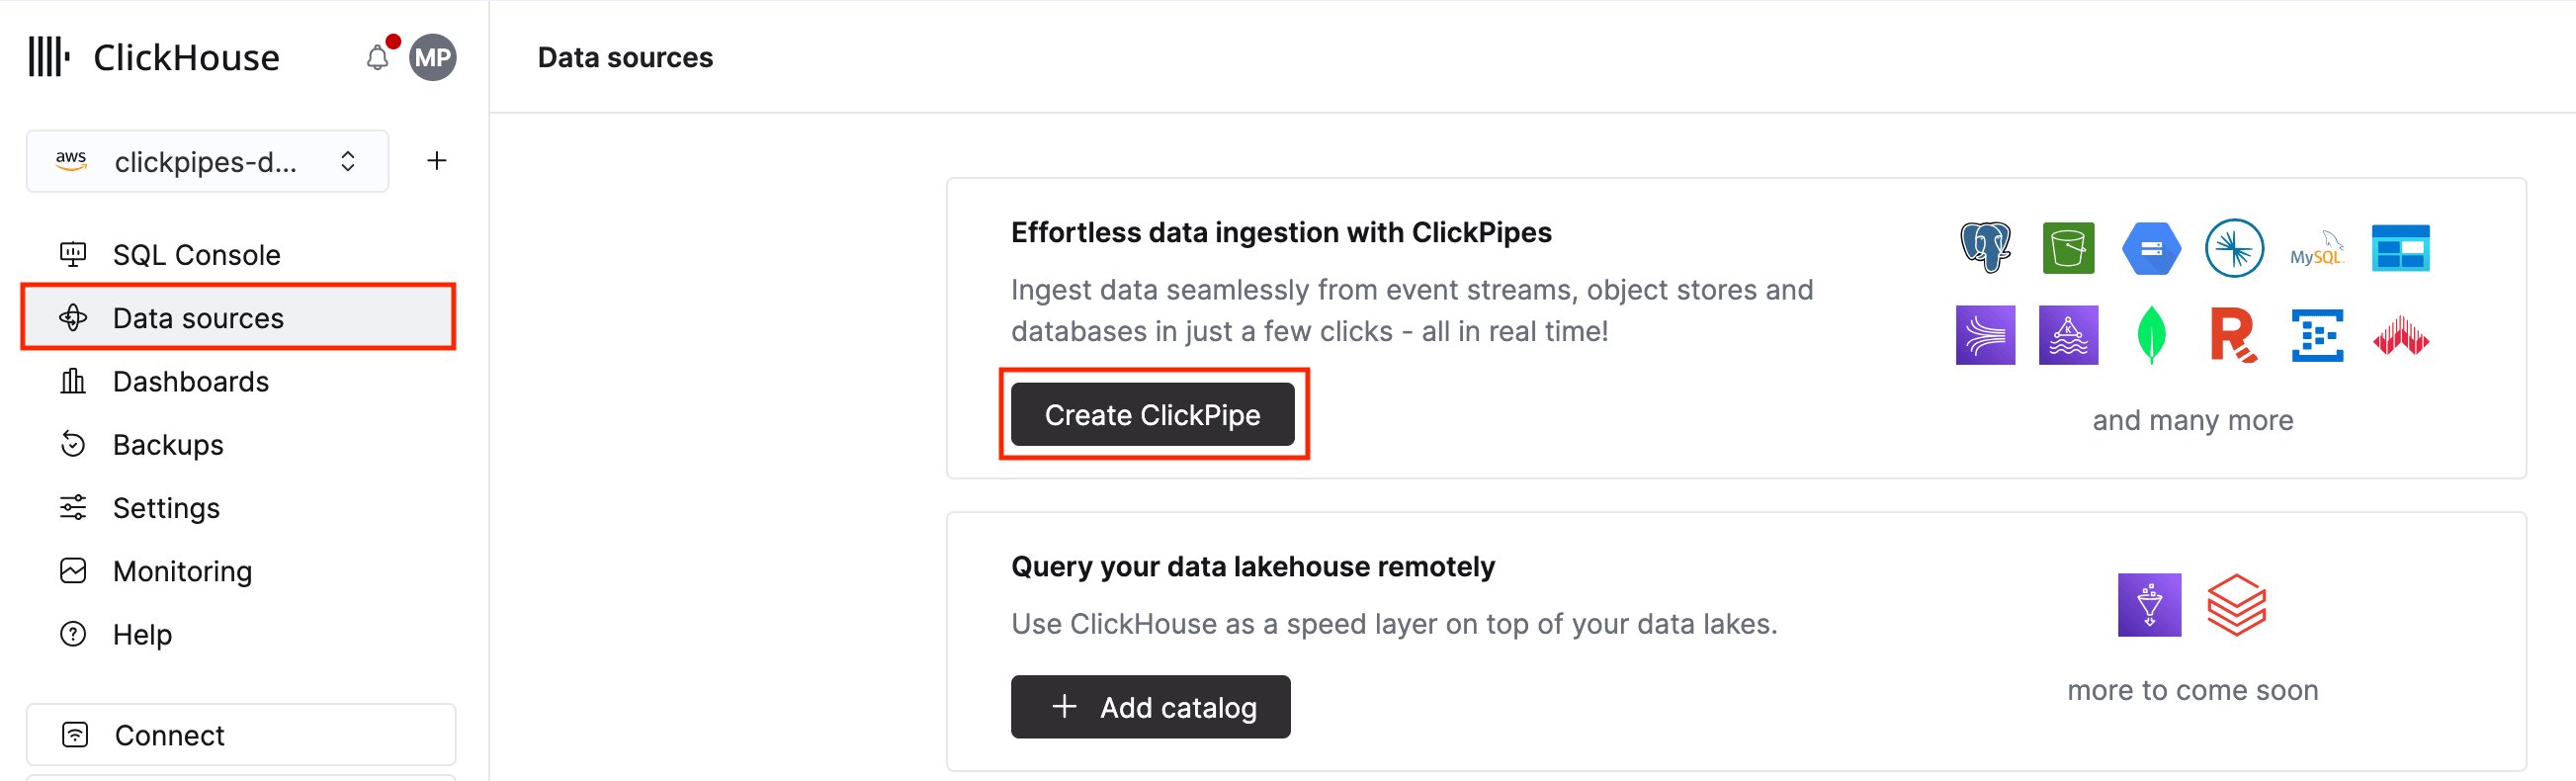
**1.** ClickHouse Cloud의 기본 탐색 메뉴에서 **Data sources**를 선택하고 **Create ClickPipe**를 클릭합니다.
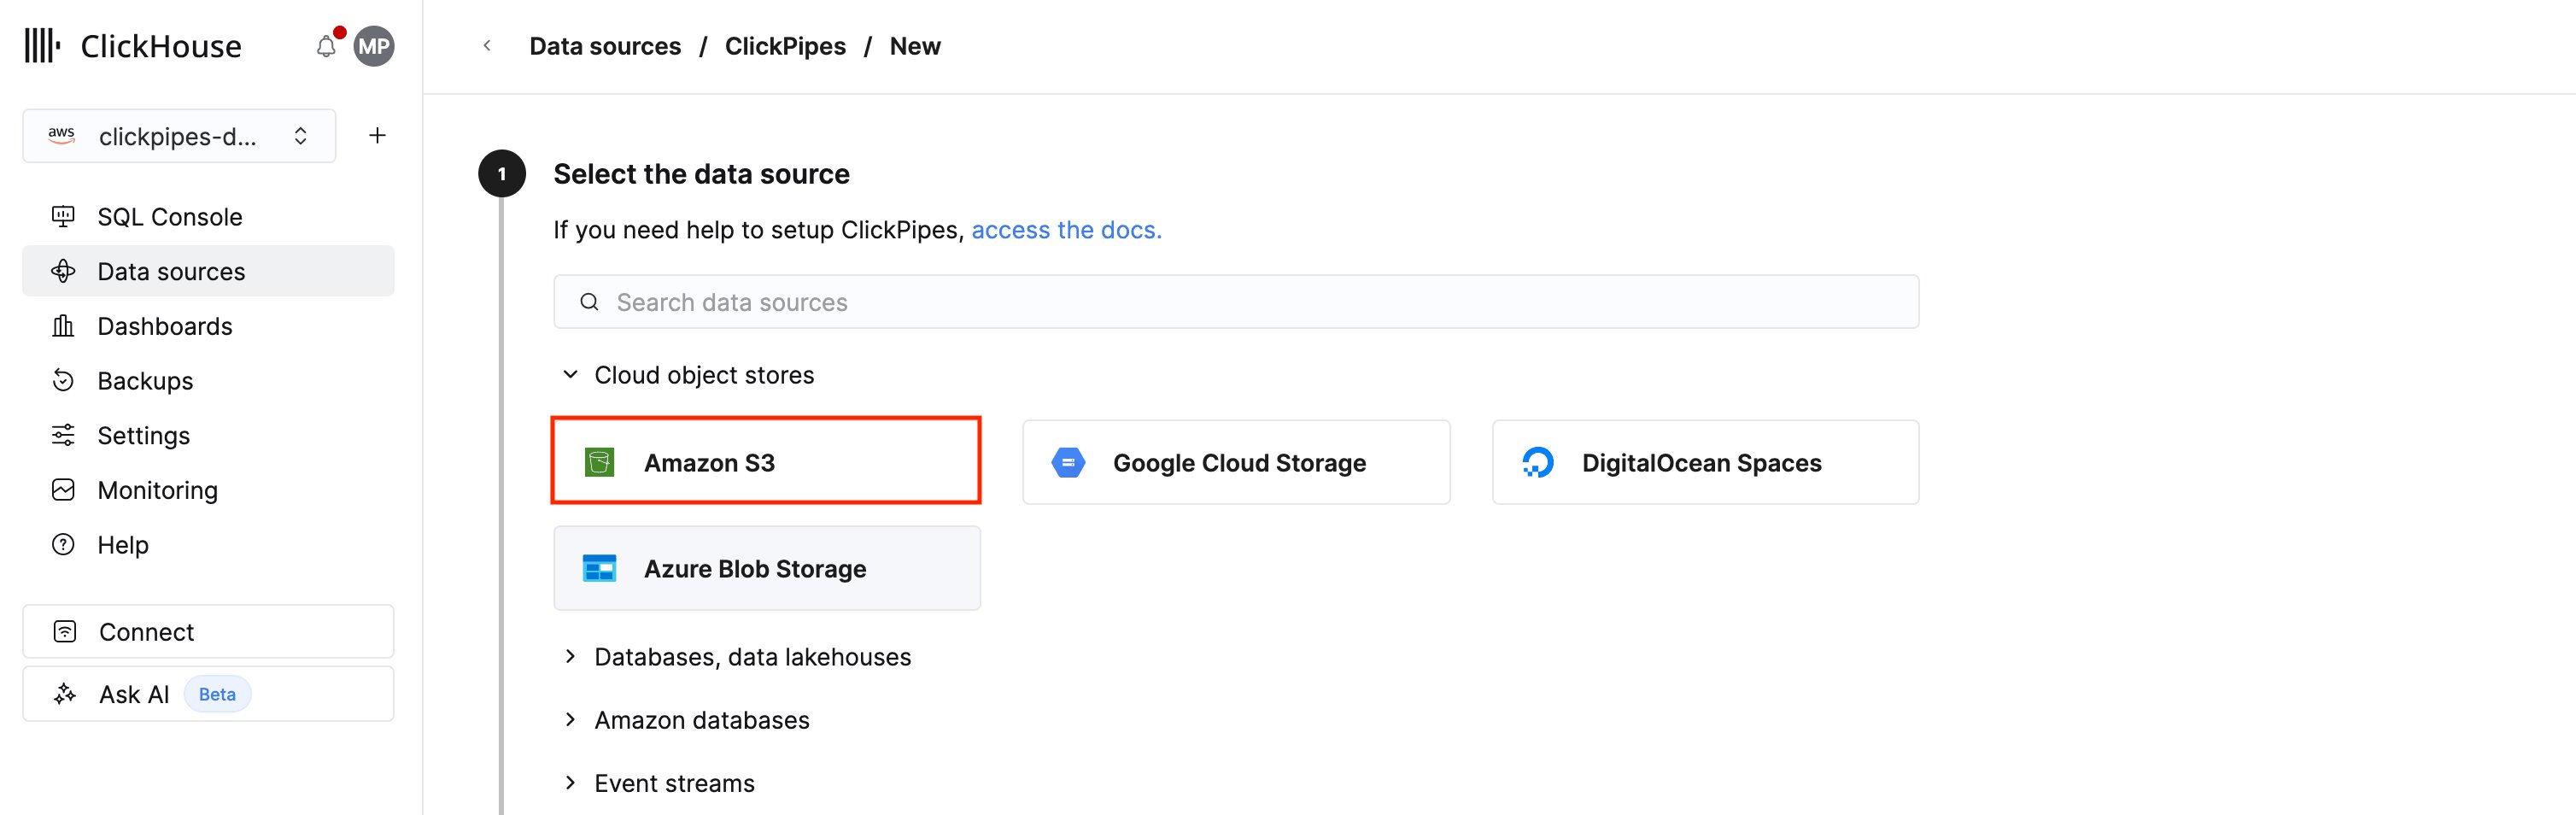
 **2.** **Amazon S3** 타일을 클릭하세요. 이 타일을 사용하면 ClickPipes UI에 표시되지 않은 다른 S3 호환 서비스에도 연결할 수 있습니다.
 객체 스토리지 서비스 제공업체마다 URL 포맷과 API 구현이 다르므로, 모든 S3 호환 서비스가 별도 설정 없이 즉시 지원되는 것은 아닙니다. [지원되는 data sources](/docs/ko/integrations/clickpipes/object-storage/amazon-s3/overview#supported-data-sources)에 없는 서비스를 사용 중 문제가 발생하면 [팀에 문의하세요](https://clickhouse.com/company/contact?loc=clickpipes).
**1.** 새 ClickPipe를 설정하려면 객체 스토리지 서비스에 연결하고 인증하는 데 필요한 세부 정보를 제공해야 합니다.
객체 스토리지 서비스 제공업체마다 URL 포맷과 API 구현이 다르므로, 모든 S3 호환 서비스가 별도 설정 없이 즉시 지원되는 것은 아닙니다. [지원되는 data sources](/docs/ko/integrations/clickpipes/object-storage/amazon-s3/overview#supported-data-sources)에 없는 서비스를 사용 중 문제가 발생하면 [팀에 문의하세요](https://clickhouse.com/company/contact?loc=clickpipes).
**1.** 새 ClickPipe를 설정하려면 객체 스토리지 서비스에 연결하고 인증하는 데 필요한 세부 정보를 제공해야 합니다.
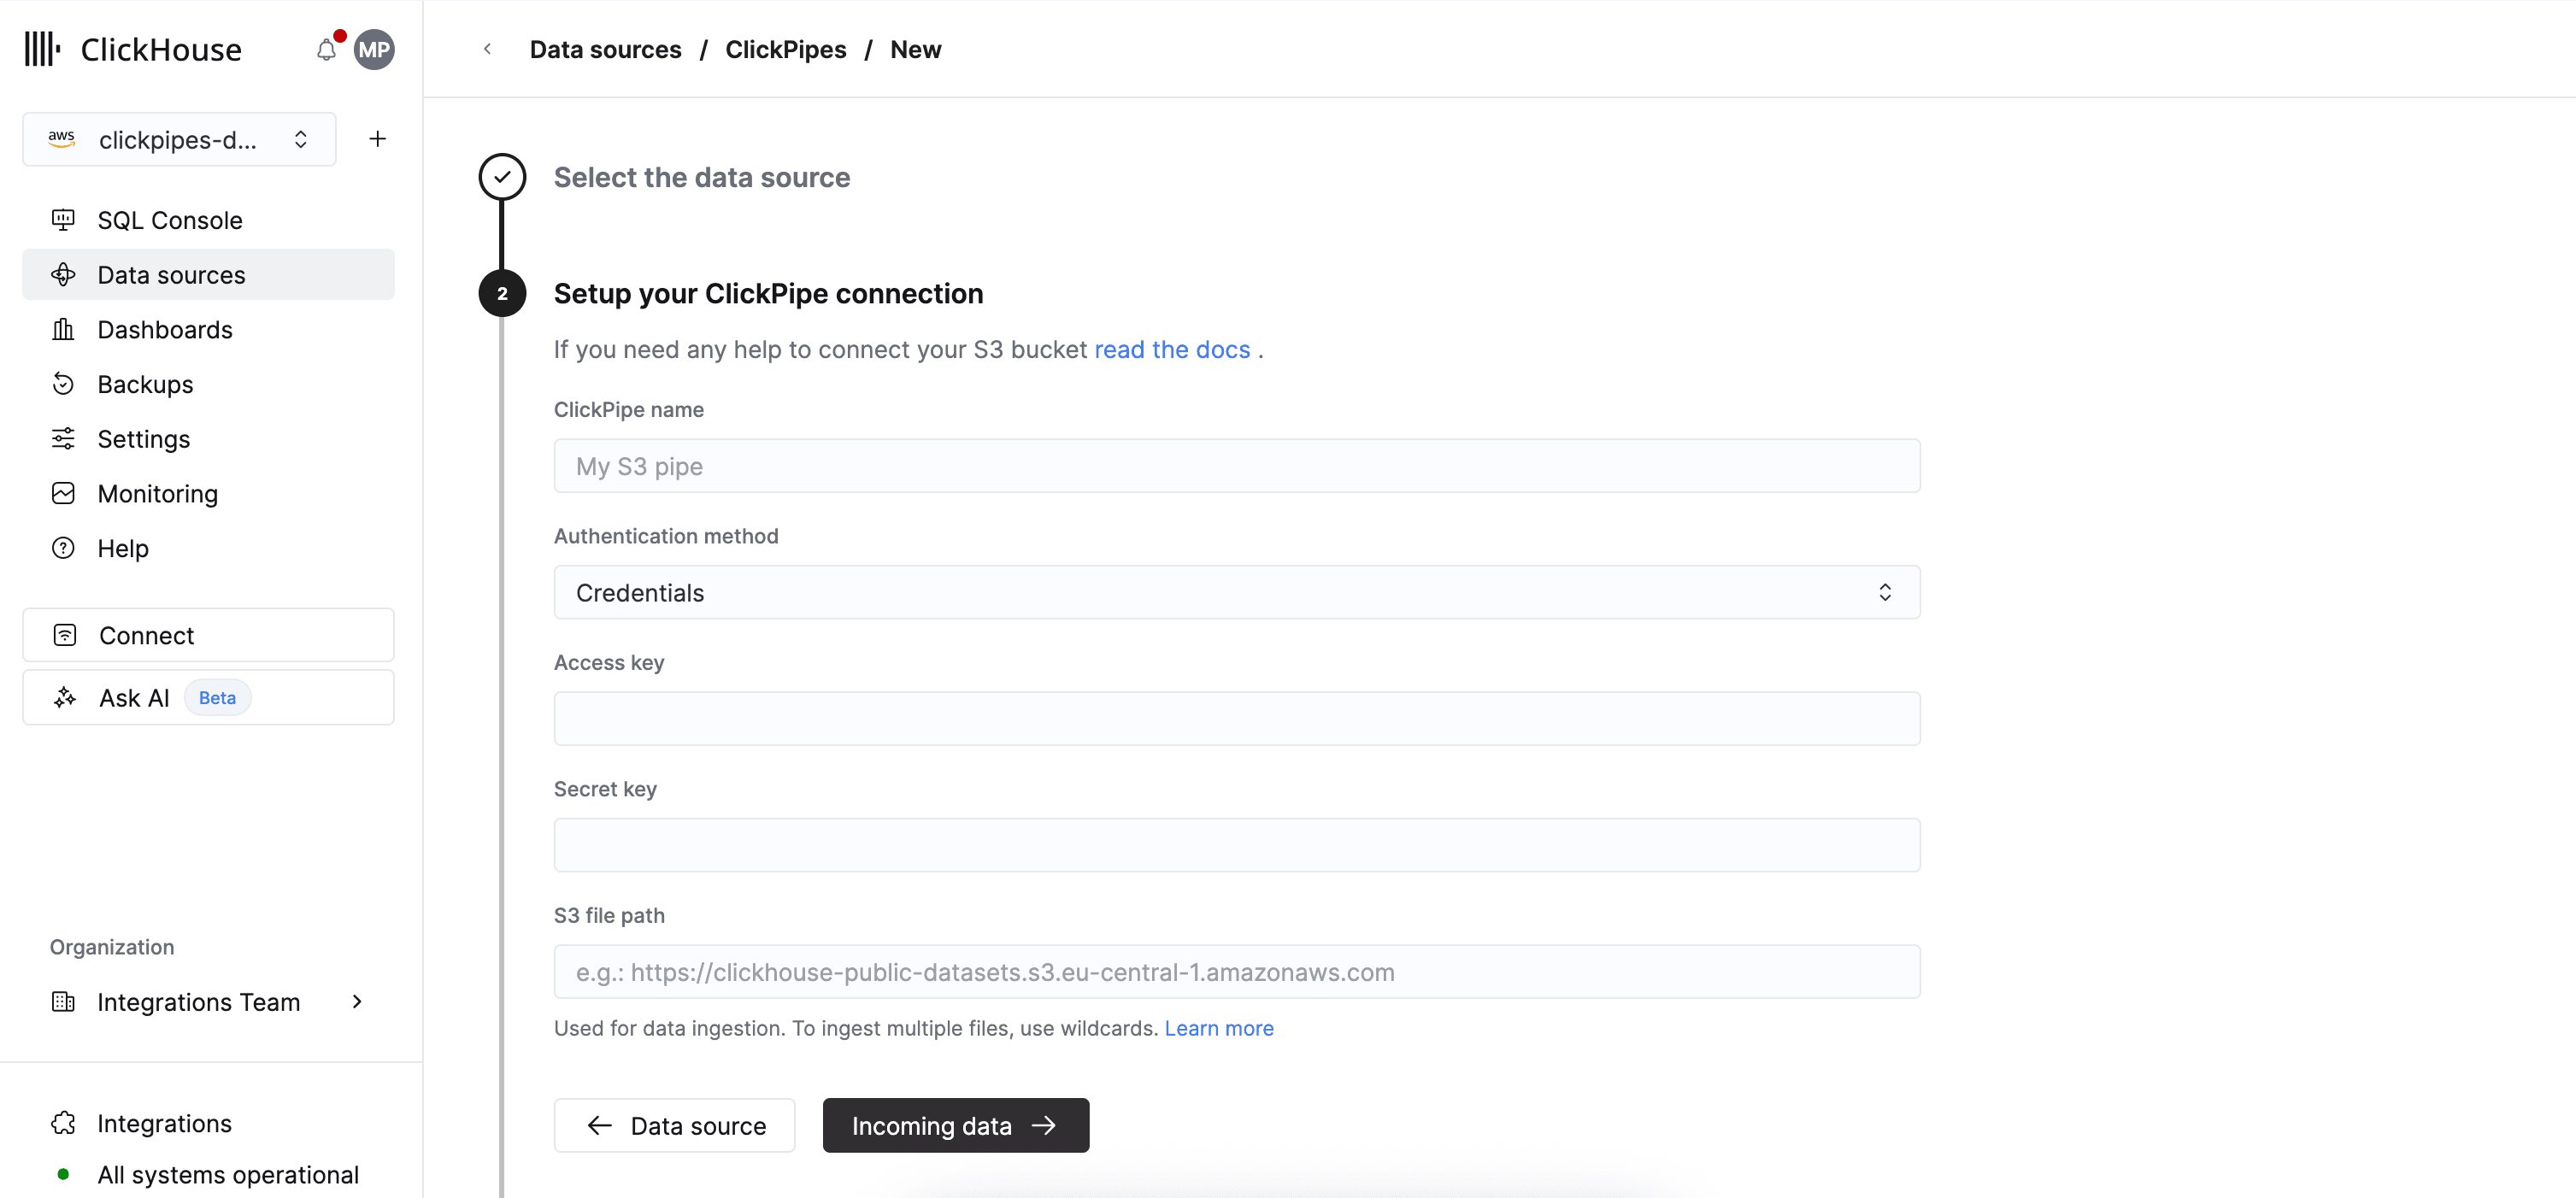 * **인증 방식**: S3 ClickPipe는 [IAM credentials](/docs/ko/integrations/clickpipes/object-storage/amazon-s3/overview#iam-credentials) (`Credentials`)와 [IAM role-based authentication](/docs/ko/integrations/clickpipes/object-storage/amazon-s3/overview#iam-role) (`IAM role`)을 지원합니다. 인증 및 권한에 대한 안내는 [참고 문서](/docs/ko/integrations/clickpipes/object-storage/amazon-s3/overview#access-control)를 참조하십시오.
* **S3 파일 경로**: S3 ClickPipe는 [virtual-hosted-style URI](https://docs.aws.amazon.com/AmazonS3/latest/userguide/VirtualHosting.html#virtual-hosted-style-access) 형식을 사용해야 합니다.
```bash theme={null}
https://bucket-name.s3.region-code.amazonaws.com/key-name
```
POSIX 와일드카드를 사용해 여러 파일 또는 프리픽스와 일치시킬 수 있습니다. 지원되는 패턴에 대한 안내는 [참고 문서](/docs/ko/integrations/clickpipes/object-storage/amazon-s3/overview#file-pattern-matching)를 참조하십시오.
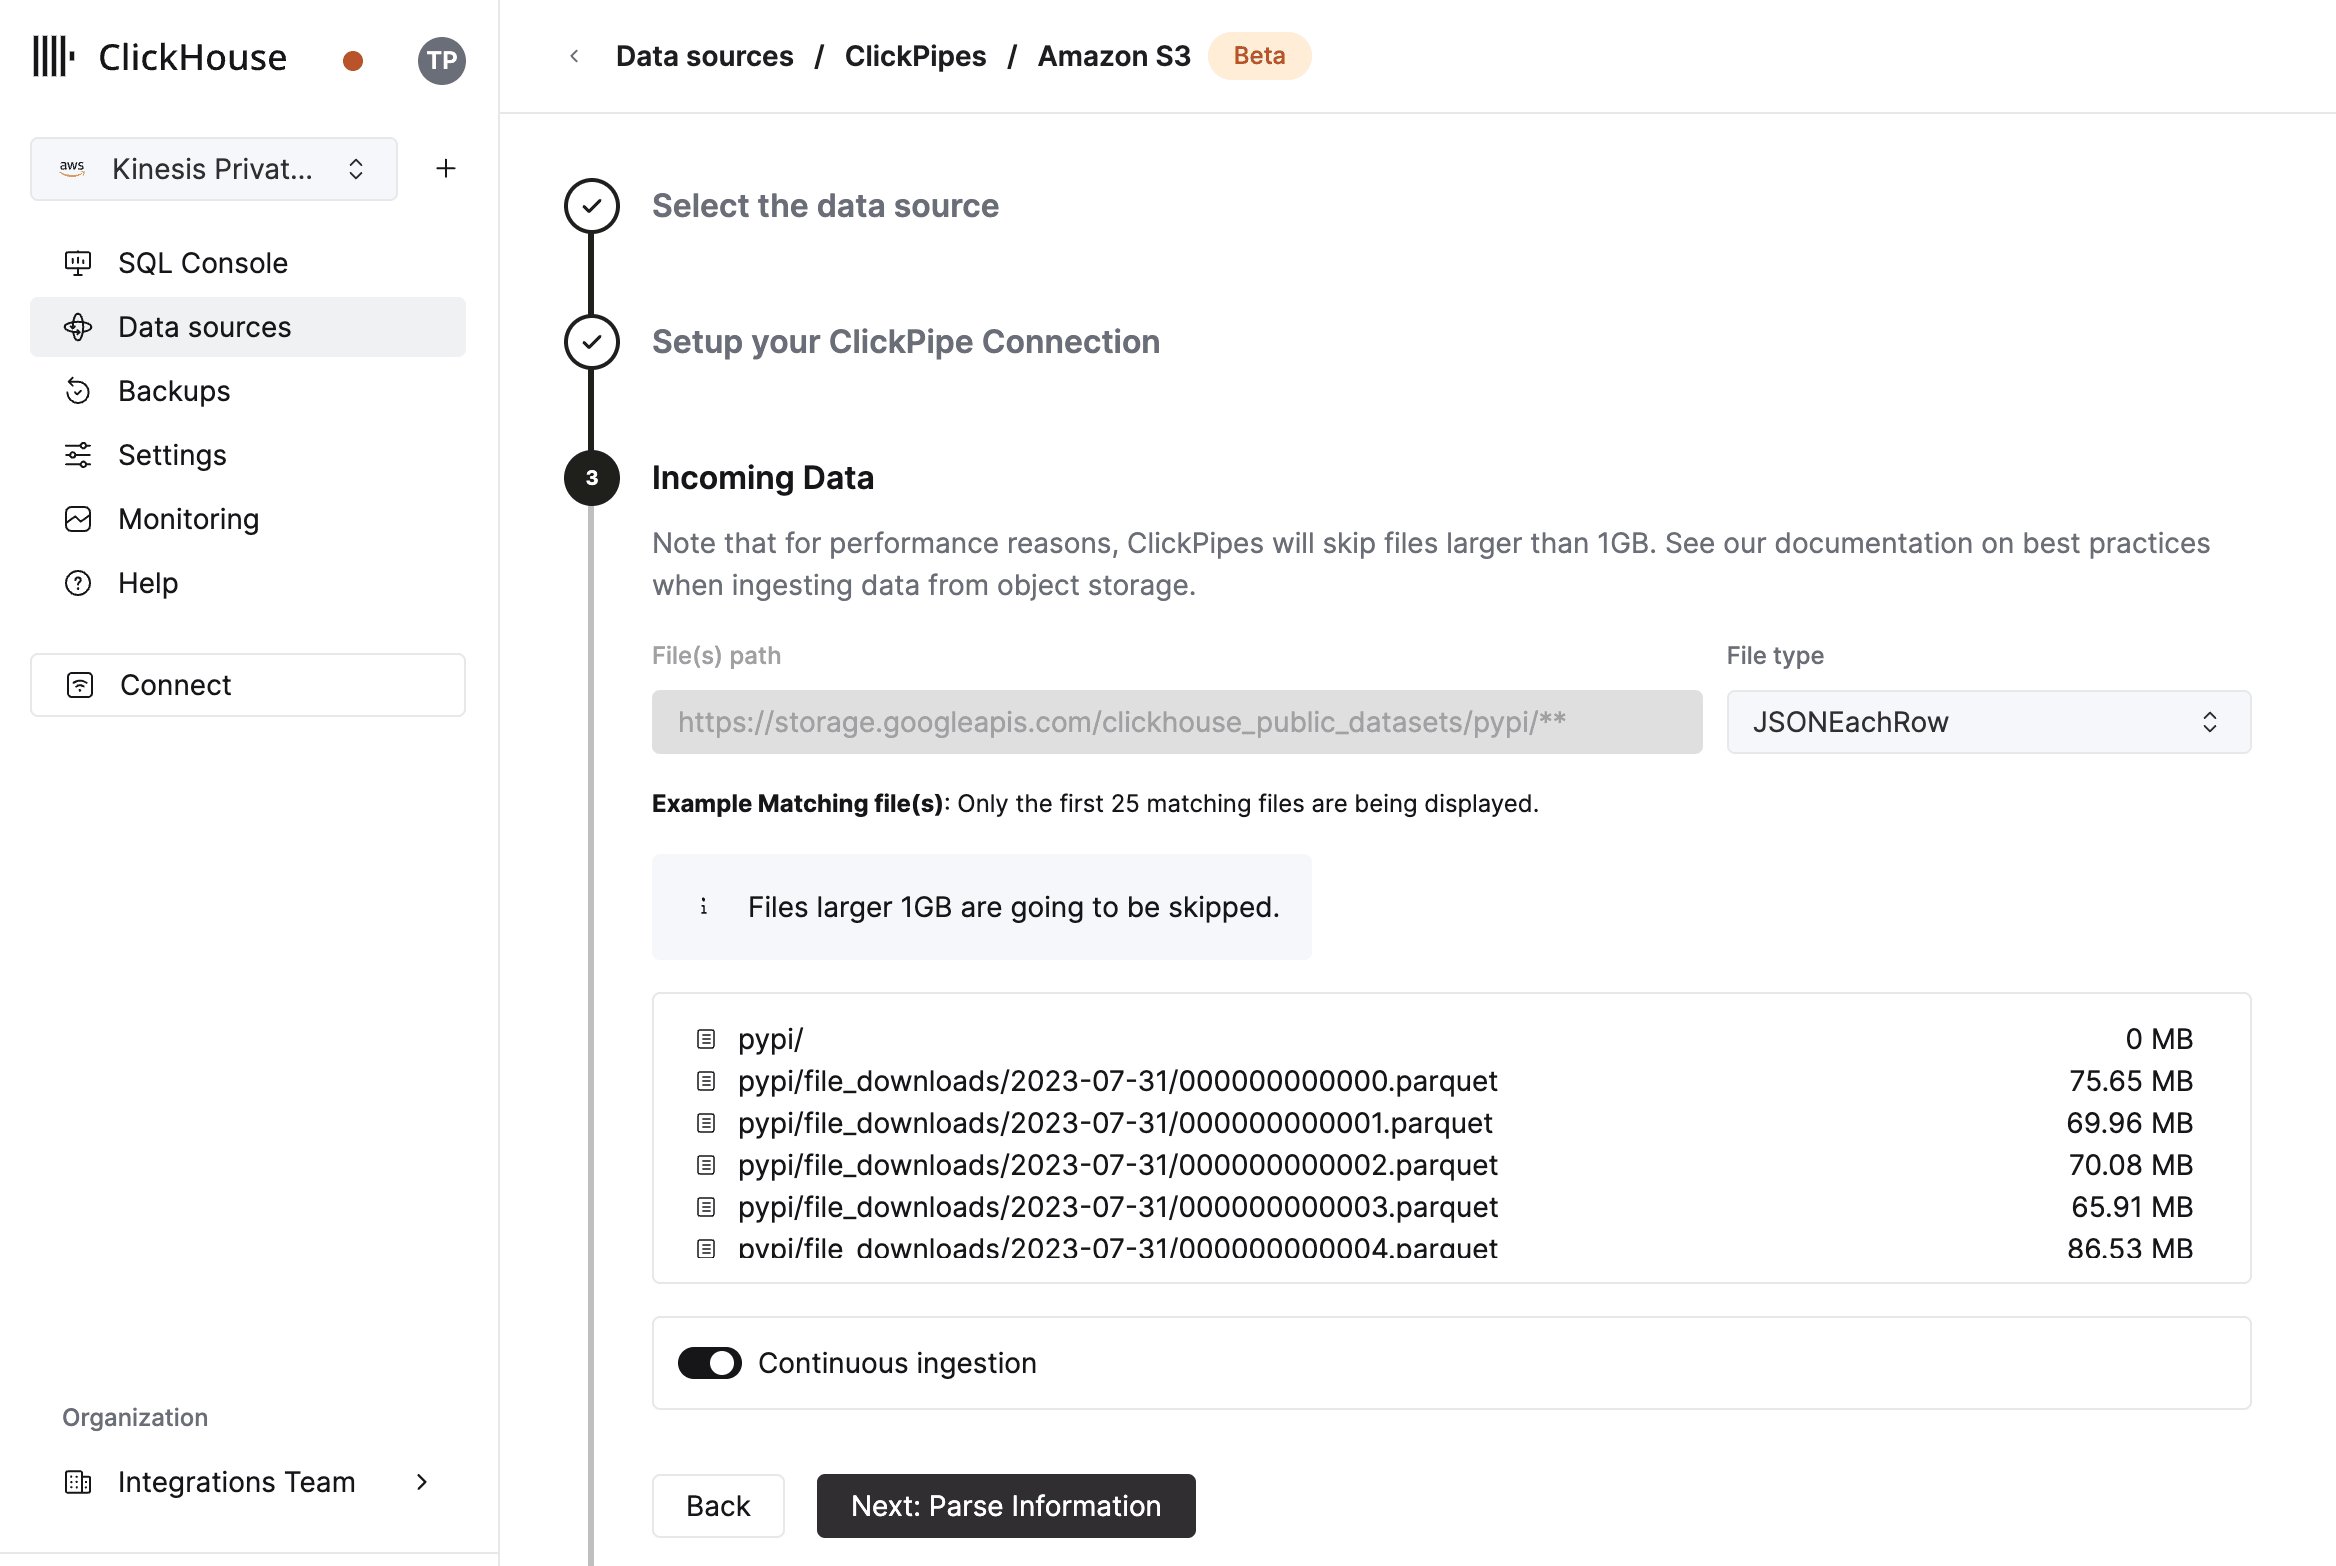
**2.** **Incoming data**를 클릭합니다. ClickPipes가 다음 단계에 사용할 메타데이터를 버킷에서 가져옵니다.
UI에 지정된 버킷의 파일 목록이 표시됩니다.
데이터 포맷(현재 ClickHouse 포맷의 일부만 지원)을 선택하고, 지속적인 수집을 활성화할지 선택합니다.
자세한 내용은 개요 페이지의 "continuous ingest" 섹션을 참조하십시오.
* **인증 방식**: S3 ClickPipe는 [IAM credentials](/docs/ko/integrations/clickpipes/object-storage/amazon-s3/overview#iam-credentials) (`Credentials`)와 [IAM role-based authentication](/docs/ko/integrations/clickpipes/object-storage/amazon-s3/overview#iam-role) (`IAM role`)을 지원합니다. 인증 및 권한에 대한 안내는 [참고 문서](/docs/ko/integrations/clickpipes/object-storage/amazon-s3/overview#access-control)를 참조하십시오.
* **S3 파일 경로**: S3 ClickPipe는 [virtual-hosted-style URI](https://docs.aws.amazon.com/AmazonS3/latest/userguide/VirtualHosting.html#virtual-hosted-style-access) 형식을 사용해야 합니다.
```bash theme={null}
https://bucket-name.s3.region-code.amazonaws.com/key-name
```
POSIX 와일드카드를 사용해 여러 파일 또는 프리픽스와 일치시킬 수 있습니다. 지원되는 패턴에 대한 안내는 [참고 문서](/docs/ko/integrations/clickpipes/object-storage/amazon-s3/overview#file-pattern-matching)를 참조하십시오.
**2.** **Incoming data**를 클릭합니다. ClickPipes가 다음 단계에 사용할 메타데이터를 버킷에서 가져옵니다.
UI에 지정된 버킷의 파일 목록이 표시됩니다.
데이터 포맷(현재 ClickHouse 포맷의 일부만 지원)을 선택하고, 지속적인 수집을 활성화할지 선택합니다.
자세한 내용은 개요 페이지의 "continuous ingest" 섹션을 참조하십시오.
 다음 단계에서는 데이터를 새 ClickHouse 테이블에 수집할지, 기존 테이블을 재사용할지 선택할 수 있습니다.
화면의 안내에 따라 테이블 이름, 스키마, 설정을 수정하십시오.
상단의 샘플 테이블에서 변경 사항의 실시간 미리보기를 확인할 수 있습니다.
다음 단계에서는 데이터를 새 ClickHouse 테이블에 수집할지, 기존 테이블을 재사용할지 선택할 수 있습니다.
화면의 안내에 따라 테이블 이름, 스키마, 설정을 수정하십시오.
상단의 샘플 테이블에서 변경 사항의 실시간 미리보기를 확인할 수 있습니다.
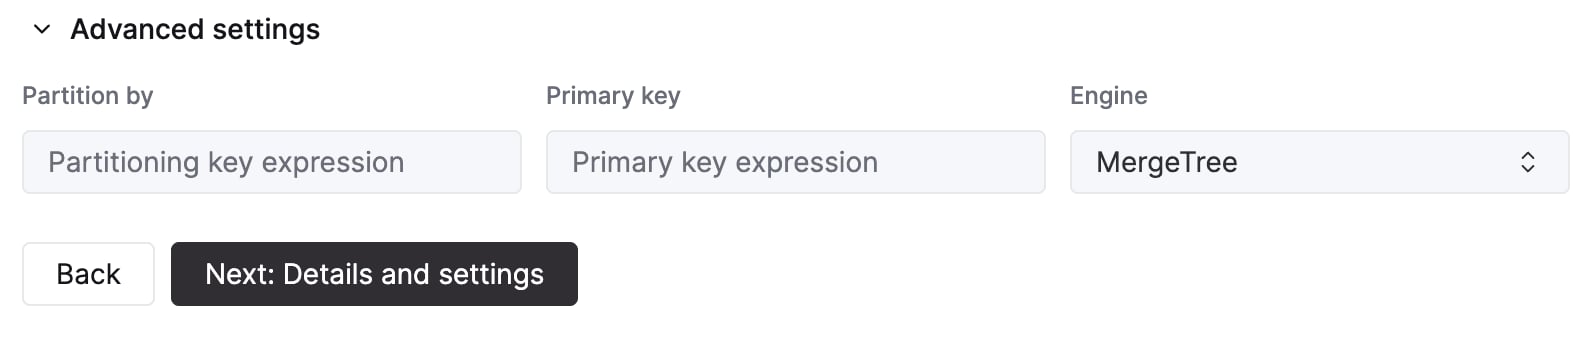
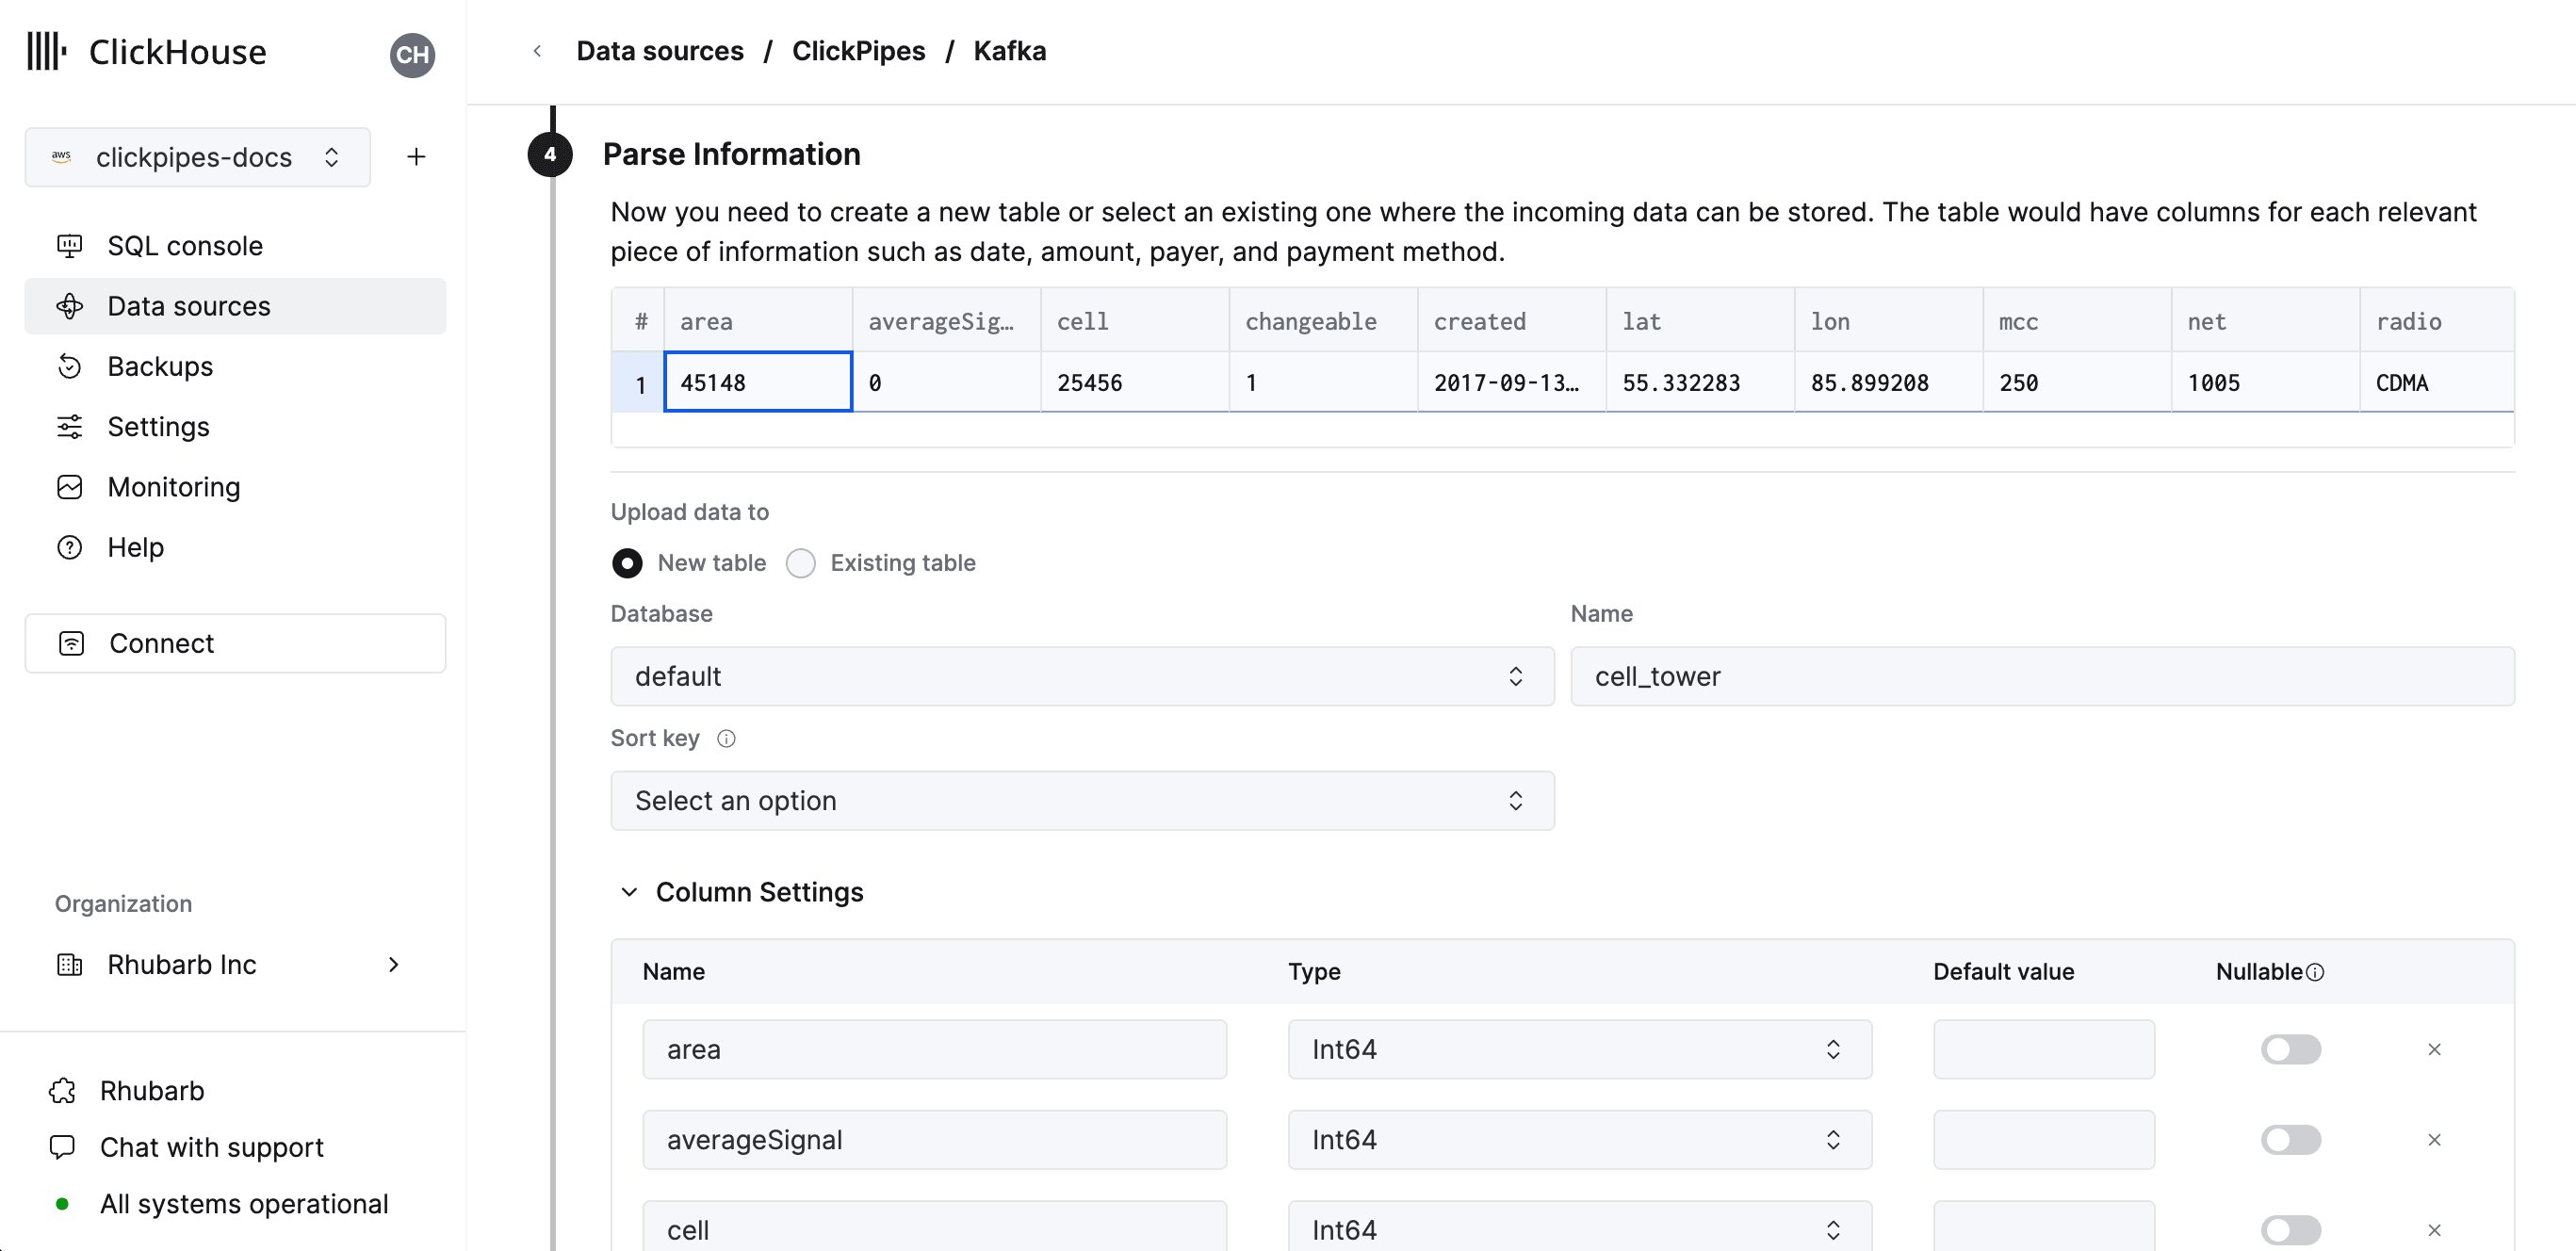 제공된 컨트롤을 사용해 고급 설정도 사용자 지정할 수 있습니다.
 또는 데이터를 기존 ClickHouse 테이블에 수집하도록 선택할 수도 있습니다.
이 경우 UI에서 소스 필드를 선택한 대상 테이블의 ClickHouse 필드에 매핑할 수 있습니다.
또는 데이터를 기존 ClickHouse 테이블에 수집하도록 선택할 수도 있습니다.
이 경우 UI에서 소스 필드를 선택한 대상 테이블의 ClickHouse 필드에 매핑할 수 있습니다.
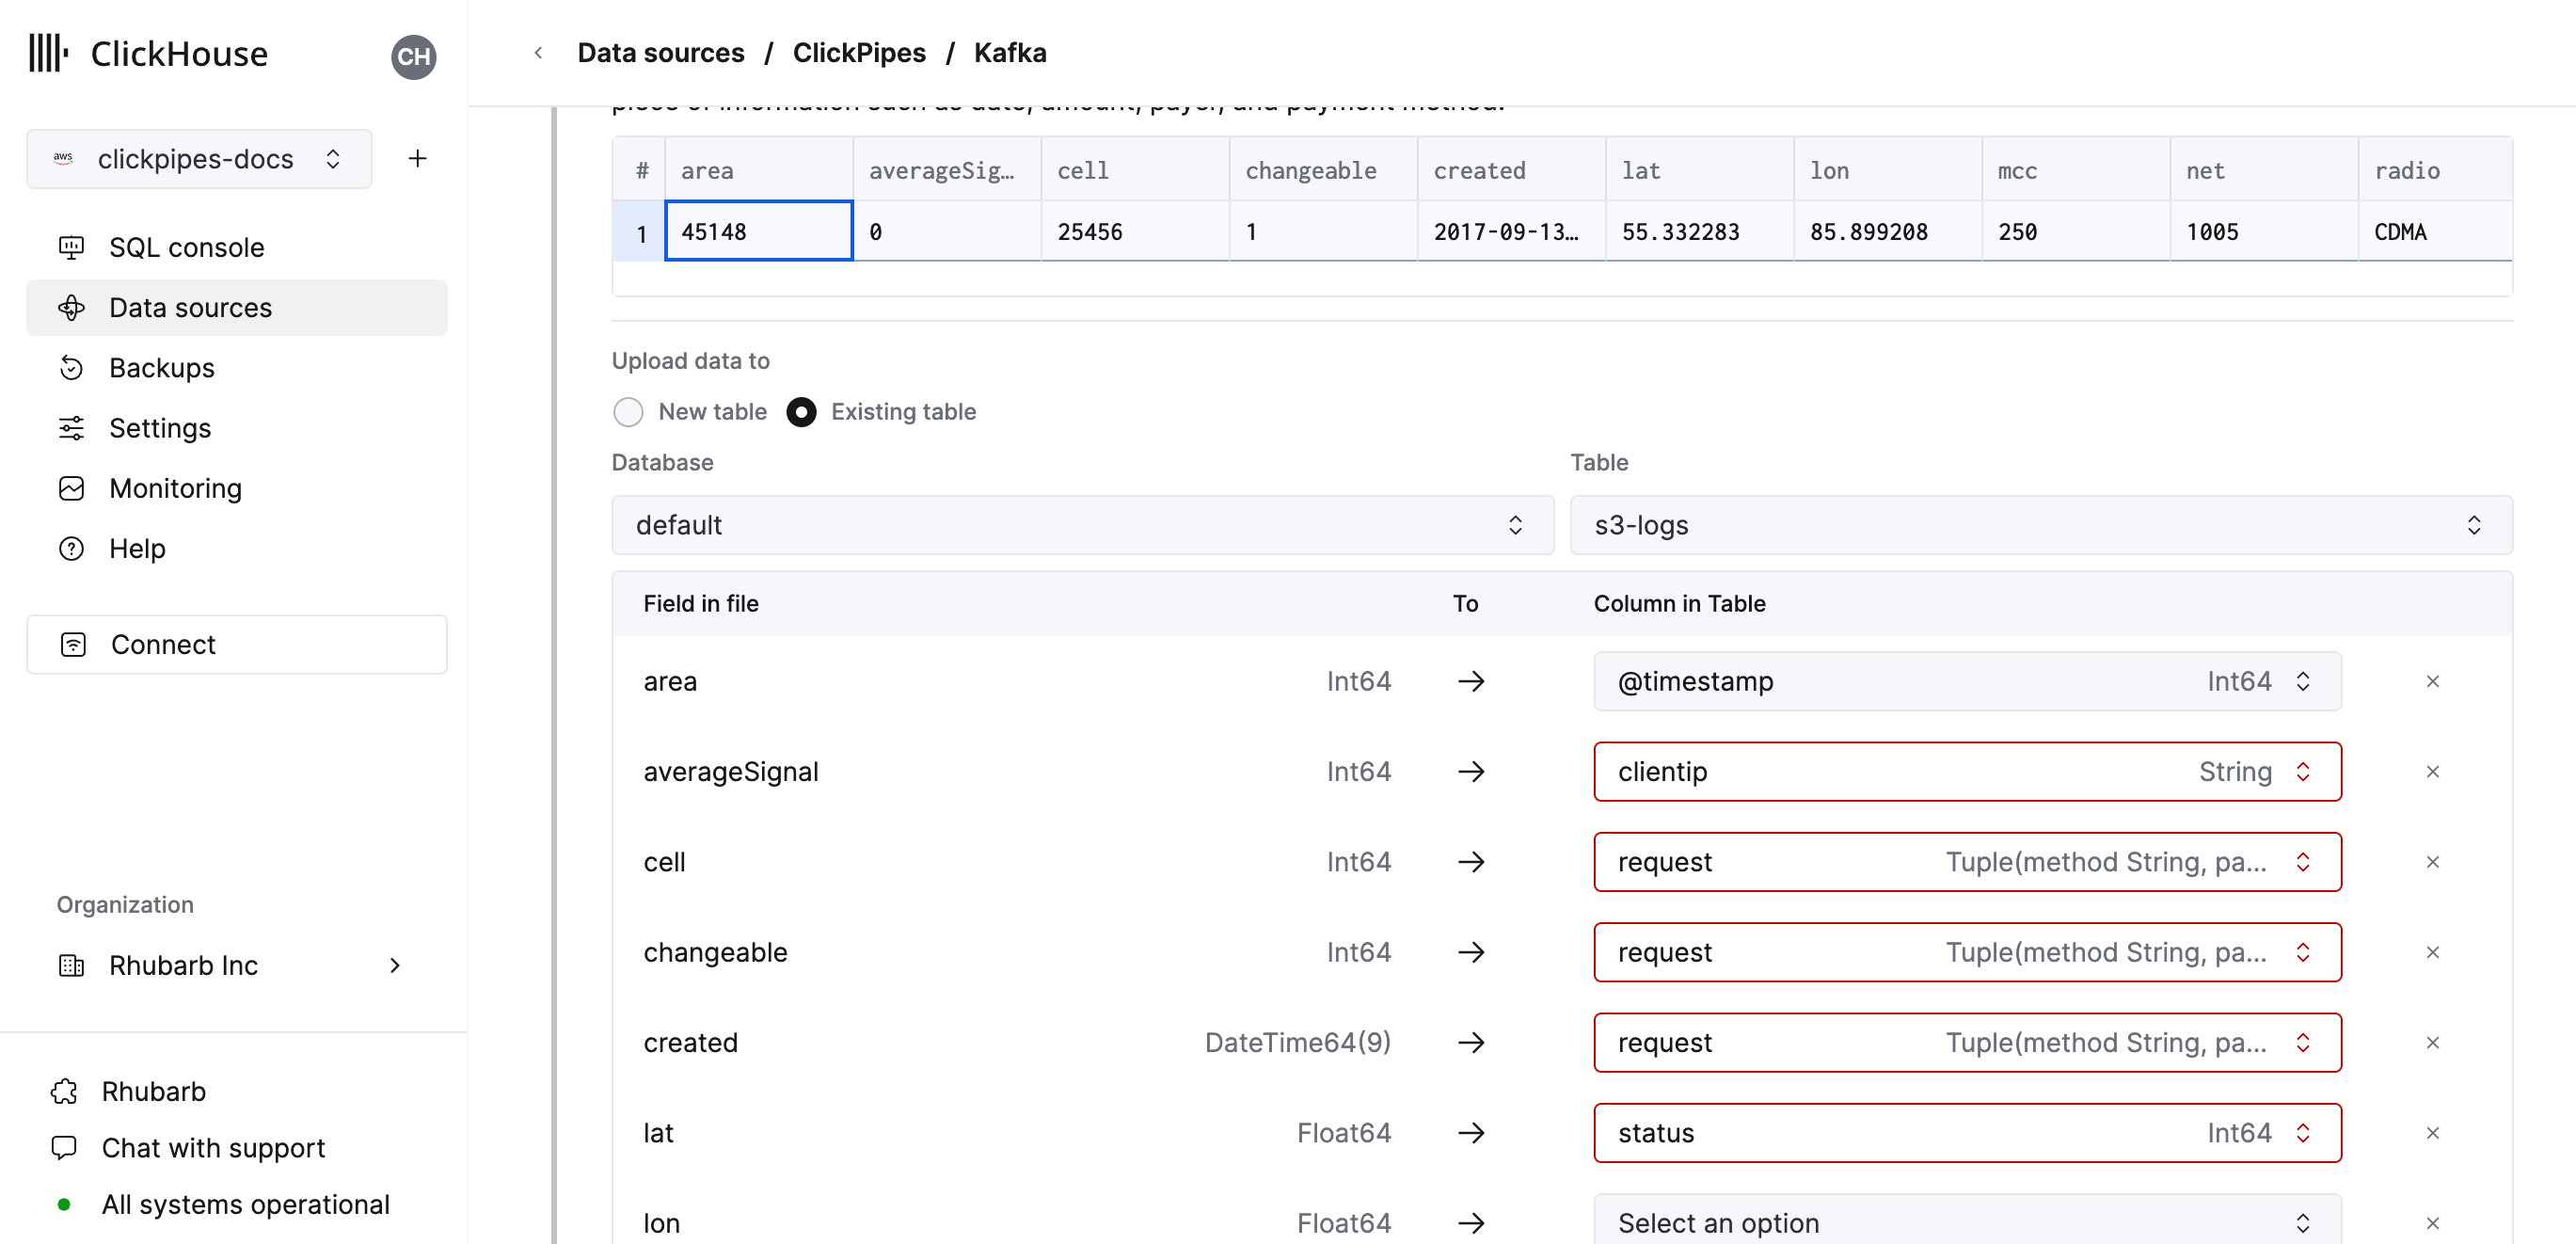 `_path` 또는 `_size`와 같은 [virtual columns](/docs/ko/reference/functions/table-functions/s3#virtual-columns)도 필드에 매핑할 수 있습니다.
마지막으로 내부 ClickPipes 사용자에 대한 권한을 구성할 수 있습니다.
**권한:** ClickPipes는 대상 테이블에 데이터를 쓰기 위한 전용 사용자를 생성합니다. 사용자 지정 Role 또는 미리 정의된 Role 중 하나를 선택해 이 내부 사용자의 Role을 지정할 수 있습니다.
* `Full access`: 클러스터 전체에 대한 액세스 권한입니다. 대상 테이블과 함께 materialized view 또는 딕셔너리(Dictionary)를 사용하는 경우 필요합니다.
* `Only destination table`: 대상 테이블에만 `INSERT` 권한을 부여합니다.
`_path` 또는 `_size`와 같은 [virtual columns](/docs/ko/reference/functions/table-functions/s3#virtual-columns)도 필드에 매핑할 수 있습니다.
마지막으로 내부 ClickPipes 사용자에 대한 권한을 구성할 수 있습니다.
**권한:** ClickPipes는 대상 테이블에 데이터를 쓰기 위한 전용 사용자를 생성합니다. 사용자 지정 Role 또는 미리 정의된 Role 중 하나를 선택해 이 내부 사용자의 Role을 지정할 수 있습니다.
* `Full access`: 클러스터 전체에 대한 액세스 권한입니다. 대상 테이블과 함께 materialized view 또는 딕셔너리(Dictionary)를 사용하는 경우 필요합니다.
* `Only destination table`: 대상 테이블에만 `INSERT` 권한을 부여합니다.
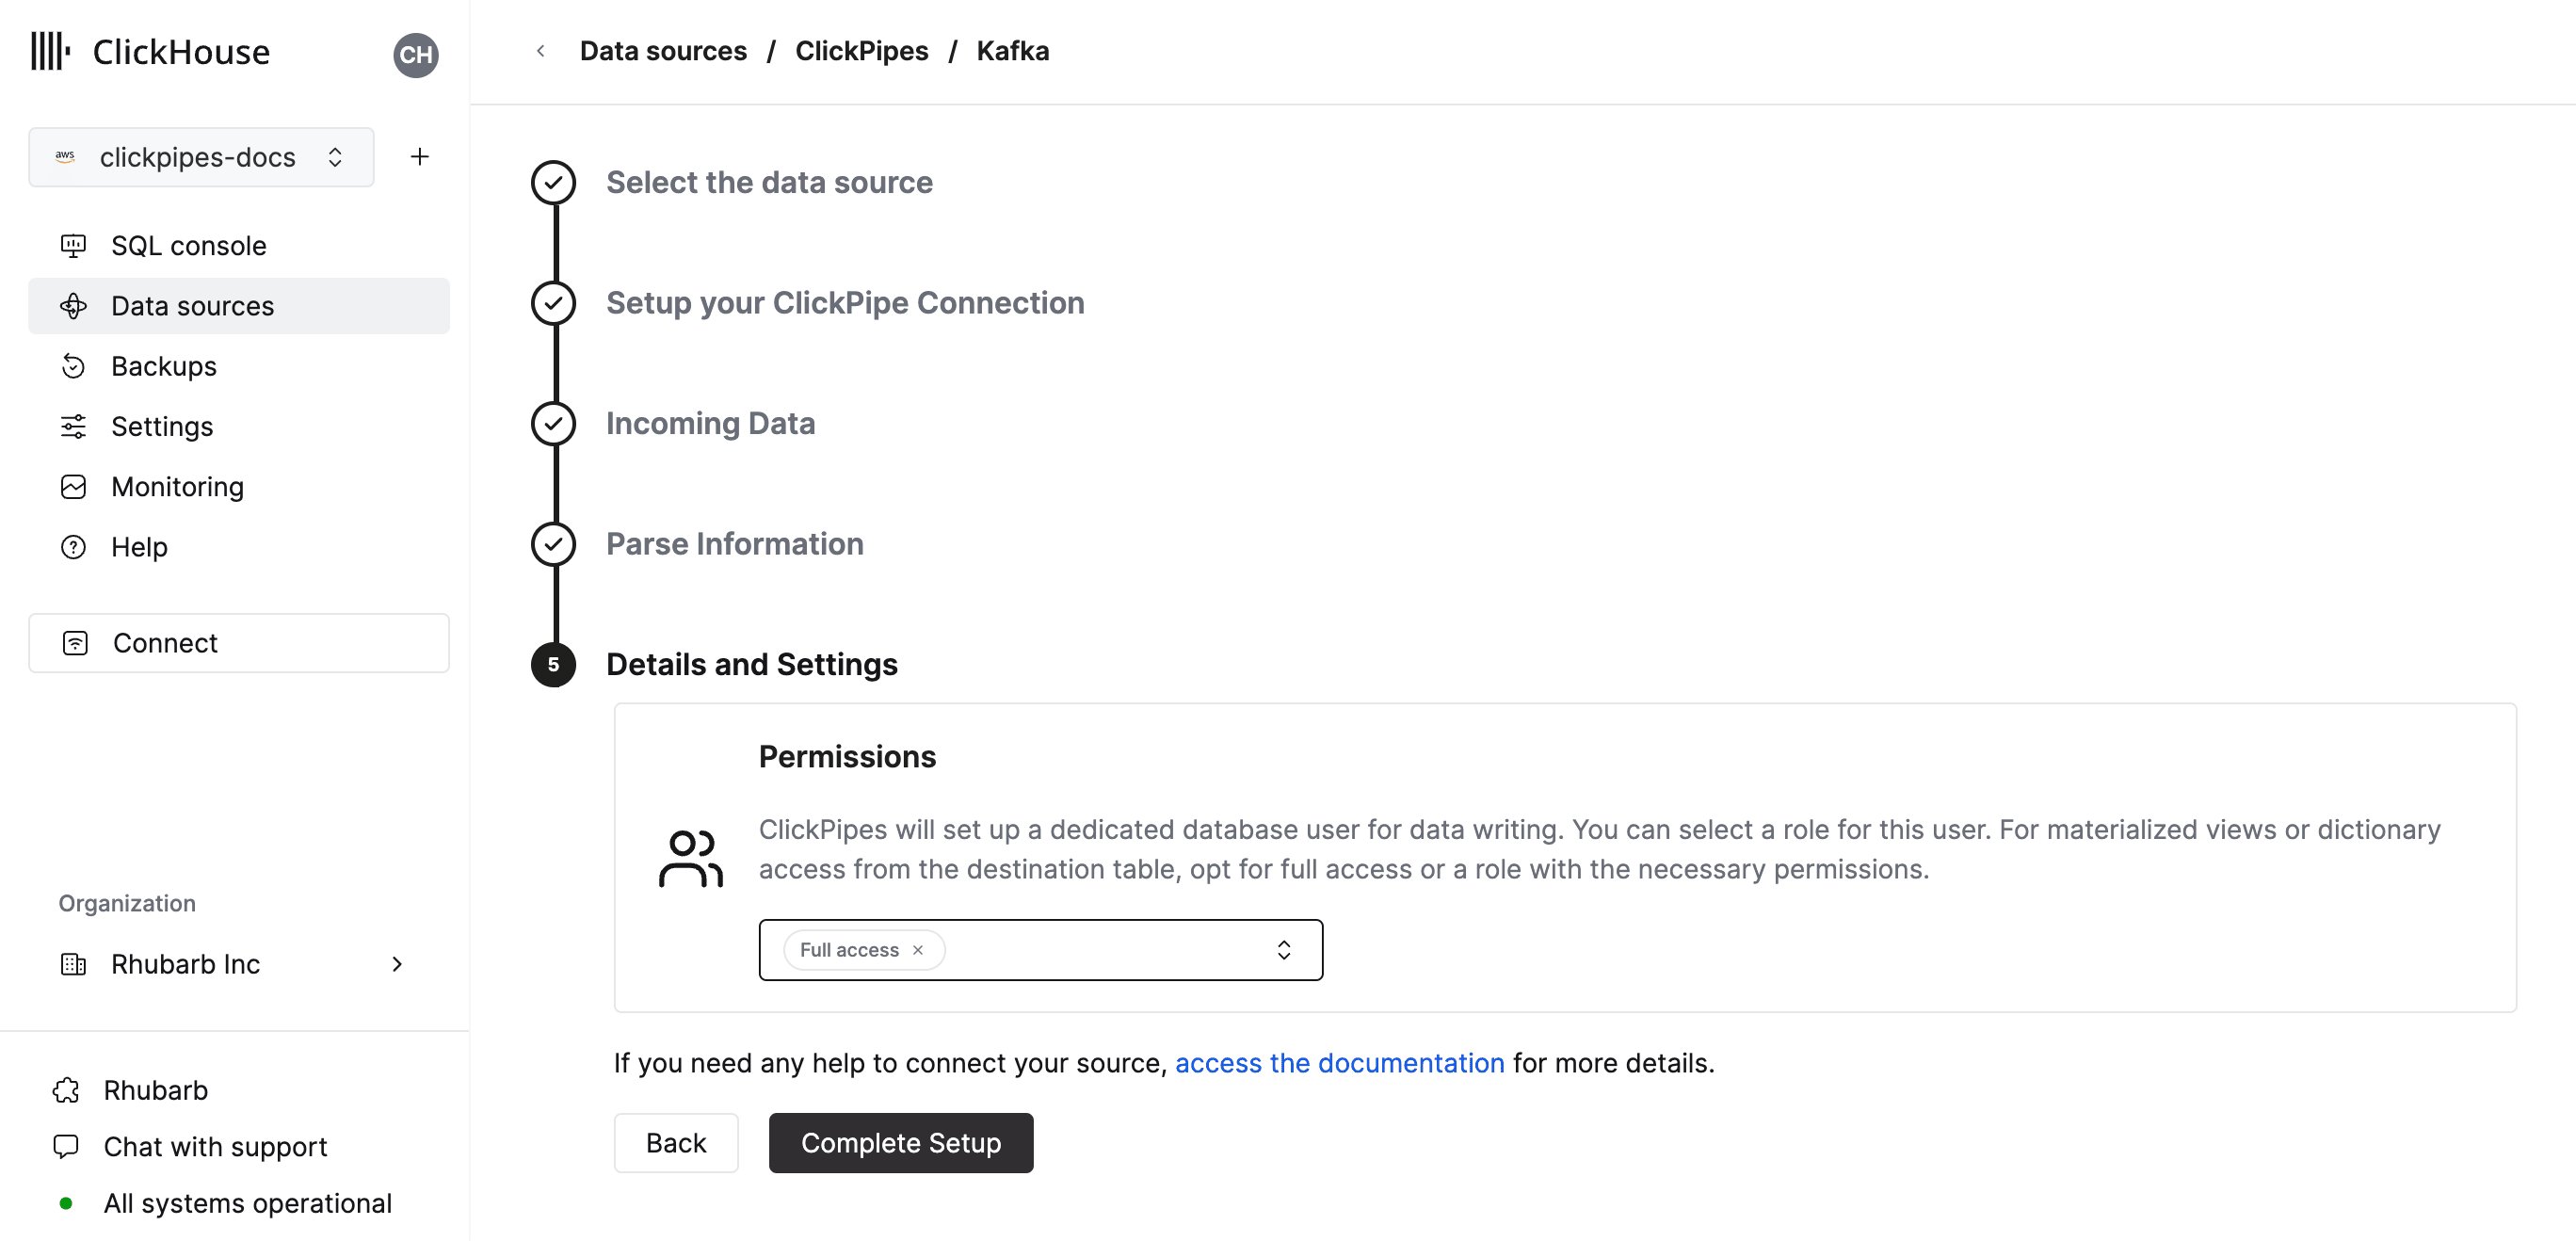 "Complete Setup"을 클릭하면 시스템이 ClickPipe를 등록하고, 요약 테이블에 표시된 항목을 확인할 수 있습니다.
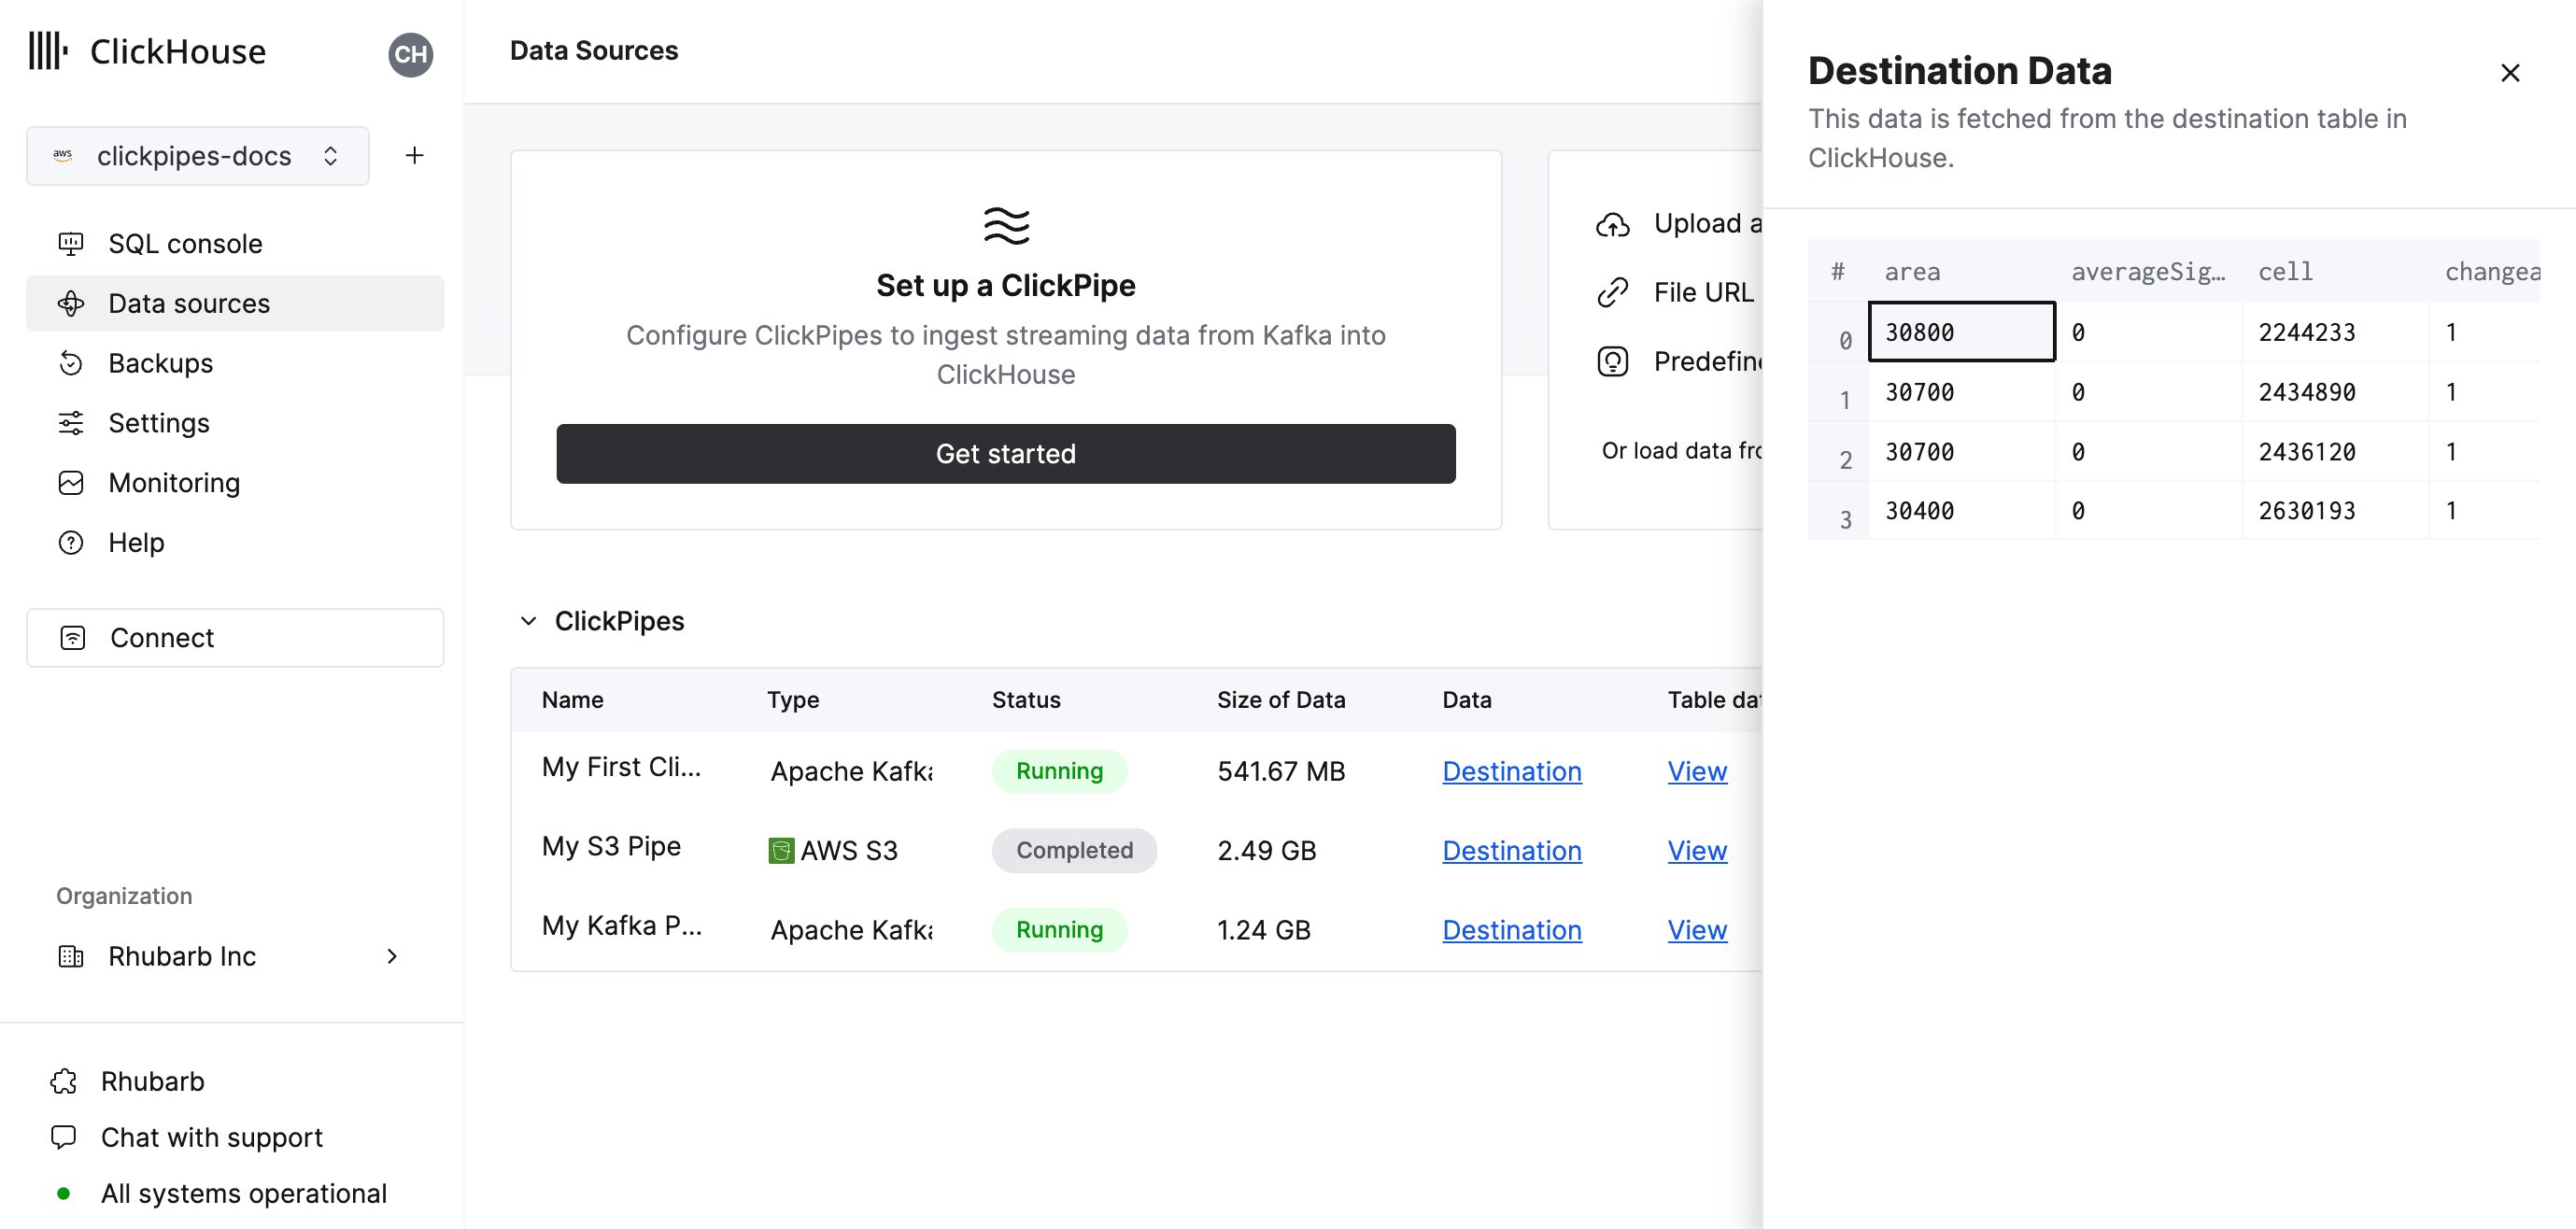
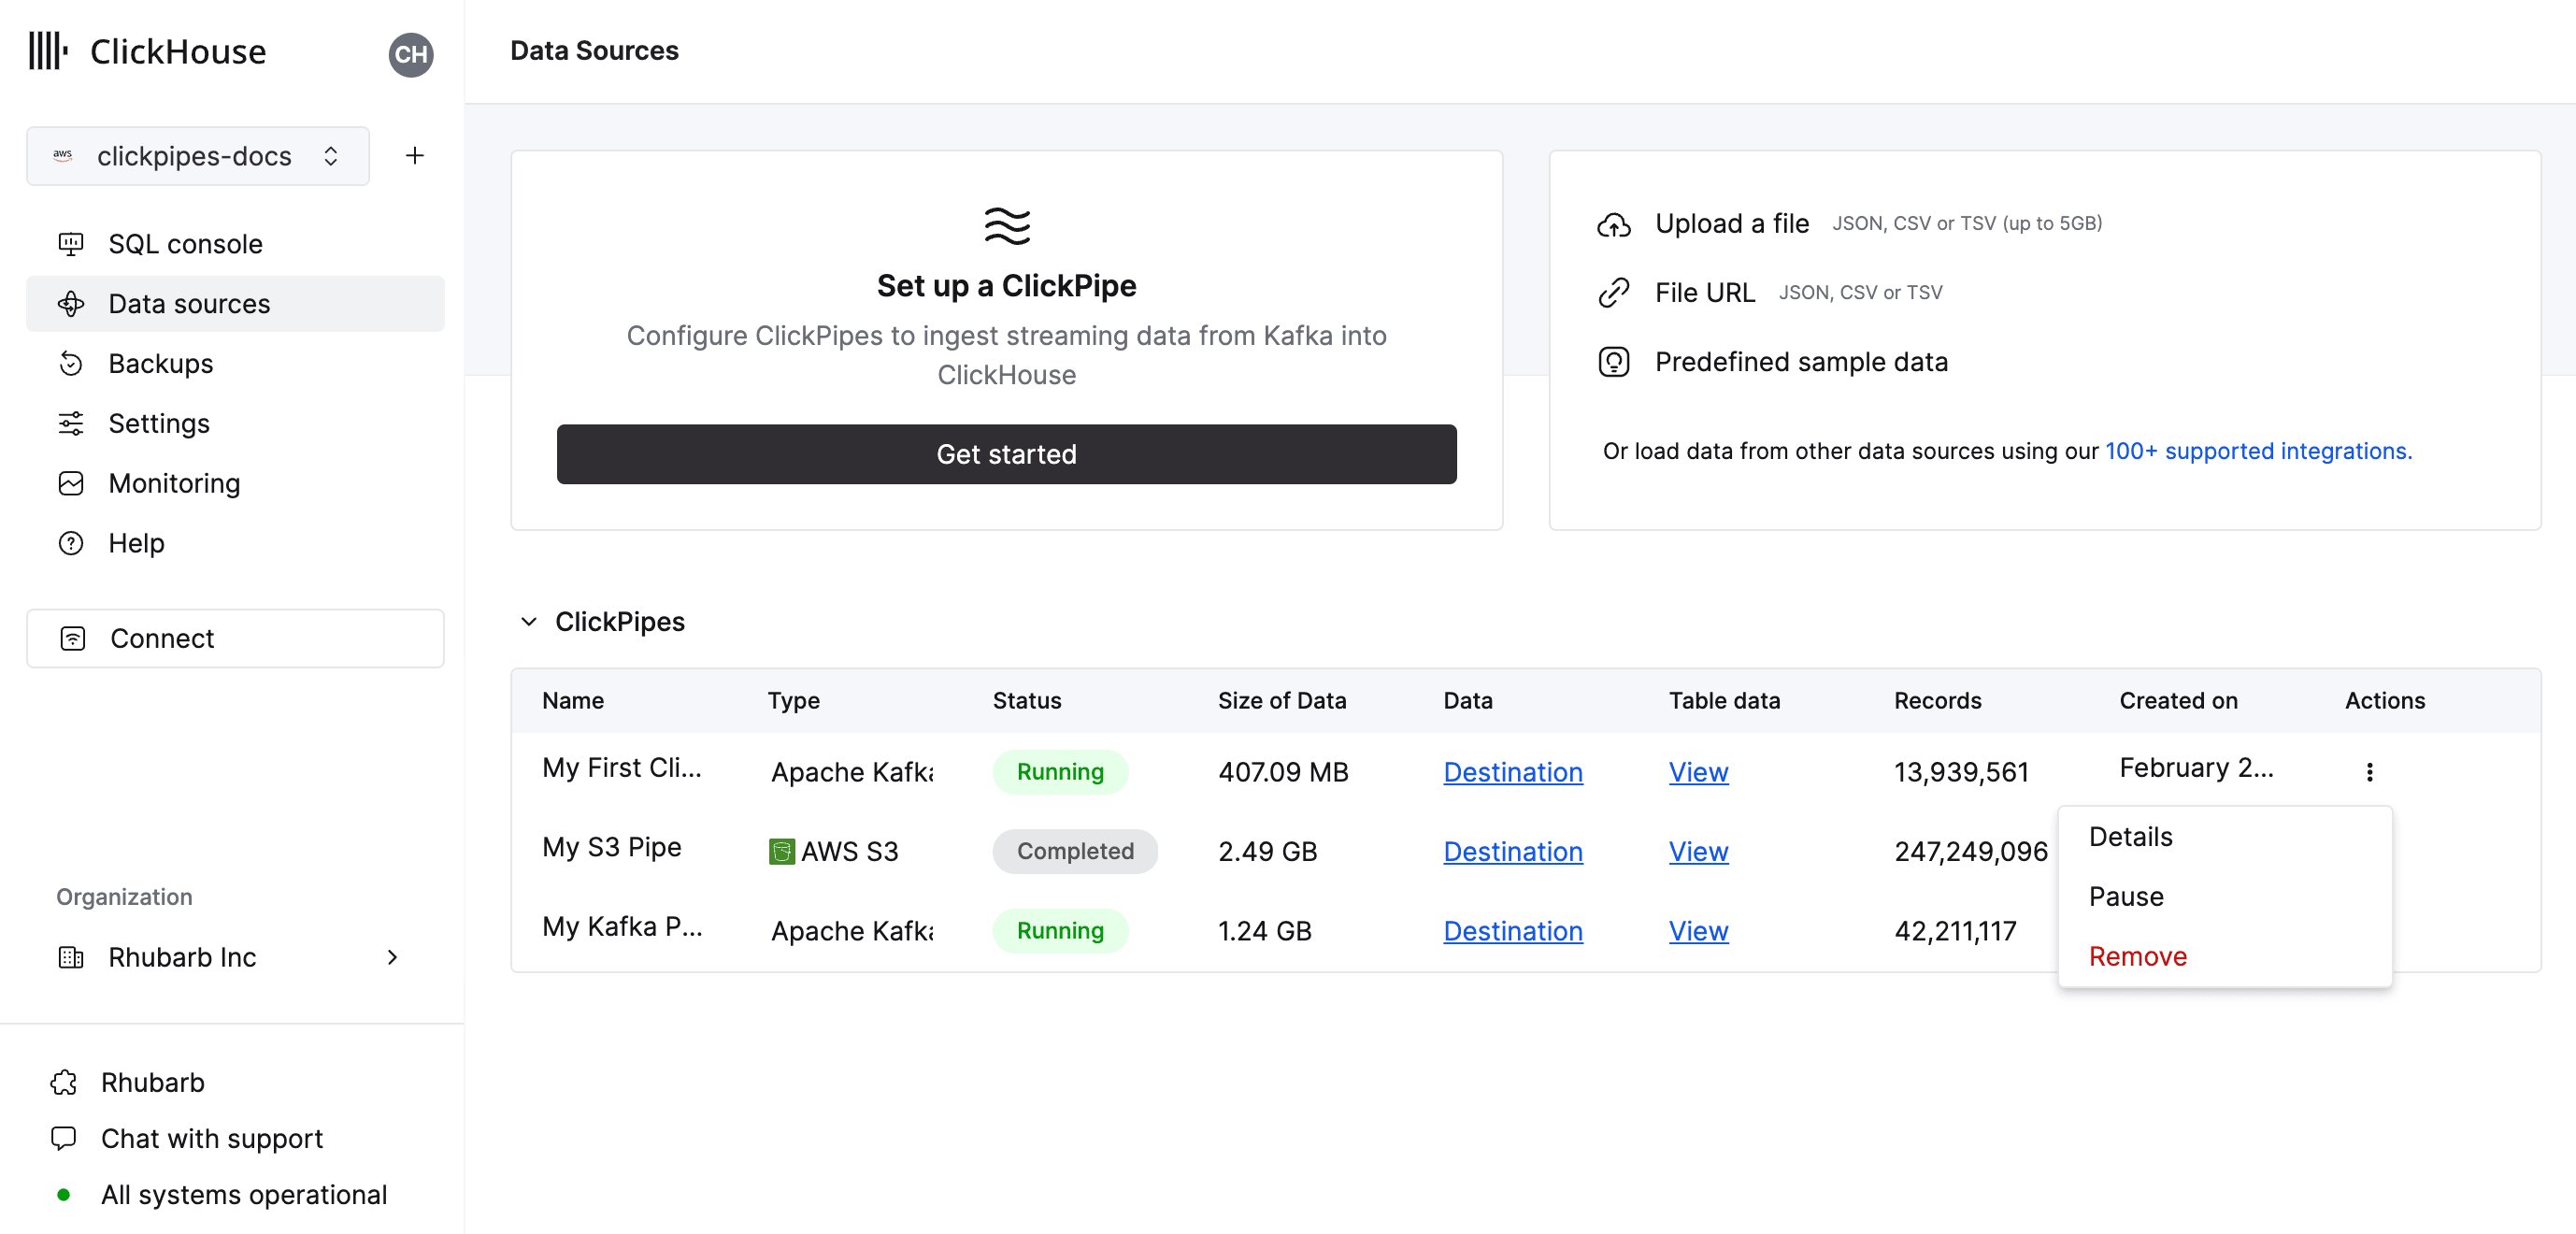 요약 테이블에는 소스 또는 ClickHouse의 대상 테이블에서 샘플 데이터를 표시하는 컨트롤이 제공됩니다.
 또한 ClickPipe를 제거하고 수집 작업의 요약을 표시하는 컨트롤도 제공합니다.
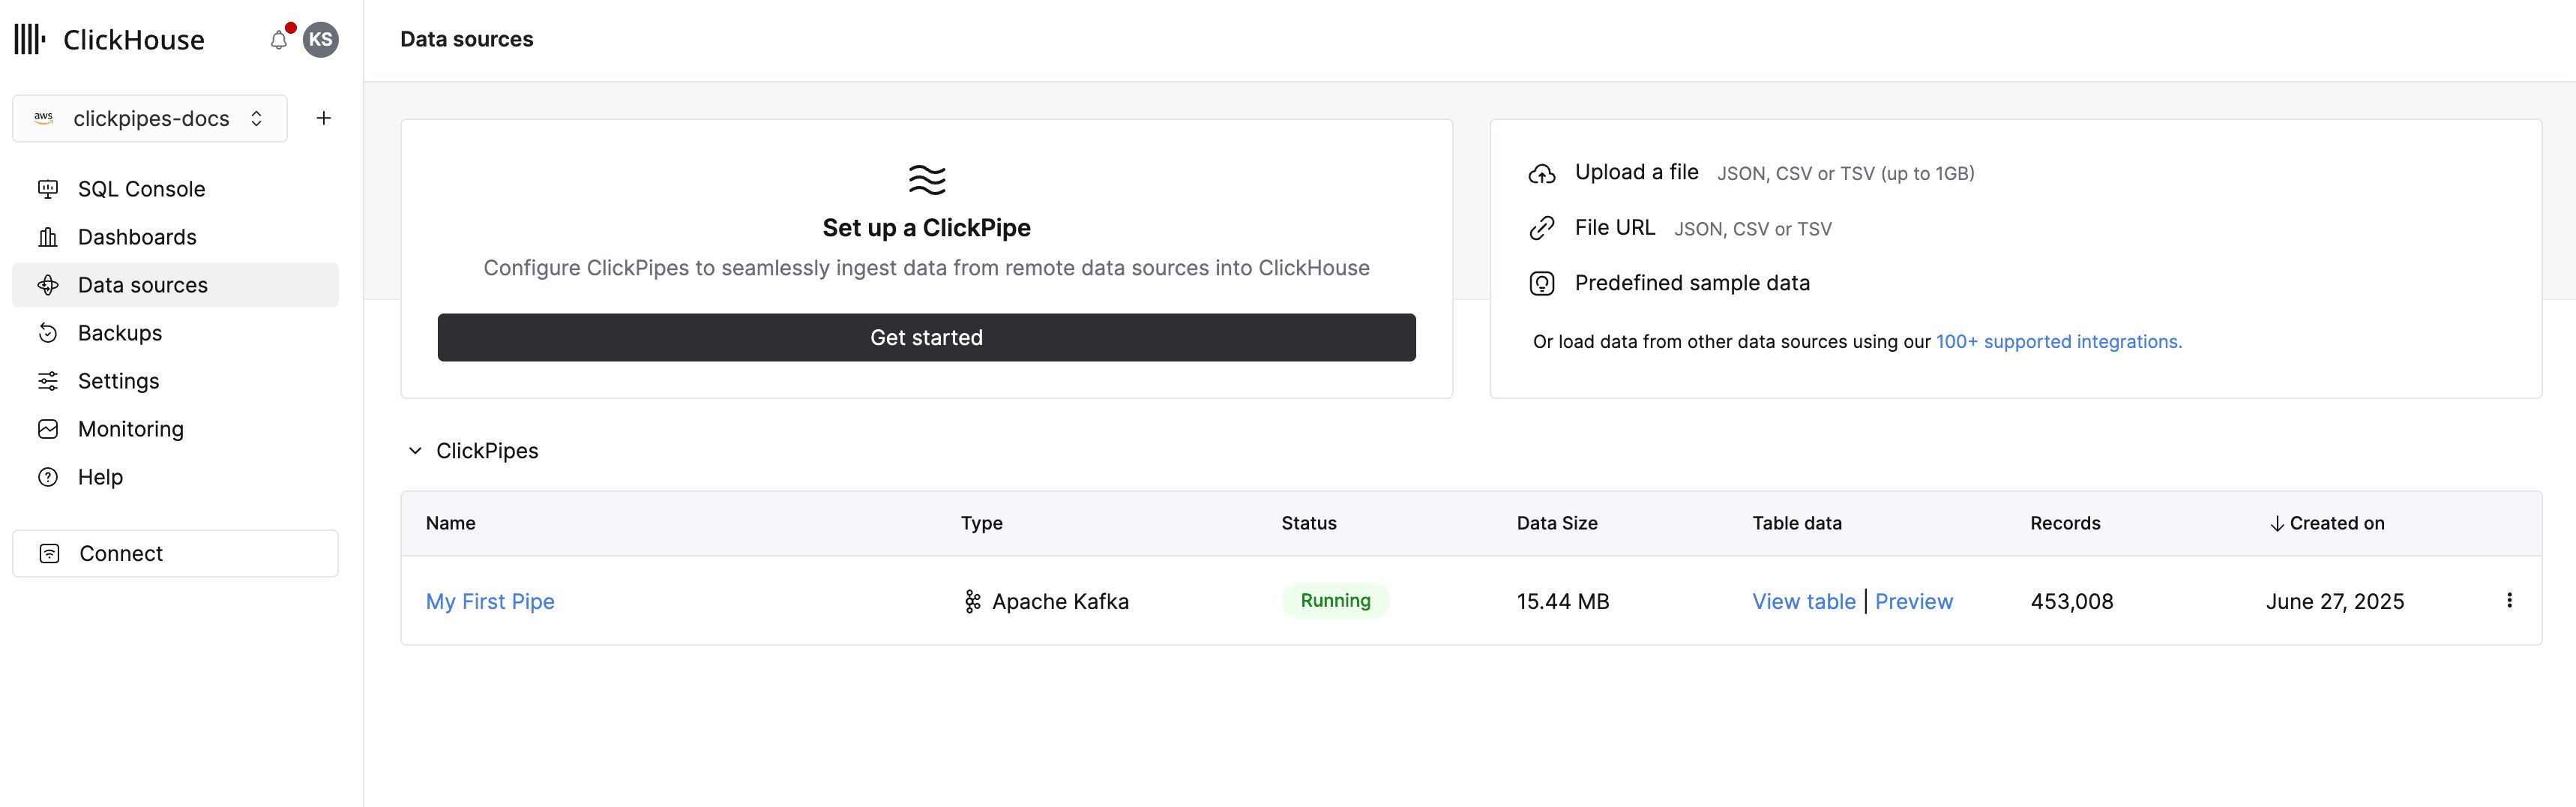 **축하합니다!** 첫 번째 ClickPipe 설정을 성공적으로 완료했습니다.
이 ClickPipe가 지속적인 수집용으로 구성된 경우 원격 data source에서 데이터를 실시간으로 수집하면서 계속 실행됩니다.
그렇지 않으면 Batch를 수집한 후 완료됩니다.
**축하합니다!** 첫 번째 ClickPipe 설정을 성공적으로 완료했습니다.
이 ClickPipe가 지속적인 수집용으로 구성된 경우 원격 data source에서 데이터를 실시간으로 수집하면서 계속 실행됩니다.
그렇지 않으면 Batch를 수집한 후 완료됩니다.