> ## Documentation Index
> Fetch the complete documentation index at: https://clickhouse.com/docs/llms.txt
> Use this file to discover all available pages before exploring further.
> 最初の Amazon S3 ClickPipe を作成するためのステップごとのガイド。
# 最初の Amazon S3 ClickPipe を作成する
export const Image = ({img, alt, size = "lg"}) => {
const normalizedSize = ["sm", "md", "lg"].includes(size) ? size : "lg";
return

;
};
S3 ClickPipe は、Amazon S3 および S3互換オブジェクトストアから ClickHouse Cloud にデータを取り込むための、フルマネージドで耐障害性に優れた仕組みです。**一回限り**と**継続的インジェスト**の両方に対応し、exactly-once セマンティクスを備えています。
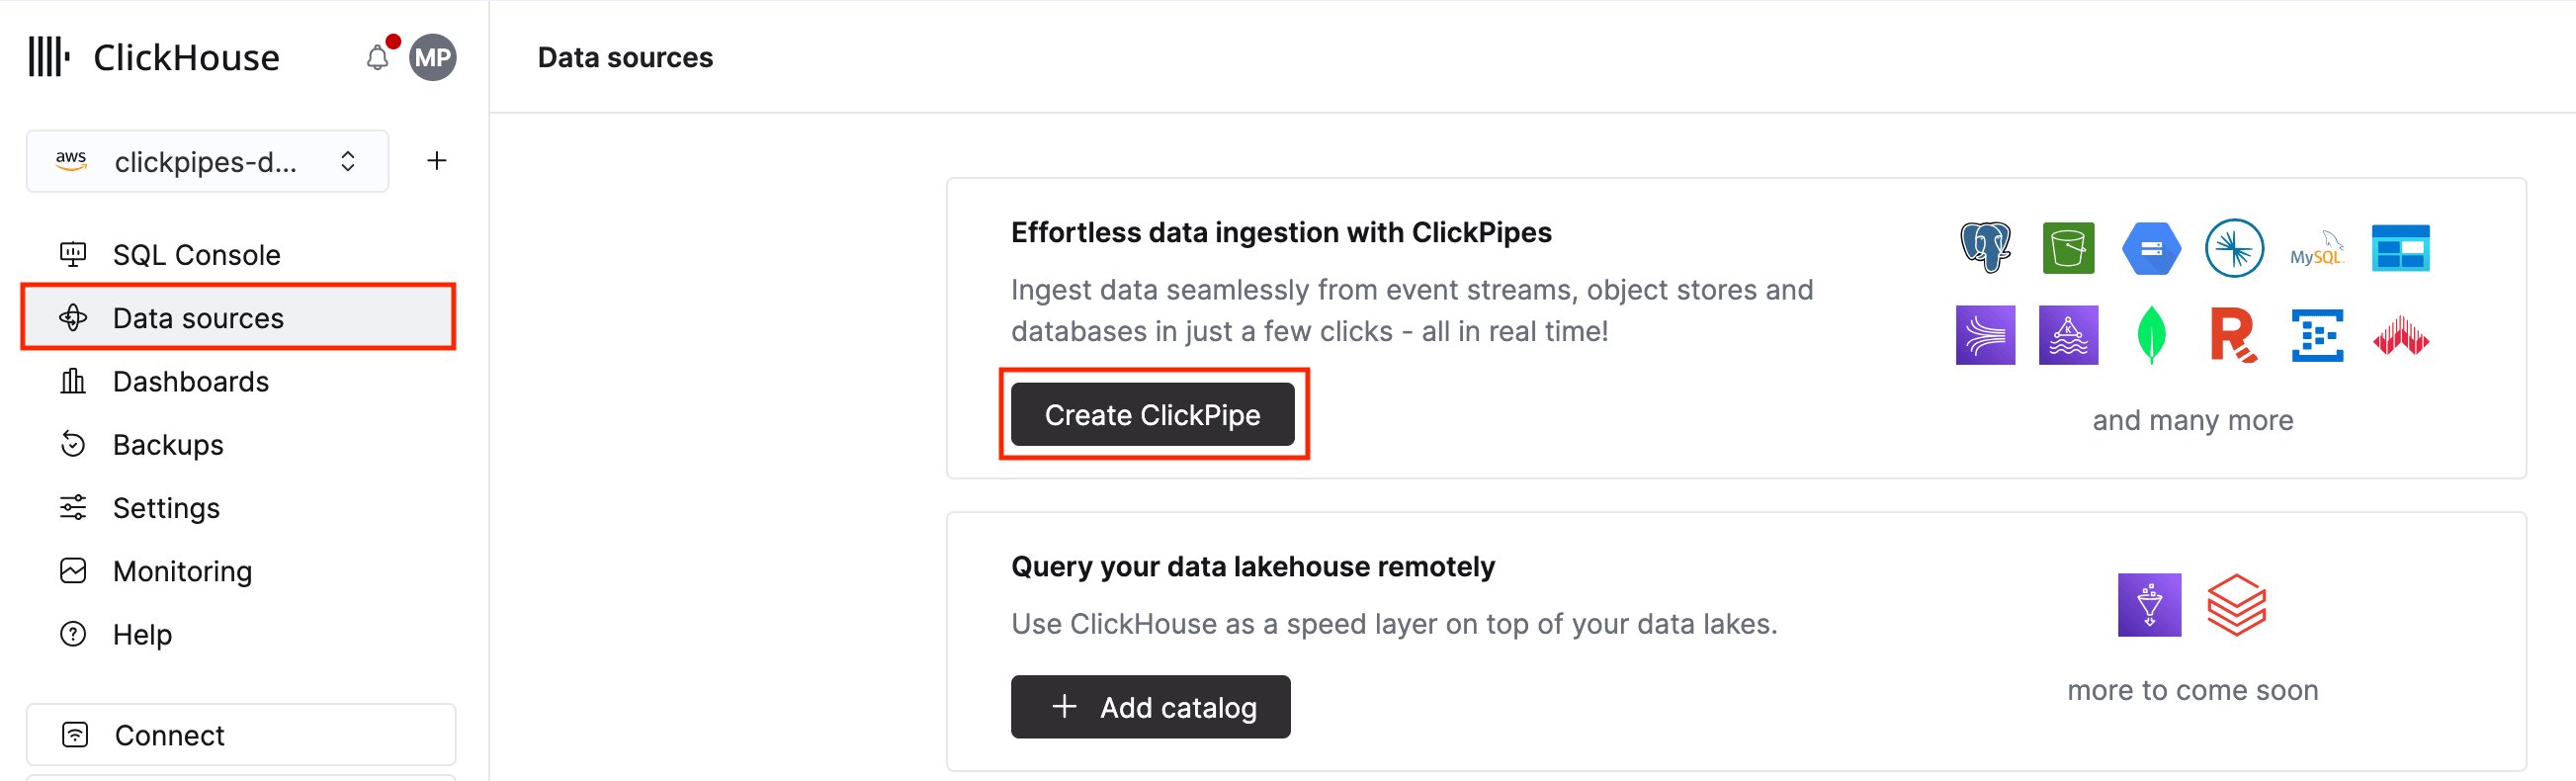
**1.** ClickHouse Cloud のメインナビゲーションメニューで **Data sources** を選択し、**Create ClickPipe** をクリックします。
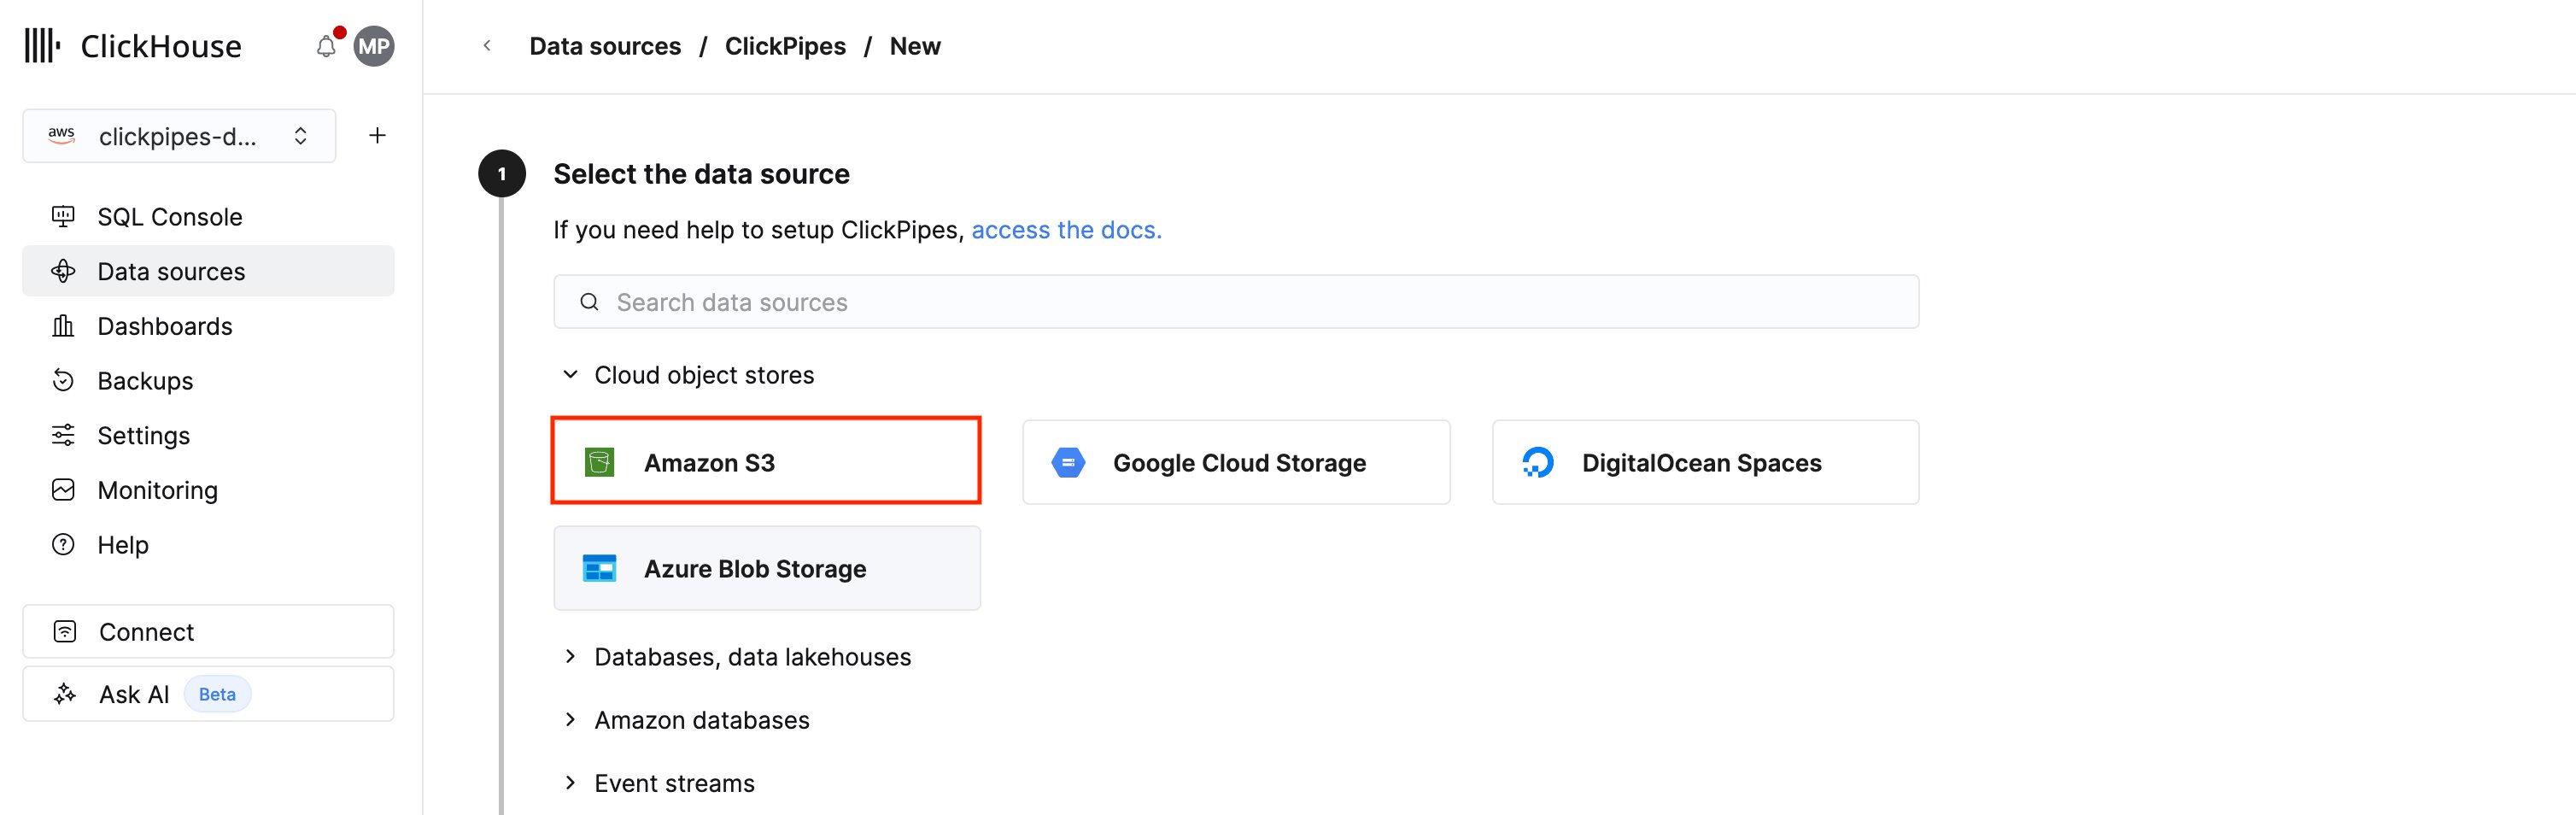
 **2.** **Amazon S3** タイルをクリックします。このタイルを使用すると、ClickPipes UI に表示されていないその他の S3 互換サービスにも接続できます。
 オブジェクトストレージサービスプロバイダーごとに URL 形式や API 実装が異なるため、すべての S3 互換サービスがそのままサポートされているわけではありません。[サポートされているデータソース](/docs/ja/integrations/clickpipes/object-storage/amazon-s3/overview#supported-data-sources) に記載されていないサービスで問題が発生した場合は、[当社チームまでお問い合わせください](https://clickhouse.com/company/contact?loc=clickpipes)。
**1.** 新しい ClickPipe を設定するには、オブジェクトストレージサービスへの接続方法と認証方法に関する詳細を入力する必要があります。
オブジェクトストレージサービスプロバイダーごとに URL 形式や API 実装が異なるため、すべての S3 互換サービスがそのままサポートされているわけではありません。[サポートされているデータソース](/docs/ja/integrations/clickpipes/object-storage/amazon-s3/overview#supported-data-sources) に記載されていないサービスで問題が発生した場合は、[当社チームまでお問い合わせください](https://clickhouse.com/company/contact?loc=clickpipes)。
**1.** 新しい ClickPipe を設定するには、オブジェクトストレージサービスへの接続方法と認証方法に関する詳細を入力する必要があります。
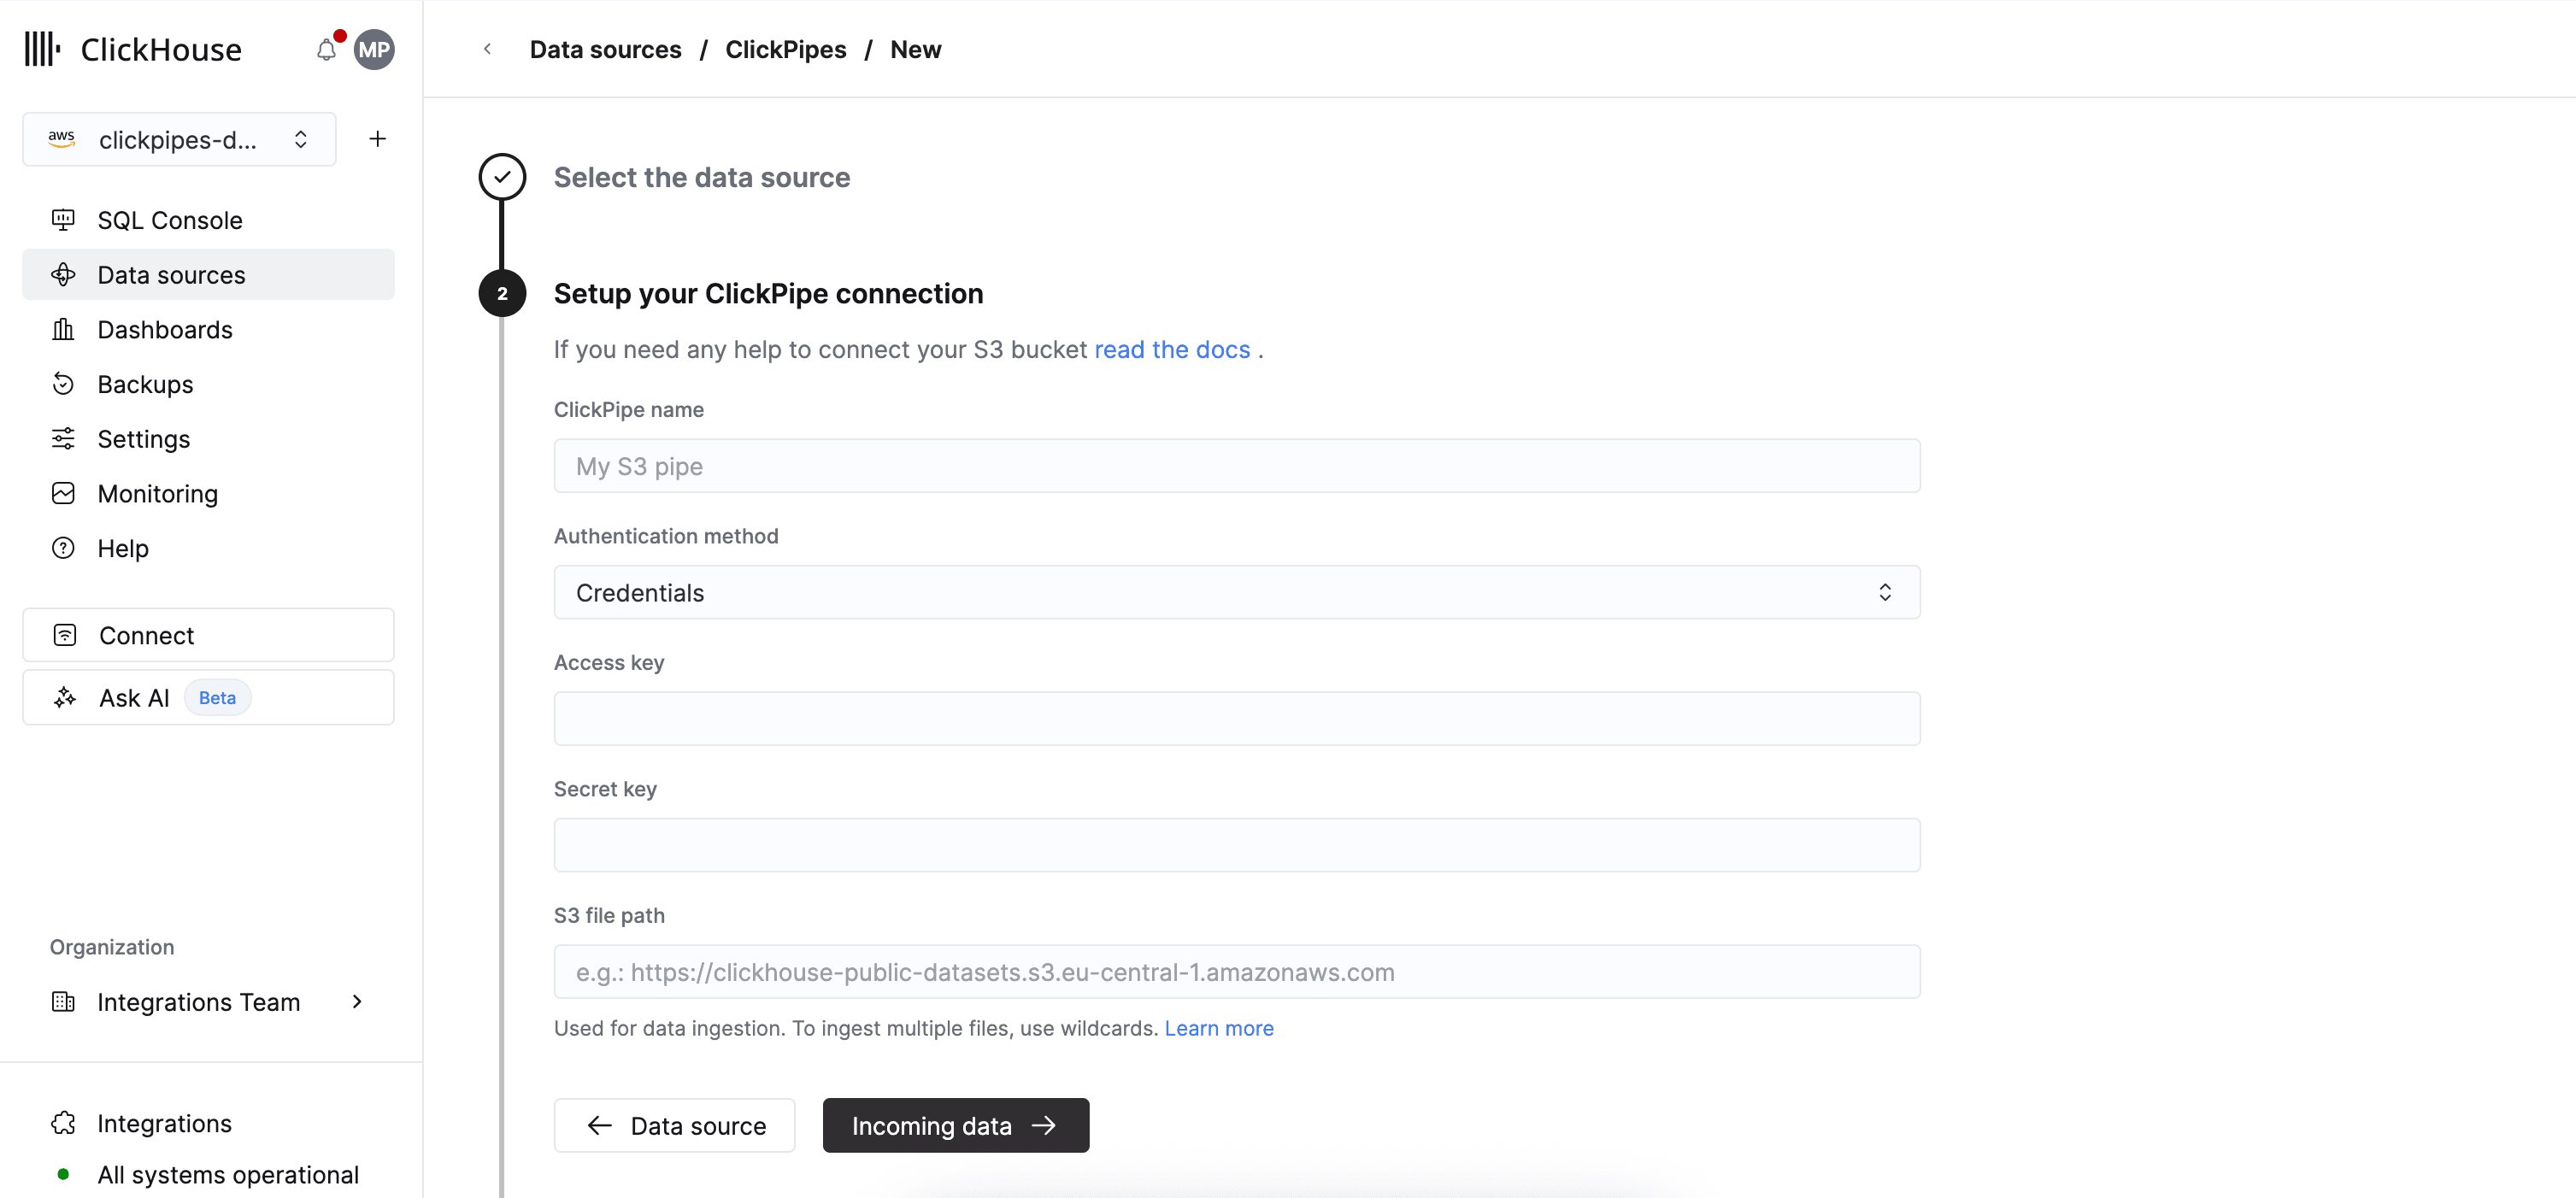 * **認証方法**: S3 ClickPipe は、[IAM credentials](/docs/ja/integrations/clickpipes/object-storage/amazon-s3/overview#iam-credentials) (`Credentials`) および [IAM role-based authentication](/docs/ja/integrations/clickpipes/object-storage/amazon-s3/overview#iam-role) (`IAM role`) をサポートしています。認証と権限の詳細については、[リファレンスドキュメント](/docs/ja/integrations/clickpipes/object-storage/amazon-s3/overview#access-control)を参照してください。
* **S3 ファイルパス**: S3 ClickPipe では、[virtual-hosted-style URI](https://docs.aws.amazon.com/AmazonS3/latest/userguide/VirtualHosting.html#virtual-hosted-style-access) 形式の URI を想定しています。
```bash theme={null}
https://bucket-name.s3.region-code.amazonaws.com/key-name
```
POSIX ワイルドカードを使って、複数のファイルやプレフィックスに一致させることができます。サポートされているパターンの詳細については、[リファレンスドキュメント](/docs/ja/integrations/clickpipes/object-storage/amazon-s3/overview#file-pattern-matching)を参照してください。
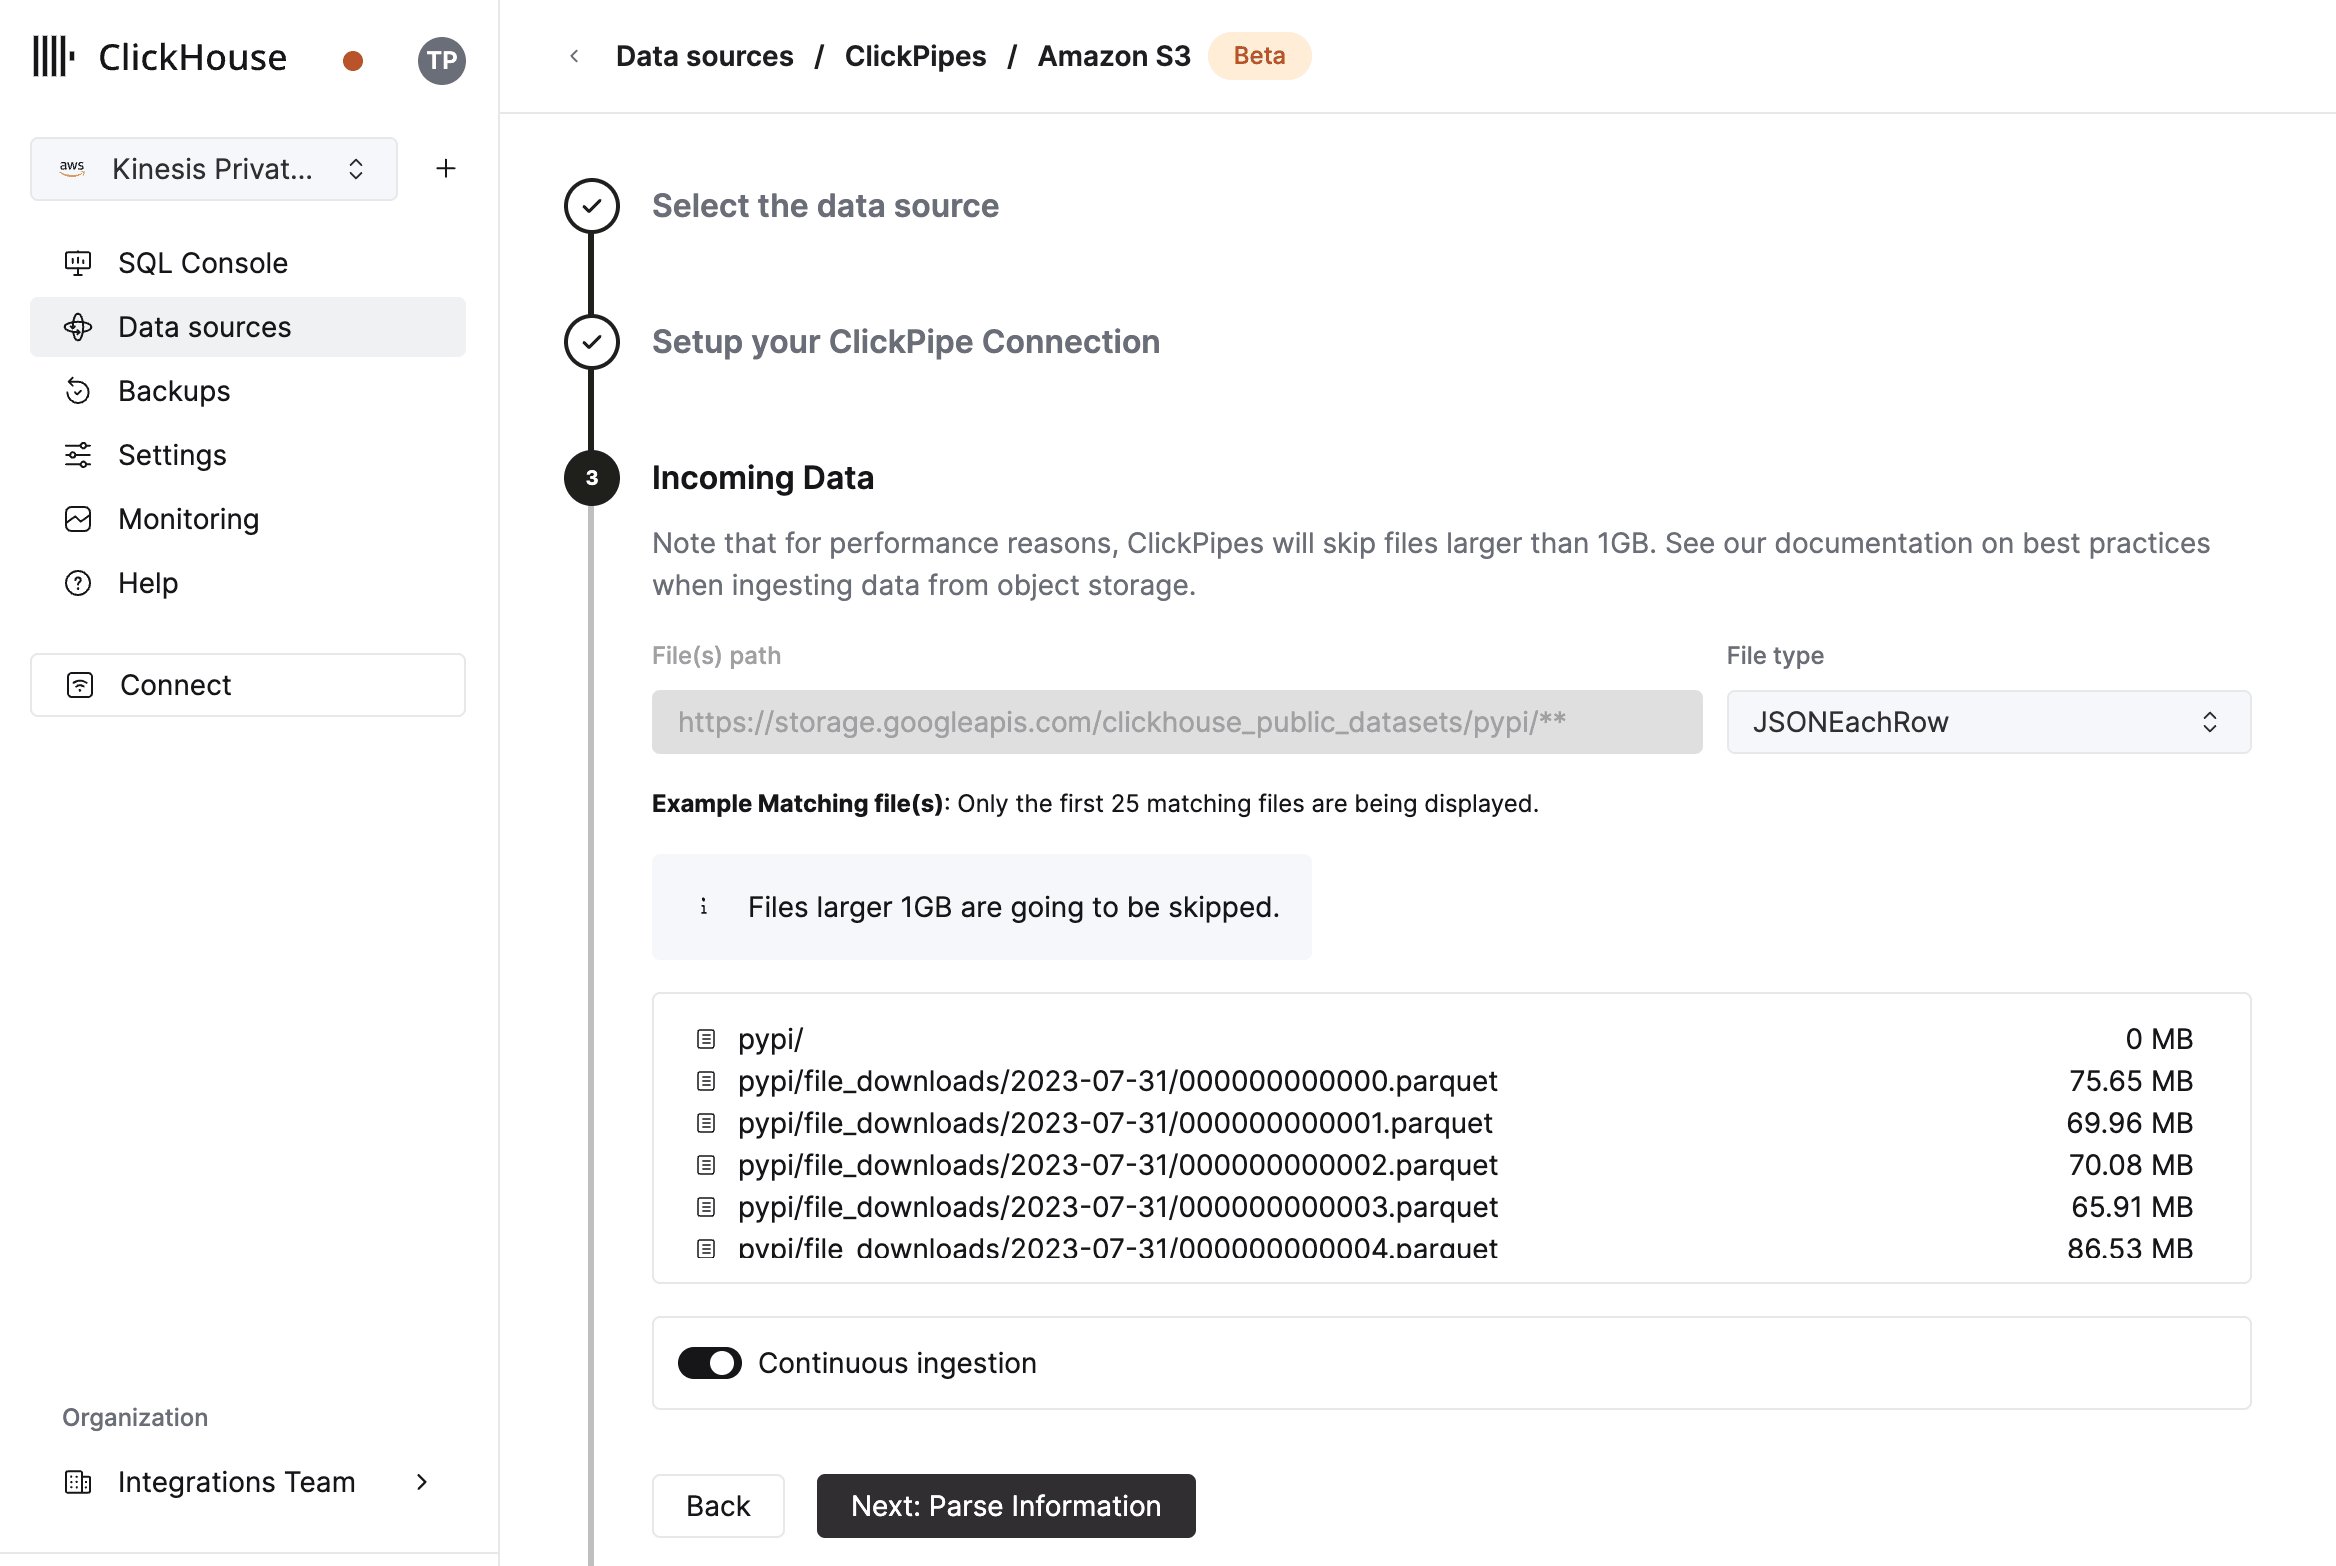
**2.** **Incoming data** をクリックします。ClickPipes が次の手順に向けてバケットからメタデータを取得します。
UI に、指定した bucket 内のファイル一覧が表示されます。
データフォーマット (現在対応しているのは ClickHouse のフォーマットの一部です) と、継続的インジェストを有効にするかどうかを選択してください。
詳細は、概要ページの「continuous ingest」セクションを参照してください。
* **認証方法**: S3 ClickPipe は、[IAM credentials](/docs/ja/integrations/clickpipes/object-storage/amazon-s3/overview#iam-credentials) (`Credentials`) および [IAM role-based authentication](/docs/ja/integrations/clickpipes/object-storage/amazon-s3/overview#iam-role) (`IAM role`) をサポートしています。認証と権限の詳細については、[リファレンスドキュメント](/docs/ja/integrations/clickpipes/object-storage/amazon-s3/overview#access-control)を参照してください。
* **S3 ファイルパス**: S3 ClickPipe では、[virtual-hosted-style URI](https://docs.aws.amazon.com/AmazonS3/latest/userguide/VirtualHosting.html#virtual-hosted-style-access) 形式の URI を想定しています。
```bash theme={null}
https://bucket-name.s3.region-code.amazonaws.com/key-name
```
POSIX ワイルドカードを使って、複数のファイルやプレフィックスに一致させることができます。サポートされているパターンの詳細については、[リファレンスドキュメント](/docs/ja/integrations/clickpipes/object-storage/amazon-s3/overview#file-pattern-matching)を参照してください。
**2.** **Incoming data** をクリックします。ClickPipes が次の手順に向けてバケットからメタデータを取得します。
UI に、指定した bucket 内のファイル一覧が表示されます。
データフォーマット (現在対応しているのは ClickHouse のフォーマットの一部です) と、継続的インジェストを有効にするかどうかを選択してください。
詳細は、概要ページの「continuous ingest」セクションを参照してください。
 次のステップでは、新しい ClickHouse テーブルにデータを取り込むか、既存のテーブルを再利用するかを選択できます。
画面の指示に従って、テーブル名、スキーマ、設定を変更してください。
上部のサンプルテーブルで、変更内容のリアルタイムプレビューを確認できます。
次のステップでは、新しい ClickHouse テーブルにデータを取り込むか、既存のテーブルを再利用するかを選択できます。
画面の指示に従って、テーブル名、スキーマ、設定を変更してください。
上部のサンプルテーブルで、変更内容のリアルタイムプレビューを確認できます。
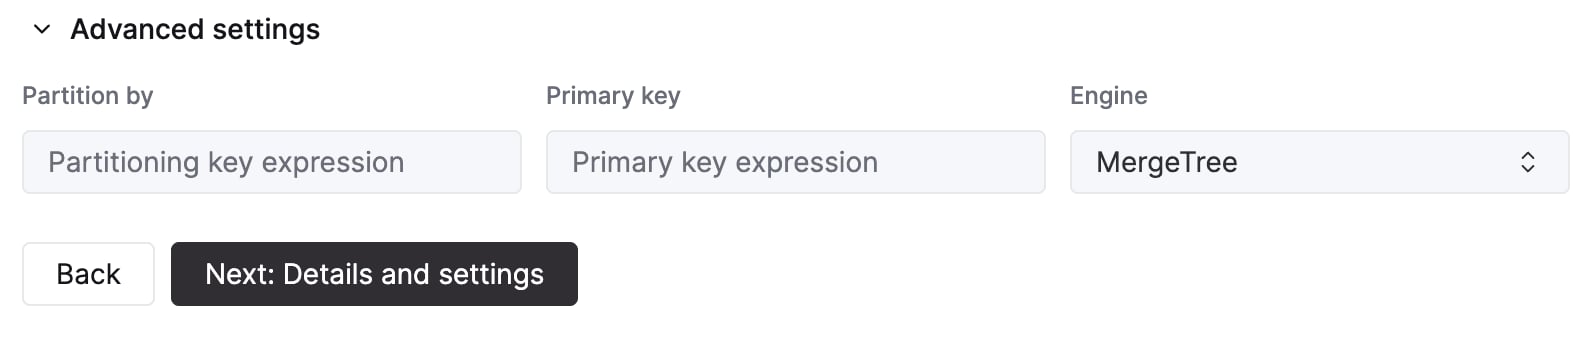
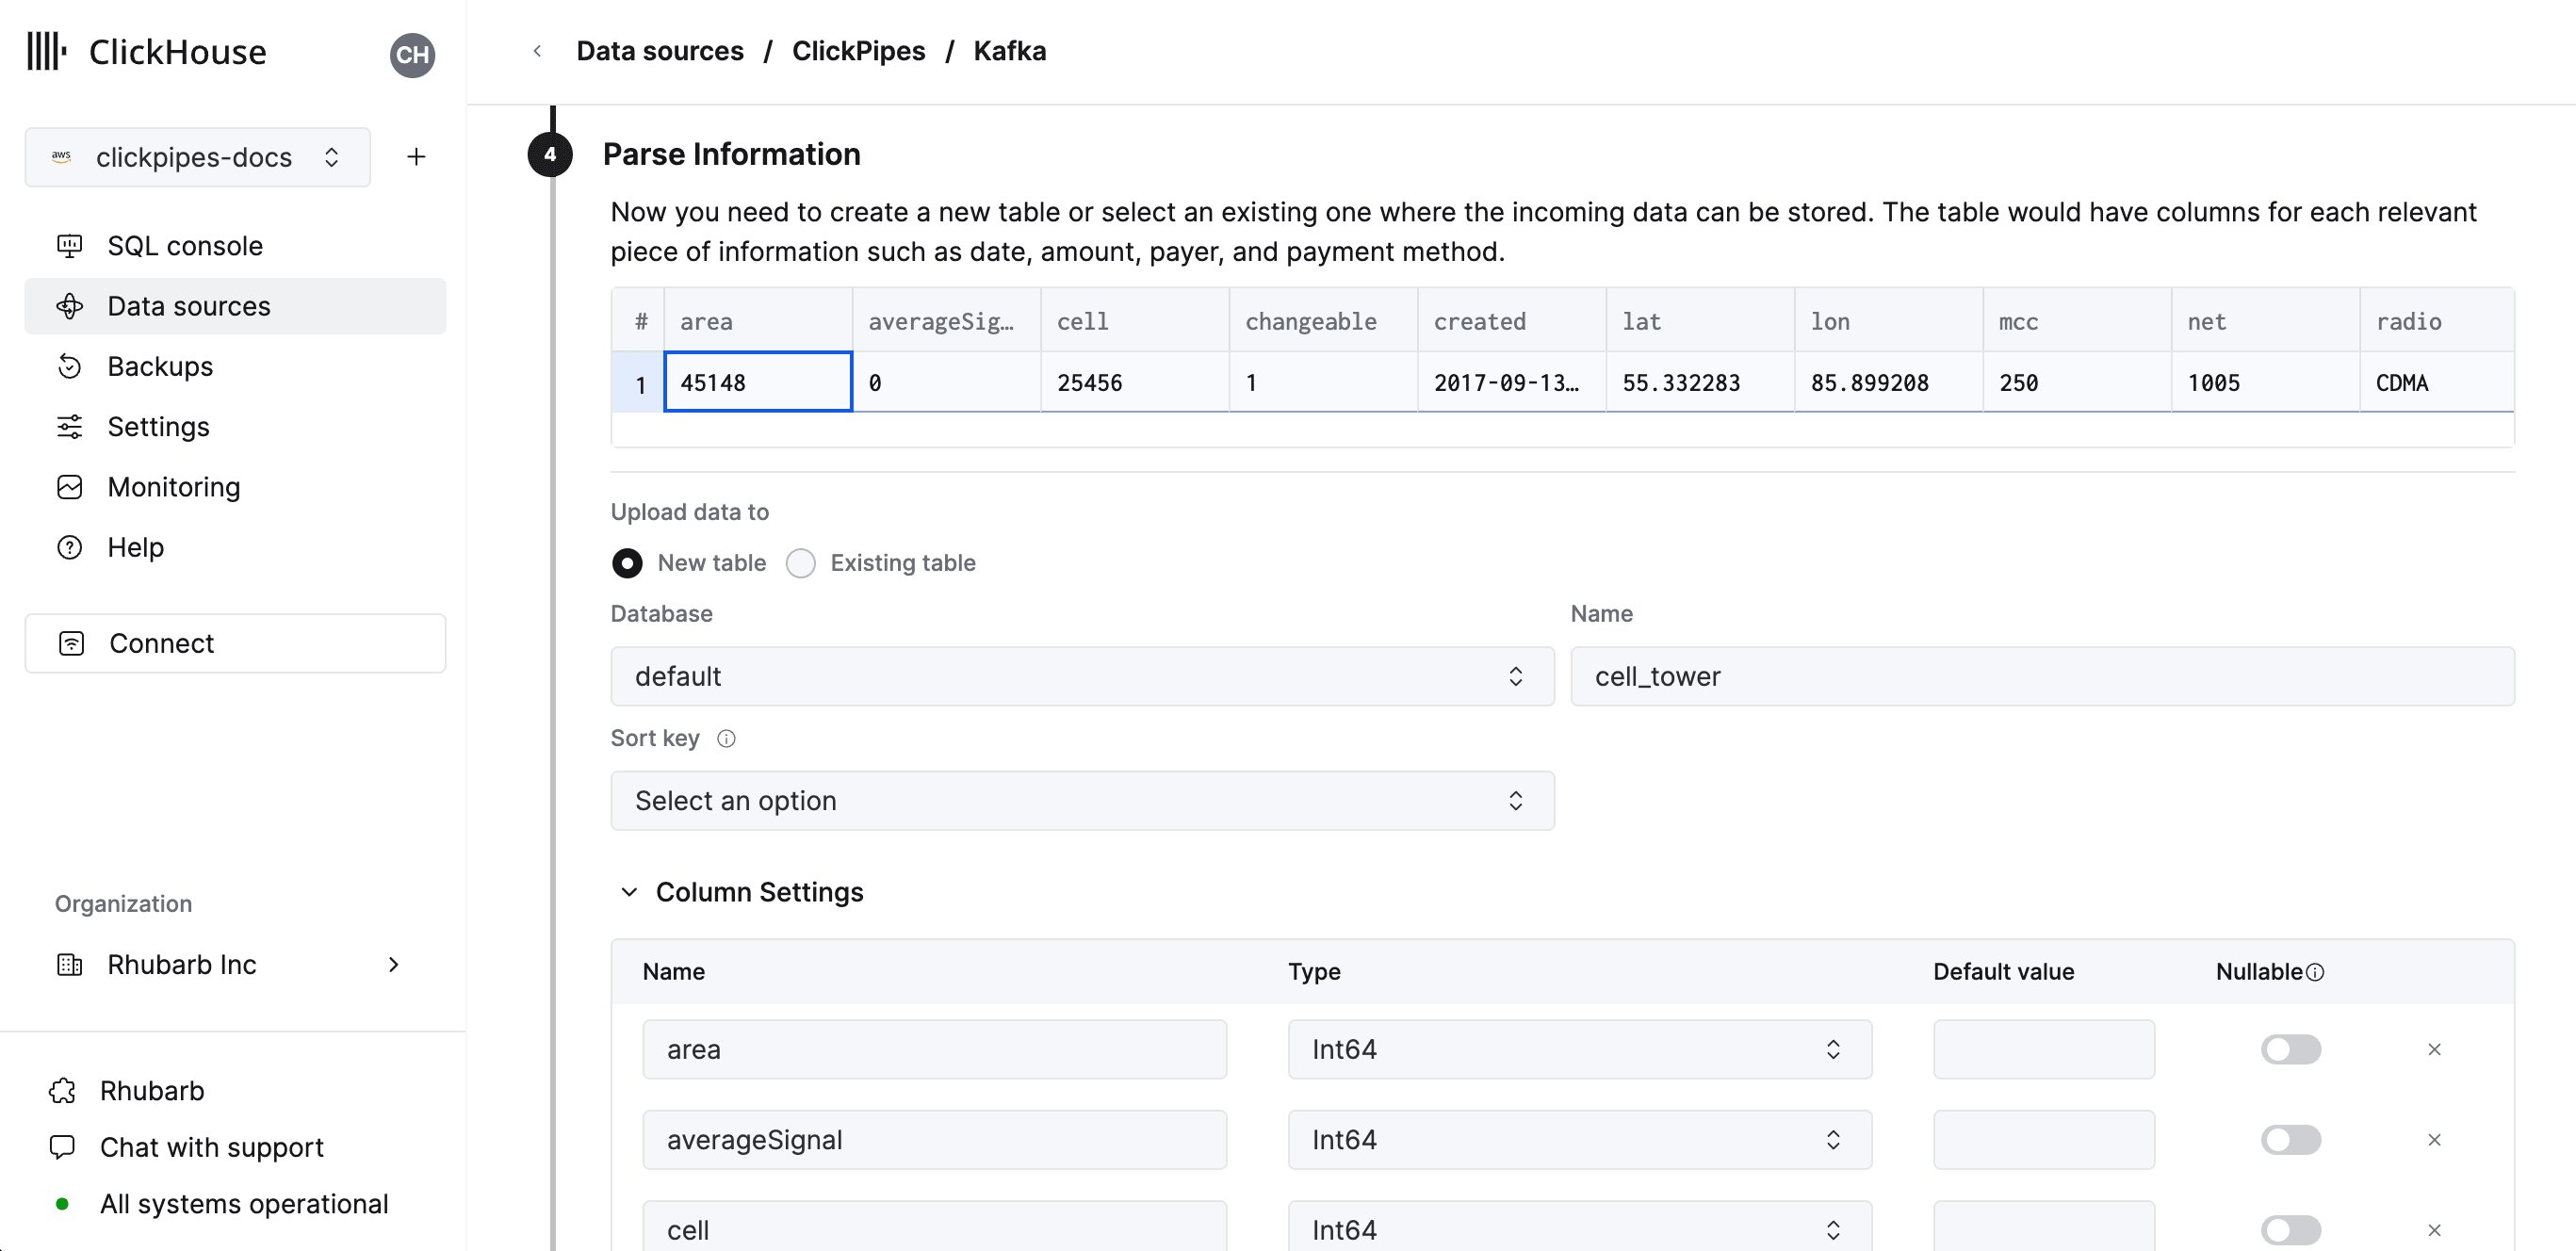 用意されているコントロールを使って、高度な設定をカスタマイズすることもできます。
 または、既存の ClickHouse テーブルにデータを取り込むこともできます。
その場合、UI でソースのフィールドを、選択した宛先テーブル内の ClickHouse のフィールドにマッピングできます。
または、既存の ClickHouse テーブルにデータを取り込むこともできます。
その場合、UI でソースのフィールドを、選択した宛先テーブル内の ClickHouse のフィールドにマッピングできます。
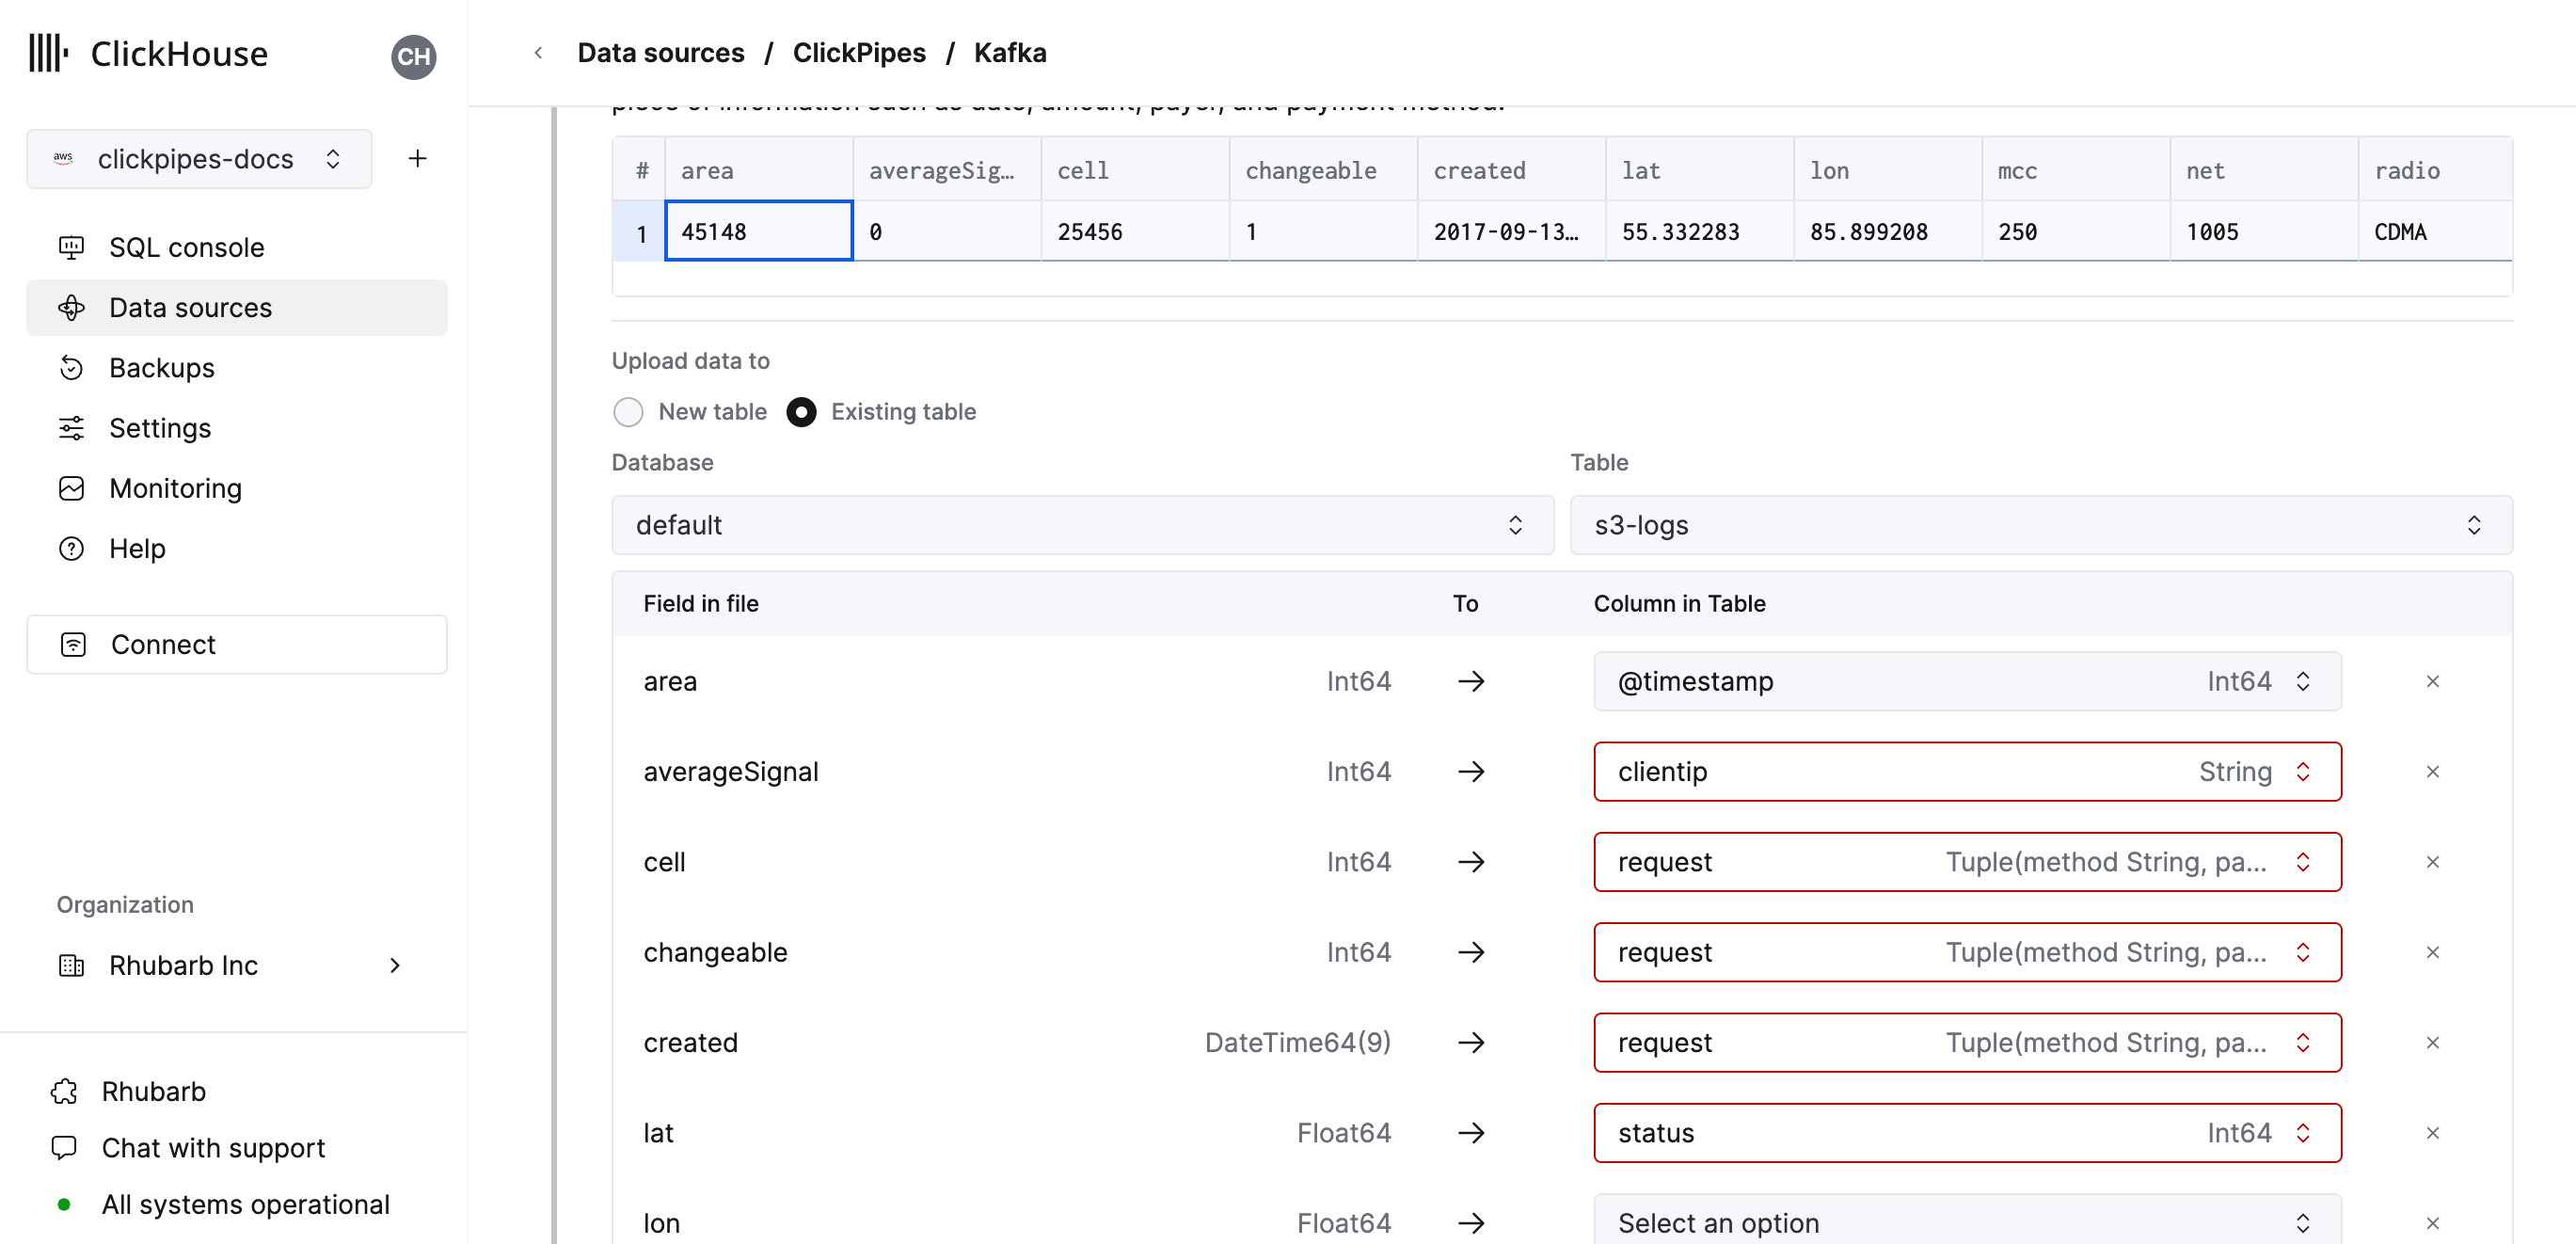 [仮想カラム](/docs/ja/reference/functions/table-functions/s3#virtual-columns) (`_path` や `_size` など) をフィールドにマッピングすることもできます。
最後に、内部 ClickPipes ユーザーの権限を構成できます。
**権限:** ClickPipes は、宛先テーブルにデータを書き込むための専用ユーザーを作成します。カスタムロール、または事前定義されたロールのいずれかを使って、この内部ユーザーに割り当てるロールを選択できます。
* `Full access`: クラスターへのフルアクセス。宛先テーブルで materialized view または Dictionary を使用する場合に必要です。
* `Only destination table`: 宛先テーブルに対する `INSERT` 権限のみ。
[仮想カラム](/docs/ja/reference/functions/table-functions/s3#virtual-columns) (`_path` や `_size` など) をフィールドにマッピングすることもできます。
最後に、内部 ClickPipes ユーザーの権限を構成できます。
**権限:** ClickPipes は、宛先テーブルにデータを書き込むための専用ユーザーを作成します。カスタムロール、または事前定義されたロールのいずれかを使って、この内部ユーザーに割り当てるロールを選択できます。
* `Full access`: クラスターへのフルアクセス。宛先テーブルで materialized view または Dictionary を使用する場合に必要です。
* `Only destination table`: 宛先テーブルに対する `INSERT` 権限のみ。
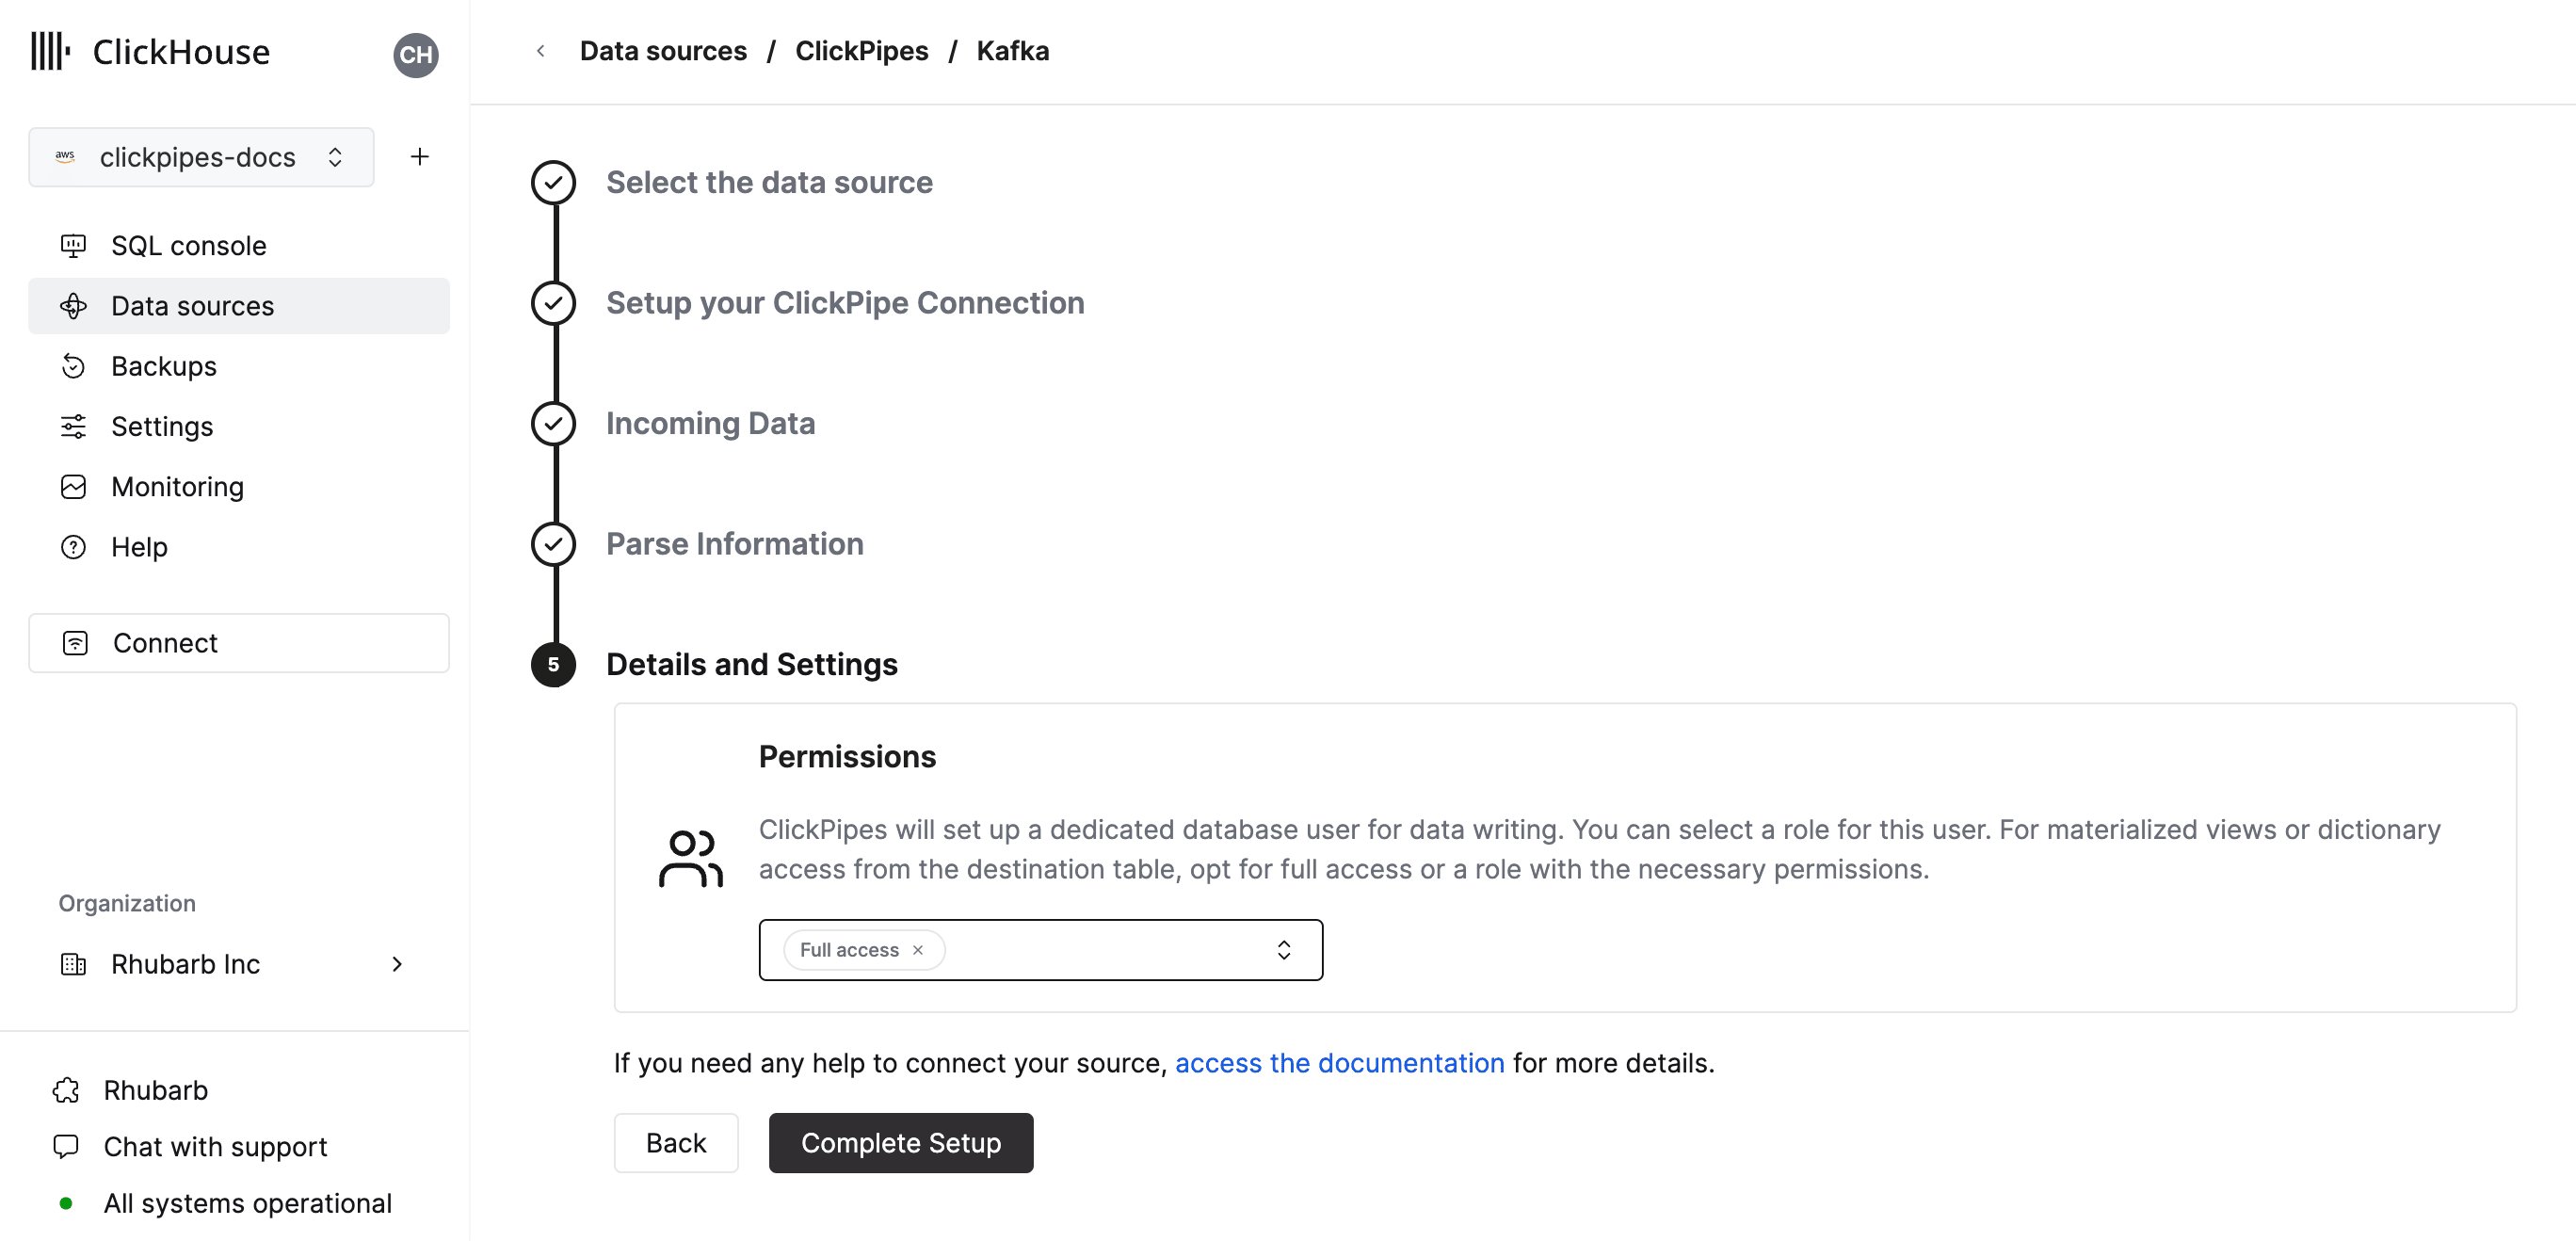 「Complete Setup」をクリックすると、システムに ClickPipe が登録され、サマリーテーブルに表示されるようになります。
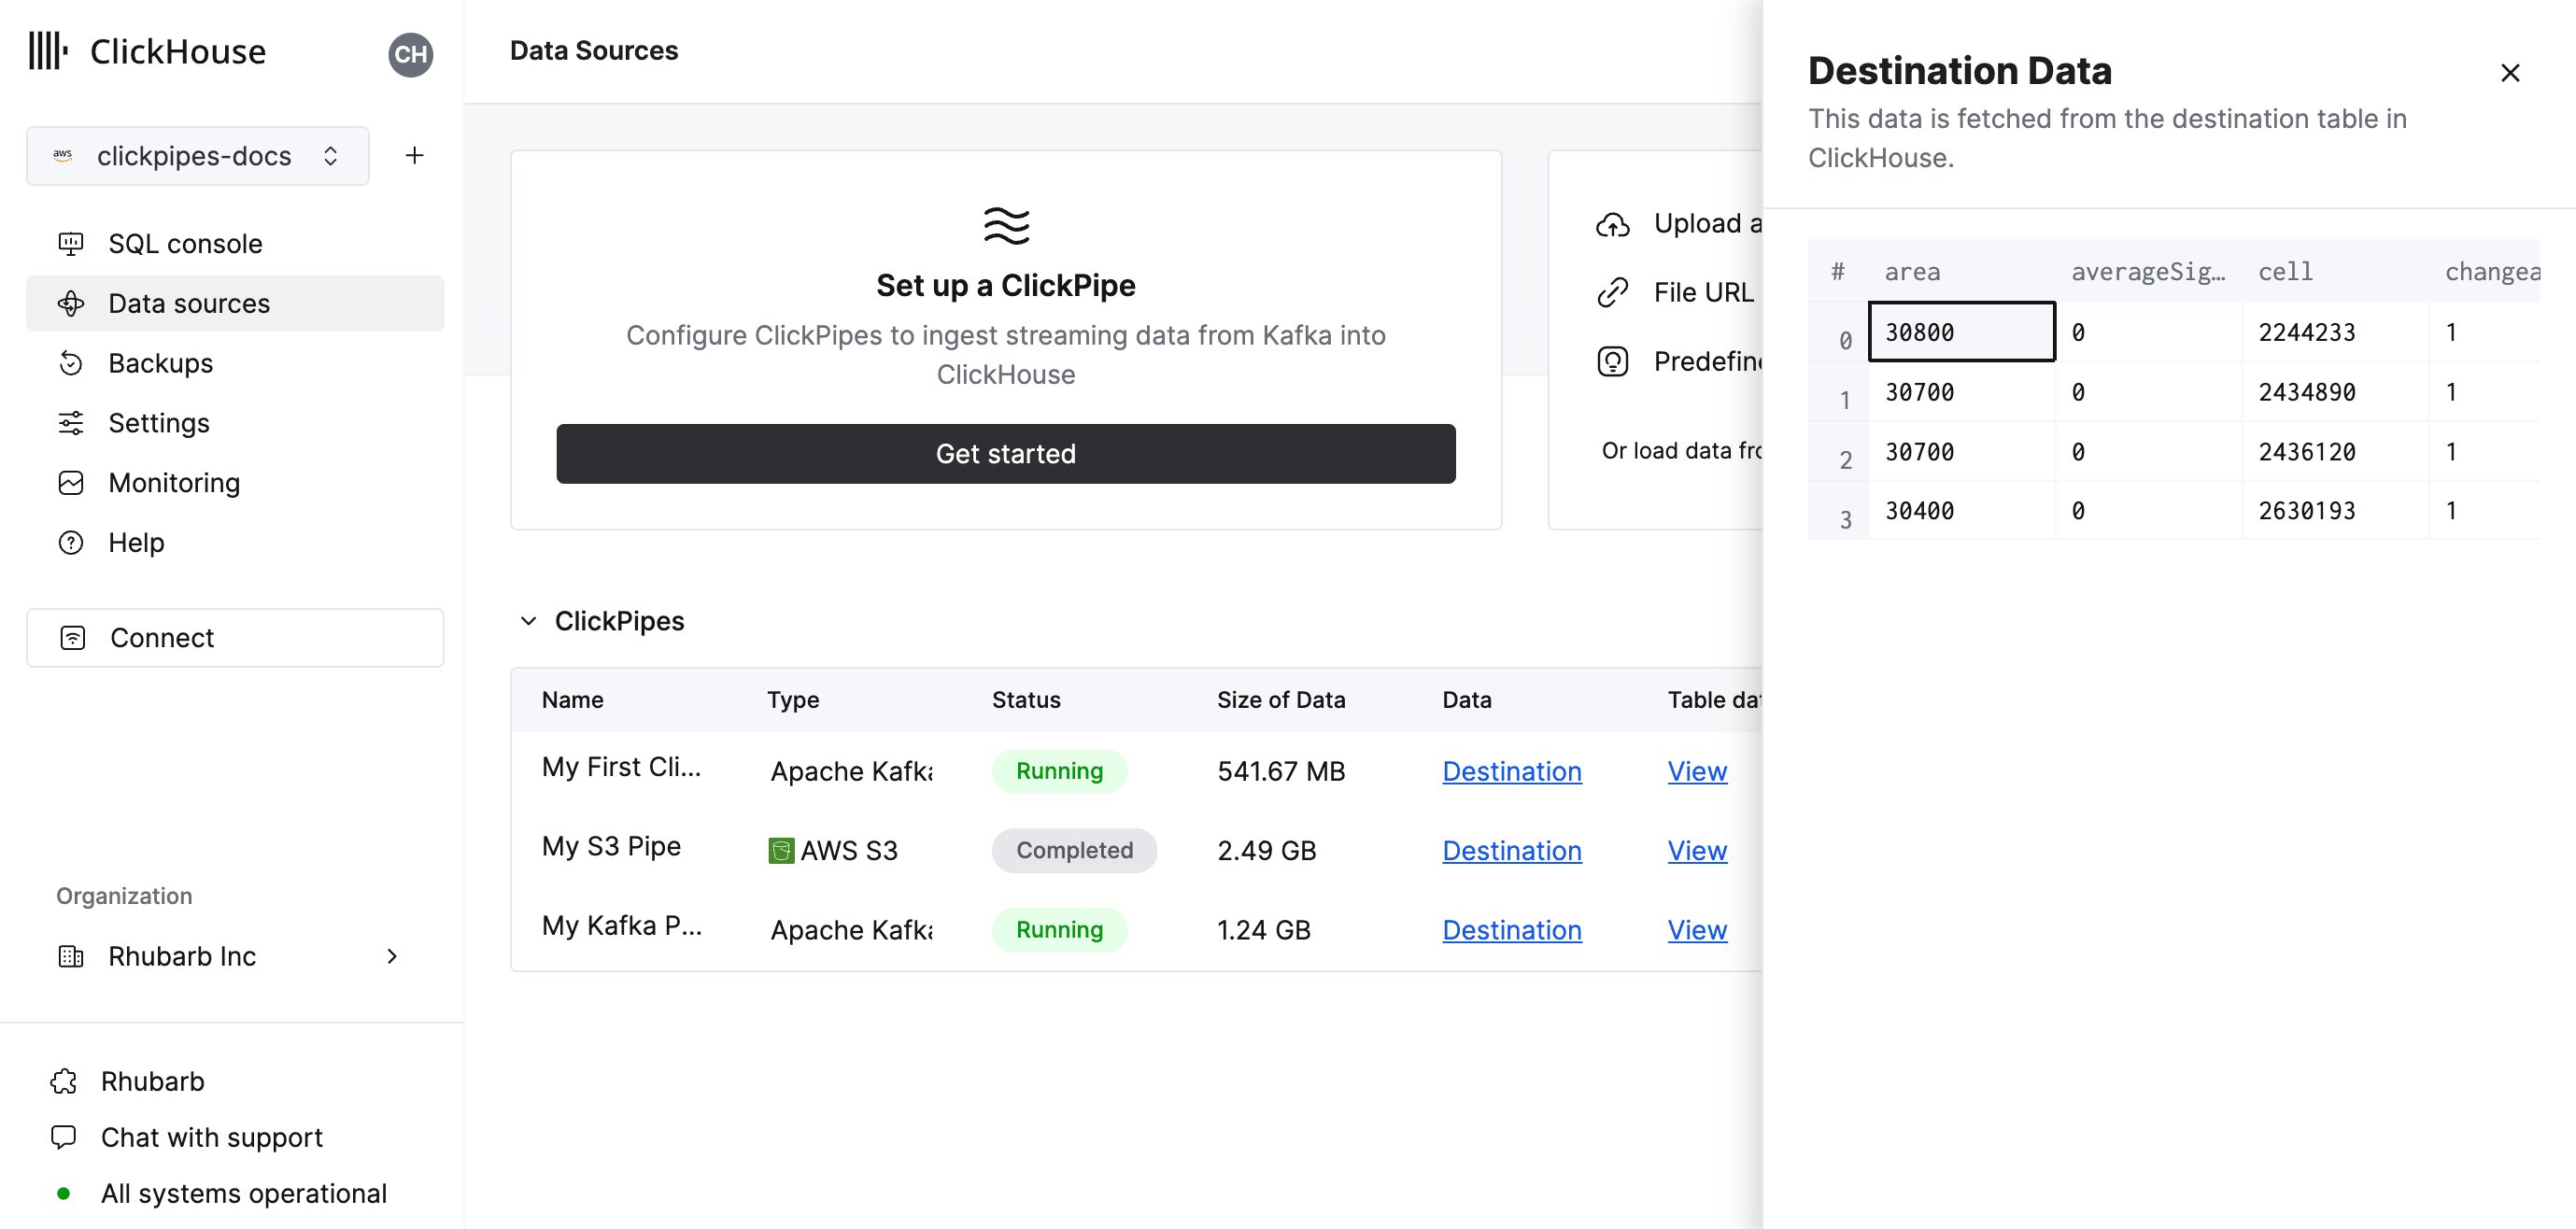
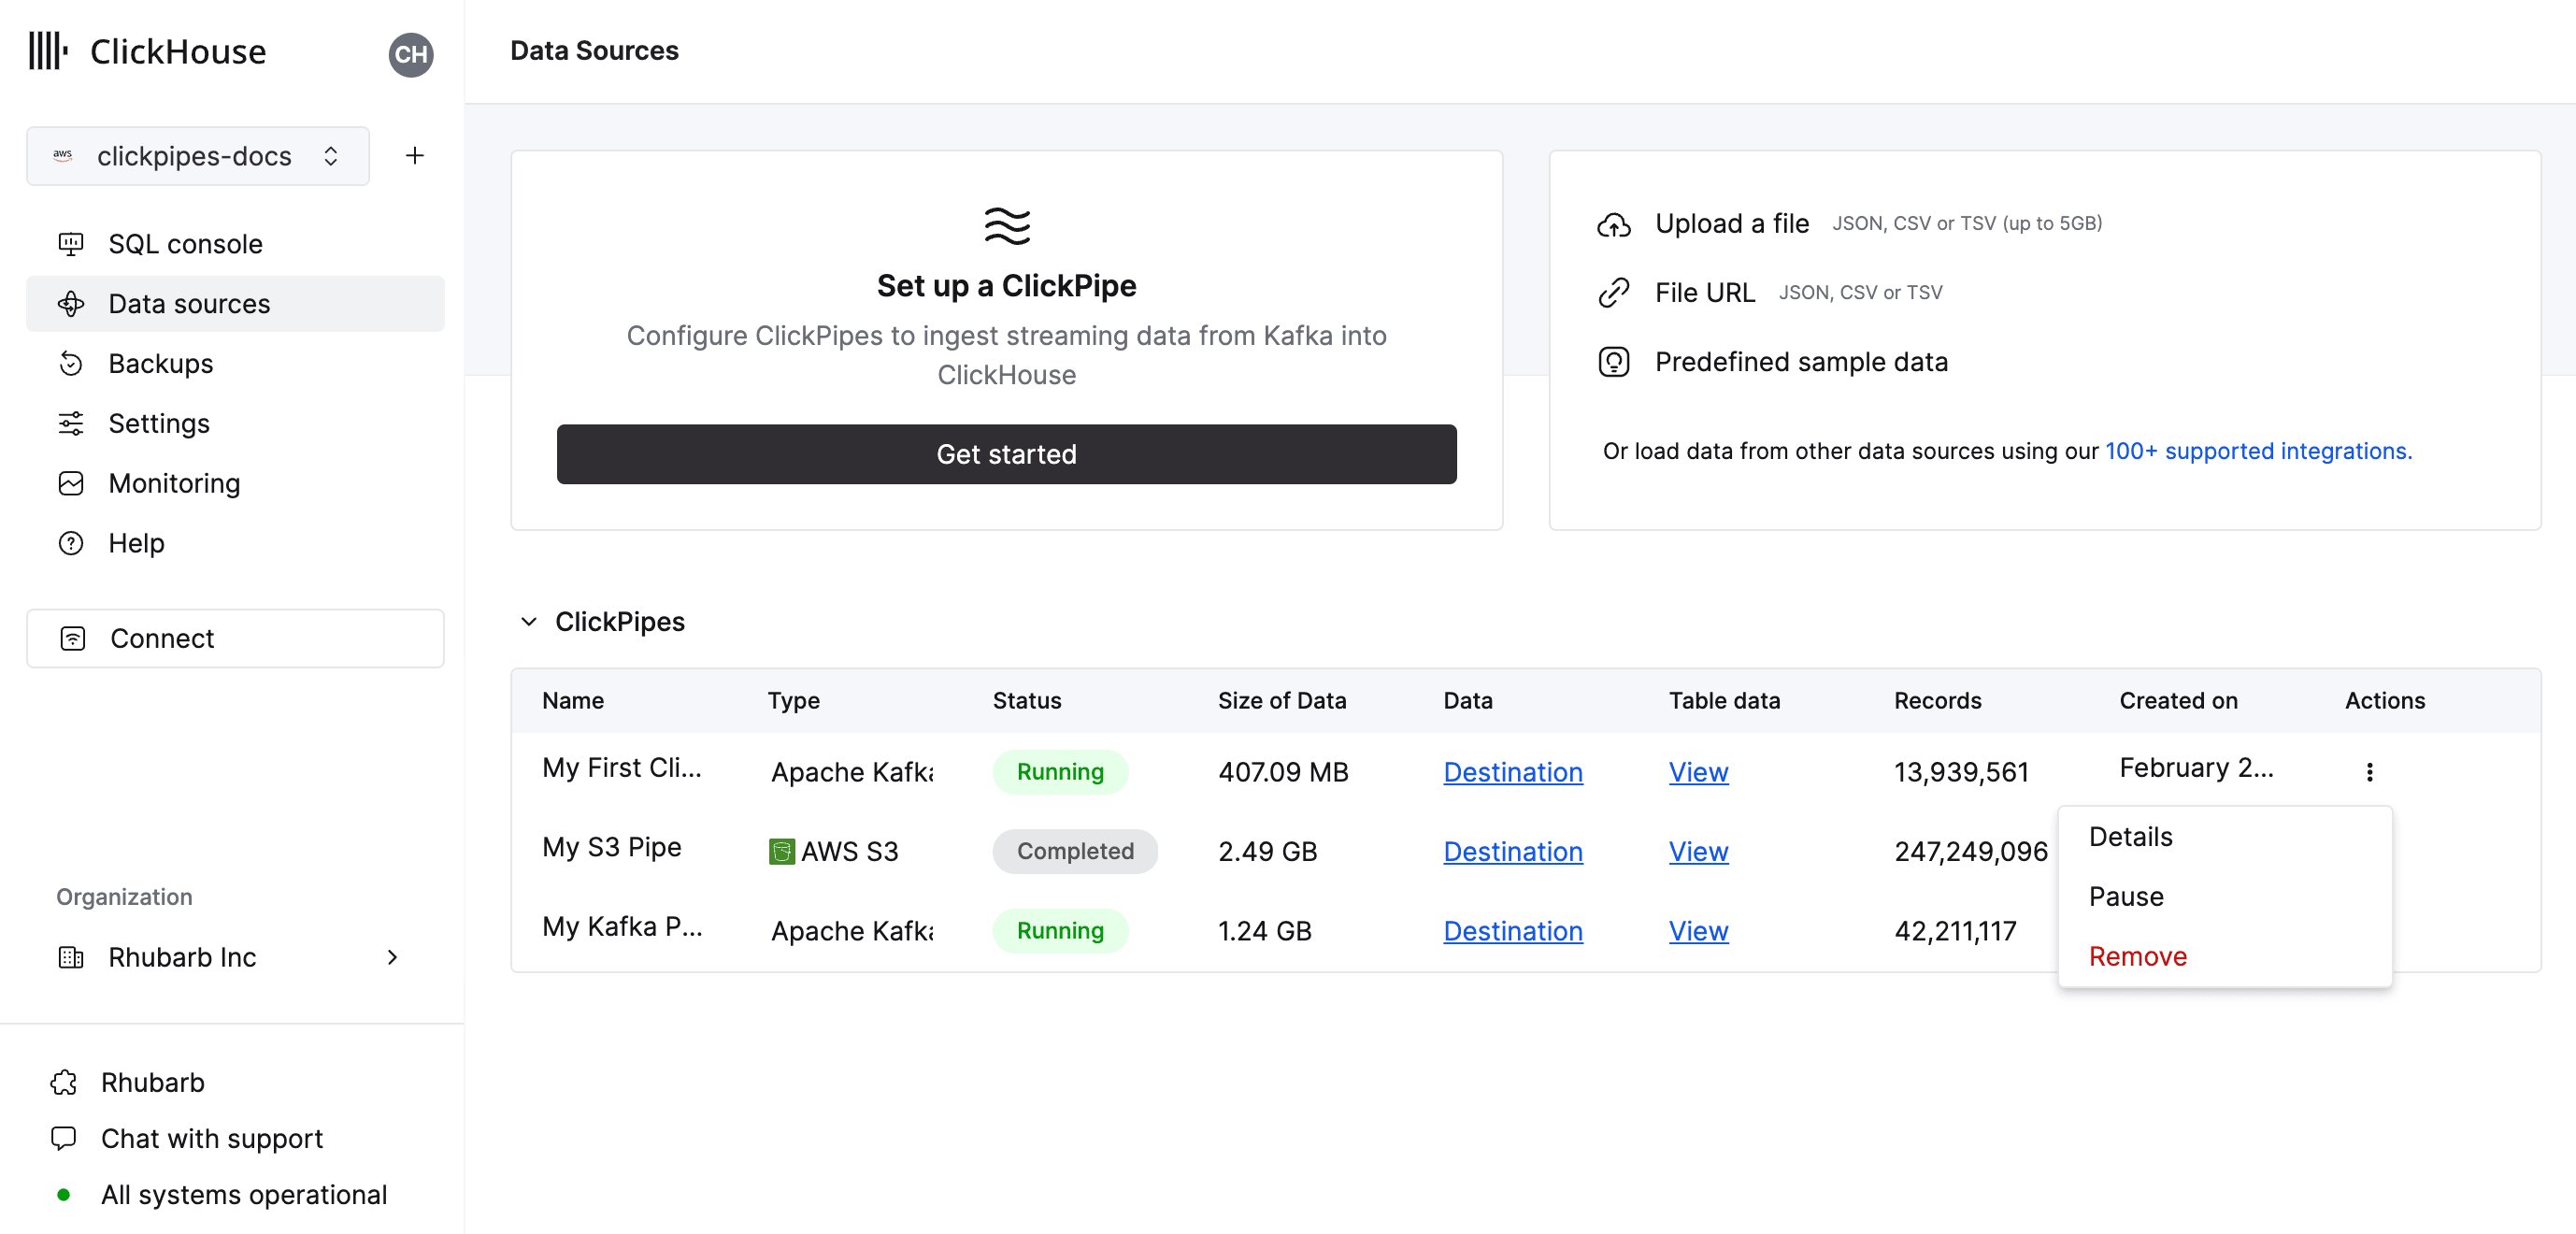 サマリーテーブルには、ソースまたは ClickHouse 内の宛先テーブルからサンプルデータを表示するためのコントロールがあります。
 また、ClickPipe を削除したり、インジェストジョブの概要を表示したりするためのコントロールもあります。
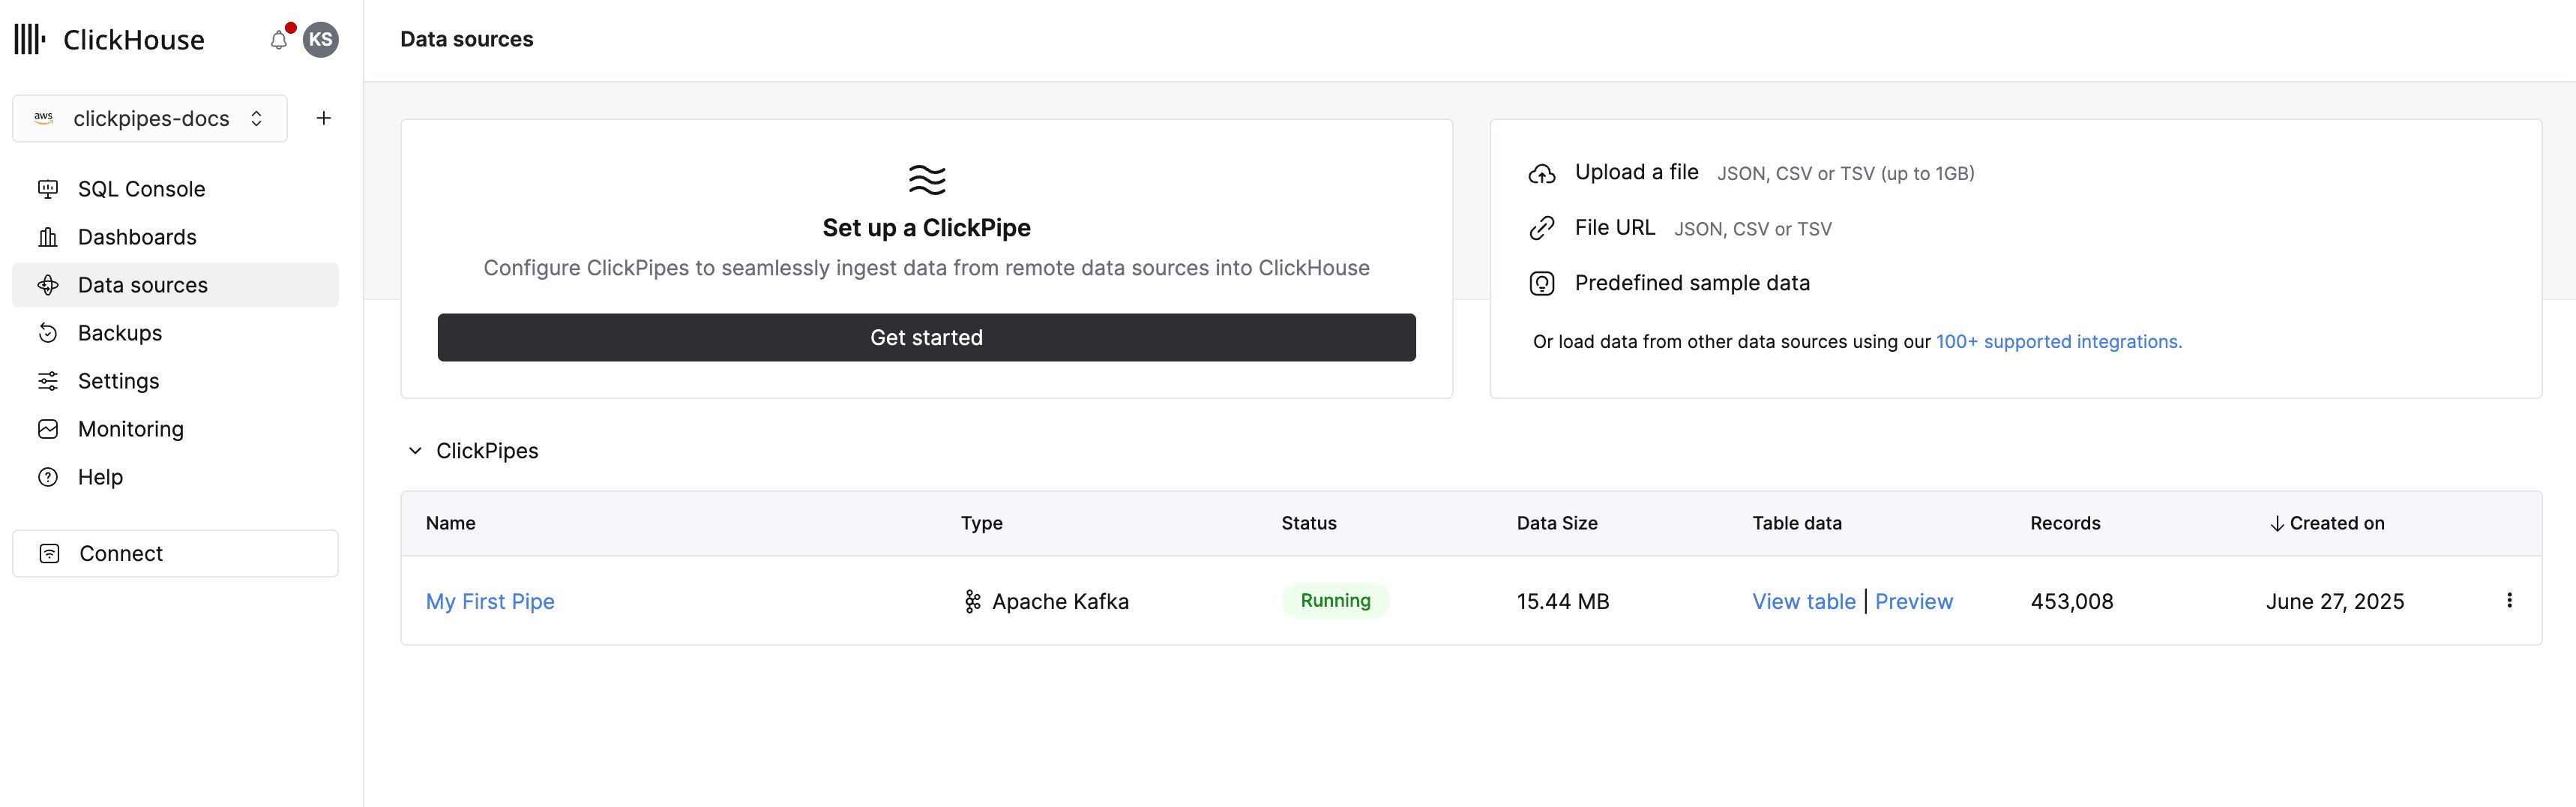 **おめでとうございます!** 最初の ClickPipe のセットアップが正常に完了しました。
この ClickPipe が継続的インジェスト用に構成されている場合は、継続的に稼働し、リモートのデータソースからデータをリアルタイムで取り込み続けます。
それ以外の場合は、Batch を取り込んで完了します。
**おめでとうございます!** 最初の ClickPipe のセットアップが正常に完了しました。
この ClickPipe が継続的インジェスト用に構成されている場合は、継続的に稼働し、リモートのデータソースからデータをリアルタイムで取り込み続けます。
それ以外の場合は、Batch を取り込んで完了します。