> ## Documentation Index
> Fetch the complete documentation index at: https://clickhouse.com/docs/llms.txt
> Use this file to discover all available pages before exploring further.
> ThoughtSpot is an AI-powered analytics platform that lets you search, explore, and visualize your data in real time.
# ThoughtSpot
export const PartnerBadge = () => {
return ;
};
ThoughtSpot can connect to ClickHouse Cloud or on-premise deployment via its native ClickHouse connector.
To connect to ClickHouse with HTTP(S) you need this information:
| Parameter(s) | Description |
| - | - |
| `HOST` and `PORT` | Typically, the port is 8443 when using TLS or 8123 when not using TLS. |
| `DATABASE NAME` | Out of the box, there is a database named `default`, use the name of the database that you want to connect to. |
| `USERNAME` and `PASSWORD` | Out of the box, the username is `default`. Use the username appropriate for your use case. |
The details for your ClickHouse Cloud service are available in the ClickHouse Cloud console.
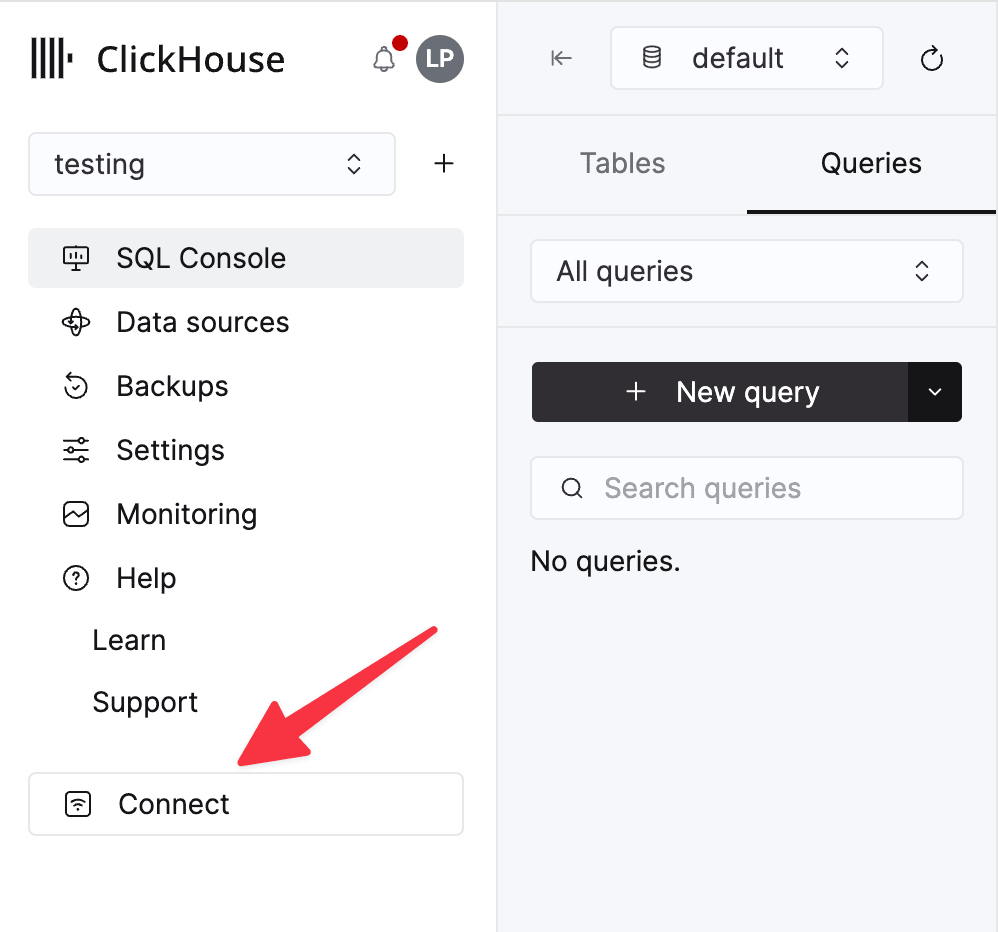
Select a service and click **Connect**:
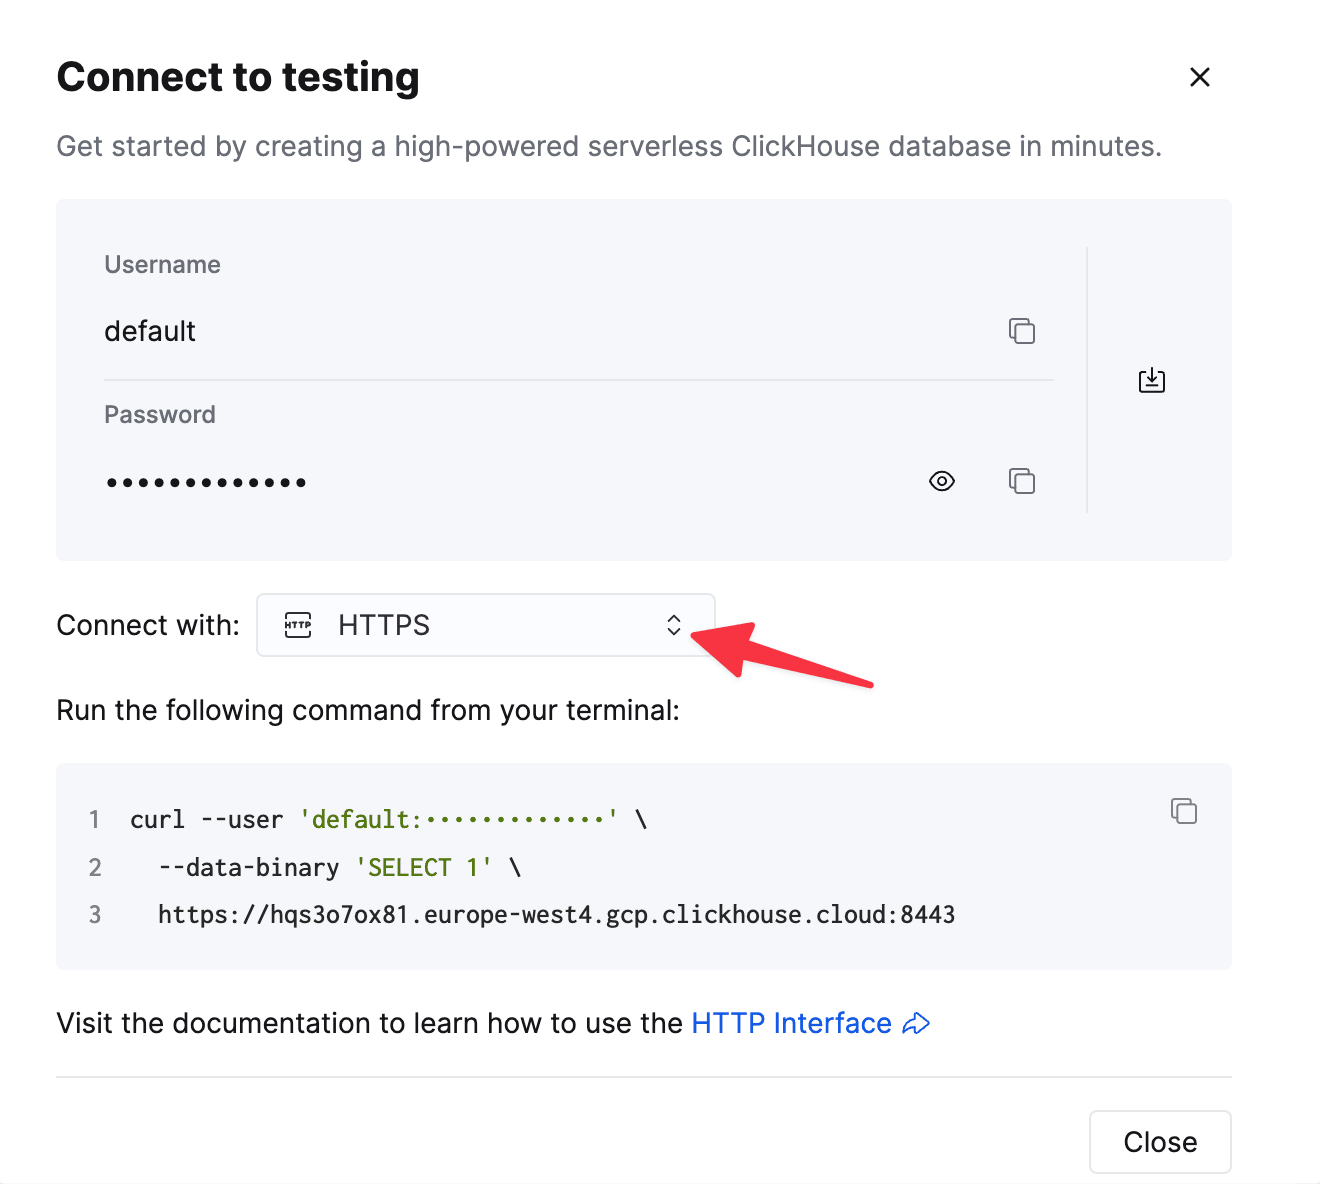
Choose **HTTPS**. Connection details are displayed in an example `curl` command.
If you're using self-managed ClickHouse, the connection details are set by your ClickHouse administrator.
1. Navigate to **Data workspace** > **Connections**.
2. Click **+ Create connection**, select the **ClickHouse** tile, then click **Next**.
3. Enter a name for your connection, an optional description, and the ClickHouse connection details you gathered in the previous step, then click **Next**. For details on each attribute, see the [ClickHouse connection reference](https://docs.thoughtspot.com/cloud/latest/connections-clickhouse-reference) in the ThoughtSpot documentation.
4. (Optional) To configure a query-level timeout, open the **Advanced Config** menu. For **Key**, enter `queryTimeoutSeconds`. For **Value**, enter the timeout in seconds. A maximum of 10 minutes is recommended.
5. (Optional) To provide additional key-value pairs, open the **Advanced Config** menu and enter a **Key** and **Value**. Click the plus sign (**+**) to add more pairs.
Any key-value pairs that you enter must be defined in your ClickHouse data source. Key-value pairs are case-sensitive.
6. Select the tables and columns you want to use, then click **Create connection**. A message confirms the number of tables and columns added.
The connection now appears on the **Data workspace** > **Connections** page. You can search your ClickHouse data and run live queries on the linked tables in ThoughtSpot.