> ## Documentation Index
> Fetch the complete documentation index at: https://clickhouse.com/docs/llms.txt
> Use this file to discover all available pages before exploring further.
> Using ClickHouse Connector Sink with Kafka Connect and ClickHouse
# Integrating Confluent platform with ClickHouse
export const Image = ({img, alt, size = "lg"}) => {
const normalizedSize = ["sm", "md", "lg"].includes(size) ? size : "lg";
return ;
};
Prerequisites
We assume you're familiar with:
* [ClickHouse Connector Sink](/docs/integrations/connectors/data-ingestion/kafka/kafka-clickhouse-connect-sink)
* Confluent Platform and [Custom Connectors](https://docs.confluent.io/cloud/current/connectors/bring-your-connector/overview.html).
This is meant to be a quick guide to get you started with the ClickHouse Sink Connector on Confluent Platform.
For more details, please refer to the [official Confluent documentation](https://docs.confluent.io/cloud/current/connectors/bring-your-connector/custom-connector-qs.html#uploading-and-launching-the-connector).
Create a Topic
Creating a topic on Confluent Platform is fairly simple, and there are detailed instructions [here](https://docs.confluent.io/cloud/current/client-apps/topics/manage.html).
Important notes
* The Kafka topic name must be the same as the ClickHouse table name. The way to tweak this is by using a transformer (for example [`ExtractTopic`](https://docs.confluent.io/platform/current/connect/transforms/extracttopic.html)).
* More partitions doesn't always mean more performance - see our upcoming guide for more details and performance tips.
Install connector
You can download the connector from our [repository](https://github.com/ClickHouse/clickhouse-kafka-connect/releases) - please feel free to submit comments and issues there as well!
Navigate to "Connector Plugins" -> "Add plugin" and using the following settings:
```text theme={null}
'Connector Class' - 'com.clickhouse.kafka.connect.ClickHouseSinkConnector'
'Connector type' - Sink
'Sensitive properties' - 'password'. This will ensure entries of the ClickHouse password are masked during configuration.
```
Example:
Gather your connection details
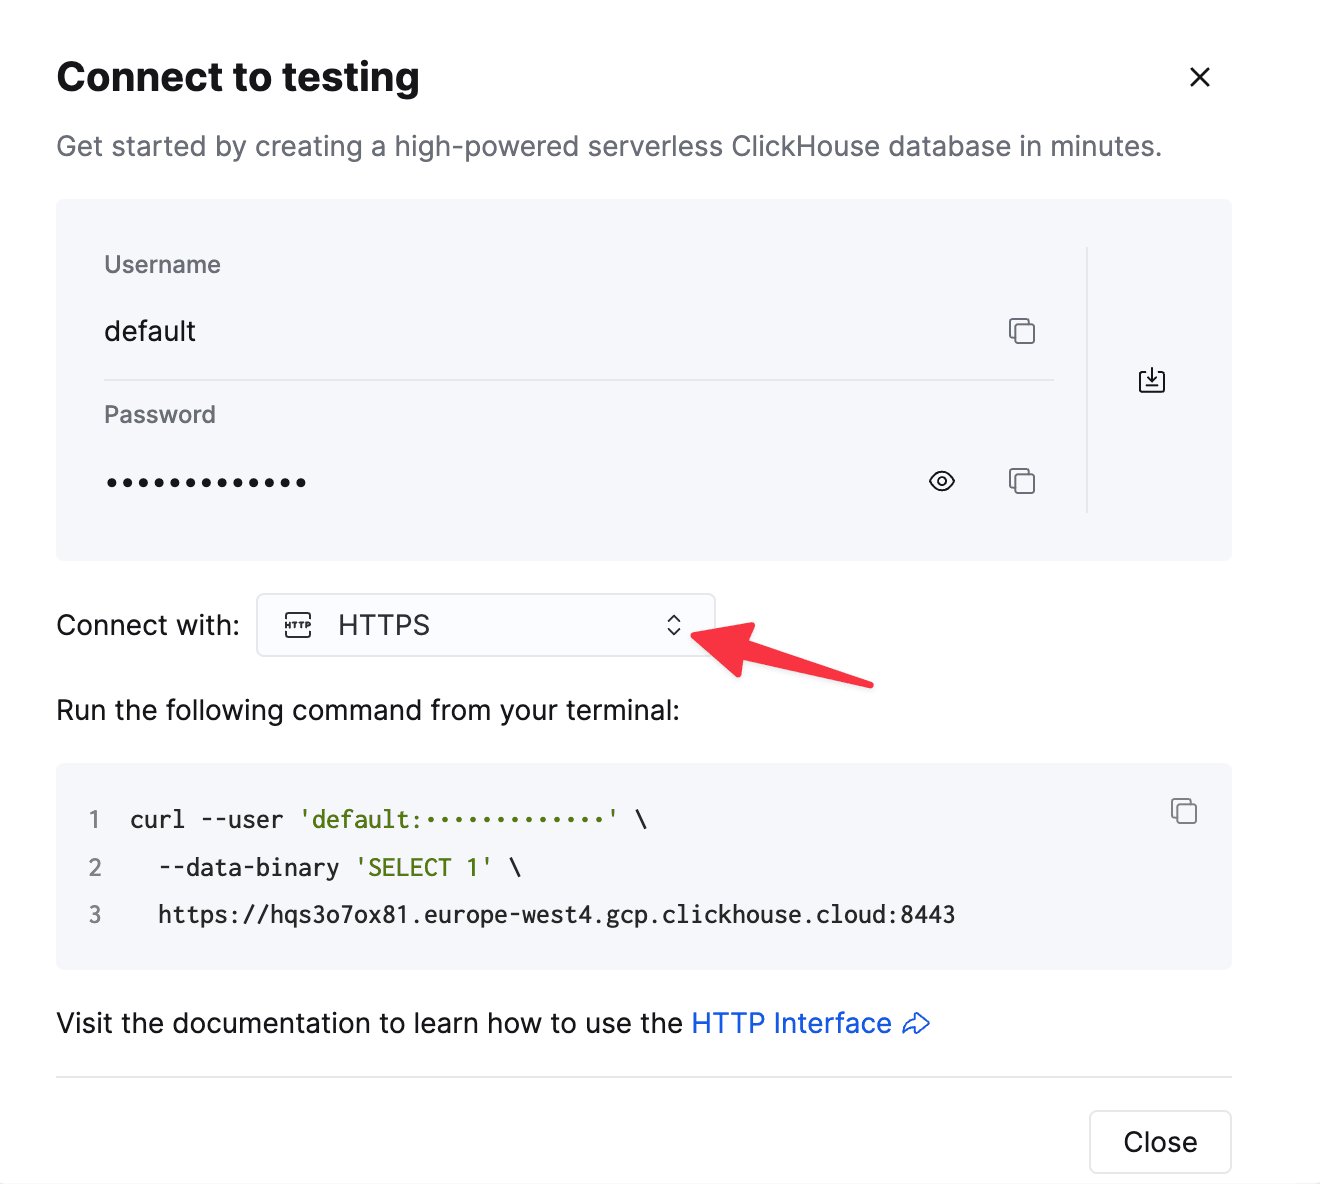
To connect to ClickHouse with HTTP(S) you need this information:
| Parameter(s) | Description |
| ------------------------- | -------------------------------------------------------------------------------------------------------------- |
| `HOST` and `PORT` | Typically, the port is 8443 when using TLS or 8123 when not using TLS. |
| `DATABASE NAME` | Out of the box, there is a database named `default`, use the name of the database that you want to connect to. |
| `USERNAME` and `PASSWORD` | Out of the box, the username is `default`. Use the username appropriate for your use case. |
The details for your ClickHouse Cloud service are available in the ClickHouse Cloud console.
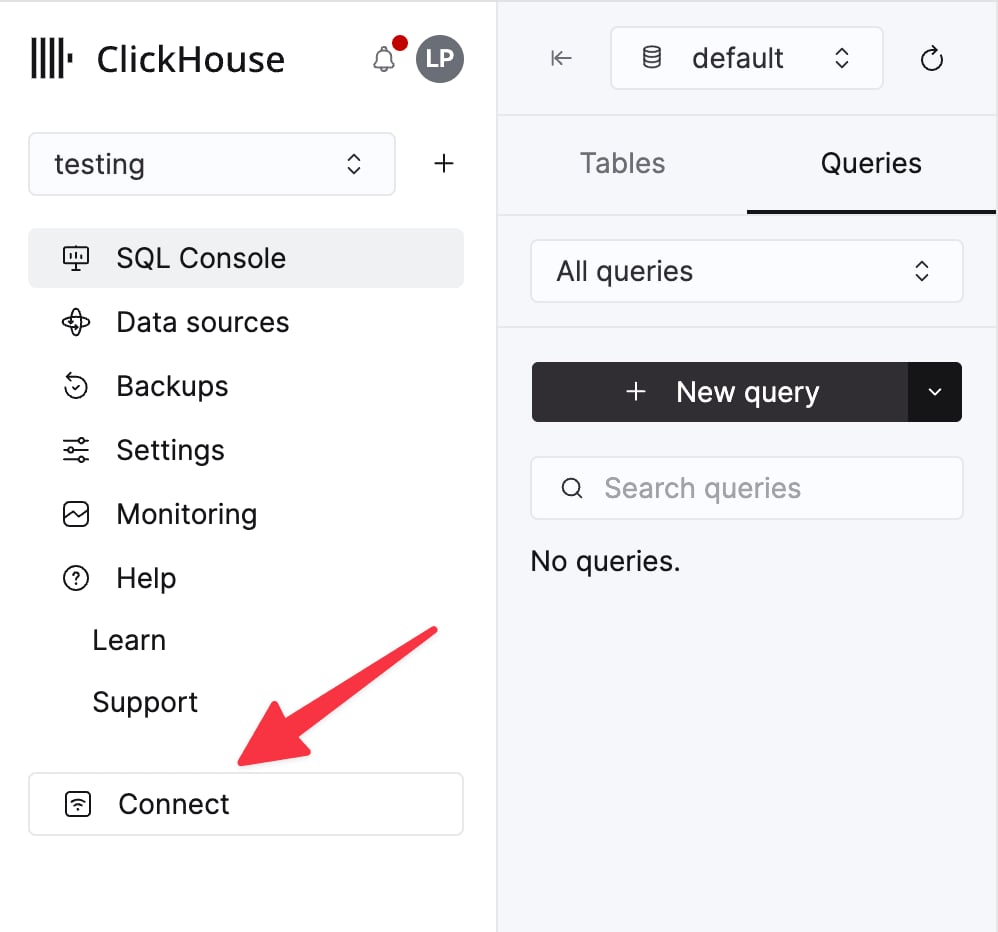
Select a service and click **Connect**:
Choose **HTTPS**. Connection details are displayed in an example `curl` command.
If you're using self-managed ClickHouse, the connection details are set by your ClickHouse administrator.
Navigate to `Connectors` -> `Add Connector` and use the following settings (note that the values are examples only):
```json theme={null}
{
"database": "",
"errors.retry.timeout": "30",
"exactlyOnce": "false",
"schemas.enable": "false",
"hostname": "",
"password": "",
"port": "8443",
"ssl": "true",
"topics": "",
"username": "",
"key.converter": "org.apache.kafka.connect.storage.StringConverter",
"value.converter": "org.apache.kafka.connect.json.JsonConverter",
"value.converter.schemas.enable": "false"
}
```
Specify the connection endpoints
You need to specify the allow-list of endpoints that the connector can access.
You must use a fully-qualified domain name (FQDN) when adding the networking egress endpoints.
Example: `u57swl97we.eu-west-1.aws.clickhouse.com:8443`
You must specify HTTP(S) port. The Connector doesn't support Native protocol yet.
[Read the documentation.](https://docs.confluent.io/cloud/current/connectors/bring-your-connector/custom-connector-qs.html#cc-byoc-endpoints)
You should be all set!
Known limitations
* Custom Connectors must use public internet endpoints. Static IP addresses aren't supported.
* You can override some Custom Connector properties. See the fill [list in the official documentation.](https://docs.confluent.io/cloud/current/connectors/bring-your-connector/custom-connector-manage.html#override-configuration-properties)
* Custom Connectors are available only in [some AWS regions](https://docs.confluent.io/cloud/current/connectors/bring-your-connector/custom-connector-fands.html#supported-aws-regions)
* See the list of [Custom Connectors limitations in the official docs](https://docs.confluent.io/cloud/current/connectors/bring-your-connector/custom-connector-fands.html#limitations)