> ## Documentation Index
> Fetch the complete documentation index at: https://clickhouse.com/docs/llms.txt
> Use this file to discover all available pages before exploring further.
> Load web scraping and automation data from Apify into ClickHouse
# Connect Apify to ClickHouse
export const CommunityMaintainedBadge = () => {
return ;
};
[Apify](https://apify.com/) is a web scraping and automation platform. You build, run, and scale serverless cloud programs called [**Actors**](https://docs.apify.com/platform/actors). Actors scrape websites, crawl the web, process data, or automate workflows. Every Actor run produces structured output stored in [**Datasets**](https://docs.apify.com/platform/storage/dataset) (collections of JSON objects).
Load scraped or processed data into ClickHouse for analytics, monitoring, or enrichment pipelines.
Key concepts
| Apify concept | What it is |
| -------------------------------------------------------------------- | ------------------------------------------------------------------------------------------------------------------------------------------------------------------------ |
| **[Actor](https://docs.apify.com/platform/actors)** | A serverless cloud program that runs on the Apify platform. Thousands of ready-made Actors are available in the [Apify Store](https://apify.com/store). |
| **[Dataset](https://docs.apify.com/platform/storage/dataset)** | The output of an Actor run. A table-like collection of JSON objects, retrievable as JSON, CSV, XML, or other formats via the [Apify API](https://docs.apify.com/api/v2). |
| **[Webhook](https://docs.apify.com/platform/integrations/webhooks)** | An event-driven HTTP call triggered when an Actor run succeeds, fails, or reaches other lifecycle events. Use webhooks to automate the Apify-to-ClickHouse pipeline. |
Setup guide
To connect to ClickHouse with HTTP(S) you need this information:
| Parameter(s) | Description |
| ------------------------- | -------------------------------------------------------------------------------------------------------------- |
| `HOST` and `PORT` | Typically, the port is 8443 when using TLS or 8123 when not using TLS. |
| `DATABASE NAME` | Out of the box, there is a database named `default`, use the name of the database that you want to connect to. |
| `USERNAME` and `PASSWORD` | Out of the box, the username is `default`. Use the username appropriate for your use case. |
The details for your ClickHouse Cloud service are available in the ClickHouse Cloud console.
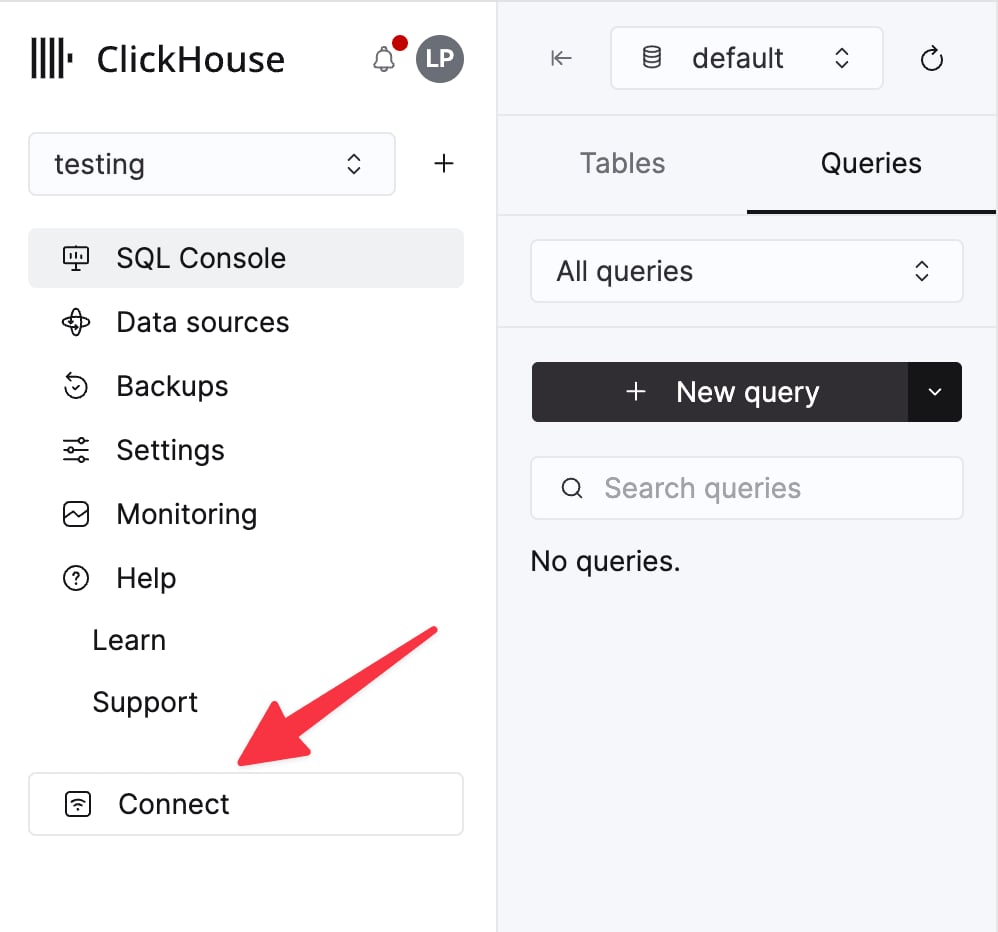
Select a service and click **Connect**:
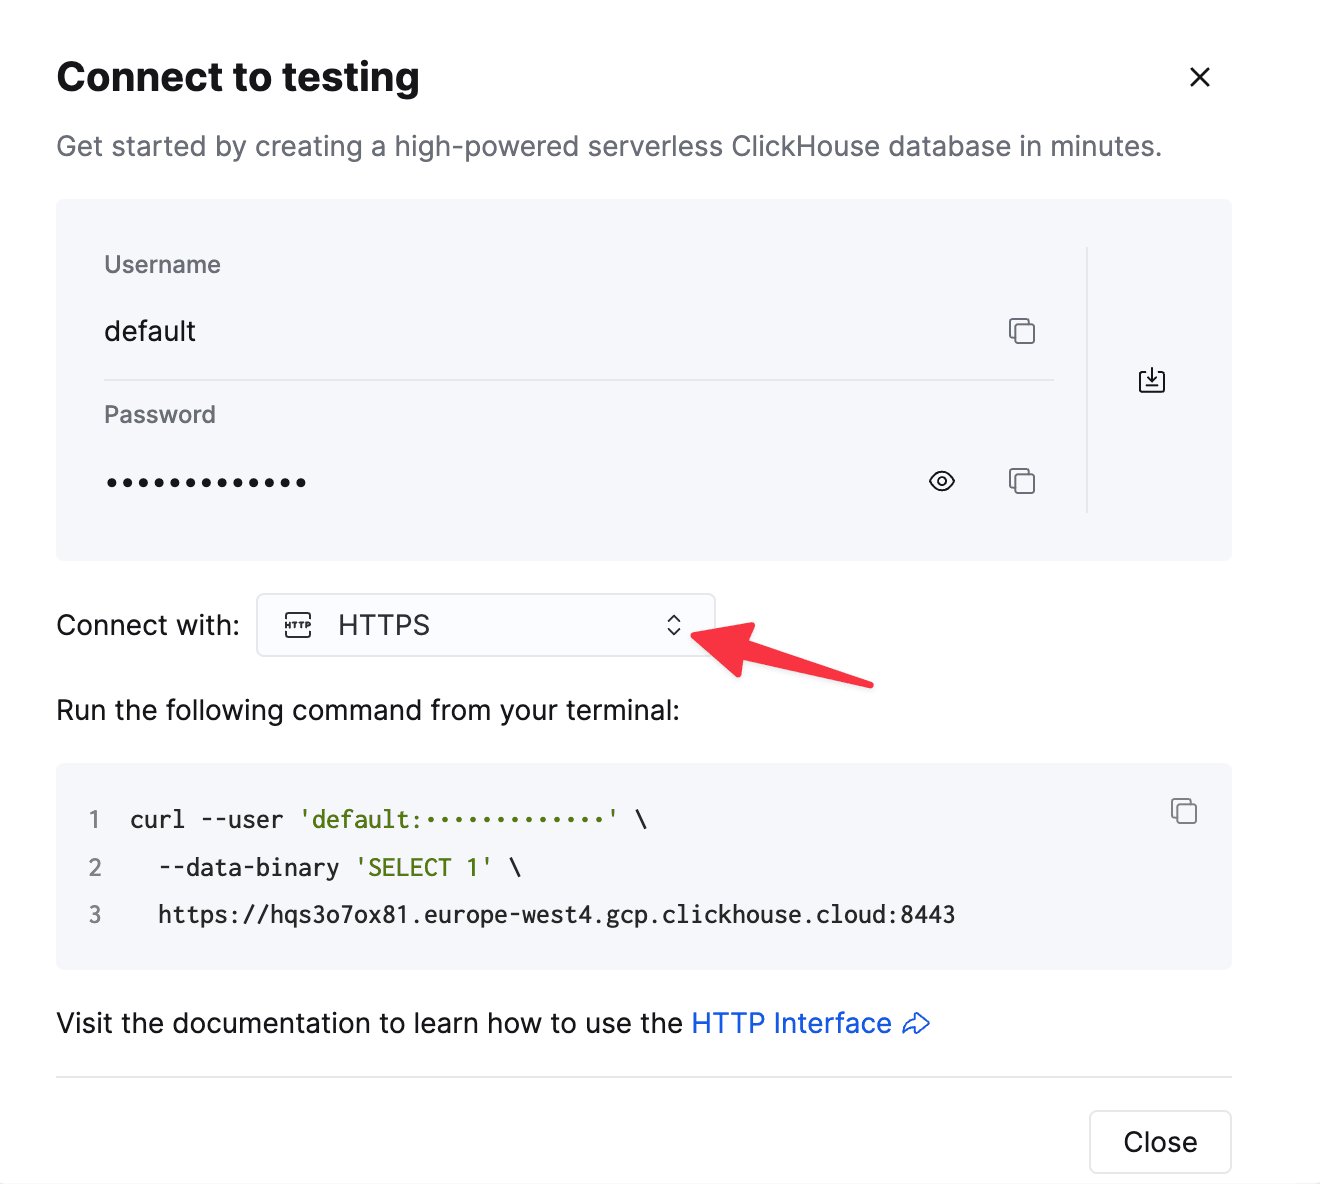
Choose **HTTPS**. Connection details are displayed in an example `curl` command.
If you're using self-managed ClickHouse, the connection details are set by your ClickHouse administrator.
You'll also need:
* An [Apify account](https://console.apify.com/sign-up) (free tier available).
* An [Apify API token](https://docs.apify.com/platform/integrations/api#api-token), found in **Settings > Integrations** in the [Apify Console](https://console.apify.com/).
* Node.js 18+ installed locally (for the JavaScript examples).
Install the Apify JavaScript client and the ClickHouse JavaScript client:
```bash theme={null}
npm install apify-client @clickhouse/client
```
Apify also provides a [Python client](https://docs.apify.com/api/client/python). If you prefer Python, install `apify-client` via pip and use [clickhouse-connect](/docs/integrations/language-clients/python/index) for ClickHouse.
Create a table to hold the scraped data. The schema depends on the Actor you use. This example uses [MergeTree](/docs/reference/engines/table-engines/mergetree-family/mergetree) for a product scraping Actor:
```sql theme={null}
CREATE TABLE apify_products
(
url String,
title String,
price Float64,
currency String,
scraped_at DateTime DEFAULT now()
)
ENGINE = MergeTree()
ORDER BY (scraped_at, url);
```
The following script fetches the results of an Apify Actor run and inserts them into ClickHouse:
```javascript theme={null}
import { ApifyClient } from 'apify-client';
import { createClient } from '@clickhouse/client';
// Initialize clients
const apify = new ApifyClient({ token: 'YOUR_APIFY_API_TOKEN' });
const clickhouse = createClient({
url: 'https://YOUR_CLICKHOUSE_HOST:8443',
username: 'default',
password: 'YOUR_CLICKHOUSE_PASSWORD',
database: 'default',
});
// Fetch dataset items from the last run of an Actor
const run = await apify.actor('YOUR_ACTOR_ID').call();
const { items } = await apify.dataset(run.defaultDatasetId).listItems();
console.log(`Fetched ${items.length} items from Apify dataset.`);
// Insert into ClickHouse
await clickhouse.insert({
table: 'apify_products',
values: items,
format: 'JSONEachRow',
});
console.log(`Inserted ${items.length} rows into ClickHouse.`);
await clickhouse.close();
```
For large datasets, paginate through results using the `limit` and `offset` parameters of the [List dataset items](https://docs.apify.com/api/v2#/reference/datasets/item-collection/list-items) endpoint. You can also pass `clean=true` to retrieve only non-empty, deduplicated items.
Instead of running the script manually, automate the pipeline so data loads into ClickHouse every time an Actor finishes:
1. In the [Apify Console](https://console.apify.com/), go to your Actor and open the **Integrations** tab.
2. Add a new webhook with:
* **Event type:** `ACTOR.RUN.SUCCEEDED`
* **Action:** An HTTP POST to your loader endpoint, or trigger another Actor that handles the ClickHouse insert.
3. The webhook payload includes the `defaultDatasetId`, which you can use to fetch the run's results.
See [Apify webhook documentation](https://docs.apify.com/platform/integrations/webhooks) for payload details and configuration options.
An alternative approach is to use [Apify Schedules](https://docs.apify.com/platform/schedules) to run Actors on a cron-like schedule, combined with webhooks for the loading step.
Best practices
Fetching data from Apify
Use the Apify client library (`apify-client` for [JavaScript](https://docs.apify.com/api/client/js) or [Python](https://docs.apify.com/api/client/python)) instead of raw HTTP calls. It handles pagination, retries, and authentication for you. For large datasets, paginate through results with the `limit` and `offset` parameters of the [List dataset items](https://docs.apify.com/api/v2#/reference/datasets/item-collection/list-items) endpoint.
Loading into ClickHouse
Use [`JSONEachRow`](/docs/reference/formats/JSON/JSONEachRow) format when inserting into ClickHouse. It maps directly to Apify's JSON output with no transformation needed.
Match your ClickHouse table schema to the Actor's output fields. Check the Actor's output schema on its [Apify Store](https://apify.com/store) page or in the **Dataset** tab after a run.
For high-throughput inserts from the JavaScript client, follow the [Tips for performance optimizations](/docs/integrations/language-clients/js/index#tips-for-performance-optimizations). Batch rows into larger inserts rather than inserting one row at a time, and consider [async inserts](/docs/concepts/features/operations/insert/asyncinserts) when client-side batching isn't practical.
Security
The examples on this page use the `default` user and database to keep things simple. In production, create a dedicated user with the minimum privileges required to insert into your target table, and store credentials securely (for example, in environment variables or a secrets manager rather than committing them to source code). See [Cloud access management](/docs/products/cloud/guides/security/cloud-access-management/index) for guidance.
* [Apify Platform documentation](https://docs.apify.com)
* [Apify API reference](https://docs.apify.com/api/v2)
* [Apify JavaScript client](https://docs.apify.com/api/client/js)
* [Apify Python client](https://docs.apify.com/api/client/python)
* [Apify Store (ready-made Actors)](https://apify.com/store)
* [Apify integrations overview](https://docs.apify.com/platform/integrations)
* [ClickHouse JavaScript client](/docs/integrations/language-clients/js/index)