> ## Documentation Index
> Fetch the complete documentation index at: https://clickhouse.com/docs/llms.txt
> Use this file to discover all available pages before exploring further.
# Integrating S3 with ClickHouse
> Page describing how to integrate S3 with ClickHouse
export const Image = ({img, alt, size = "lg"}) => {
const normalizedSize = ["sm", "md", "lg"].includes(size) ? size : "lg";
return ;
};
You can insert data from S3 into ClickHouse and also use S3 as an export destination, thus allowing interaction with "Data Lake" architectures. Furthermore, S3 can provide "cold" storage tiers and assist with separating storage and compute. In the sections below we use the New York City taxi dataset to demonstrate the process of moving data between S3 and ClickHouse, as well as identifying key configuration parameters and providing hints on optimizing performance.
S3 table functions
The `s3` table function allows you to read and write files from and to S3 compatible storage. The outline for this syntax is:
```sql theme={null}
s3(path, [aws_access_key_id, aws_secret_access_key,] [format, [structure, [compression]]])
```
where:
* path — Bucket URL with a path to the file. This supports following wildcards in read-only mode: `*`, `?`, `{abc,def}` and `{N..M}` where `N`, `M` are numbers, `'abc'`, `'def'` are strings. For more information, see the docs on [using wildcards in path](/docs/reference/engines/table-engines/integrations/s3#wildcards-in-path).
* format — The [format](/docs/reference/formats/index#formats-overview) of the file.
* structure — Structure of the table. Format `'column1_name column1_type, column2_name column2_type, ...'`.
* compression — Parameter is optional. Supported values: `none`, `gzip/gz`, `brotli/br`, `xz/LZMA`, `zstd/zst`. By default, it will autodetect compression by file extension.
Using wildcards in the path expression allow multiple files to be referenced and opens the door for parallelism.
Preparation
Prior to creating the table in ClickHouse, you may want to first take a closer look at the data in the S3 bucket. You can do this directly from ClickHouse using the `DESCRIBE` statement:
```sql theme={null}
DESCRIBE TABLE s3('https://datasets-documentation.s3.eu-west-3.amazonaws.com/nyc-taxi/trips_*.gz', 'TabSeparatedWithNames');
```
The output of the `DESCRIBE TABLE` statement should show you how ClickHouse would automatically infer this data, as viewed in the S3 bucket. Notice that it also automatically recognizes and decompresses the gzip compression format:
```sql theme={null}
DESCRIBE TABLE s3('https://datasets-documentation.s3.eu-west-3.amazonaws.com/nyc-taxi/trips_*.gz', 'TabSeparatedWithNames') SETTINGS describe_compact_output=1
```
```response theme={null}
┌─name──────────────────┬─type───────────────┐
│ trip_id │ Nullable(Int64) │
│ vendor_id │ Nullable(Int64) │
│ pickup_date │ Nullable(Date) │
│ pickup_datetime │ Nullable(DateTime) │
│ dropoff_date │ Nullable(Date) │
│ dropoff_datetime │ Nullable(DateTime) │
│ store_and_fwd_flag │ Nullable(Int64) │
│ rate_code_id │ Nullable(Int64) │
│ pickup_longitude │ Nullable(Float64) │
│ pickup_latitude │ Nullable(Float64) │
│ dropoff_longitude │ Nullable(Float64) │
│ dropoff_latitude │ Nullable(Float64) │
│ passenger_count │ Nullable(Int64) │
│ trip_distance │ Nullable(String) │
│ fare_amount │ Nullable(String) │
│ extra │ Nullable(String) │
│ mta_tax │ Nullable(String) │
│ tip_amount │ Nullable(String) │
│ tolls_amount │ Nullable(Float64) │
│ ehail_fee │ Nullable(Int64) │
│ improvement_surcharge │ Nullable(String) │
│ total_amount │ Nullable(String) │
│ payment_type │ Nullable(String) │
│ trip_type │ Nullable(Int64) │
│ pickup │ Nullable(String) │
│ dropoff │ Nullable(String) │
│ cab_type │ Nullable(String) │
│ pickup_nyct2010_gid │ Nullable(Int64) │
│ pickup_ctlabel │ Nullable(Float64) │
│ pickup_borocode │ Nullable(Int64) │
│ pickup_ct2010 │ Nullable(String) │
│ pickup_boroct2010 │ Nullable(String) │
│ pickup_cdeligibil │ Nullable(String) │
│ pickup_ntacode │ Nullable(String) │
│ pickup_ntaname │ Nullable(String) │
│ pickup_puma │ Nullable(Int64) │
│ dropoff_nyct2010_gid │ Nullable(Int64) │
│ dropoff_ctlabel │ Nullable(Float64) │
│ dropoff_borocode │ Nullable(Int64) │
│ dropoff_ct2010 │ Nullable(String) │
│ dropoff_boroct2010 │ Nullable(String) │
│ dropoff_cdeligibil │ Nullable(String) │
│ dropoff_ntacode │ Nullable(String) │
│ dropoff_ntaname │ Nullable(String) │
│ dropoff_puma │ Nullable(Int64) │
└───────────────────────┴────────────────────┘
```
To interact with our S3-based dataset, we prepare a standard `MergeTree` table as our destination. The statement below creates a table named `trips` in the default database. Note that we have chosen to modify some of those data types as inferred above, particularly to not use the [`Nullable()`](/docs/reference/data-types/nullable) data type modifier, which could cause some unnecessary additional stored data and some additional performance overhead:
```sql theme={null}
CREATE TABLE trips
(
`trip_id` UInt32,
`vendor_id` Enum8('1' = 1, '2' = 2, '3' = 3, '4' = 4, 'CMT' = 5, 'VTS' = 6, 'DDS' = 7, 'B02512' = 10, 'B02598' = 11, 'B02617' = 12, 'B02682' = 13, 'B02764' = 14, '' = 15),
`pickup_date` Date,
`pickup_datetime` DateTime,
`dropoff_date` Date,
`dropoff_datetime` DateTime,
`store_and_fwd_flag` UInt8,
`rate_code_id` UInt8,
`pickup_longitude` Float64,
`pickup_latitude` Float64,
`dropoff_longitude` Float64,
`dropoff_latitude` Float64,
`passenger_count` UInt8,
`trip_distance` Float64,
`fare_amount` Float32,
`extra` Float32,
`mta_tax` Float32,
`tip_amount` Float32,
`tolls_amount` Float32,
`ehail_fee` Float32,
`improvement_surcharge` Float32,
`total_amount` Float32,
`payment_type` Enum8('UNK' = 0, 'CSH' = 1, 'CRE' = 2, 'NOC' = 3, 'DIS' = 4),
`trip_type` UInt8,
`pickup` FixedString(25),
`dropoff` FixedString(25),
`cab_type` Enum8('yellow' = 1, 'green' = 2, 'uber' = 3),
`pickup_nyct2010_gid` Int8,
`pickup_ctlabel` Float32,
`pickup_borocode` Int8,
`pickup_ct2010` String,
`pickup_boroct2010` String,
`pickup_cdeligibil` String,
`pickup_ntacode` FixedString(4),
`pickup_ntaname` String,
`pickup_puma` UInt16,
`dropoff_nyct2010_gid` UInt8,
`dropoff_ctlabel` Float32,
`dropoff_borocode` UInt8,
`dropoff_ct2010` String,
`dropoff_boroct2010` String,
`dropoff_cdeligibil` String,
`dropoff_ntacode` FixedString(4),
`dropoff_ntaname` String,
`dropoff_puma` UInt16
)
ENGINE = MergeTree
PARTITION BY toYYYYMM(pickup_date)
ORDER BY pickup_datetime
```
Note the use of [partitioning](/docs/reference/engines/table-engines/mergetree-family/custom-partitioning-key) on the `pickup_date` field. Usually a partition key is for data management, but later on we will use this key to parallelize writes to S3.
Each entry in our taxi dataset contains a taxi trip. This anonymized data consists of 20M records compressed in the S3 bucket [https://datasets-documentation.s3.eu-west-3.amazonaws.com/](https://datasets-documentation.s3.eu-west-3.amazonaws.com/) under the folder **nyc-taxi**. The data is in the TSV format with approximately 1M rows per file.
Reading Data from S3
We can query S3 data as a source without requiring persistence in ClickHouse. In the following query, we sample 10 rows. Note the absence of credentials here as the bucket is publicly accessible:
```sql theme={null}
SELECT *
FROM s3('https://datasets-documentation.s3.eu-west-3.amazonaws.com/nyc-taxi/trips_*.gz', 'TabSeparatedWithNames')
LIMIT 10;
```
Note that we're not required to list the columns since the `TabSeparatedWithNames` format encodes the column names in the first row. Other formats, such as `CSV` or `TSV`, will return auto-generated columns for this query, e.g., `c1`, `c2`, `c3` etc.
Queries additionally support [virtual columns](/docs/reference/functions/table-functions/s3#virtual-columns), like `_path` and `_file`, that provide information regarding the bucket path and filename respectively. For example:
```sql theme={null}
SELECT _path, _file, trip_id
FROM s3('https://datasets-documentation.s3.eu-west-3.amazonaws.com/nyc-taxi/trips_0.gz', 'TabSeparatedWithNames')
LIMIT 5;
```
```response theme={null}
┌─_path──────────────────────────────────────┬─_file──────┬────trip_id─┐
│ datasets-documentation/nyc-taxi/trips_0.gz │ trips_0.gz │ 1199999902 │
│ datasets-documentation/nyc-taxi/trips_0.gz │ trips_0.gz │ 1199999919 │
│ datasets-documentation/nyc-taxi/trips_0.gz │ trips_0.gz │ 1199999944 │
│ datasets-documentation/nyc-taxi/trips_0.gz │ trips_0.gz │ 1199999969 │
│ datasets-documentation/nyc-taxi/trips_0.gz │ trips_0.gz │ 1199999990 │
└────────────────────────────────────────────┴────────────┴────────────┘
```
Confirm the number of rows in this sample dataset. Note the use of wildcards for file expansion, so we consider all twenty files. This query will take around 10 seconds, depending on the number of cores on the ClickHouse instance:
```sql theme={null}
SELECT count() AS count
FROM s3('https://datasets-documentation.s3.eu-west-3.amazonaws.com/nyc-taxi/trips_*.gz', 'TabSeparatedWithNames');
```
```response theme={null}
┌────count─┐
│ 20000000 │
└──────────┘
```
While useful for sampling data and executing ae-hoc, exploratory queries, reading data directly from S3 isn't something you want to do regularly. When it is time to get serious, import the data into a `MergeTree` table in ClickHouse.
Using clickhouse-local
The `clickhouse-local` program enables you to perform fast processing on local files without deploying and configuring the ClickHouse server. Any queries using the `s3` table function can be performed with this utility. For example:
```sql theme={null}
clickhouse-local --query "SELECT * FROM s3('https://datasets-documentation.s3.eu-west-3.amazonaws.com/nyc-taxi/trips_*.gz', 'TabSeparatedWithNames') LIMIT 10"
```
Inserting Data from S3
To exploit the full capabilities of ClickHouse, we next read and insert the data into our instance.
We combine our `s3` function with a simple `INSERT` statement to achieve this. Note that we aren't required to list our columns because our target table provides the required structure. This requires the columns to appear in the order specified in the table DDL statement: columns are mapped according to their position in the `SELECT` clause. The insertion of all 10m rows can take a few minutes depending on the ClickHouse instance. Below we insert 1M rows to ensure a prompt response. Adjust the `LIMIT` clause or column selection to import subsets as required:
```sql theme={null}
INSERT INTO trips
SELECT *
FROM s3('https://datasets-documentation.s3.eu-west-3.amazonaws.com/nyc-taxi/trips_*.gz', 'TabSeparatedWithNames')
LIMIT 1000000;
```
Remote Insert using ClickHouse Local
If network security policies prevent your ClickHouse cluster from making outbound connections, you can potentially insert S3 data using `clickhouse-local`. In the example below, we read from an S3 bucket and insert into ClickHouse using the `remote` function:
```sql theme={null}
clickhouse-local --query "INSERT INTO TABLE FUNCTION remote('localhost:9000', 'default.trips', 'username', 'password') (*) SELECT * FROM s3('https://datasets-documentation.s3.eu-west-3.amazonaws.com/nyc-taxi/trips_*.gz', 'TabSeparatedWithNames') LIMIT 10"
```
To execute this over a secure SSL connection, utilize the `remoteSecure` function.
Exporting data
You can write to files in S3 using the `s3` table function. This will require appropriate permissions. We pass the credentials needed in the request, but view the [Managing Credentials](#managing-credentials) page for more options.
In the simple example below, we use the table function as a destination instead of a source. Here we stream 10,000 rows from the `trips` table to a bucket, specifying `lz4` compression and output type of `CSV`:
```sql theme={null}
INSERT INTO FUNCTION
s3(
'https://datasets-documentation.s3.eu-west-3.amazonaws.com/csv/trips.csv.lz4',
's3_key',
's3_secret',
'CSV'
)
SELECT *
FROM trips
LIMIT 10000;
```
Note here how the format of the file is inferred from the extension. We also don't need to specify the columns in the `s3` function - this can be inferred from the `SELECT`.
Splitting large files
It is unlikely you will want to export your data as a single file. Most tools, including ClickHouse, will achieve higher throughput performance when reading and writing to multiple files due to the possibility of parallelism. We could execute our `INSERT` command multiple times, targeting a subset of the data. ClickHouse offers a means of automatic splitting files using a `PARTITION` key.
In the example below, we create ten files using a modulus of the `rand()` function. Notice how the resulting partition ID is referenced in the filename. This results in ten files with a numerical suffix, e.g. `trips_0.csv.lz4`, `trips_1.csv.lz4` etc...:
```sql theme={null}
INSERT INTO FUNCTION
s3(
'https://datasets-documentation.s3.eu-west-3.amazonaws.com/csv/trips_{_partition_id}.csv.lz4',
's3_key',
's3_secret',
'CSV'
)
PARTITION BY rand() % 10
SELECT *
FROM trips
LIMIT 100000;
```
Alternatively, we can reference a field in the data. For this dataset, the `payment_type` provides a natural partitioning key with a cardinality of 5.
```sql theme={null}
INSERT INTO FUNCTION
s3(
'https://datasets-documentation.s3.eu-west-3.amazonaws.com/csv/trips_{_partition_id}.csv.lz4',
's3_key',
's3_secret',
'CSV'
)
PARTITION BY payment_type
SELECT *
FROM trips
LIMIT 100000;
```
Utilizing clusters
The above functions are all limited to execution on a single node. Read speeds will scale linearly with CPU cores until other resources (typically network) are saturated, allowing users to vertically scale. However, this approach has its limitations. While you can alleviate some resource pressure by inserting into a distributed table when performing an `INSERT INTO SELECT` query, this still leaves a single node reading, parsing, and processing the data. To address this challenge and allow us to scale reads horizontally, we have the [s3Cluster](/docs/reference/functions/table-functions/s3Cluster) function.
The node which receives the query, known as the initiator, creates a connection to every node in the cluster. The glob pattern determining which files need to be read is resolved to a set of files. The initiator distributes files to the nodes in the cluster, which act as workers. These workers, in turn, request files to process as they complete reads. This process ensures that we can scale reads horizontally.
The `s3Cluster` function takes the same format as the single node variants, except that a target cluster is required to denote the worker nodes:
```sql theme={null}
s3Cluster(cluster_name, source, [access_key_id, secret_access_key,] format, structure)
```
* `cluster_name` — Name of a cluster that is used to build a set of addresses and connection parameters to remote and local servers.
* `source` — URL to a file or a bunch of files. Supports following wildcards in read-only mode: `*`, `?`, `{'abc','def'}` and `{N..M}` where N, M — numbers, abc, def — strings. For more information see [Wildcards In Path](/docs/reference/engines/table-engines/integrations/s3#wildcards-in-path).
* `access_key_id` and `secret_access_key` — Keys that specify credentials to use with the given endpoint. Optional.
* `format` — The [format](/docs/reference/formats/index#formats-overview) of the file.
* `structure` — Structure of the table. Format 'column1\_name column1\_type, column2\_name column2\_type, ...'.
Like any `s3` functions, the credentials are optional if the bucket is insecure or you define security through the environment, e.g., IAM roles. Unlike the s3 function, however, the structure must be specified in the request as of 22.3.1, i.e., the schema isn't inferred.
This function will be used as part of an `INSERT INTO SELECT` in most cases. In this case, you will often be inserting a distributed table. We illustrate a simple example below where trips\_all is a distributed table. While this table uses the events cluster, the consistency of the nodes used for reads and writes isn't a requirement:
```sql theme={null}
INSERT INTO default.trips_all
SELECT *
FROM s3Cluster(
'events',
'https://datasets-documentation.s3.eu-west-3.amazonaws.com/nyc-taxi/trips_*.gz',
'TabSeparatedWithNames'
)
```
Inserts will occur against the initiator node. This means that while reads will occur on each node, the resulting rows will be routed to the initiator for distribution. In high throughput scenarios, this may prove a bottleneck. To address this, set the parameter [parallel\_distributed\_insert\_select](/docs/reference/settings/session-settings#parallel_distributed_insert_select) for the `s3cluster` function.
S3 table engines
While the `s3` functions allow ad-hoc queries to be performed on data stored in S3, they're syntactically verbose. The `S3` table engine allows you to not have to specify the bucket URL and credentials over and over again. To address this, ClickHouse provides the S3 table engine.
```sql theme={null}
CREATE TABLE s3_engine_table (name String, value UInt32)
ENGINE = S3(path, [aws_access_key_id, aws_secret_access_key,] format, [compression])
[SETTINGS ...]
```
* `path` — Bucket URL with a path to the file. Supports following wildcards in read-only mode: `*`, `?`, `{abc,def}` and `{N..M}` where N, M — numbers, 'abc', 'def' — strings. For more information, see [here](/docs/reference/engines/table-engines/integrations/s3#wildcards-in-path).
* `format` — The[ format](/docs/reference/formats/index#formats-overview) of the file.
* `aws_access_key_id`, `aws_secret_access_key` - Long-term credentials for the AWS account user. You can use these to authenticate your requests. The parameter is optional. If credentials aren't specified, configuration file values are used. For more information, see [Managing credentials](#managing-credentials).
* `compression` — Compression type. Supported values: none, gzip/gz, brotli/br, xz/LZMA, zstd/zst. The parameter is optional. By default, it will autodetect compression by file extension.
Reading data
In the following example, we create a table named `trips_raw` using the first ten TSV files located in the `https://datasets-documentation.s3.eu-west-3.amazonaws.com/nyc-taxi/` bucket. Each of these contains 1M rows each:
```sql theme={null}
CREATE TABLE trips_raw
(
`trip_id` UInt32,
`vendor_id` Enum8('1' = 1, '2' = 2, '3' = 3, '4' = 4, 'CMT' = 5, 'VTS' = 6, 'DDS' = 7, 'B02512' = 10, 'B02598' = 11, 'B02617' = 12, 'B02682' = 13, 'B02764' = 14, '' = 15),
`pickup_date` Date,
`pickup_datetime` DateTime,
`dropoff_date` Date,
`dropoff_datetime` DateTime,
`store_and_fwd_flag` UInt8,
`rate_code_id` UInt8,
`pickup_longitude` Float64,
`pickup_latitude` Float64,
`dropoff_longitude` Float64,
`dropoff_latitude` Float64,
`passenger_count` UInt8,
`trip_distance` Float64,
`fare_amount` Float32,
`extra` Float32,
`mta_tax` Float32,
`tip_amount` Float32,
`tolls_amount` Float32,
`ehail_fee` Float32,
`improvement_surcharge` Float32,
`total_amount` Float32,
`payment_type_` Enum8('UNK' = 0, 'CSH' = 1, 'CRE' = 2, 'NOC' = 3, 'DIS' = 4),
`trip_type` UInt8,
`pickup` FixedString(25),
`dropoff` FixedString(25),
`cab_type` Enum8('yellow' = 1, 'green' = 2, 'uber' = 3),
`pickup_nyct2010_gid` Int8,
`pickup_ctlabel` Float32,
`pickup_borocode` Int8,
`pickup_ct2010` String,
`pickup_boroct2010` FixedString(7),
`pickup_cdeligibil` String,
`pickup_ntacode` FixedString(4),
`pickup_ntaname` String,
`pickup_puma` UInt16,
`dropoff_nyct2010_gid` UInt8,
`dropoff_ctlabel` Float32,
`dropoff_borocode` UInt8,
`dropoff_ct2010` String,
`dropoff_boroct2010` FixedString(7),
`dropoff_cdeligibil` String,
`dropoff_ntacode` FixedString(4),
`dropoff_ntaname` String,
`dropoff_puma` UInt16
) ENGINE = S3('https://datasets-documentation.s3.eu-west-3.amazonaws.com/nyc-taxi/trips_{0..9}.gz', 'TabSeparatedWithNames', 'gzip');
```
Notice the use of the `{0..9}` pattern to limit to the first ten files. Once created, we can query this table like any other table:
```sql theme={null}
SELECT DISTINCT(pickup_ntaname)
FROM trips_raw
LIMIT 10;
```
```response theme={null}
┌─pickup_ntaname───────────────────────────────────┐
│ Lenox Hill-Roosevelt Island │
│ Airport │
│ SoHo-TriBeCa-Civic Center-Little Italy │
│ West Village │
│ Chinatown │
│ Hudson Yards-Chelsea-Flatiron-Union Square │
│ Turtle Bay-East Midtown │
│ Upper West Side │
│ Murray Hill-Kips Bay │
│ DUMBO-Vinegar Hill-Downtown Brooklyn-Boerum Hill │
└──────────────────────────────────────────────────┘
```
Inserting data
The `S3` table engine supports parallel reads. Writes are only supported if the table definition doesn't contain glob patterns. The above table, therefore, would block writes.
To demonstrate writes, create a table that points to a writable S3 bucket:
```sql theme={null}
CREATE TABLE trips_dest
(
`trip_id` UInt32,
`pickup_date` Date,
`pickup_datetime` DateTime,
`dropoff_datetime` DateTime,
`tip_amount` Float32,
`total_amount` Float32
) ENGINE = S3('/trips.bin', 'Native');
```
```sql theme={null}
INSERT INTO trips_dest
SELECT
trip_id,
pickup_date,
pickup_datetime,
dropoff_datetime,
tip_amount,
total_amount
FROM trips
LIMIT 10;
```
```sql theme={null}
SELECT * FROM trips_dest LIMIT 5;
```
```response theme={null}
┌────trip_id─┬─pickup_date─┬─────pickup_datetime─┬────dropoff_datetime─┬─tip_amount─┬─total_amount─┐
│ 1200018648 │ 2015-07-01 │ 2015-07-01 00:00:16 │ 2015-07-01 00:02:57 │ 0 │ 7.3 │
│ 1201452450 │ 2015-07-01 │ 2015-07-01 00:00:20 │ 2015-07-01 00:11:07 │ 1.96 │ 11.76 │
│ 1202368372 │ 2015-07-01 │ 2015-07-01 00:00:40 │ 2015-07-01 00:05:46 │ 0 │ 7.3 │
│ 1200831168 │ 2015-07-01 │ 2015-07-01 00:01:06 │ 2015-07-01 00:09:23 │ 2 │ 12.3 │
│ 1201362116 │ 2015-07-01 │ 2015-07-01 00:01:07 │ 2015-07-01 00:03:31 │ 0 │ 5.3 │
└────────────┴─────────────┴─────────────────────┴─────────────────────┴────────────┴──────────────┘
```
Note that rows can only be inserted into new files. There are no merge cycles or file split operations. Once a file is written, subsequent inserts will fail. Users have two options here:
* Specify the setting `s3_create_new_file_on_insert=1`. This will cause the creation of new files on each insert. A numeric suffix will be appended to the end of each file that will monotonically increase for each insert operation. For the above example, a subsequent insert would cause the creation of a trips\_1.bin file.
* Specify the setting `s3_truncate_on_insert=1`. This will cause a truncation of the file, i.e. it will only contain the newly inserted rows once complete.
Both of these settings default to 0 - thus forcing the user to set one of them. `s3_truncate_on_insert` will take precedence if both are set.
Some notes about the `S3` table engine:
* Unlike a traditional `MergeTree` family table, dropping an `S3` table won't delete the underlying data.
* Full settings for this table type can be found [here](/docs/reference/engines/table-engines/integrations/s3#settings).
* Be aware of the following caveats when using this engine:
* ALTER queries aren't supported
* SAMPLE operations aren't supported
* There is no notion of indexes, i.e. primary or skip.
Managing credentials
In the previous examples, we have passed credentials in the `s3` function or `S3` table definition. While this may be acceptable for occasional usage, users require less explicit authentication mechanisms in production. To address this, ClickHouse has several options:
* Specify the connection details in the **config.xml** or an equivalent configuration file under **conf.d**. The contents of an example file are shown below, assuming installation using the debian package.
```xml theme={null}
ubuntu@single-node-clickhouse:/etc/clickhouse-server/config.d$ cat s3.xml
https://dalem-files.s3.amazonaws.com/test/
key
secret
{/* false */}
{/* Authorization: Bearer SOME-TOKEN */}
```
These credentials will be used for any requests where the endpoint above is an exact prefix match for the requested URL. Also, note the ability in this example to declare an authorization header as an alternative to access and secret keys. A complete list of supported settings can be found [here](/docs/reference/engines/table-engines/integrations/s3#settings).
* The example above highlights the availability of the configuration parameter `use_environment_credentials`. This configuration parameter can also be set globally at the `s3` level:
```xml theme={null}
true
```
This setting turns on an attempt to retrieve S3 credentials from the environment, thus allowing access through IAM roles. Specifically, the following order of retrieval is performed:
* A lookup for the environment variables `AWS_ACCESS_KEY_ID`, `AWS_SECRET_ACCESS_KEY` and `AWS_SESSION_TOKEN`
* Check performed in **\$HOME/.aws**
* Temporary credentials obtained via the AWS Security Token Service - i.e. via [`AssumeRole`](https://docs.aws.amazon.com/STS/latest/APIReference/API_AssumeRole.html) API
* Checks for credentials in the ECS environment variables `AWS_CONTAINER_CREDENTIALS_RELATIVE_URI` or `AWS_CONTAINER_CREDENTIALS_FULL_URI` and `AWS_ECS_CONTAINER_AUTHORIZATION_TOKEN`.
* Obtains the credentials via [Amazon EC2 instance metadata](https://docs.aws.amazon.com/cli/latest/userguide/cli-configure-metadata.html) provided [AWS\_EC2\_METADATA\_DISABLED](https://docs.aws.amazon.com/cli/latest/userguide/cli-configure-envvars.html#envvars-list-AWS_EC2_METADATA_DISABLED) isn't set to true.
* These same settings can also be set for a specific endpoint, using the same prefix matching rule.
For how to optimize reading and inserting using the S3 function, see the [dedicated performance guide](/docs/integrations/connectors/data-ingestion/AWS/performance).
S3 storage tuning
Internally, the ClickHouse merge tree uses two primary storage formats: [`Wide` and `Compact`](/docs/reference/engines/table-engines/mergetree-family/mergetree#mergetree-data-storage). While the current implementation uses the default behavior of ClickHouse (controlled through the settings `min_bytes_for_wide_part` and `min_rows_for_wide_part`), we expect behavior to diverge for S3 in the future releases, e.g., a larger default value of `min_bytes_for_wide_part` encouraging a more `Compact` format and thus fewer files. You may now wish to tune these settings when using exclusively S3 storage.
S3 backed MergeTree
The `s3` functions and associated table engine allow us to query data in S3 using familiar ClickHouse syntax. However, concerning data management features and performance, they're limited. There is no support for primary indexes, no-cache support, and files inserts need to be managed by the user.
ClickHouse recognizes that S3 represents an attractive storage solution, especially where query performance on "colder" data is less critical, and users seek to separate storage and compute. To help achieve this, support is provided for using S3 as the storage for a MergeTree engine. This will enable you to exploit the scalability and cost benefits of S3, and the insert and query performance of the MergeTree engine.
Storage Tiers
ClickHouse storage volumes allow physical disks to be abstracted from the MergeTree table engine. Any single volume can be composed of an ordered set of disks. Whilst principally allowing multiple block devices to be potentially used for data storage, this abstraction also allows other storage types, including S3. ClickHouse data parts can be moved between volumes according to storage policies and fill rates, thus creating the concept of storage tiers.
Storage tiers unlock hot-cold architectures where the most recent data, which is typically also the most queried, requires only a small amount of space on high-performing storage, e.g., NVMe SSDs. As the data ages, SLAs for query times increase, as does query frequency. This fat tail of data can be stored on slower, less performant storage such as HDD or object storage such as S3.
Creating a disk
To utilize an S3 bucket as a disk, we must first declare it within the ClickHouse configuration file. Either extend config.xml or preferably provide a new file under conf.d. An example of an S3 disk declaration is shown below:
```xml theme={null}
...
s3
https://sample-bucket.s3.us-east-2.amazonaws.com/tables/
your_access_key_id
your_secret_access_key
/var/lib/clickhouse/disks/s3/
cache
s3
/var/lib/clickhouse/disks/s3_cache/
10Gi
...
```
A complete list of settings relevant to this disk declaration can be found [here](/docs/reference/engines/table-engines/mergetree-family/mergetree#table_engine-mergetree-s3). Note that credentials can be managed here using the same approaches described in [Managing credentials](#managing-credentials), i.e., the use\_environment\_credentials can be set to true in the above settings block to use IAM roles.
Creating a storage policy
Once configured, this "disk" can be used by a storage volume declared within a policy. For the example below, we assume s3 is our only storage. This ignores more complex hot-cold architectures where data can be relocated based on TTLs and fill rates.
```xml theme={null}
...
...
s3
```
Creating a table
Assuming you have configured your disk to use a bucket with write access, you should be able to create a table such as in the example below. For purposes of brevity, we use a subset of the NYC taxi columns and stream data directly to the s3 backed table:
```sql theme={null}
CREATE TABLE trips_s3
(
`trip_id` UInt32,
`pickup_date` Date,
`pickup_datetime` DateTime,
`dropoff_datetime` DateTime,
`pickup_longitude` Float64,
`pickup_latitude` Float64,
`dropoff_longitude` Float64,
`dropoff_latitude` Float64,
`passenger_count` UInt8,
`trip_distance` Float64,
`tip_amount` Float32,
`total_amount` Float32,
`payment_type` Enum8('UNK' = 0, 'CSH' = 1, 'CRE' = 2, 'NOC' = 3, 'DIS' = 4)
)
ENGINE = MergeTree
PARTITION BY toYYYYMM(pickup_date)
ORDER BY pickup_datetime
SETTINGS storage_policy='s3_main'
```
```sql theme={null}
INSERT INTO trips_s3 SELECT trip_id, pickup_date, pickup_datetime, dropoff_datetime, pickup_longitude, pickup_latitude, dropoff_longitude, dropoff_latitude, passenger_count, trip_distance, tip_amount, total_amount, payment_type FROM s3('https://ch-nyc-taxi.s3.eu-west-3.amazonaws.com/tsv/trips_{0..9}.tsv.gz', 'TabSeparatedWithNames') LIMIT 1000000;
```
Depending on the hardware, this latter insert of 1m rows may take a few minutes to execute. You can confirm the progress via the system.processes table. Feel free to adjust the row count up to the limit of 10m and explore some sample queries.
```sql theme={null}
SELECT passenger_count, avg(tip_amount) AS avg_tip, avg(total_amount) AS avg_amount FROM trips_s3 GROUP BY passenger_count;
```
Modifying a table
Occasionally you may need to modify the storage policy of a specific table. Whilst this is possible, it comes with limitations. The new target policy must contain all of the disks and volumes of the previous policy, i.e., data won't be migrated to satisfy a policy change. When validating these constraints, volumes and disks will be identified by their name, with attempts to violate resulting in an error. However, assuming you use the previous examples, the following changes are valid.
```xml theme={null}
s3
default
s3
0.2
```
```sql theme={null}
ALTER TABLE trips_s3 MODIFY SETTING storage_policy='s3_tiered'
```
Here we reuse the main volume in our new s3\_tiered policy and introduce a new hot volume. This uses the default disk, which consists of only one disk configured via the parameter ``. Note that our volume names and disks don't change. New inserts to our table will reside on the default disk until this reaches move\_factor \* disk\_size - at which data will be relocated to S3.
Handling replication
Replication with S3 disks can be accomplished by using the `ReplicatedMergeTree` table engine. See the [replicating a single shard across two AWS regions using S3 Object Storage](#s3-multi-region) guide for details.
Read & writes
The following notes cover the implementation of S3 interactions with ClickHouse. Whilst generally only informative, it may help the readers when [Optimizing for Performance](#s3-optimizing-performance):
* By default, the maximum number of query processing threads used by any stage of the query processing pipeline is equal to the number of cores. Some stages are more parallelizable than others, so this value provides an upper bound. Multiple query stages may execute at once since data is streamed from the disk. The exact number of threads used for a query may thus exceed this. Modify through the setting [max\_threads](/docs/reference/settings/session-settings#max_threads).
* Reads on S3 are asynchronous by default. This behavior is determined by setting `remote_filesystem_read_method`, set to the value `threadpool` by default. When serving a request, ClickHouse reads granules in stripes. Each of these stripes potentially contain many columns. A thread will read the columns for their granules one by one. Rather than doing this synchronously, a prefetch is made for all columns before waiting for the data. This offers significant performance improvements over synchronous waits on each column. You won't need to change this setting in most cases - see [Optimizing for Performance](#s3-optimizing-performance).
* Writes are performed in parallel, with a maximum of 100 concurrent file writing threads. `max_insert_delayed_streams_for_parallel_write`, which has a default value of 1000, controls the number of S3 blobs written in parallel. Since a buffer is required for each file being written (\~1MB), this effectively limits the memory consumption of an INSERT. It may be appropriate to lower this value in low server memory scenarios.
Use S3 object storage as a ClickHouse disk
If you need step-by-step instructions to create buckets and an IAM role, please refer to ["How to create an AWS IAM user and S3 bucket"](/docs/integrations/connectors/data-ingestion/AWS/creating-an-s3-iam-role-and-bucket)
The following example is based on a Linux Deb package installed as a service with default ClickHouse directories.
1. Create a new file in the ClickHouse `config.d` directory to store the storage configuration.
```bash theme={null}
vim /etc/clickhouse-server/config.d/storage_config.xml
```
2. Add the following for storage configuration; substituting the bucket path, access key and secret keys from earlier steps
```xml theme={null}
s3
https://mars-doc-test.s3.amazonaws.com/clickhouse3/
ABC123
Abc+123
/var/lib/clickhouse/disks/s3_disk/
cache
s3_disk
/var/lib/clickhouse/disks/s3_cache/
10Gi
s3_disk
```
The tags `s3_disk` and `s3_cache` within the `` tag are arbitrary labels. These can be set to something else but the same label must be used in the `` tab under the `` tab to reference the disk.
The `` tag is also arbitrary and is the name of the policy which will be used as the identifier storage target when creating resources in ClickHouse.
The configuration shown above is for ClickHouse version 22.8 or higher, if you're using an older version please see the [storing data](/docs/concepts/features/configuration/server-config/storing-data#using-local-cache) docs.
For more information about using S3:
Integrations Guide: [S3 Backed MergeTree](#s3-backed-mergetree)
3. Update the owner of the file to the `clickhouse` user and group
```bash theme={null}
chown clickhouse:clickhouse /etc/clickhouse-server/config.d/storage_config.xml
```
4. Restart the ClickHouse instance to have the changes take effect.
```bash theme={null}
service clickhouse-server restart
```
Testing
1. Log in with the ClickHouse client, something like the following
```bash theme={null}
clickhouse-client --user default --password ClickHouse123!
```
2. Create a table specifying the new S3 storage policy
```sql theme={null}
CREATE TABLE s3_table1
(
`id` UInt64,
`column1` String
)
ENGINE = MergeTree
ORDER BY id
SETTINGS storage_policy = 's3_main';
```
3. Show that the table was created with the correct policy
```sql theme={null}
SHOW CREATE TABLE s3_table1;
```
```response theme={null}
┌─statement────────────────────────────────────────────────────
│ CREATE TABLE default.s3_table1
(
`id` UInt64,
`column1` String
)
ENGINE = MergeTree
ORDER BY id
SETTINGS storage_policy = 's3_main', index_granularity = 8192
└──────────────────────────────────────────────────────────────
```
4. Insert test rows into the table
```sql theme={null}
INSERT INTO s3_table1
(id, column1)
VALUES
(1, 'abc'),
(2, 'xyz');
```
```response theme={null}
INSERT INTO s3_table1 (id, column1) FORMAT Values
Query id: 0265dd92-3890-4d56-9d12-71d4038b85d5
Ok.
2 rows in set. Elapsed: 0.337 sec.
```
5. View the rows
```sql theme={null}
SELECT * FROM s3_table1;
```
```response theme={null}
┌─id─┬─column1─┐
│ 1 │ abc │
│ 2 │ xyz │
└────┴─────────┘
2 rows in set. Elapsed: 0.284 sec.
```
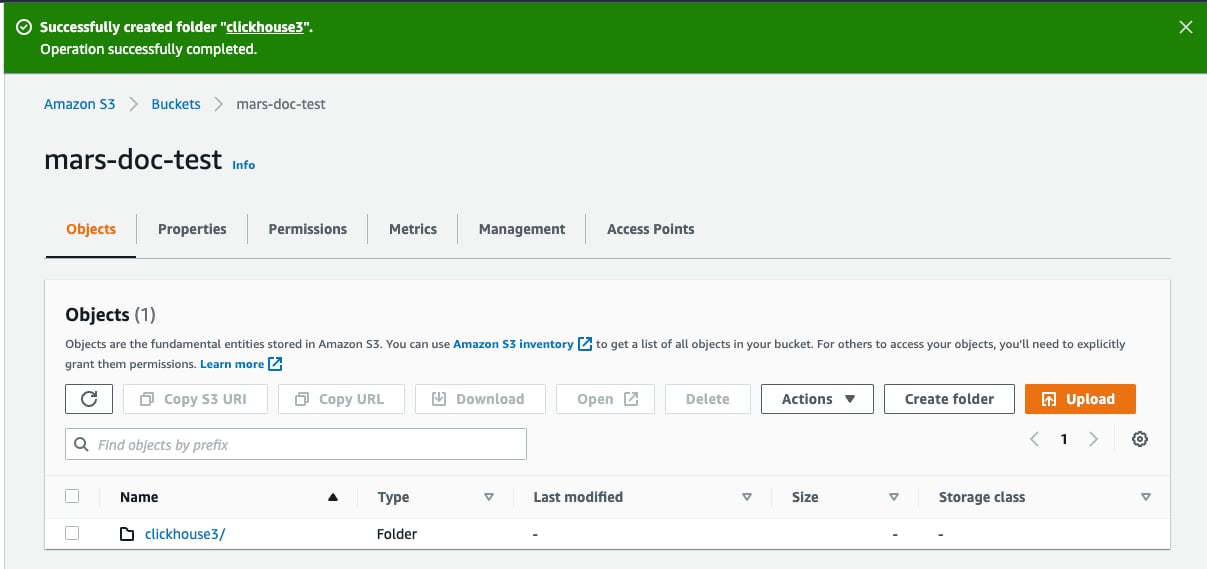
6. In the AWS console, navigate to the buckets, and select the new one and the folder.
You should see something like the following:
Replicating a single shard across two AWS regions using S3 Object Storage
Object storage is used by default in ClickHouse Cloud, you don't need to follow this procedure if you're running in ClickHouse Cloud.
Plan the deployment
This tutorial is based on deploying two ClickHouse Server nodes and three ClickHouse Keeper nodes in AWS EC2. The data store for the ClickHouse servers is S3. Two AWS regions, with a ClickHouse Server and an S3 Bucket in each region, are used in order to support disaster recovery.
ClickHouse tables are replicated across the two servers, and therefore across the two regions.
Install software
ClickHouse server nodes
Refer to the [installation instructions](/docs/get-started/setup/install) when performing the deployment steps on the ClickHouse server nodes.
Deploy ClickHouse
Deploy ClickHouse on two hosts, in the sample configurations these are named `chnode1`, `chnode2`.
Place `chnode1` in one AWS region, and `chnode2` in a second.
Deploy ClickHouse Keeper
Deploy ClickHouse Keeper on three hosts, in the sample configurations these are named `keepernode1`, `keepernode2`, and `keepernode3`. `keepernode1` can be deployed in the same region as `chnode1`, `keepernode2` with `chnode2`, and `keepernode3` in either region but a different availability zone from the ClickHouse node in that region.
Refer to the [installation instructions](/docs/get-started/setup/install) when performing the deployment steps on the ClickHouse Keeper nodes.
Create S3 buckets
Create two S3 buckets, one in each of the regions that you have placed `chnode1` and `chnode2`.
If you need step-by-step instructions to create buckets and an IAM role, then expand **Create S3 buckets and an IAM role** and follow along:
This article demonstrates the basics of how to configure an AWS IAM user, create an S3 bucket and configure ClickHouse to use the bucket as an S3 disk.
You should work with your security team to determine the permissions to be used, and consider these as a starting point.
Create an AWS IAM user
In the following steps you'll be creating a service account user (not a login user).
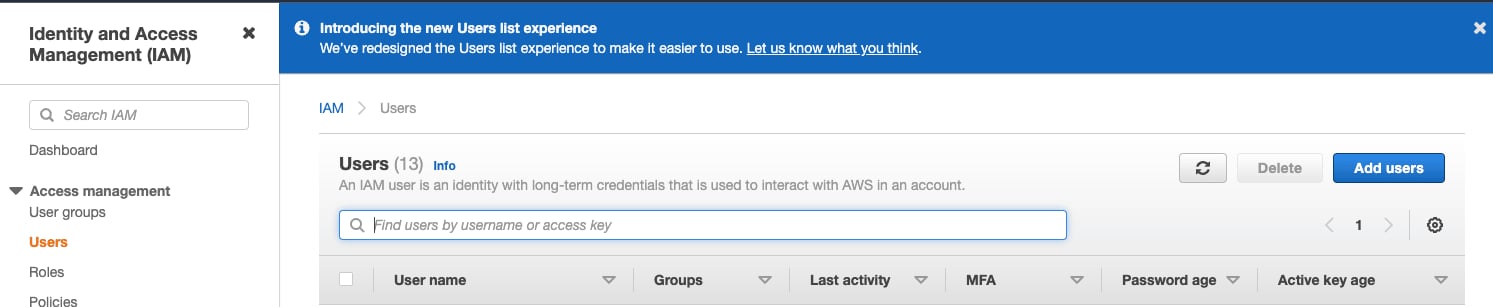
1. Log into the AWS IAM Management Console.
2. In the `Users` menu, select `Create user`
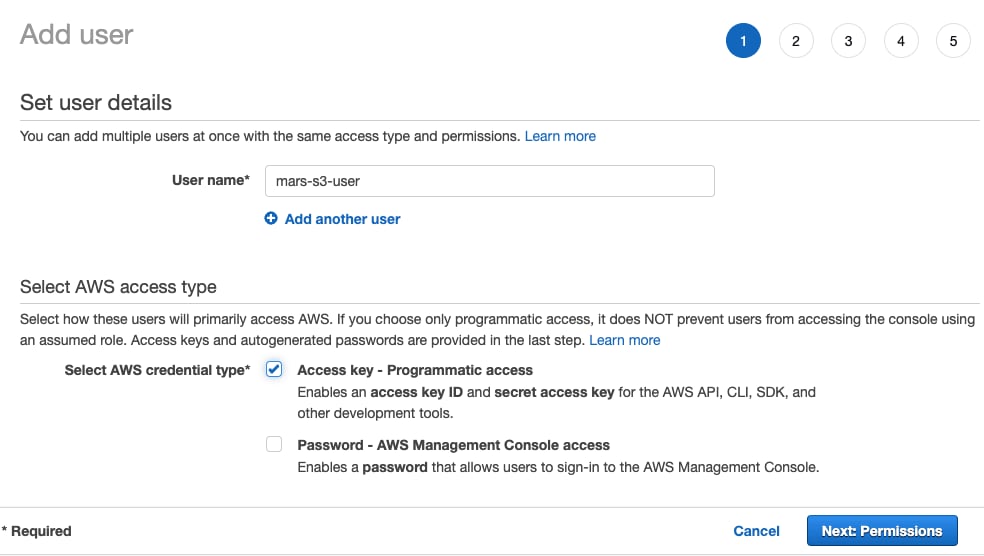
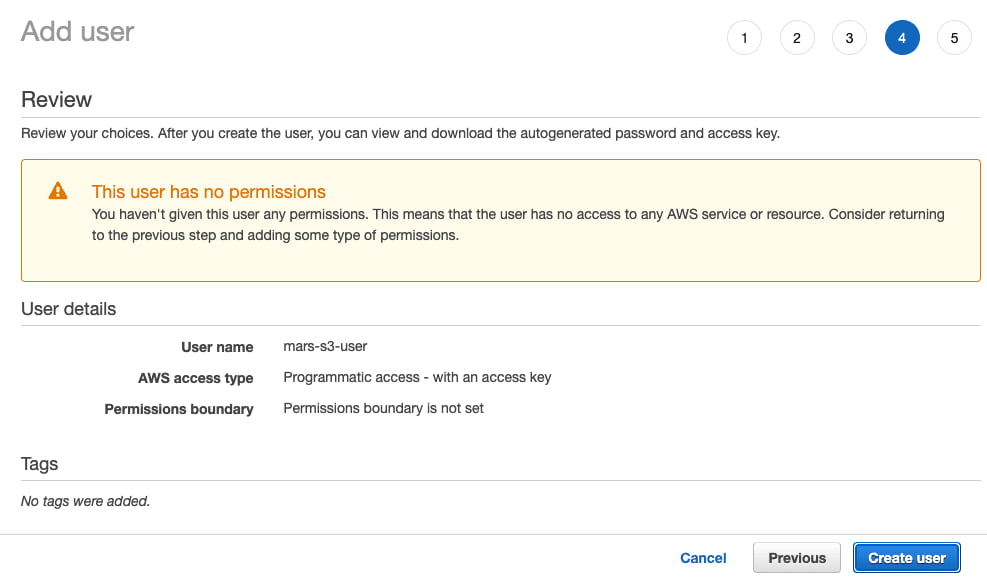
3. Enter the username and set the credential type to `Access key - Programmatic access` and select `Next: Permissions`
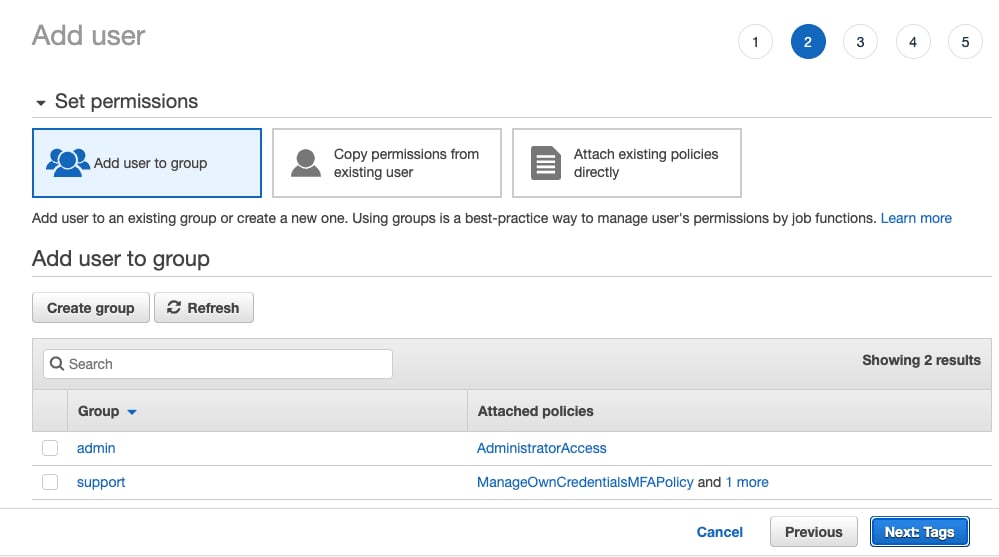
4. Don't add the user to any group; select `Next: Tags`
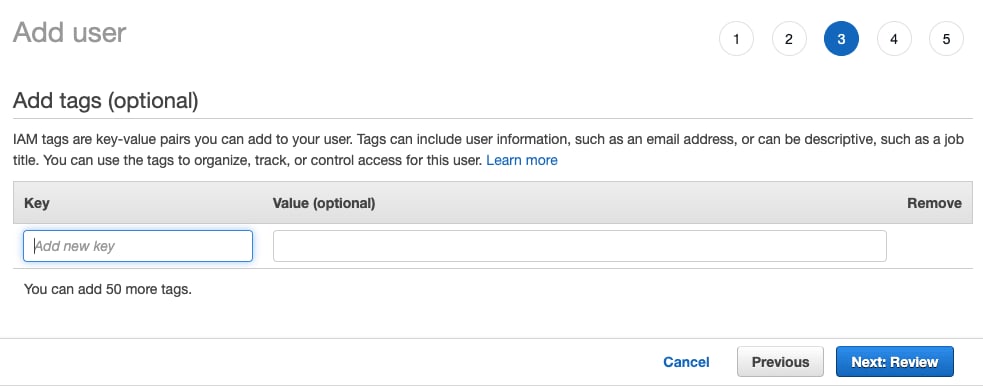
5. Unless you need to add any tags, select `Next: Review`
6. Select `Create User`
The warning message stating that the user has no permissions can be ignored; permissions will be granted on the bucket for the user in the next section
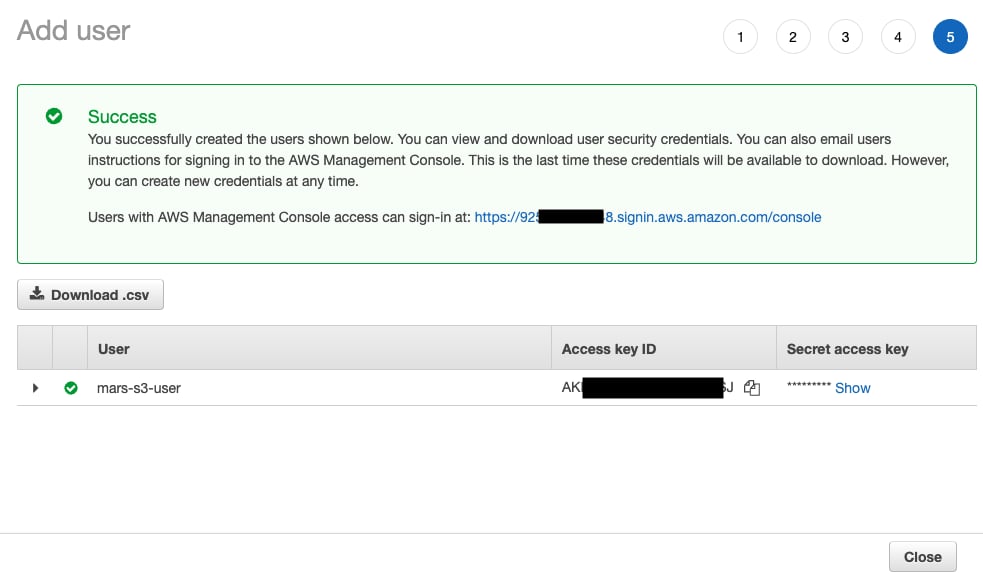
7. The user is now created; click on `show` and copy the access and secret keys.
Save the keys somewhere else; this is the only time that the secret access key will be available.
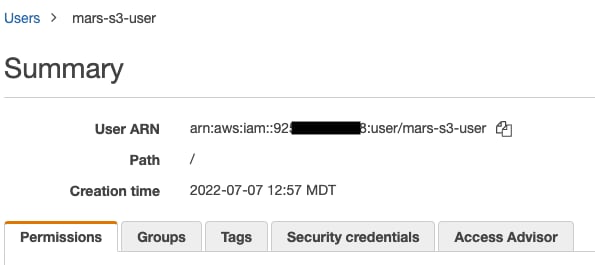
8. Click close, then find the user in the users screen.
9. Copy the ARN (Amazon Resource Name) and save it for use when configuring the access policy for the bucket.
Create an S3 bucket
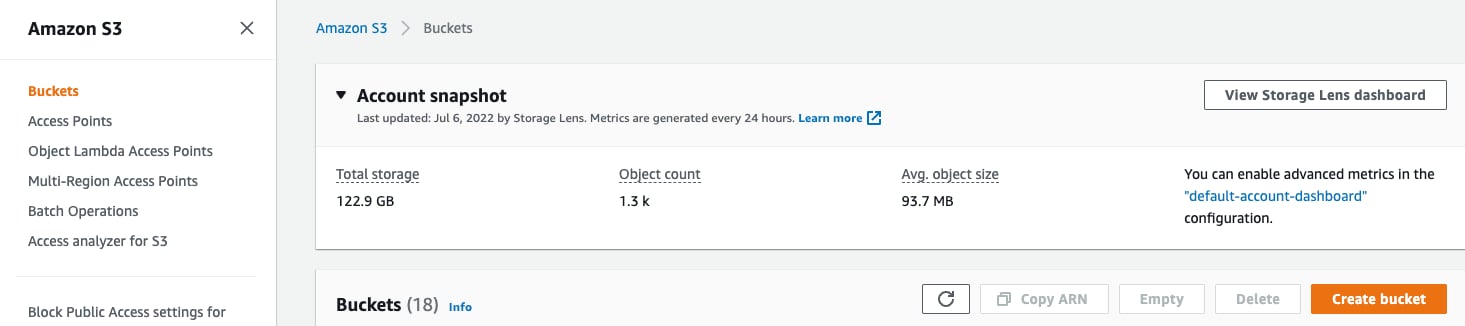
1. In the S3 bucket section, select `Create bucket`
2. Enter a bucket name, leave other options default
The bucket name must be unique across AWS, not just the organization, or it will emit an error.
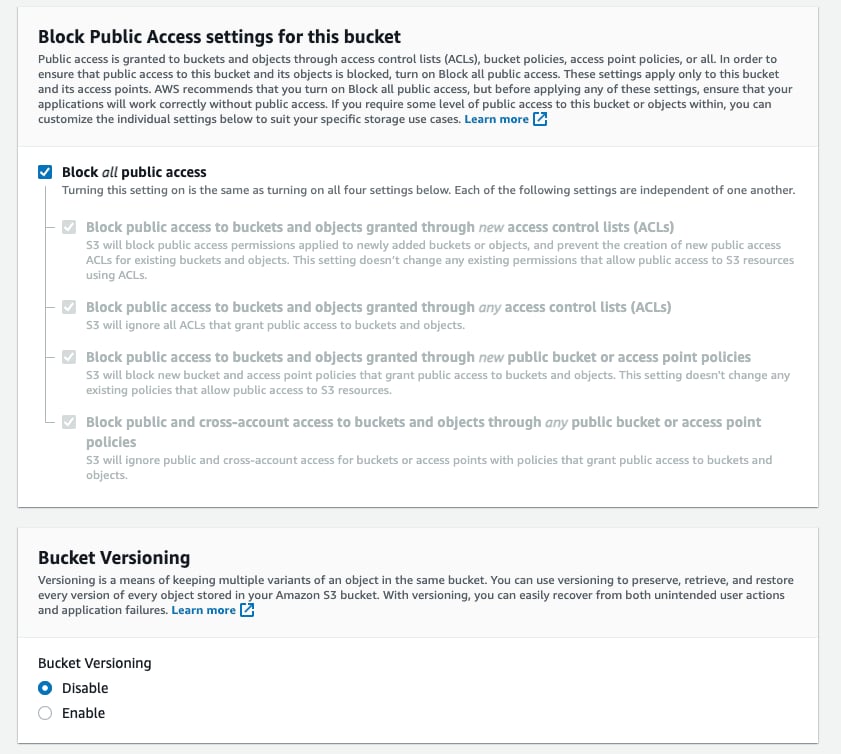
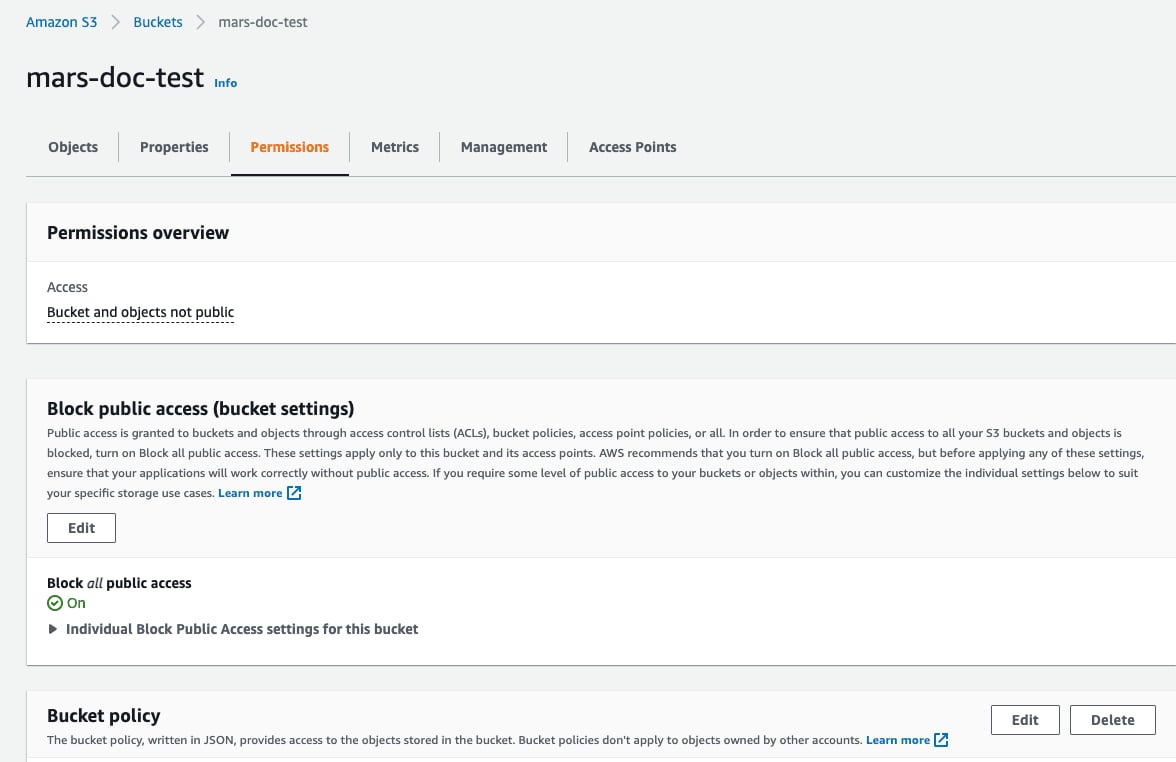
3. Leave `Block all Public Access` enabled; public access isn't needed.
4. Select `Create Bucket` at the bottom of the page
5. Select the link, copy the ARN, and save it for use when configuring the access policy for the bucket.
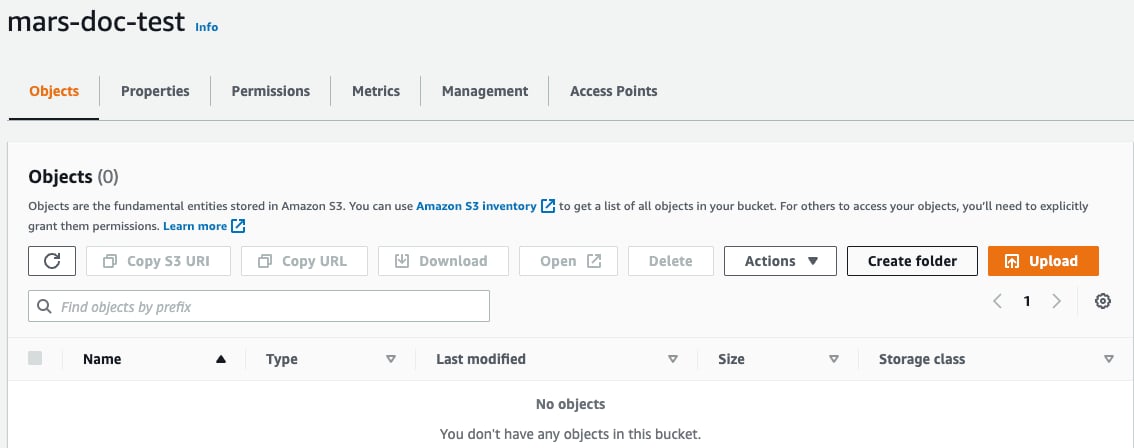
6. Once the bucket has been created, find the new S3 bucket in the S3 bucket list and select the link
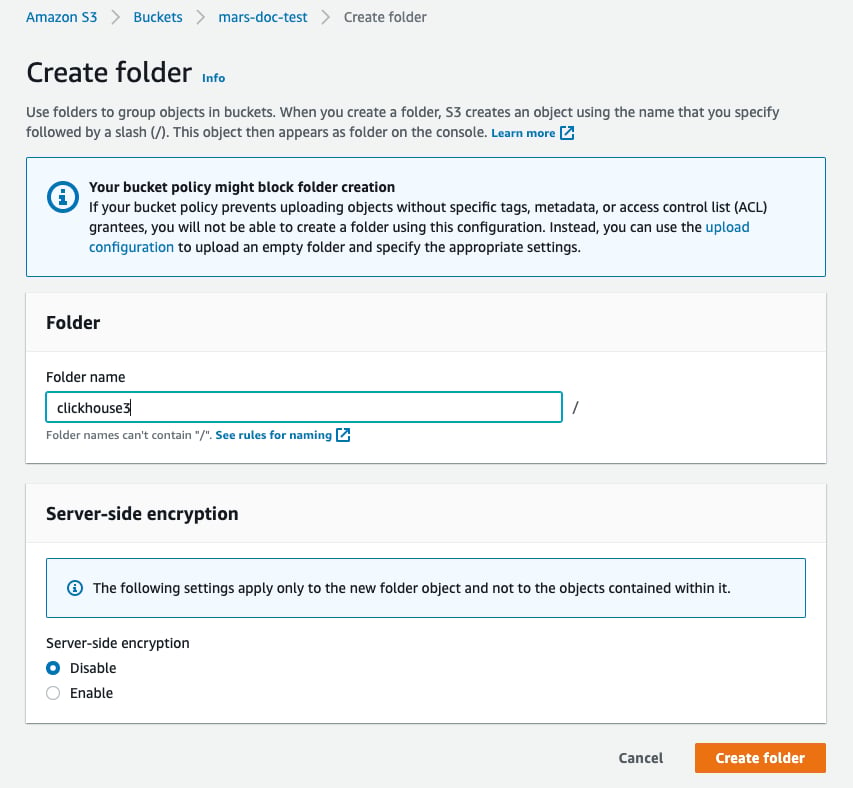
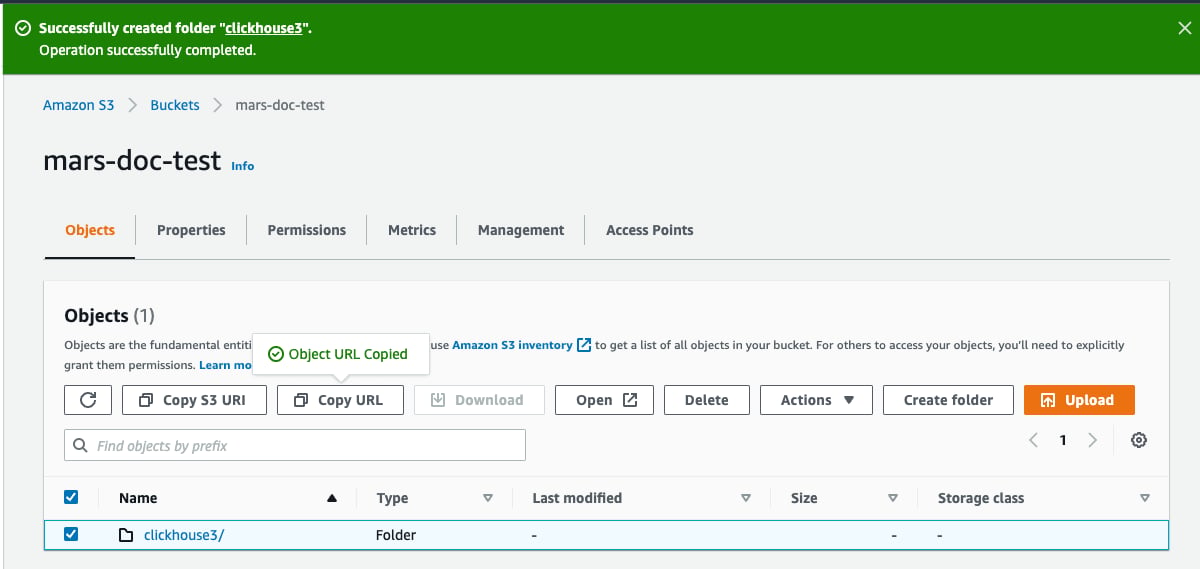
7. Select `Create folder`
8. Enter a folder name that will be the target for the ClickHouse S3 disk and select `Create folder`
9. The folder should now be visible on the bucket list
10. Select the checkbox for the new folder and click on `Copy URL` Save the URL copied to be used in the ClickHouse storage configuration in the next section.
11. Select the `Permissions` tab and click on the `Edit` button in the `Bucket Policy` section
12. Add a bucket policy, example below:
```json theme={null}
{
"Version" : "2012-10-17",
"Id" : "Policy123456",
"Statement" : [
{
"Sid" : "abc123",
"Effect" : "Allow",
"Principal" : {
"AWS" : "arn:aws:iam::921234567898:user/mars-s3-user"
},
"Action" : "s3:*",
"Resource" : [
"arn:aws:s3:::mars-doc-test",
"arn:aws:s3:::mars-doc-test/*"
]
}
]
}
```
```response theme={null}
|Parameter | Description | Example Value |
|----------|-------------|----------------|
|Version | Version of the policy interpreter, leave as-is | 2012-10-17 |
|Sid | User-defined policy id | abc123 |
|Effect | Whether user requests will be allowed or denied | Allow |
|Principal | The accounts or user that will be allowed | arn:aws:iam::921234567898:user/mars-s3-user |
|Action | What operations are allowed on the bucket| s3:*|
|Resource | Which resources in the bucket will operations be allowed in | "arn:aws:s3:::mars-doc-test", "arn:aws:s3:::mars-doc-test/*" |
```
You should work with your security team to determine the permissions to be used, consider these as a starting point.
For more information on Policies and settings, refer to AWS documentation:
[https://docs.aws.amazon.com/AmazonS3/latest/userguide/access-policy-language-overview.html](https://docs.aws.amazon.com/AmazonS3/latest/userguide/access-policy-language-overview.html)
13. Save the policy configuration.
The configuration files will then be placed in `/etc/clickhouse-server/config.d/`. Here is a sample configuration file for one bucket, the other is similar with the three highlighted lines differing:
```xml title="/etc/clickhouse-server/config.d/storage_config.xml" highlight={6-8} theme={null}
s3
https://docs-clickhouse-s3.s3.us-east-2.amazonaws.com/clickhouses3/
ABCDEFGHIJKLMNOPQRST
Tjdm4kf5snfkj303nfljnev79wkjn2l3knr81007
/var/lib/clickhouse/disks/s3_disk/
cache
s3_disk
/var/lib/clickhouse/disks/s3_cache/
10Gi
s3_disk
```
Many of the steps in this guide will ask you to place a configuration file in `/etc/clickhouse-server/config.d/`. This is the default location on Linux systems for configuration override files. When you put these files into that directory ClickHouse will use the content to override the default configuration. By placing these files in the override directory you will avoid losing your configuration during an upgrade.
When running ClickHouse Keeper standalone (separate from ClickHouse server) the configuration is a single XML file. In this tutorial, the file is `/etc/clickhouse-keeper/keeper_config.xml`. All three Keeper servers use the same configuration with one setting different; ``.
`server_id` indicates the ID to be assigned to the host where the configuration files is used. In the example below, the `server_id` is `3`, and if you look further down in the file in the `` section, you will see that server 3 has the hostname `keepernode3`. This is how the ClickHouse Keeper process knows which other servers to connect to when choosing a leader and all other activities.
```xml title="/etc/clickhouse-keeper/keeper_config.xml" highlight={12,33-37} theme={null}
trace
/var/log/clickhouse-keeper/clickhouse-keeper.log
/var/log/clickhouse-keeper/clickhouse-keeper.err.log
1000M
3
0.0.0.0
9181
3
/var/lib/clickhouse/coordination/log
/var/lib/clickhouse/coordination/snapshots
10000
30000
warning
1
keepernode1
9234
2
keepernode2
9234
3
keepernode3
9234
```
Copy the configuration file for ClickHouse Keeper in place (remembering to set the ``):
```bash theme={null}
sudo -u clickhouse \
cp keeper.xml /etc/clickhouse-keeper/keeper.xml
```
Define a cluster
ClickHouse clusters are defined in the `` section of the configuration. In this sample one cluster, `cluster_1S_2R`, is defined and it consists of a single shard with two replicas. The replicas are located on the hosts `chnode1` and `chnode2`.
```xml title="/etc/clickhouse-server/config.d/remote-servers.xml" theme={null}
chnode1
9000
chnode2
9000
```
When working with clusters it is handy to define macros that populate DDL queries with the cluster, shard, and replica settings. This sample allows you to specify the use of a replicated table engine without providing `shard` and `replica` details. When you create a table you can see how the `shard` and `replica` macros are used by querying `system.tables`.
```xml title="/etc/clickhouse-server/config.d/macros.xml" theme={null}
/clickhouse/task_queue/ddl
cluster_1S_2R
1
replica_1
```
The above macros are for `chnode1`, on `chnode2` set `replica` to `replica_2`.
Disable zero-copy replication
In ClickHouse versions 22.7 and lower the setting `allow_remote_fs_zero_copy_replication` is set to `true` by default for S3 and HDFS disks. This setting should be set to `false` for this disaster recovery scenario, and in version 22.8 and higher it is set to `false` by default.
This setting should be false for two reasons: 1) this feature isn't production ready; 2) in a disaster recovery scenario both the data and metadata need to be stored in multiple regions. Set `allow_remote_fs_zero_copy_replication` to `false`.
```xml title="/etc/clickhouse-server/config.d/remote-servers.xml" theme={null}
false
```
ClickHouse Keeper is responsible for coordinating the replication of data across the ClickHouse nodes. To inform ClickHouse about the ClickHouse Keeper nodes add a configuration file to each of the ClickHouse nodes.
```xml title="/etc/clickhouse-server/config.d/use_keeper.xml" theme={null}
keepernode1
9181
keepernode2
9181
keepernode3
9181
```
See the [network ports](/docs/concepts/features/security/network-ports) list when you configure the security settings in AWS so that your servers can communicate with each other, and you can communicate with them.
All three servers must listen for network connections so that they can communicate between the servers and with S3. By default, ClickHouse listens only on the loopback address, so this must be changed. This is configured in `/etc/clickhouse-server/config.d/`. Here is a sample that configures ClickHouse and ClickHouse Keeper to listen on all IP v4 interfaces. see the documentation or the default configuration file `/etc/clickhouse/config.xml` for more information.
```xml title="/etc/clickhouse-server/config.d/networking.xml" theme={null}
0.0.0.0
```
Start the servers
Run ClickHouse Keeper
On each Keeper server run the commands for your operating system, for example:
```bash theme={null}
sudo systemctl enable clickhouse-keeper
sudo systemctl start clickhouse-keeper
sudo systemctl status clickhouse-keeper
```
Check ClickHouse Keeper status
Send commands to the ClickHouse Keeper with `netcat`. For example, `mntr` returns the state of the ClickHouse Keeper cluster. If you run the command on each of the Keeper nodes you will see that one is a leader, and the other two are followers:
```bash theme={null}
echo mntr | nc localhost 9181
```
```response highlight={7-9,18-19} theme={null}
zk_version v22.7.2.15-stable-f843089624e8dd3ff7927b8a125cf3a7a769c069
zk_avg_latency 0
zk_max_latency 11
zk_min_latency 0
zk_packets_received 1783
zk_packets_sent 1783
zk_num_alive_connections 2
zk_outstanding_requests 0
zk_server_state leader
zk_znode_count 135
zk_watch_count 8
zk_ephemerals_count 3
zk_approximate_data_size 42533
zk_key_arena_size 28672
zk_latest_snapshot_size 0
zk_open_file_descriptor_count 182
zk_max_file_descriptor_count 18446744073709551615
zk_followers 2
zk_synced_followers 2
```
Run ClickHouse server
On each ClickHouse server run
```bash theme={null}
sudo service clickhouse-server start
```
Verify ClickHouse server
When you added the [cluster configuration](#define-a-cluster) a single shard replicated across the two ClickHouse nodes was defined. In this verification step you will check that the cluster was built when ClickHouse was started, and you will create a replicated table using that cluster.
* Verify that the cluster exists:
```sql theme={null}
show clusters
```
```response theme={null}
┌─cluster───────┐
│ cluster_1S_2R │
└───────────────┘
1 row in set. Elapsed: 0.009 sec. `
```
* Create a table in the cluster using the `ReplicatedMergeTree` table engine:
```sql theme={null}
create table trips on cluster 'cluster_1S_2R' (
`trip_id` UInt32,
`pickup_date` Date,
`pickup_datetime` DateTime,
`dropoff_datetime` DateTime,
`pickup_longitude` Float64,
`pickup_latitude` Float64,
`dropoff_longitude` Float64,
`dropoff_latitude` Float64,
`passenger_count` UInt8,
`trip_distance` Float64,
`tip_amount` Float32,
`total_amount` Float32,
`payment_type` Enum8('UNK' = 0, 'CSH' = 1, 'CRE' = 2, 'NOC' = 3, 'DIS' = 4))
ENGINE = ReplicatedMergeTree
PARTITION BY toYYYYMM(pickup_date)
ORDER BY pickup_datetime
SETTINGS storage_policy='s3_main'
```
```response theme={null}
┌─host────┬─port─┬─status─┬─error─┬─num_hosts_remaining─┬─num_hosts_active─┐
│ chnode1 │ 9000 │ 0 │ │ 1 │ 0 │
│ chnode2 │ 9000 │ 0 │ │ 0 │ 0 │
└─────────┴──────┴────────┴───────┴─────────────────────┴──────────────────┘
```
* Understand the use of the macros defined earlier
The macros `shard`, and `replica` were [defined earlier](#define-a-cluster), and in the highlighted line below you can see where the values are substituted on each ClickHouse node. Additionally, the value `uuid` is used; `uuid` isn't defined in the macros as it is generated by the system.
```sql theme={null}
SELECT create_table_query
FROM system.tables
WHERE name = 'trips'
FORMAT Vertical
```
```response highlight={6} theme={null}
Query id: 4d326b66-0402-4c14-9c2f-212bedd282c0
Row 1:
──────
create_table_query: CREATE TABLE default.trips (`trip_id` UInt32, `pickup_date` Date, `pickup_datetime` DateTime, `dropoff_datetime` DateTime, `pickup_longitude` Float64, `pickup_latitude` Float64, `dropoff_longitude` Float64, `dropoff_latitude` Float64, `passenger_count` UInt8, `trip_distance` Float64, `tip_amount` Float32, `total_amount` Float32, `payment_type` Enum8('UNK' = 0, 'CSH' = 1, 'CRE' = 2, 'NOC' = 3, 'DIS' = 4))
ENGINE = ReplicatedMergeTree('/clickhouse/tables/{uuid}/{shard}', '{replica}')
PARTITION BY toYYYYMM(pickup_date) ORDER BY pickup_datetime SETTINGS storage_policy = 's3_main'
1 row in set. Elapsed: 0.012 sec.
```
You can customize the zookeeper path `'clickhouse/tables/{uuid}/{shard}` shown above by setting `default_replica_path` and `default_replica_name`. The docs are [here](/docs/reference/settings/server-settings/settings#default_replica_path).
Testing
These tests will verify that data is being replicated across the two servers, and that it is stored in the S3 Buckets and not on local disk.
* Add data from the New York City taxi dataset:
```sql theme={null}
INSERT INTO trips
SELECT trip_id,
pickup_date,
pickup_datetime,
dropoff_datetime,
pickup_longitude,
pickup_latitude,
dropoff_longitude,
dropoff_latitude,
passenger_count,
trip_distance,
tip_amount,
total_amount,
payment_type
FROM s3('https://ch-nyc-taxi.s3.eu-west-3.amazonaws.com/tsv/trips_{0..9}.tsv.gz', 'TabSeparatedWithNames') LIMIT 1000000;
```
* Verify that data is stored in S3.
This query shows the size of the data on disk, and the policy used to determine which disk is used.
```sql theme={null}
SELECT
engine,
data_paths,
metadata_path,
storage_policy,
formatReadableSize(total_bytes)
FROM system.tables
WHERE name = 'trips'
FORMAT Vertical
```
```response theme={null}
Query id: af7a3d1b-7730-49e0-9314-cc51c4cf053c
Row 1:
──────
engine: ReplicatedMergeTree
data_paths: ['/var/lib/clickhouse/disks/s3_disk/store/551/551a859d-ec2d-4512-9554-3a4e60782853/']
metadata_path: /var/lib/clickhouse/store/e18/e18d3538-4c43-43d9-b083-4d8e0f390cf7/trips.sql
storage_policy: s3_main
formatReadableSize(total_bytes): 36.42 MiB
1 row in set. Elapsed: 0.009 sec.
```
Check the size of data on the local disk. From above, the size on disk for the millions of rows stored is 36.42 MiB. This should be on S3, and not the local disk. The query above also tells us where on local disk data and metadata is stored. Check the local data:
```response theme={null}
root@chnode1:~# du -sh /var/lib/clickhouse/disks/s3_disk/store/551
536K /var/lib/clickhouse/disks/s3_disk/store/551
```
Check the S3 data in each S3 Bucket (the totals aren't shown, but both buckets have approximately 36 MiB stored after the inserts):
S3Express
[S3Express](https://aws.amazon.com/s3/storage-classes/express-one-zone/) is a new high-performance, single-Availability Zone storage class in Amazon S3.
You could refer to this [blog](https://aws.amazon.com/blogs/storage/clickhouse-cloud-amazon-s3-express-one-zone-making-a-blazing-fast-analytical-database-even-faster/) to read about our experience testing S3Express with ClickHouse.
S3Express stores data within a single AZ. It means data will be unavailable in case of AZ outage.
S3 disk
Creating a table with storage backed by a S3Express bucket involves the following steps:
1. Create a bucket of `Directory` type
2. Install appropriate bucket policy to grant all required permissions to your S3 user (e.g. `"Action": "s3express:*"` to simply allow unrestricted access)
3. When configuring the storage policy please provide the `region` parameter
Storage configuration is the same as for ordinary S3 and for example might look the following way:
```sql theme={null}
s3
https://my-test-bucket--eun1-az1--x-s3.s3express-eun1-az1.eu-north-1.amazonaws.com/store/
eu-north-1
...
...
s3_express
```
And then create a table on the new storage:
```sql theme={null}
CREATE TABLE t
(
a UInt64,
s String
)
ENGINE = MergeTree
ORDER BY a
SETTINGS storage_policy = 's3_express';
```
S3 storage
S3 storage is also supported but only for `Object URL` paths. Example:
```sql theme={null}
SELECT * FROM s3('https://test-bucket--eun1-az1--x-s3.s3express-eun1-az1.eu-north-1.amazonaws.com/file.csv', ...)
```
it also requires specifying bucket region in the config:
```xml theme={null}
https://test-bucket--eun1-az1--x-s3.s3express-eun1-az1.eu-north-1.amazonaws.com
eu-north-1
```
Backups
It is possible to store a backup on the disk we created above:
```sql theme={null}
BACKUP TABLE t TO Disk('s3_express', 't.zip')
```
```response theme={null}
┌─id───────────────────────────────────┬─status─────────┐
│ c61f65ac-0d76-4390-8317-504a30ba7595 │ BACKUP_CREATED │
└──────────────────────────────────────┴────────────────┘
```
```sql theme={null}
RESTORE TABLE t AS t_restored FROM Disk('s3_express', 't.zip')
```
```response theme={null}
┌─id───────────────────────────────────┬─status───┐
│ 4870e829-8d76-4171-ae59-cffaf58dea04 │ RESTORED │
└──────────────────────────────────────┴──────────┘
```