ClickHouse Cloud setup
1
Select Connect your app
After creating your ClickHouse Cloud Service, on the 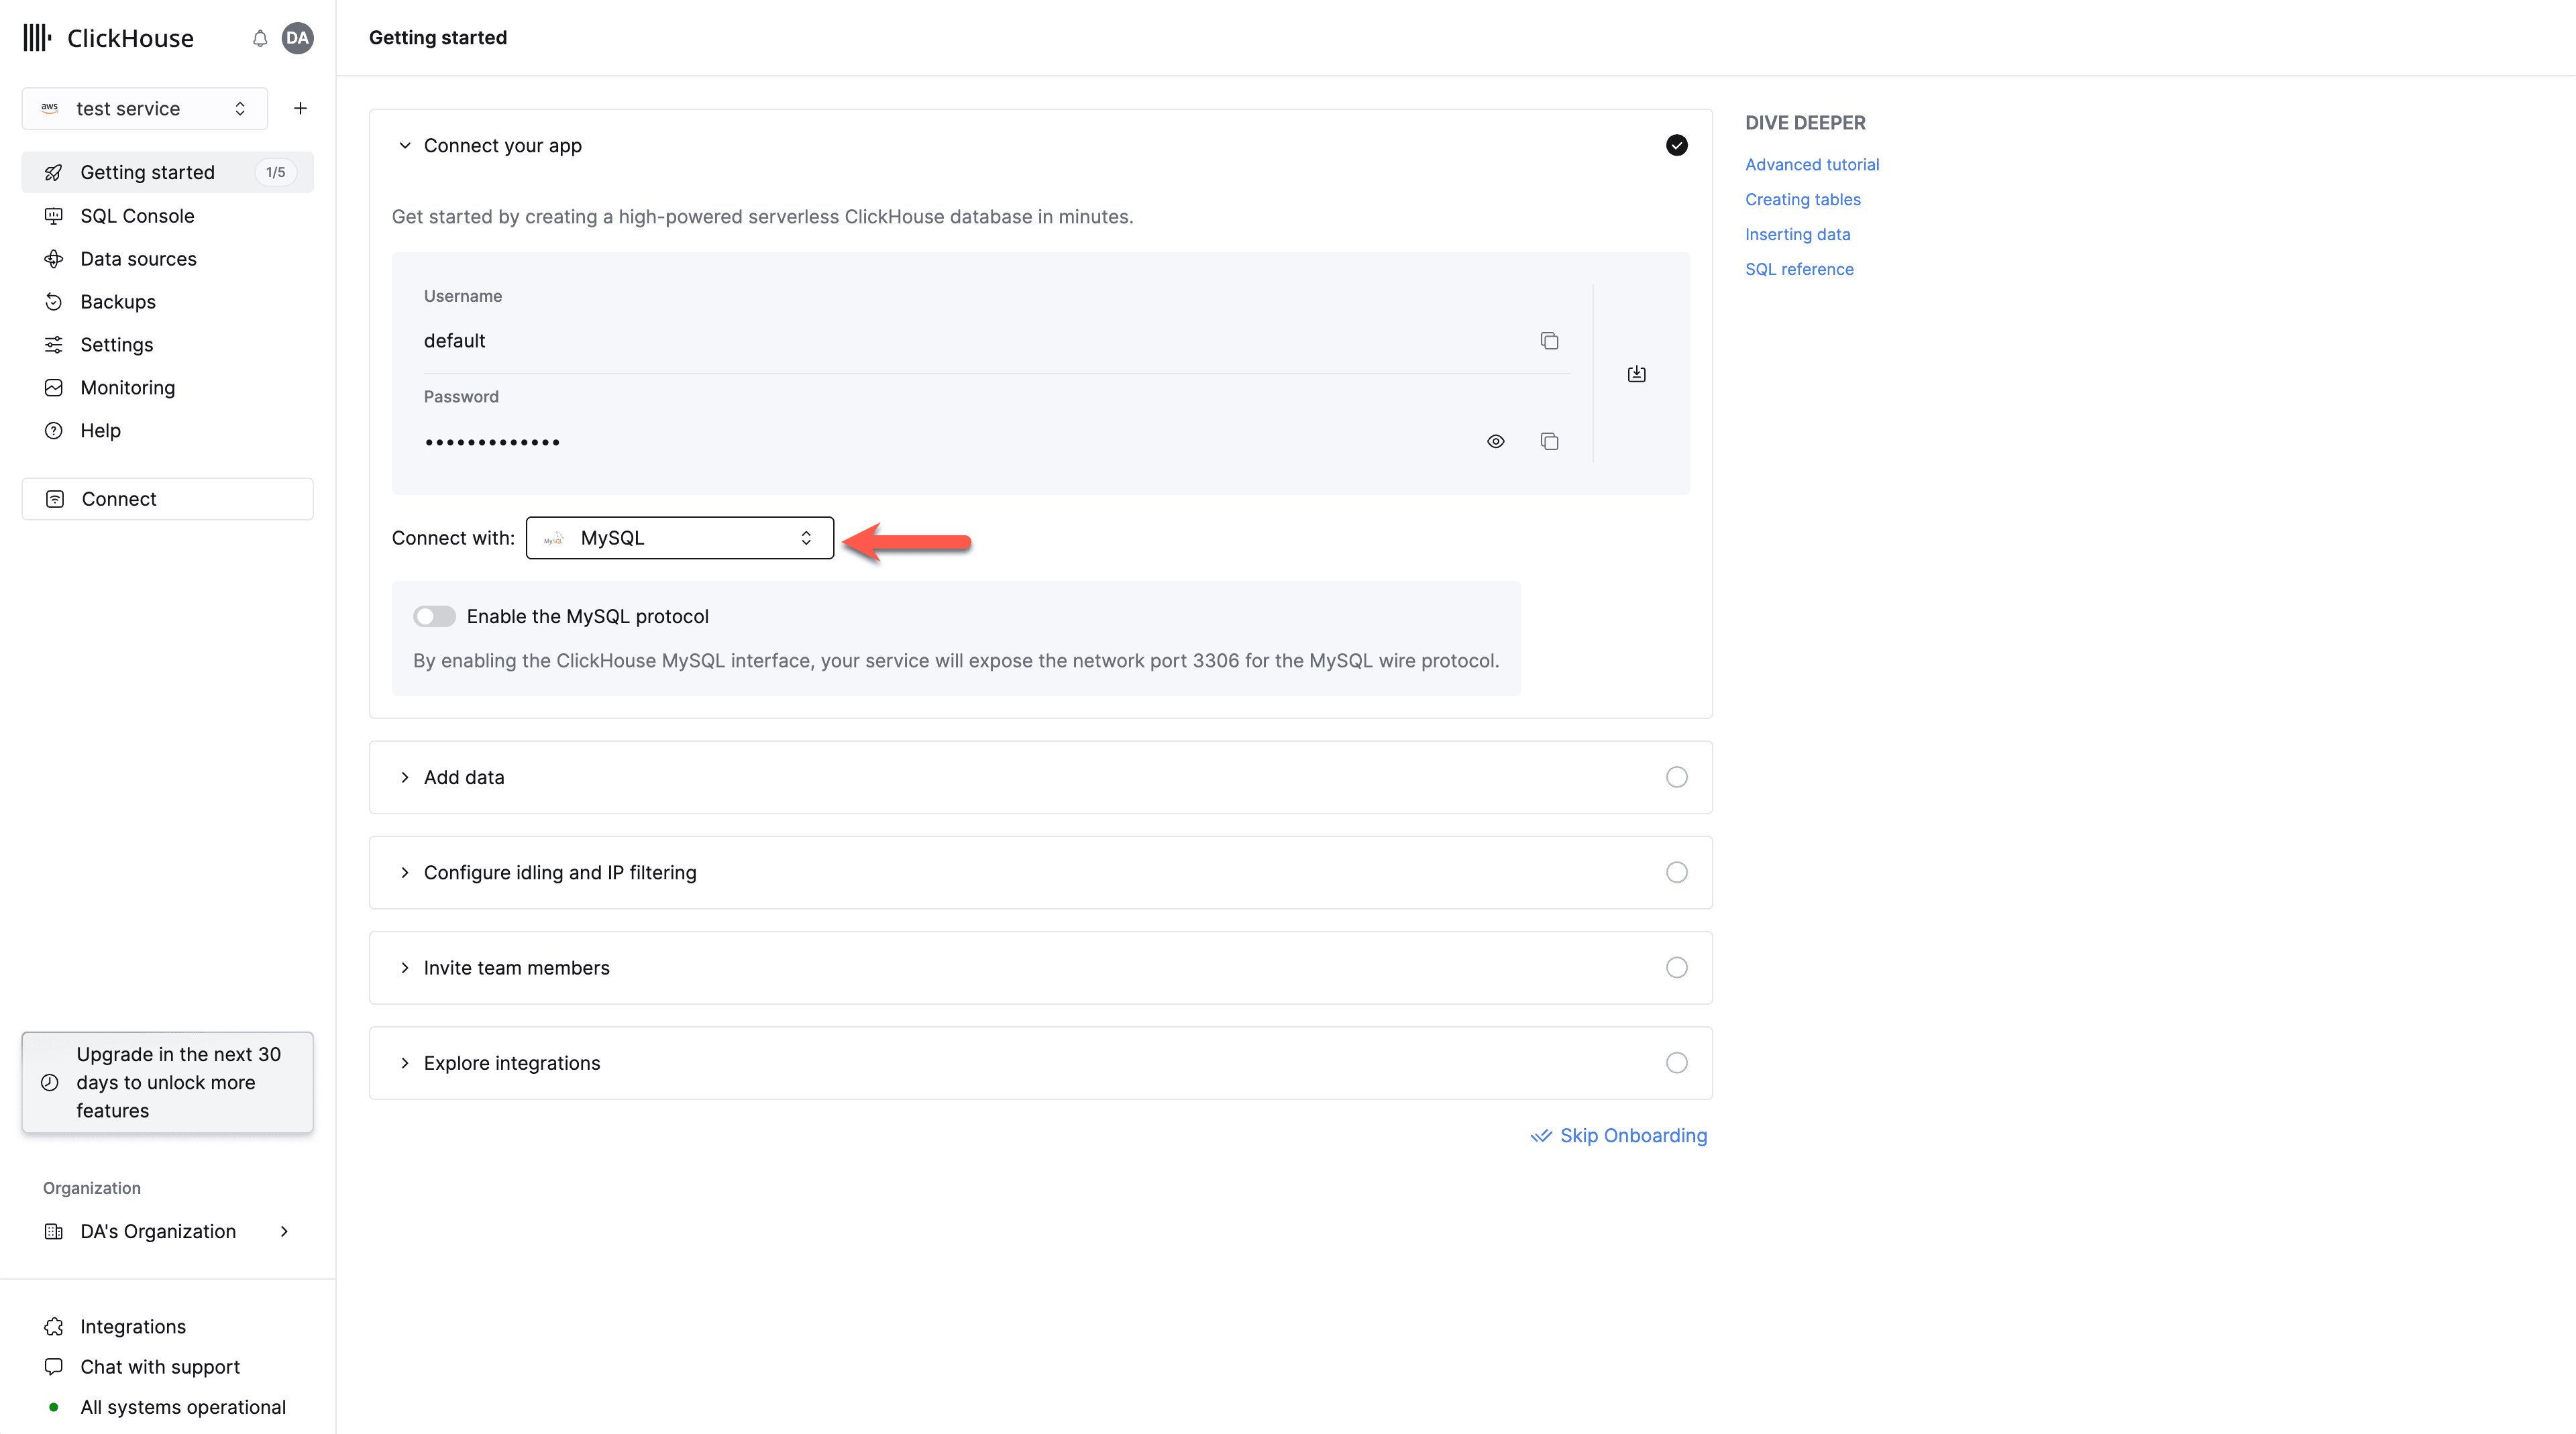
Connect your app screen, select MySQL from the drop down.2
Enable the MySQL interface
Toggle the switch to enable the MySQL interface for this specific service.
This will expose port 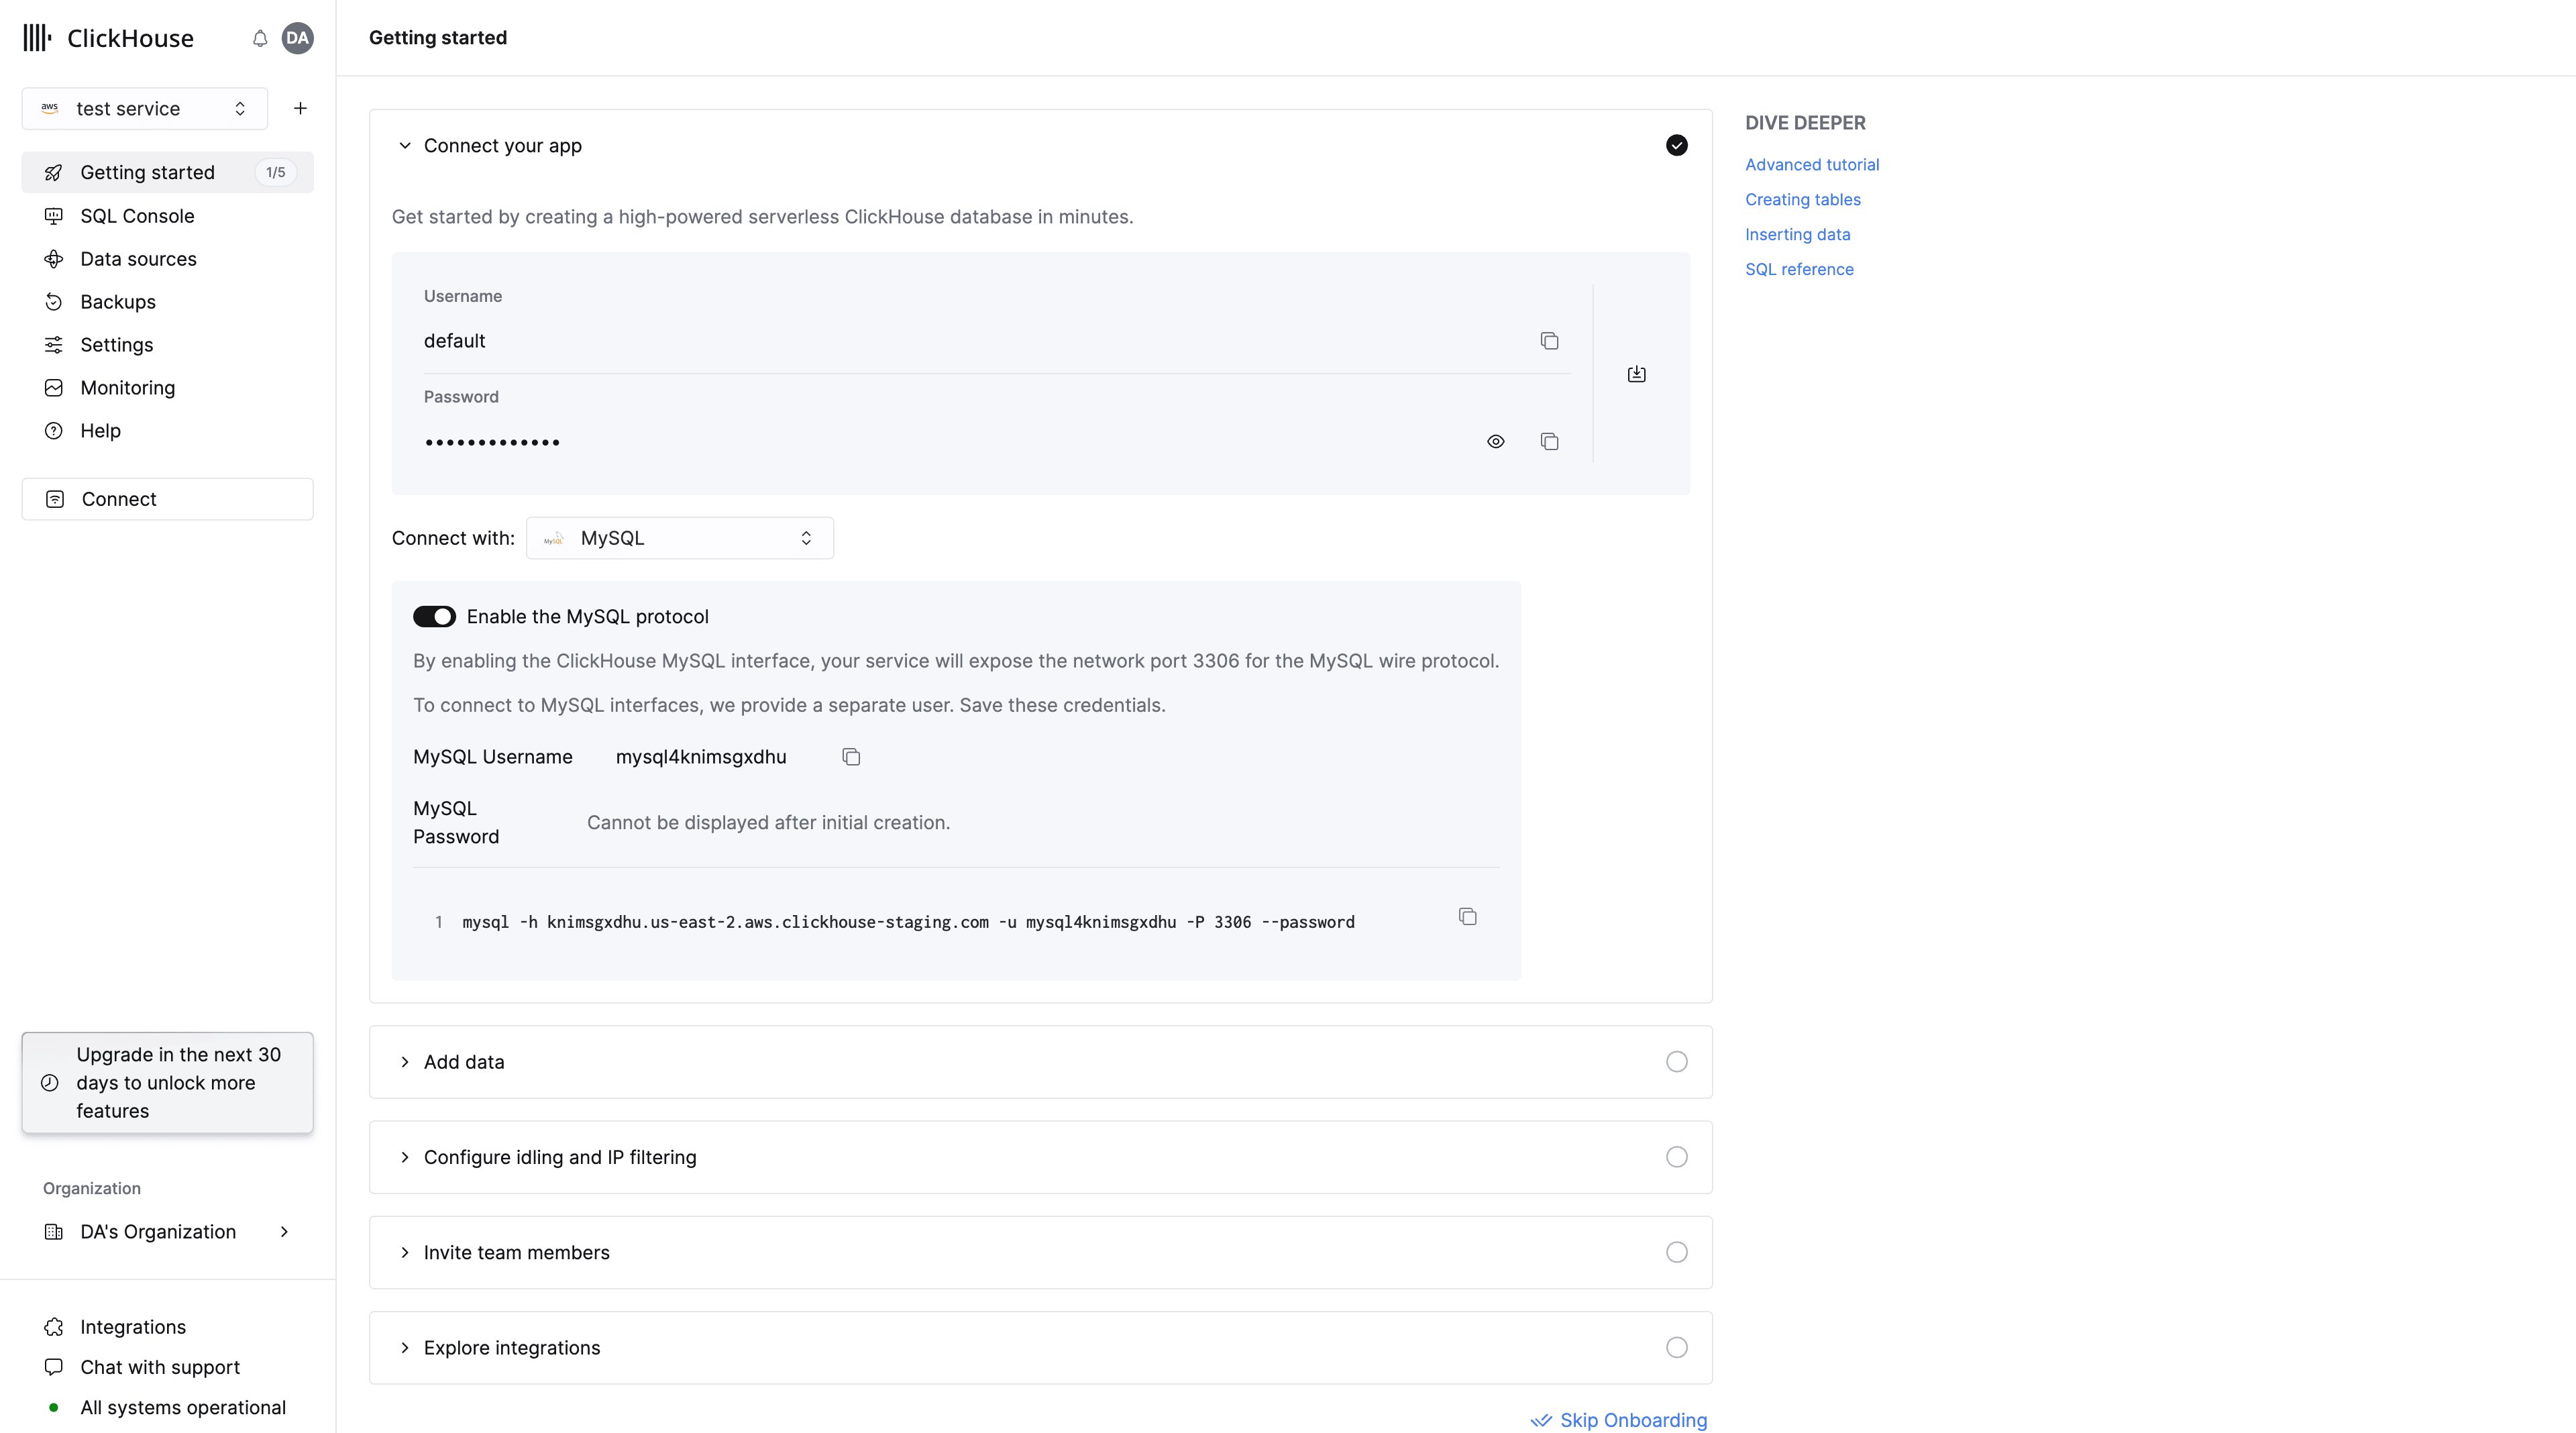
3306 for this service and prompt you with a MySQL connection screen that includes your unique MySQL username.3
Select Connect
Ensure your service is in 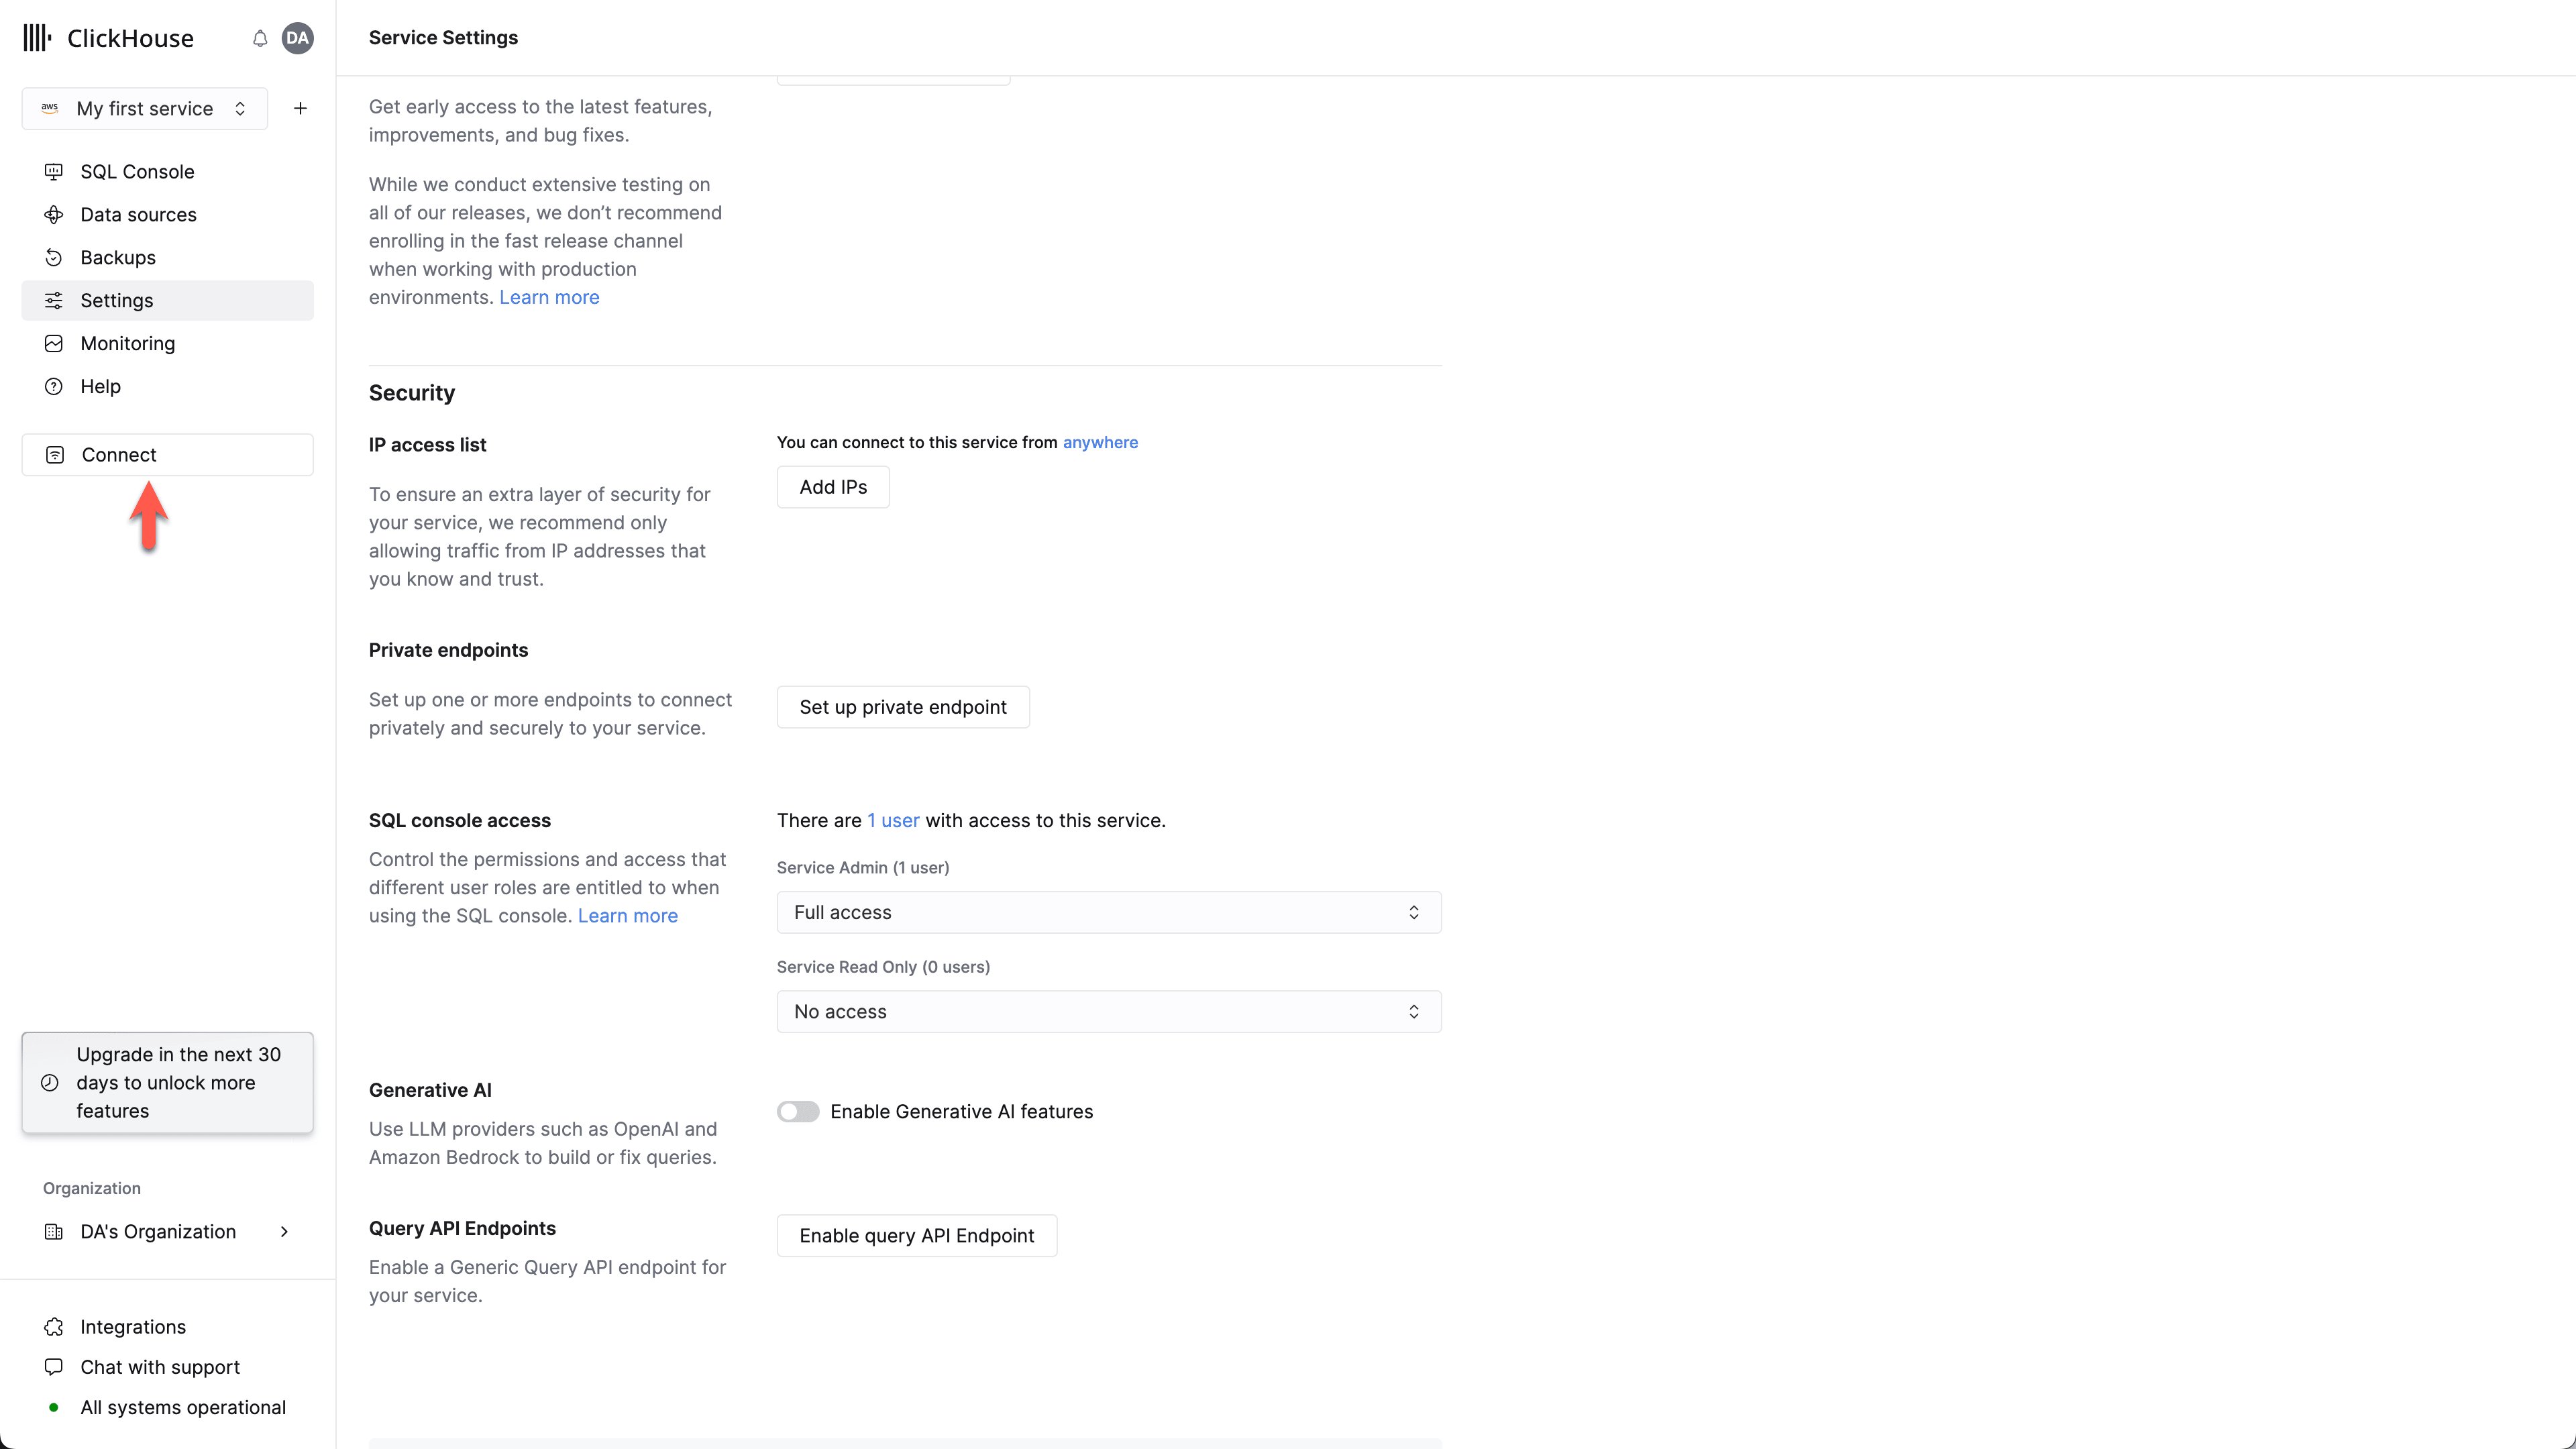
Running state then click on the service you want to enable the MySQL interface for.
Select “Connect” from the left menu:4
Choose MySQL
Select 
MySQL from the Connect With drop down.5
Enable the MySQL interface
Toggle the switch to enable the MySQL interface for this specific service.
This will expose port
3306 for this service and prompt you with your MySQL connection screen that include your unique MySQL username.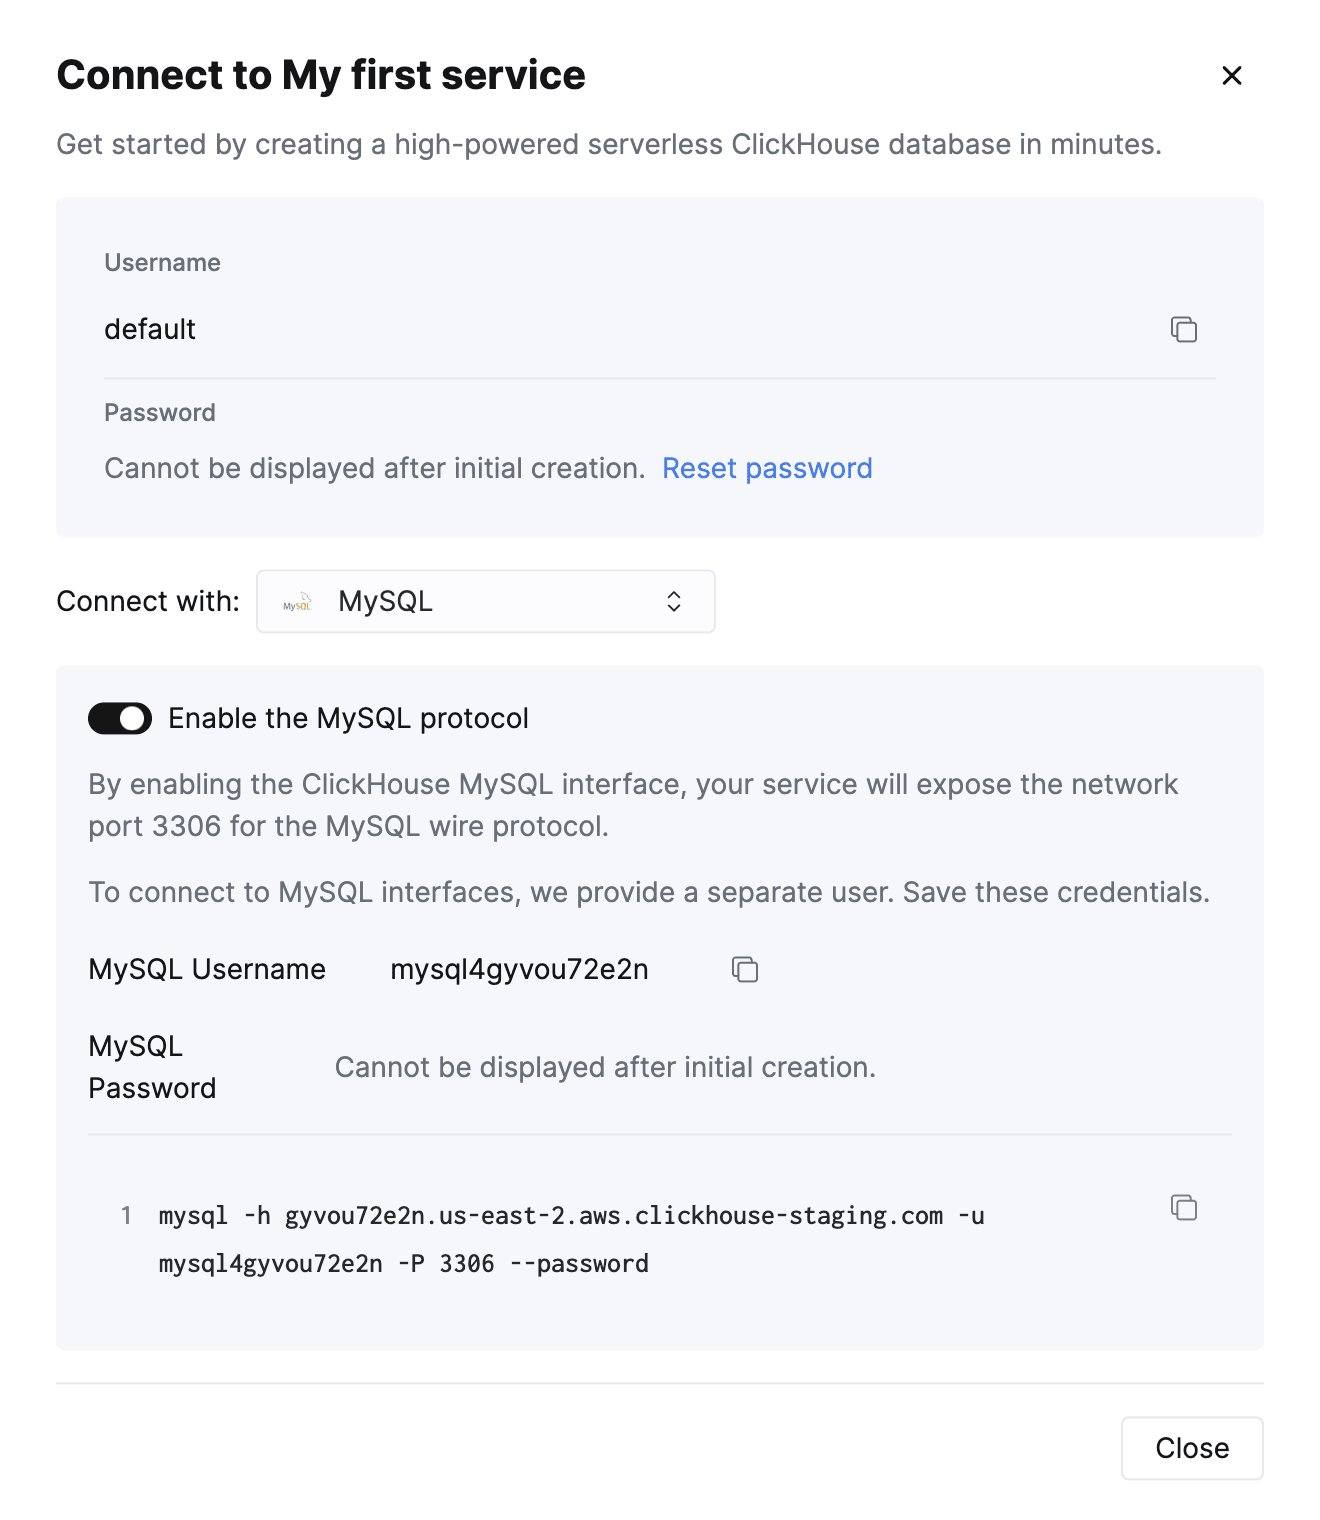
Creating a readonly MySQL user in ClickHouse Cloud
ClickHouse Cloud automatically creates amysql4<subdomain> user that shares the same password as the default user.
The <subdomain> portion corresponds to the first part of your ClickHouse Cloud hostname.
This username format is required for compatibility with tools that establish secure connections but don’t include SNI (Server Name Indication) data in their TLS handshake.
Without SNI information, the system can’t perform proper internal routing, so the subdomain hint embedded in the username provides the necessary routing information.
The MySQL console client is an example of a tool that requires this.
For a ClickHouse Cloud hostname like
foobar.us-east1.aws.clickhouse.cloud, the <subdomain> part equals to foobar, and a custom MySQL username could look like mysql4foobar_team1.1
Create a readonly settings profile
Create a settings profile to apply to your readonly user,
setting the
readonly setting to 1:2
Create a new readonly MySQL user
Create a user with a name following this format:Apply the
readonly_profile to the new user and make sure that the password is in double SHA1 format. For example:3
Grant the new user permissions to access the desired tables
Grant the new user the necessary permissions to interact with the desired tables or databases.
For example, if you want to grant access to The newly created user can be used to connect to your ClickHouse Cloud service with the MySQL interface.
system.query_log only:For the readonly user, make sure to only grant
SELECT permissions to the tables you want to access.Troubleshooting multiple MySQL users in ClickHouse Cloud
If you created a new MySQL user, and you see the following error while connecting via MySQL CLI client:mysql4<subdomain>_<username> format, as described (above).
On-premise ClickHouse server setup
Please refer to the official documentation on how to set up a ClickHouse server with enabled MySQL interface. Aside from adding an entry to the server’sconfig.xml
mysql_user that uses the generated hash:
/etc/clickhouse-server/users.d/mysql_user.xml
password_double_sha1_hex entry with your own generated Double SHA1 hash.
Additionally, it is recommended to use use_mysql_types_in_show_columns
to show the native MySQL types instead of ClickHouse ones in SHOW [FULL] COLUMNS query results,
which allows BI tools to properly introspect the database schema when using MySQL connectors.
For example:
/etc/clickhouse-server/users.d/mysql_user.xml
mysql binary available, you can test the connection from the commandline.
Using the sample username (mysql_user) and password (LZOQYnqQN4L/T6L0) from above the command line would be:
config.xml, uncomment out the following to listen on all addresses:
Connecting Tableau Online to ClickHouse (on-premise without SSL)
Login to your Tableau Cloud site and add a new Published Data Source.Select “MySQL” from the list of available connectors.
Specify your connection details gathered during the ClickHouse setup.
Tableau Online will introspect the database and provide a list of available tables. Drag the desired table to the canvas on the right. Additionally, you can click “Update Now” to preview the data, as well as fine-tune the introspected field types or names.
After that, all that remains is to click “Publish As” in the top right corner, and you should be able to use a newly created dataset in Tableau Online as usual. NB: if you want to use Tableau Online in combination with Tableau Desktop and share ClickHouse datasets between them, make sure you use Tableau Desktop with the default MySQL connector as well, following the setup guide that is displayed here if you select MySQL from the Data Source drop-down. If you have an M1 Mac, check this troubleshooting thread for a driver installation workaround.
Connecting Tableau Online to ClickHouse (cloud or on-premise setup with SSL)
As it isn’t possible to provide the SSL certificates via the Tableau Online MySQL connection setup wizard, the only way is to use Tableau Desktop to set the connection up, and then export it to Tableau Online. This process is, however, pretty straightforward. Run Tableau Desktop on a Windows or Mac machine, and select “Connect” -> “To a Server” -> “MySQL”. Likely, it will be required to install the MySQL driver on your machine first. You can do that by following the setup guide that is displayed here if you select MySQL from the Data Source drop-down. If you have an M1 Mac, check this troubleshooting thread for a driver installation workaround.In the MySQL connection setup UI, make sure that the “SSL” option is enabled.
ClickHouse Cloud’s SSL certificate is signed by Let’s Encrypt.
You can download this root cert here.
Choose the desired tables as usual (similarly to Tableau Online), and select “Server” -> “Publish Data Source” -> Tableau Cloud.
IMPORTANT: you need to select “Embedded password” in “Authentication” options.
Additionally, choose “Update workbook to use the published data source”.
Finally, click “Publish”, and your datasource with embedded credentials will be opened automatically in Tableau Online.
Known limitations (ClickHouse 23.11)
All the known limitations has been fixed in ClickHouse23.11. If you encounter any other incompatibilities, please don’t hesitate to contact us or create a new issue.